
Bleeder-Dude's Official 22re Engine Rebuild Thread - TONS OF PICTURES!!!
 05-13-2009, 07:53 PM
#141
Contributing Member
Thread Starter

 05-13-2009, 08:24 PM
#145
Contributing Member
Thread Starter

 05-13-2009, 08:34 PM
#146
Contributing Member
iTrader: (3)
Awesome man!!  Great pics!!! Good thing to take off the bellhousing braces, i forgot about those and the machine shop took them off to paint. I totally forgot about them untill I was bolting up the motor to the tranny and was wondering what the heck I was missing!!! lol!!!
Great pics!!! Good thing to take off the bellhousing braces, i forgot about those and the machine shop took them off to paint. I totally forgot about them untill I was bolting up the motor to the tranny and was wondering what the heck I was missing!!! lol!!!
05-13-2009, 09:10 PM
#147
Registered User
Join Date: Jul 2007
Location: Yotatech, because Pirate is too expensive. NorCal.
Posts: 1,705
Likes: 0
Received 10 Likes
on
5 Posts
Thanks for all the pics by the way. I'm going to need this thread when I get back on this project. You are taking all the pics I was planning on taking, but I was to lazy to wash my hands so I could touch my camera. lol
05-13-2009, 09:42 PM
#148
Registered User
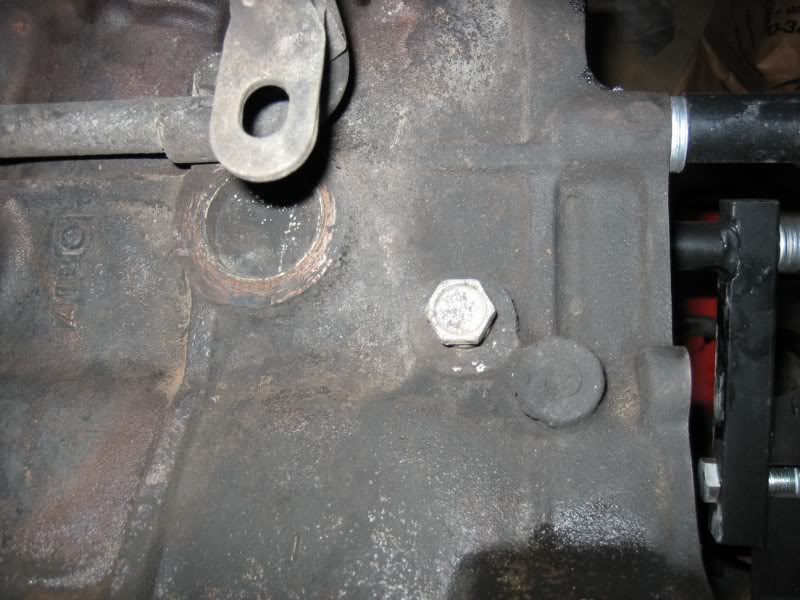
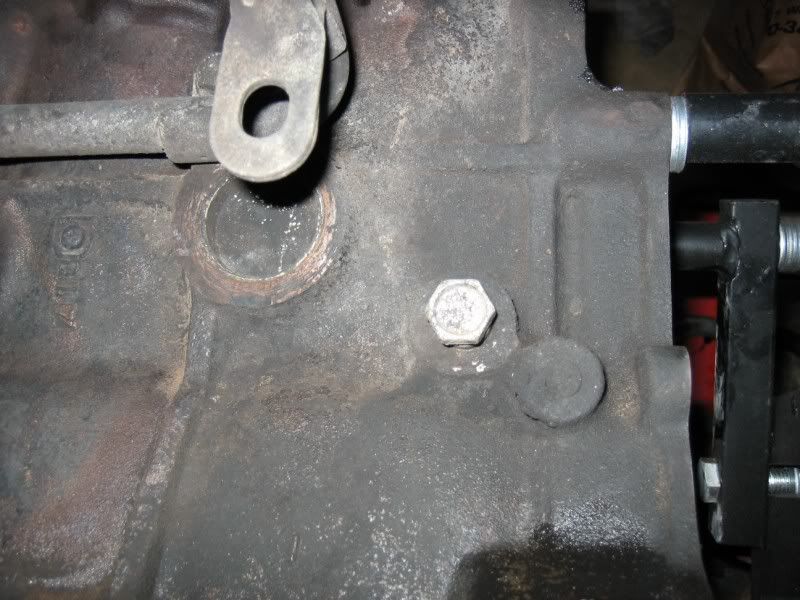
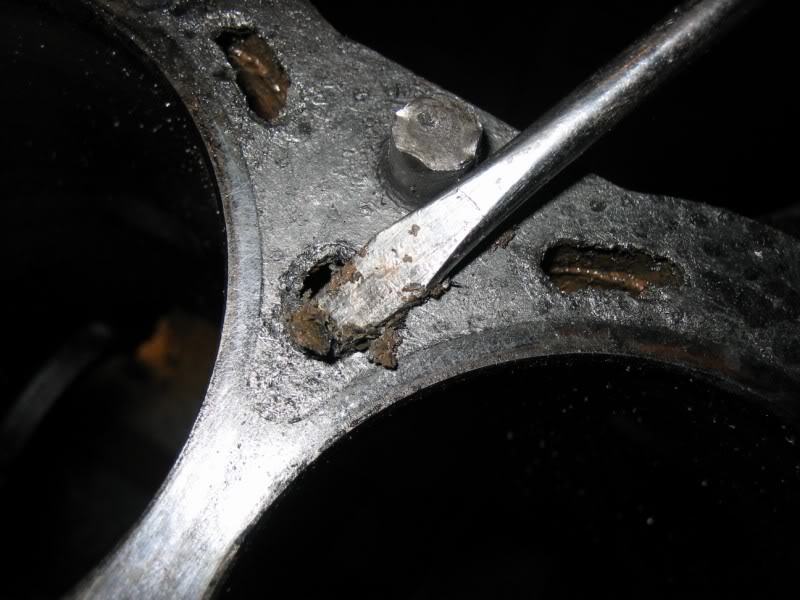
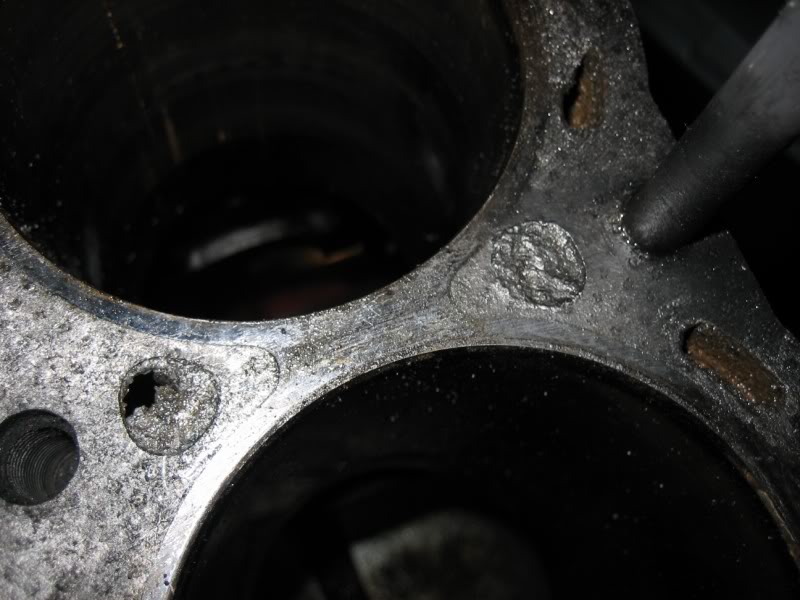
That "fake" screw was a real screw used to hold a number tag onto the block master used to make the casting mold. It simply left its impression there and was later filled with iron when the block was cast. I have a turbo compressor housing with the shape of a flathead screw cast into it and I have seen other engine blocks and cylinder heads with the same type of thing.
05-13-2009, 10:47 PM
#149
Registered User
btw, it looks freakin great!
keep on truckin man
 05-13-2009, 11:21 PM
#150
Registered User
x4178 what everyone else said, I find this thread sorta entertaining in a weird way..
You shoulda dino'd that thing before and after just to see how much HP that old ass thing was puttin out..
probably 80 at best
But seriously, Lookin good buddy !!

You shoulda dino'd that thing before and after just to see how much HP that old ass thing was puttin out..
probably 80 at best
But seriously, Lookin good buddy !!
 05-14-2009, 02:32 PM
#152
Contributing Member
Thread Starter
lmao, I thought the same thing
"80? there's now way it would make that much"
lol
I would say, just before teaing into it in it's final week, by seat of the pants measurement, probably 40-50... serisously... that bad...
well nothing getting done today. I'll probably wait till the weekend, get the trans out and clean it and replace the input seal, and both output seals. then start cleaning up some of the parts to get prepped for paint, and might dig into prepping the engine bay for paint. I take the block to the machine shop on Monday, and it's going to cost me $160 to get it decked and bored and then after I get the specs and measurements I can order my kit from LCE once that arrives, I can go ahead and order my new head from engnbldr with oversized valves (thank you 874runnersr5 for that reccomendation  much better than the one I had picked out)
I can't wait... the real fun is soon to begin
"80?
there's now way it would make that much"lol
I would say, just before teaing into it in it's final week, by seat of the pants measurement, probably 40-50... serisously... that bad...
well nothing getting done today. I'll probably wait till the weekend, get the trans out and clean it and replace the input seal, and both output seals. then start cleaning up some of the parts to get prepped for paint, and might dig into prepping the engine bay for paint. I take the block to the machine shop on Monday, and it's going to cost me $160 to get it decked and bored
and then after I get the specs and measurements I can order my kit from LCE once that arrives, I can go ahead and order my new head from engnbldr with oversized valves (thank you 874runnersr5 for that reccomendation much better than the one I had picked out)I can't wait... the real fun is soon to begin
Last edited by iamsuperbleeder; 05-14-2009 at 02:37 PM.
05-14-2009, 02:55 PM
#154
Registered User
I've been watching this thread and trying not to comment but HOLY CRAP HOW IN THE HELL WAS THAT RIG STILL RUNNING???? Jesus if a Jeep motor got half that bad it would detonate and kill every yuppie in a quarter mile radius!!!!!
I'd forgotten how mugh of a pain in the rear a rebuild can be. I did a 6.9Ford years ago that took almost a week and it SUCKED!
So, how's the progress so far?
I'd forgotten how mugh of a pain in the rear a rebuild can be. I did a 6.9Ford years ago that took almost a week and it SUCKED!
So, how's the progress so far?
05-14-2009, 04:23 PM
#155
Contributing Member
Thread Starter
good thinking though
I'm putting in LCE's street series
I've been watching this thread and trying not to comment but HOLY CRAP HOW IN THE HELL WAS THAT RIG STILL RUNNING???? Jesus if a Jeep motor got half that bad it would detonate and kill every yuppie in a quarter mile radius!!!!!
I'd forgotten how mugh of a pain in the rear a rebuild can be. I did a 6.9Ford years ago that took almost a week and it SUCKED!
So, how's the progress so far?
I'd forgotten how mugh of a pain in the rear a rebuild can be. I did a 6.9Ford years ago that took almost a week and it SUCKED!
So, how's the progress so far?
 but hey, that's a Toyota for ya
 This one's going to take a little while, but I got nothing but time (all couple hours a day, and the weekends), a steady income right now (knock on wood
 ), and a spare truck to drive during the process
 Progress is as you see it in the last pics, lol. I tucked everything to the side of the garage last night after those pictures, and it'll stay there untill Saturday (probably wont touch it tomorrow after work either; today I just didn't feel like messing with it, and tomorrow I might go out somewhere... I need to get out... it's been a while
)
05-14-2009, 04:31 PM
#156
Registered User
Bleeder I couldn't sleep with that motor in the garage at night. You need to get your ass up out of bed at about 1 in the morning and go to work slacker!!!! Your truck is sitting in the driveway DEAD and you think you can sleep while she sits there and wishes she was running??????
Get your ass to work!!!!!!
Get your ass to work!!!!!!
05-14-2009, 05:04 PM
#157
Contributing Member
Thread Starter
Bleeder I couldn't sleep with that motor in the garage at night. You need to get your ass up out of bed at about 1 in the morning and go to work slacker!!!! Your truck is sitting in the driveway DEAD and you think you can sleep while she sits there and wishes she was running??????
Get your ass to work!!!!!!
Get your ass to work!!!!!!
I get into that kinda rush, and I KNOW I'll forget something or not do something right
patients...
 05-14-2009, 08:26 PM
#158
Registered User
I still want the thread pitch and size of that drain plug..
oh and how deep it is...
I am hoping I can use a fan switch from a Honda, on the Yota for my taurus fan
Pretty please...
 05-14-2009, 08:46 PM
#159
Contributing Member
Thread Starter
I'll see if I can find out fer ya
lol, when I removed it, there was all kinda crap built up behind it from where the previous owner added some stop-leak becuase of the leaking radiator
that stuff really builds up in spots... like at openings in the block where water-flow is stopped at the head gasket...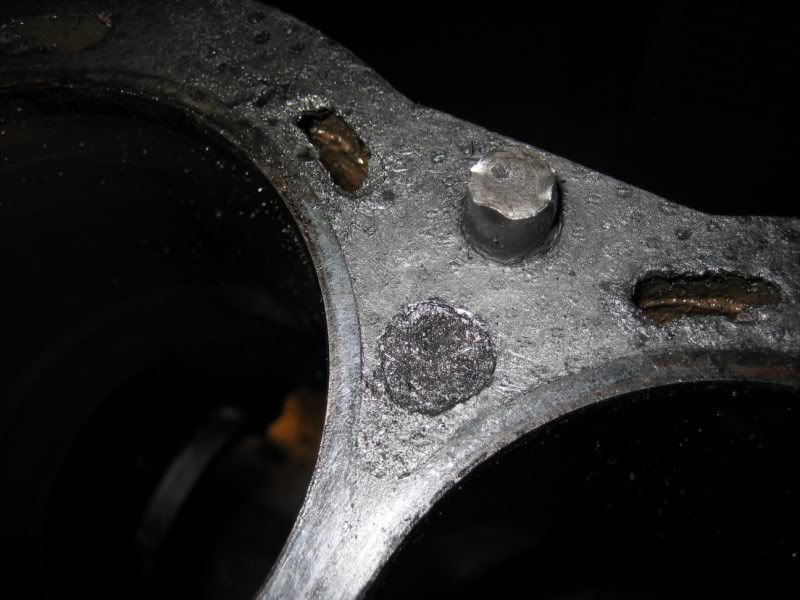

Last edited by iamsuperbleeder; 05-14-2009 at 08:50 PM.


