
Bleeder-Dude's Official 22re Engine Rebuild Thread - TONS OF PICTURES!!!
 06-13-2009, 02:32 PM
#401
Contributing Member
Thread Starter
oh boy, what a night last night was 
well, I started taping off the block (the head surface, the already installed brass freeze plugs, and all the points on the sides where any accesory or sencor bolts to it), and almost got done, and I noticed the wind picking up (looked like the tree in my front yard was about to up-root, lol), and then I heard some thunder... looked down the road, and here come's today's shower... I hate Florida this time of the year... it's either 120 degree and 90% humidity, or it's 100mph winds and 20 inches of rain
but I did run up to the store and order my main beaings, thrust washers, and rod bearings, so they'll be in Monday and I can begin assymbely, since the paint will get done tomorrow.
I thought that the lower intake was hard to prep for paint...huh, yeah, ok... nothing compared to the block, lol (and I'm a little OCD, so that makes things twice as hard, lol)
that article about the break in is rather intesting, BUT completely contradicts any and everything I've ever heard about engine break in... the cylinder walls and piston rings are not the only new parts breaking in... you're also breaking in the camshaft, all the rod and main bearings, the oil pump... there's a reason the standard for YEARS for breaking in an engine has been to run it in sequences or set RPMs for a certain amount of time... BUT, try it out if you finish before me, and see how it works out I'll be sticking to what's been proven in the past
The total machining bill was $371!
Hot Tank - $60
Rebore and hone - $100
R&R Rods - $95
Polish Crank - $35
Glassbead (main caps) - $20
Install freeze plugs - $15
Inspect clearance on mains and head surface - $25)
$350
plus $21 tax
$371.00
well, I started taping off the block (the head surface, the already installed brass freeze plugs, and all the points on the sides where any accesory or sencor bolts to it), and almost got done, and I noticed the wind picking up (looked like the tree in my front yard was about to up-root, lol), and then I heard some thunder... looked down the road, and here come's today's shower... I hate Florida this time of the year... it's either 120 degree and 90% humidity, or it's 100mph winds and 20 inches of rain
but I did run up to the store and order my main beaings, thrust washers, and rod bearings, so they'll be in Monday and I can begin assymbely, since the paint will get done tomorrow.
I thought that the lower intake was hard to prep for paint...huh, yeah, ok... nothing compared to the block, lol (and I'm a little OCD, so that makes things twice as hard, lol)
that article about the break in is rather intesting, BUT completely contradicts any and everything I've ever heard about engine break in... the cylinder walls and piston rings are not the only new parts breaking in... you're also breaking in the camshaft, all the rod and main bearings, the oil pump... there's a reason the standard for YEARS for breaking in an engine has been to run it in sequences or set RPMs for a certain amount of time... BUT, try it out if you finish before me, and see how it works out
I'll be sticking to what's been proven in the past The total machining bill was $371!
Hot Tank - $60
Rebore and hone - $100
R&R Rods - $95
Polish Crank - $35
Glassbead (main caps) - $20
Install freeze plugs - $15
Inspect clearance on mains and head surface - $25)
$350
plus $21 tax
$371.00
Last edited by iamsuperbleeder; 06-13-2009 at 02:33 PM.
 06-13-2009, 03:46 PM
#402
Registered User
that article about the break in is rather intesting, BUT completely contradicts any and everything I've ever heard about engine break in... the cylinder walls and piston rings are not the only new parts breaking in... you're also breaking in the camshaft, all the rod and main bearings, the oil pump... there's a reason the standard for YEARS for breaking in an engine has been to run it in sequences or set RPMs for a certain amount of time... BUT, try it out if you finish before me, and see how it works out I'll be sticking to what's been proven in the past
I'll be sticking to what's been proven in the past I have a Hastings ring instruction sheet somewhere that outlines a break-in method about halfway between the "old standard" of taking it easy and the "new" idea of loading the engine. I followed their instructions with a V8 and there was never any oil consumption. I did the same thing with my 22R-E and got the same results, although fuel economy was down for the first 1000mi or so until everything loosened up. I suspect that standard iron rings probably seat very quickly regardless of how they are used.
Last edited by Dirt Driver; 06-13-2009 at 03:47 PM.
06-14-2009, 02:28 PM
#403
Contributing Member
Thread Starter
Technically the bearings aren't supposed to touch the crank, so technically there is no actual break-in period for them.
I have a Hastings ring instruction sheet somewhere that outlines a break-in method about halfway between the "old standard" of taking it easy and the "new" idea of loading the engine. I followed their instructions with a V8 and there was never any oil consumption. I did the same thing with my 22R-E and got the same results, although fuel economy was down for the first 1000mi or so until everything loosened up. I suspect that standard iron rings probably seat very quickly regardless of how they are used.
I have a Hastings ring instruction sheet somewhere that outlines a break-in method about halfway between the "old standard" of taking it easy and the "new" idea of loading the engine. I followed their instructions with a V8 and there was never any oil consumption. I did the same thing with my 22R-E and got the same results, although fuel economy was down for the first 1000mi or so until everything loosened up. I suspect that standard iron rings probably seat very quickly regardless of how they are used.
few more pics of progress today
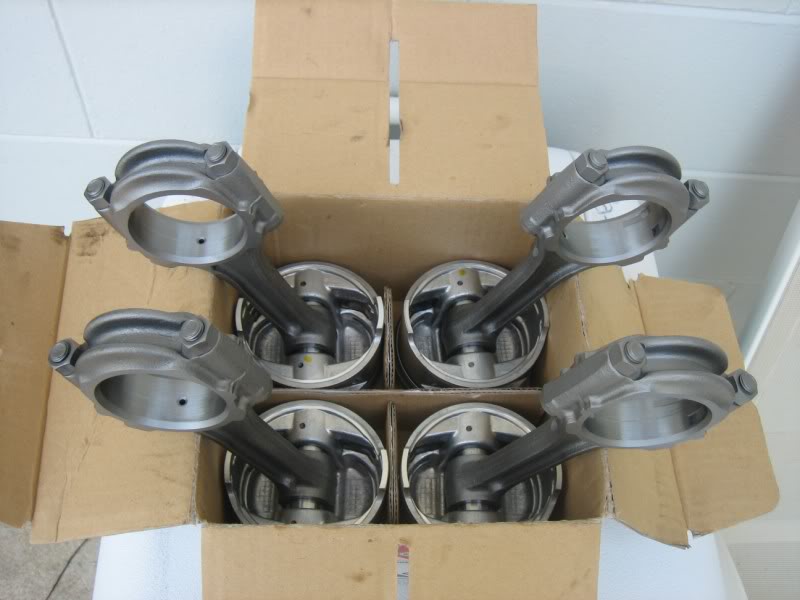
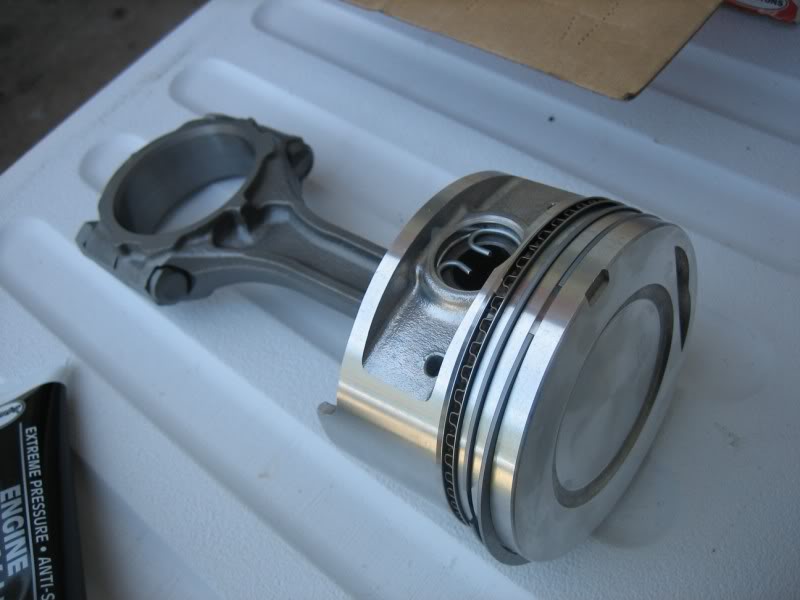
shot some primer and paint, and while waiting for it to dry, I went ahead and assymbled the pistons and rods
aaaaaaaaaaand, back to that block
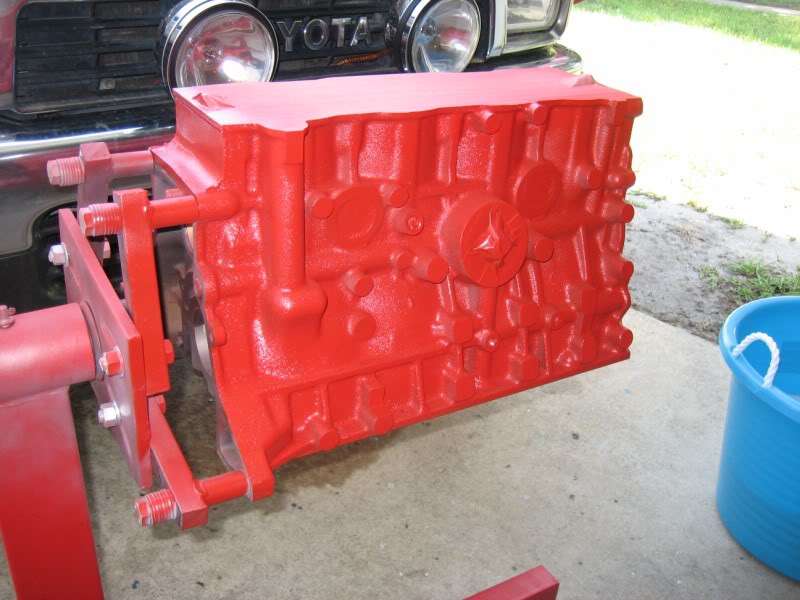
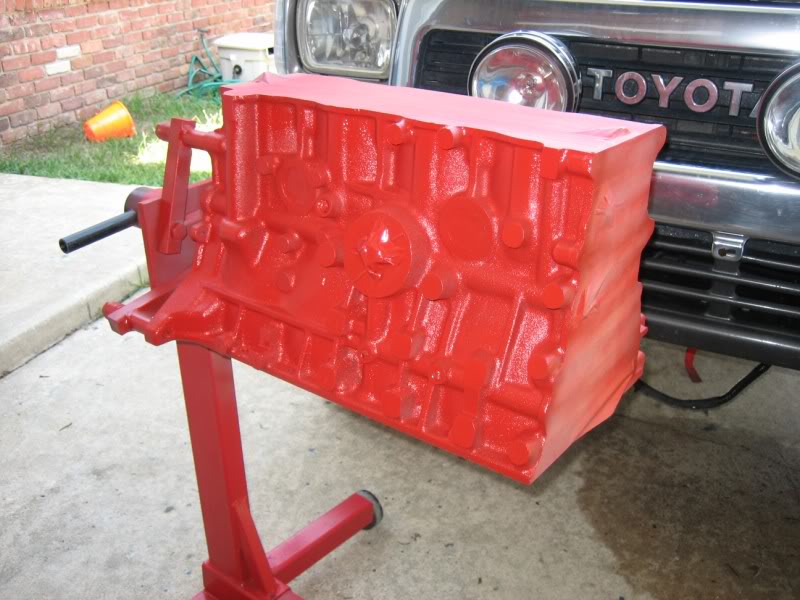
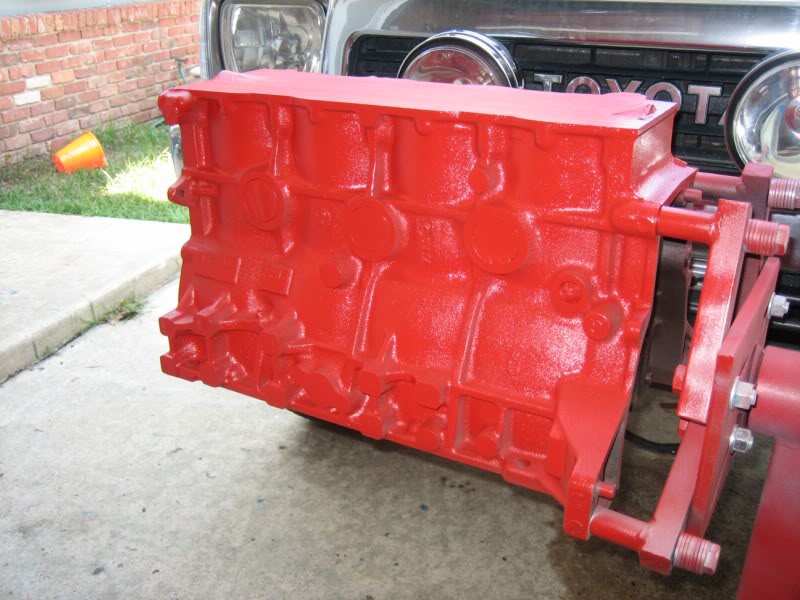
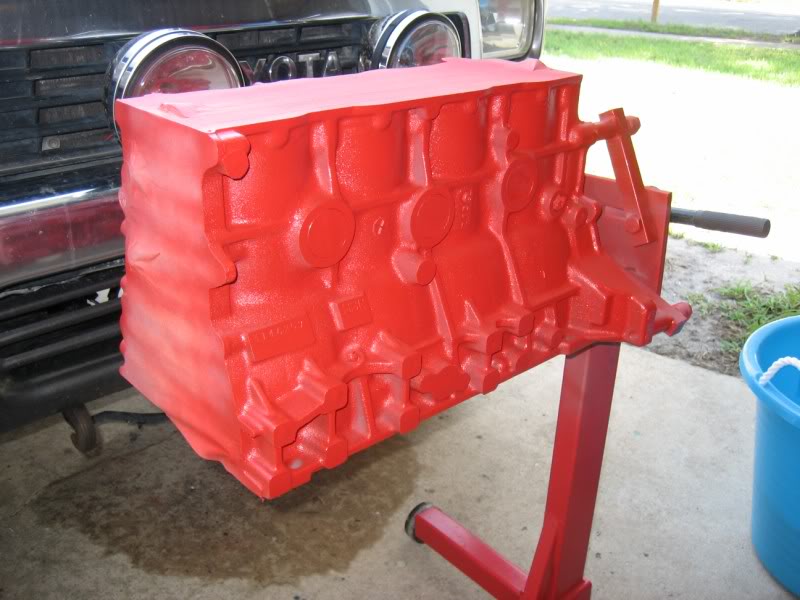
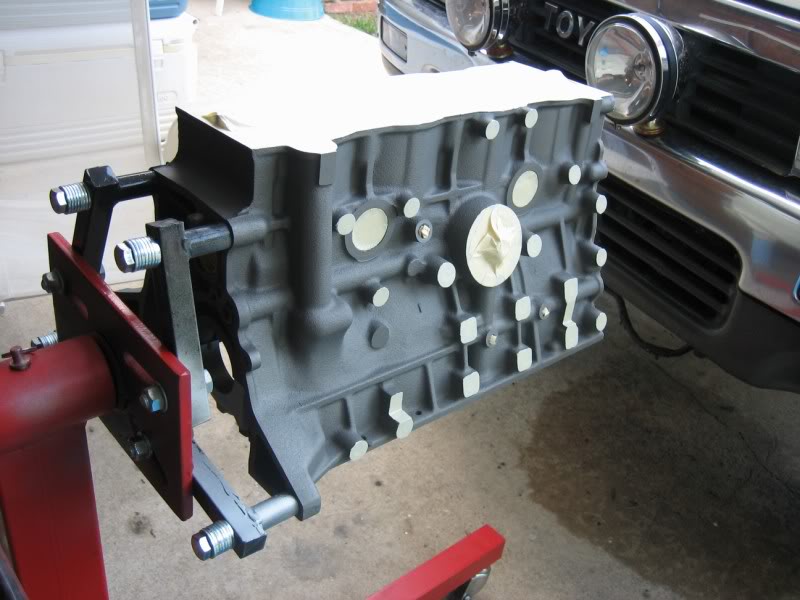
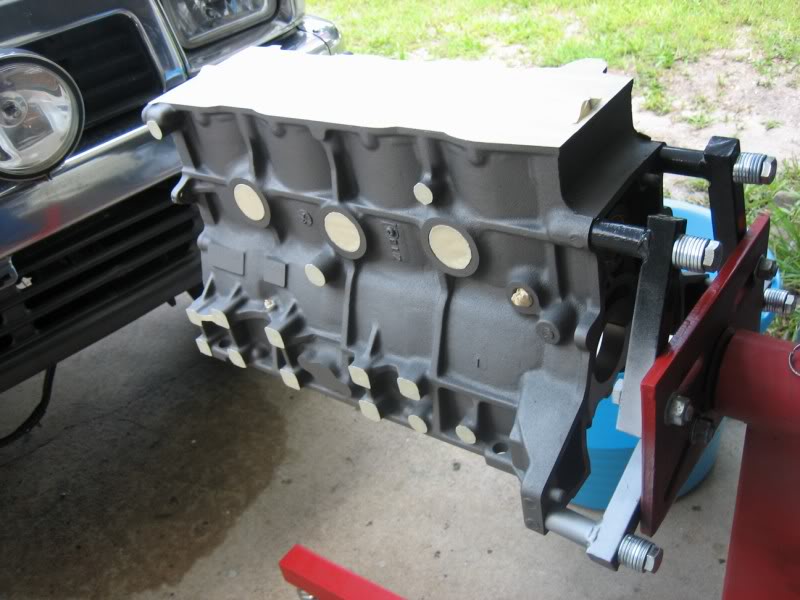
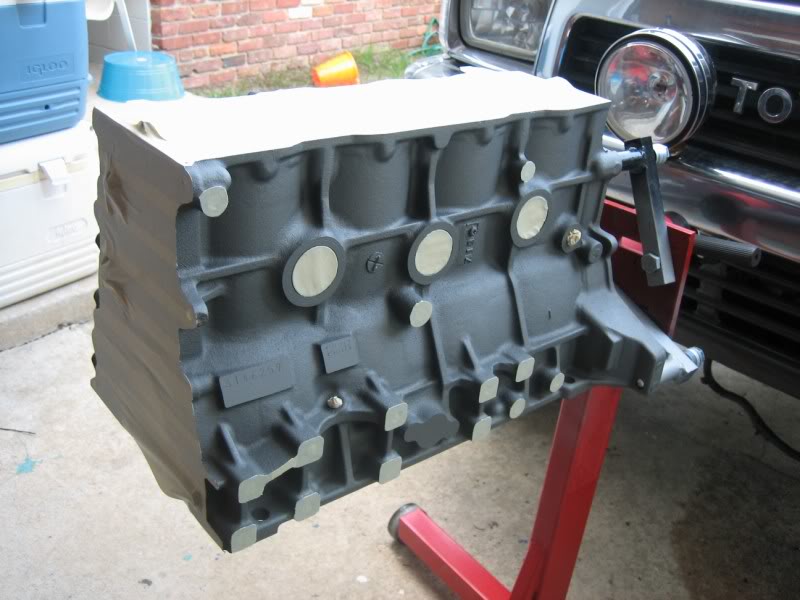
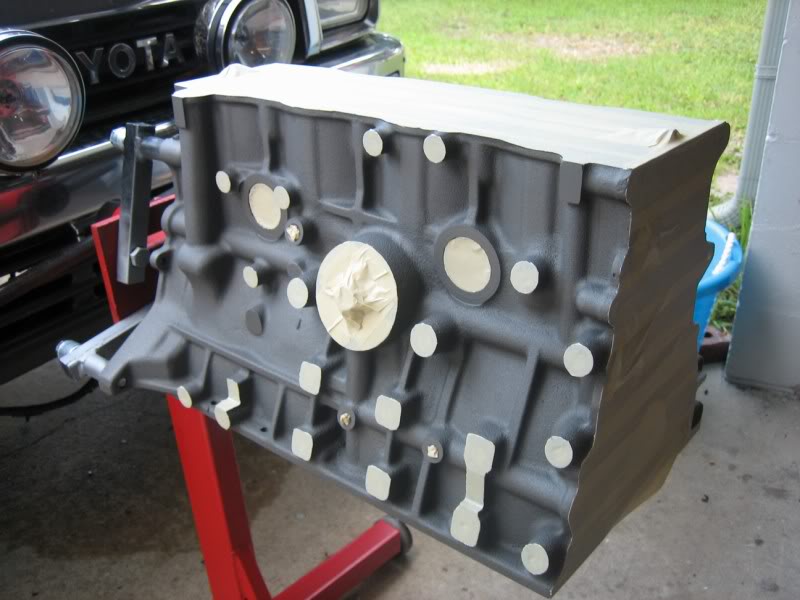
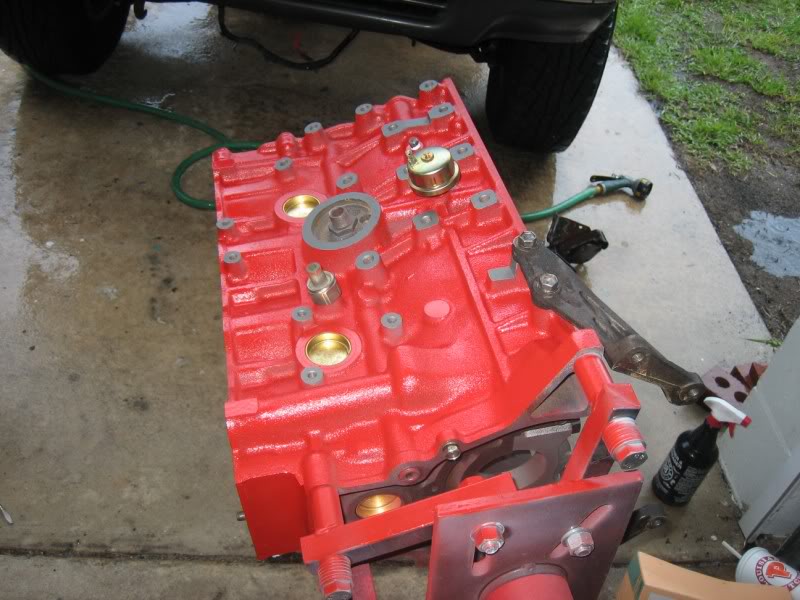
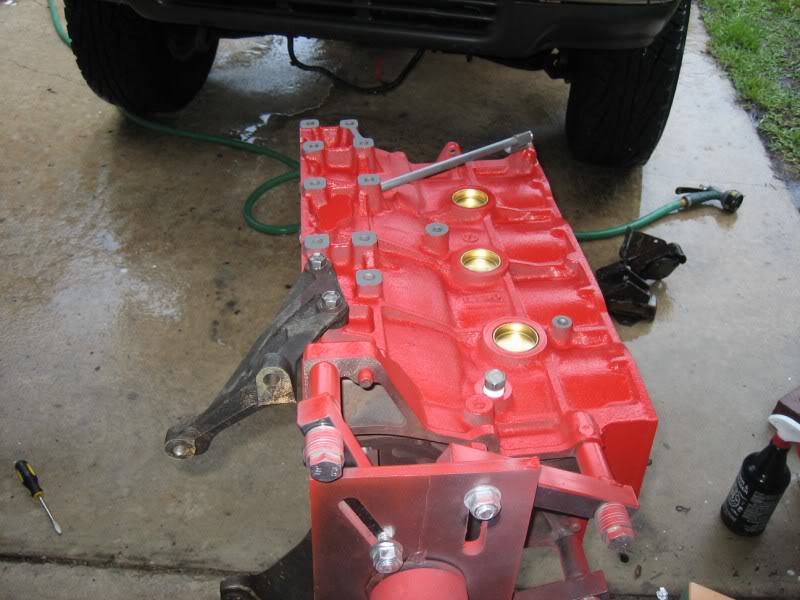
once I felt the paint was dry enough to start messing with, I removed all the taped off portions:
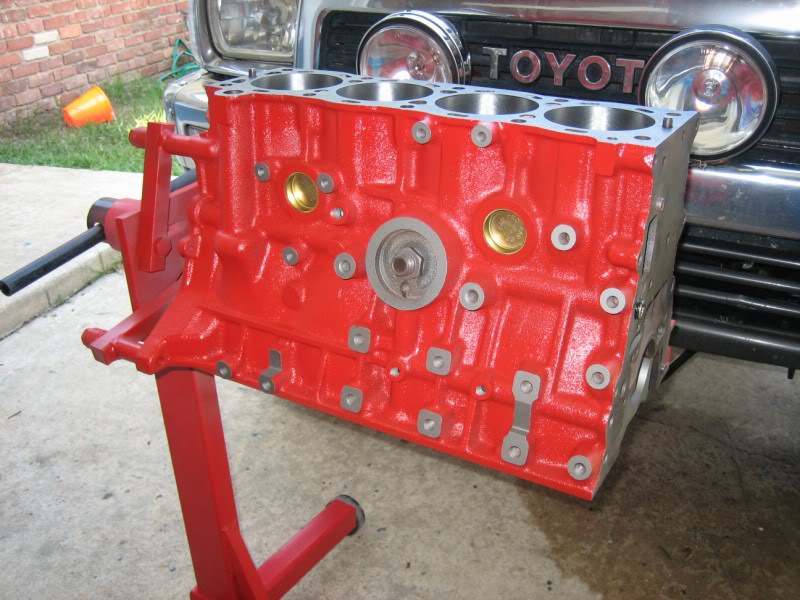
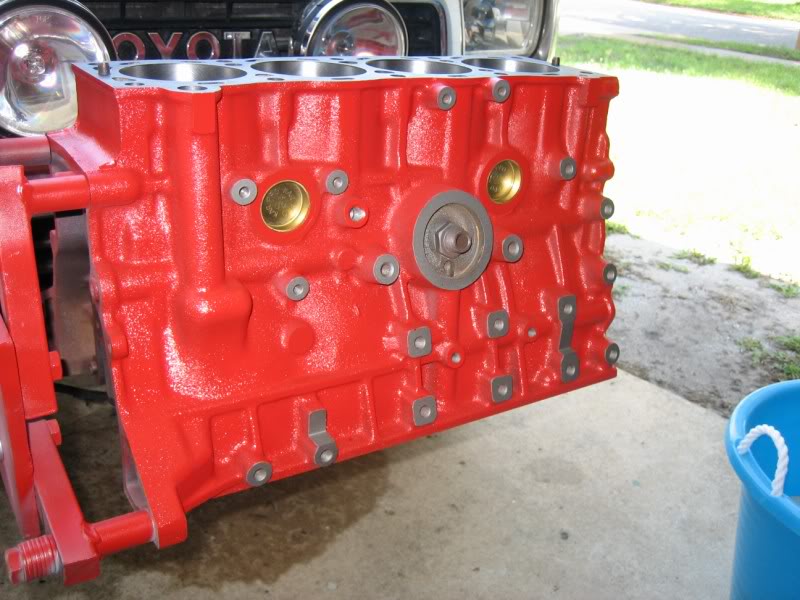

and I started to bolt a few things on, and again... IT STARTED RAINING...
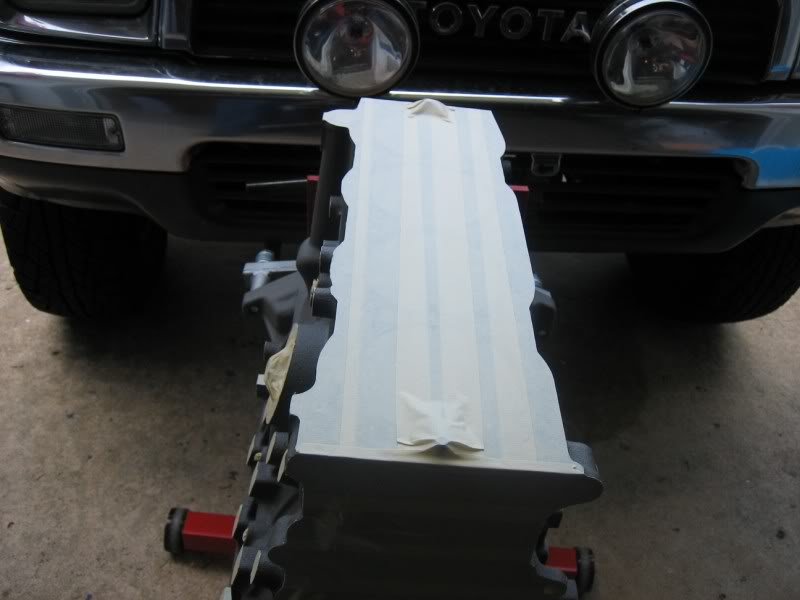
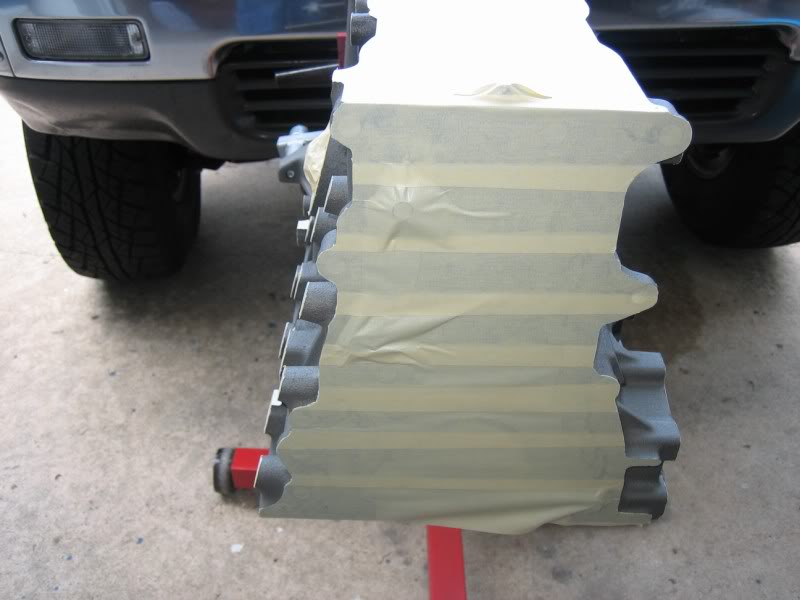
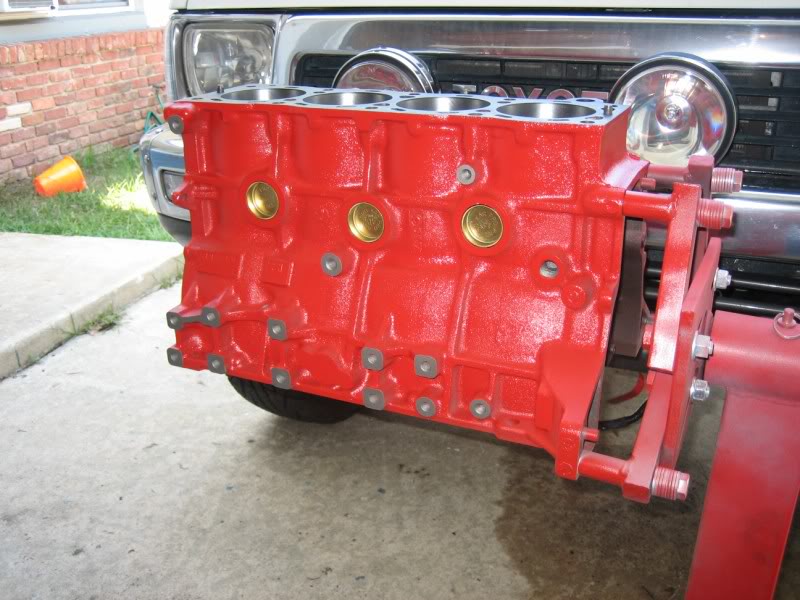
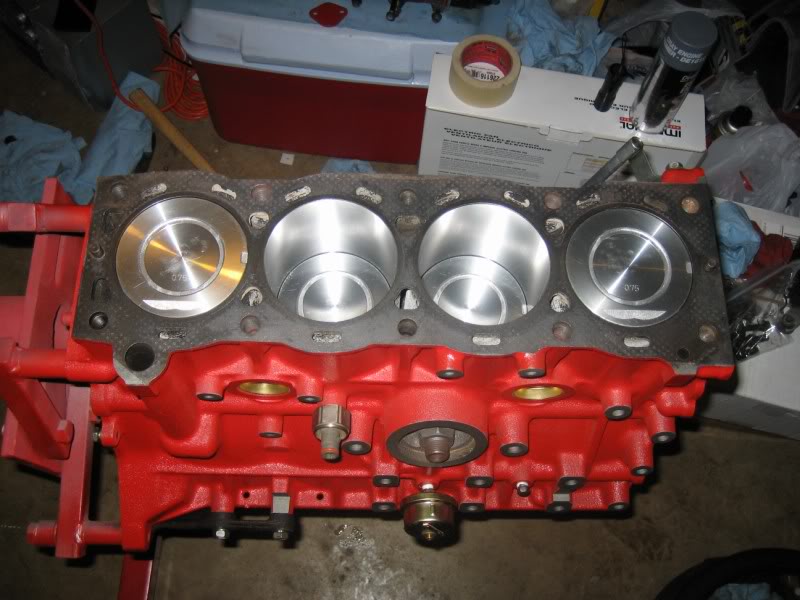
and because I see some of you are growing as impatient as I am, how's about a "Bored While It's Raining" mock-up
are you ready for this?
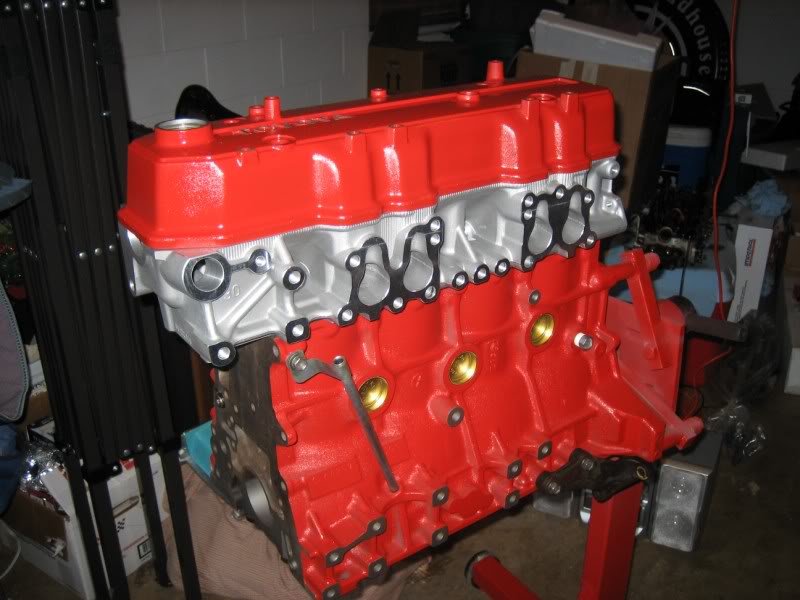
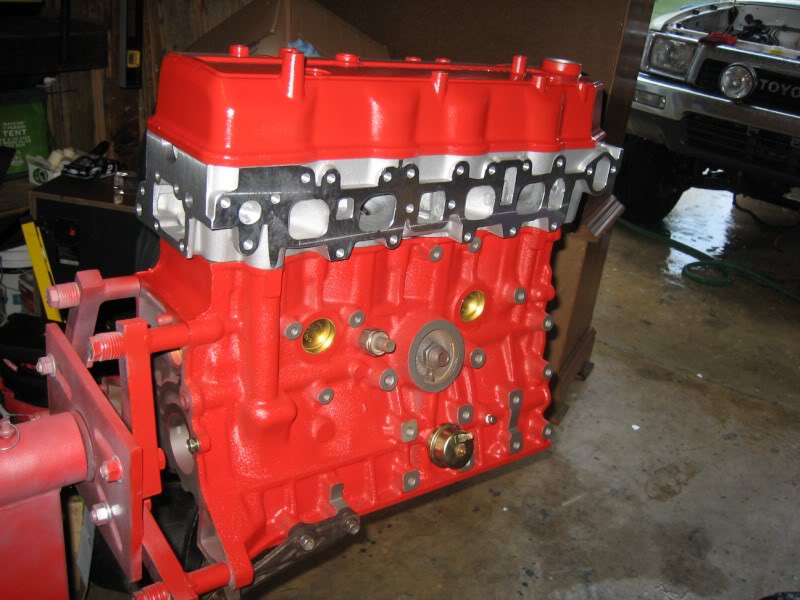
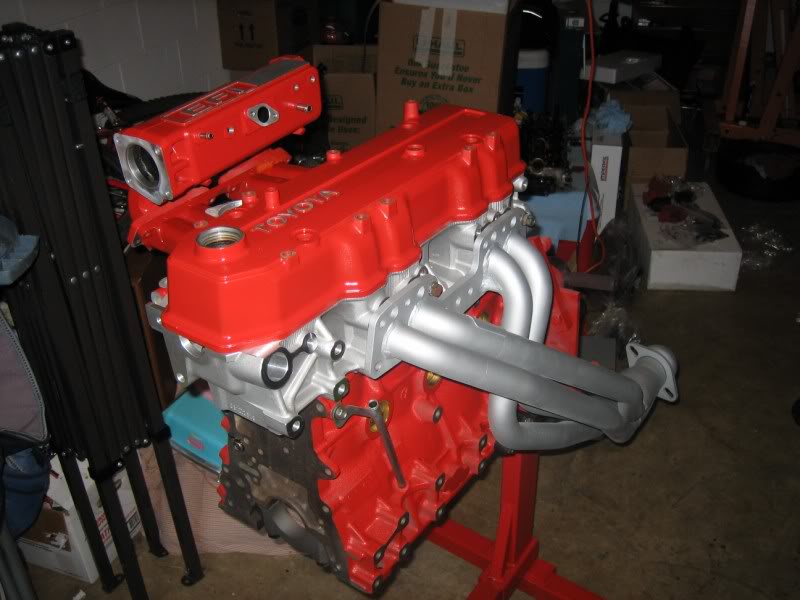
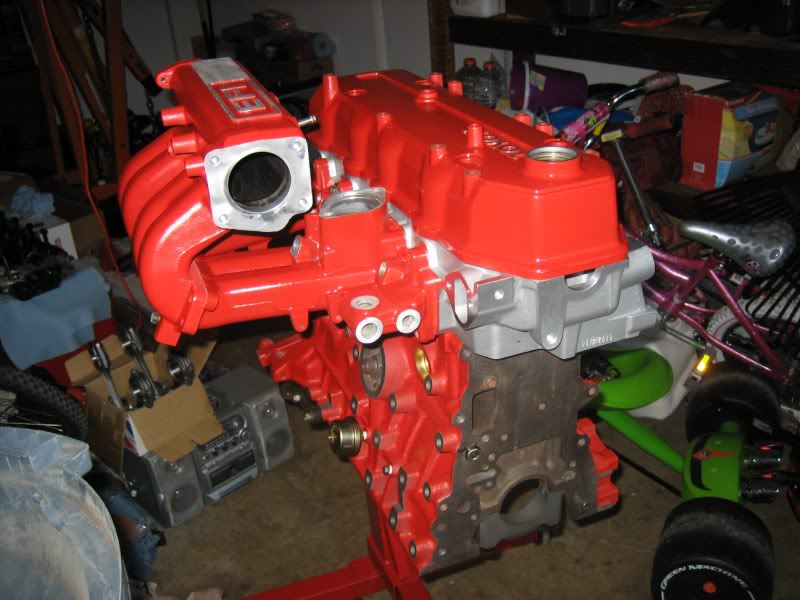
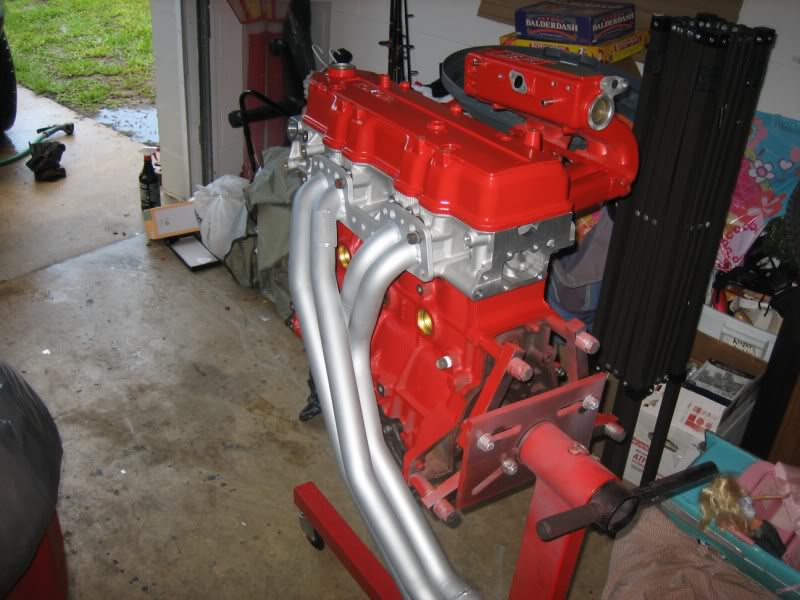
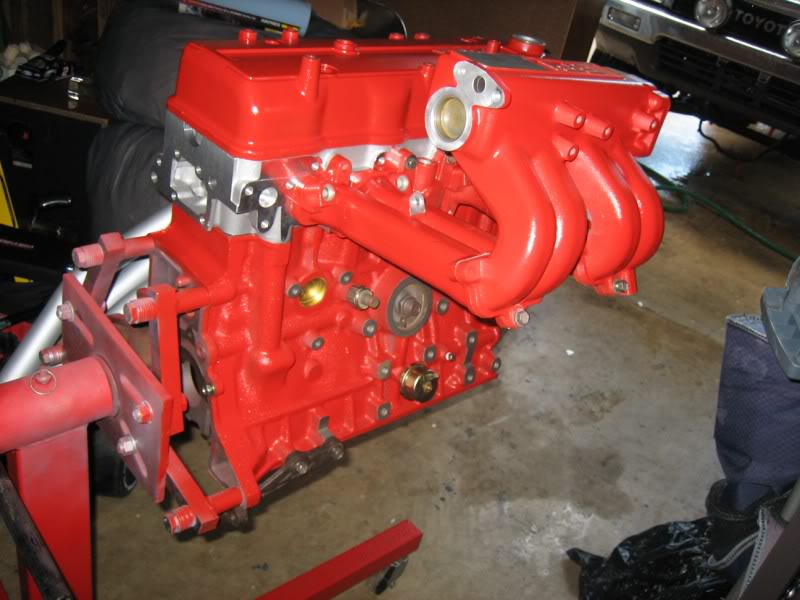
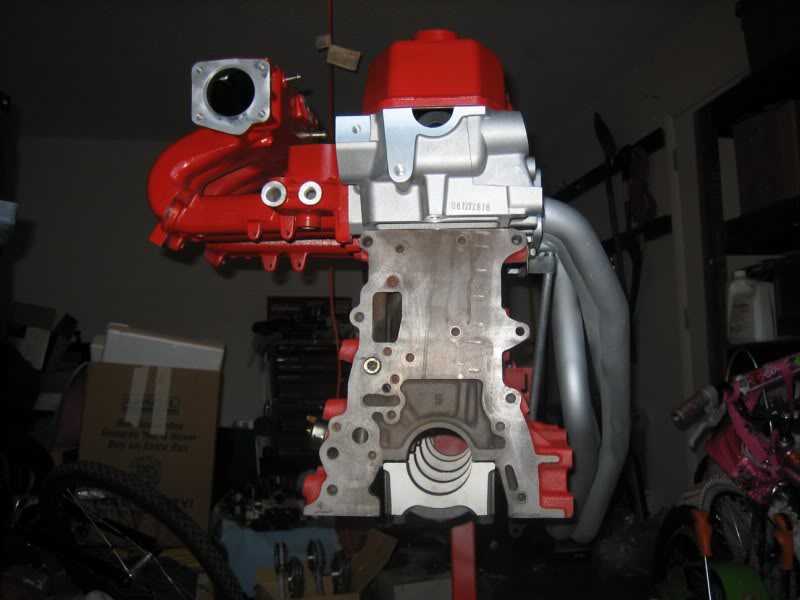
oh I can't wait...
 06-14-2009, 03:52 PM
#407
Contributing Member
Thread Starter
 06-14-2009, 04:31 PM
#409
Contributing Member
Thread Starter
I don't know if you can tell from the pics, but my garage is a DISASTER, and you can't walk around in there... I live with my sister and her husband, and I have asked them SEVERAL times if they would please pick some of their crap up so I could get this done quick and get my truck out of their driveway, but I guess they're ignoring me... if I clean it, I'm throwing EVERYTHING away, and I've told them that...
06-14-2009, 04:54 PM
#410
Registered User
wow dude, that looks awesome. Makes me want to find a motor on craigslist so I can take my time and build one up, you have been pretty patient waiting on everything considering you have to drive a non toyota in the meantime.
Keep it up, hope that thing gets done, I want video of the first run!!
Keep it up, hope that thing gets done, I want video of the first run!!
06-14-2009, 06:57 PM
#412
Registered User

Join Date: Jan 2007
Location: Minot, ND
Posts: 243
Likes: 0
Received 0 Likes
on
0 Posts
Are you planning on mocking up the crank w/ bearings, rods, and pistons to check deck-height? Since the aftermarket pistons are de-stroked a bit, my deck-height was .018 above the piston. EB says stock is .000 to -.006. I had my machinist shave the deck .018" but forgot to include the timing chain cover, so that had to be done later as a separate part. Just fyi, if you're going to try and get it back to zero deck-height, bolt on the cover when you send it in.
06-14-2009, 07:04 PM
#413
Contributing Member
Thread Starter
Are you planning on mocking up the crank w/ bearings, rods, and pistons to check deck-height? Since the aftermarket pistons are de-stroked a bit, my deck-height was .018 above the piston. EB says stock is .000 to -.006. I had my machinist shave the deck .018" but forgot to include the timing chain cover, so that had to be done later as a separate part. Just fyi, if you're going to try and get it back to zero deck-height, bolt on the cover when you send it in.
we'll see where the pistons sit at TDC tomorrow when I pick up the bearings
06-14-2009, 07:28 PM
#415
Contributing Member
Thread Starter
I still have quite a few things on the list...
If not tomorrow, by Tuesday I'm getting the injectors sent out for rebuild.
I still have yet to buy a replacement updraded alt, but money's getting tight now, and I might put the original back on in the begining, because that a rather simple swap later.
The BIGGEST thing that's going to hold me back right now, is the order I'm placing with LCE, which includes the clutch kit, all th block-off plate for the emmission crap, intake and exhaust manifold stud kits, and a bunch of other little odds and ends...
My BEST estimate is one more month, if you can believe that...
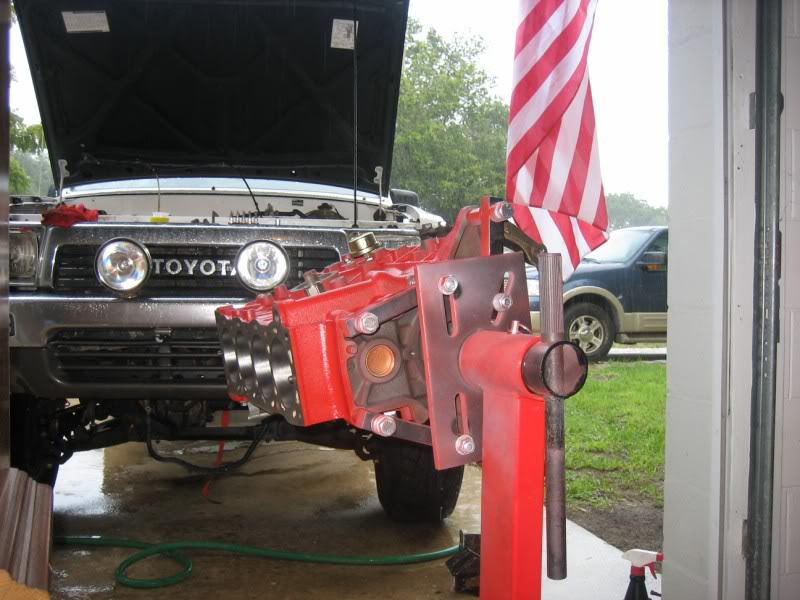
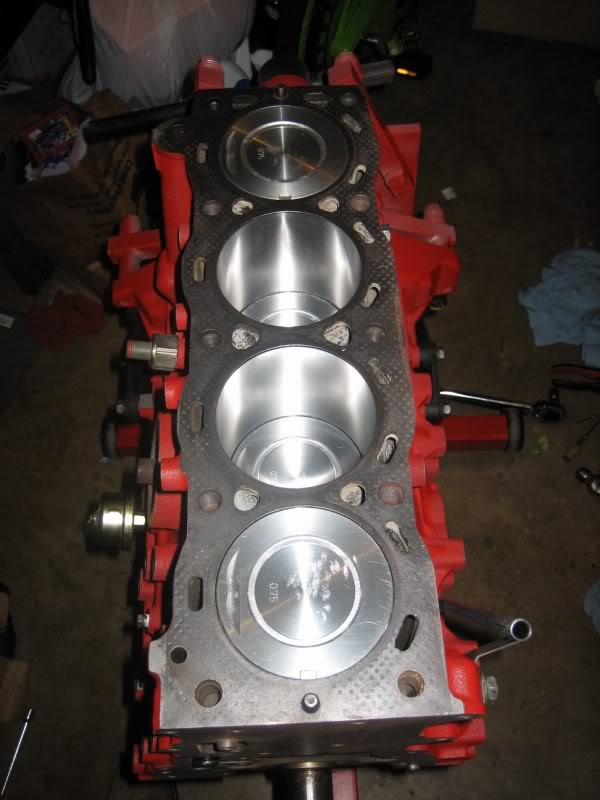
remember, that pic was ONLY A MOCK-UP, just to see how the new and painted parts are going to look...
06-14-2009, 09:45 PM
#416
Registered User
Join Date: Nov 2008
Posts: 39
Likes: 0
Received 0 Likes
on
0 Posts
OMG! Wow you must have a billion or so hours in just prep/paint, LOOKS GREAT!
Too bad my build is going to take forever now too so it will look at least half as good as yours... Nice Work!
Here is the link to the Engnbldr article where he talks about the "Quench" & some other cool little tips for building max power!
http://www.4x4wire.com/forums/showfl...=&fpart=1&vc=1
Too bad my build is going to take forever now too so it will look at least half as good as yours... Nice Work!
Here is the link to the Engnbldr article where he talks about the "Quench" & some other cool little tips for building max power!
http://www.4x4wire.com/forums/showfl...=&fpart=1&vc=1
06-15-2009, 06:17 PM
#420
Contributing Member
Thread Starter
well, I didn't get home untill freek'n 7:00PM  lucky little brother had to run his sister's rented table cloths for her wedding an hour and a half accross down to return while they're off on their get-away in Tenessee
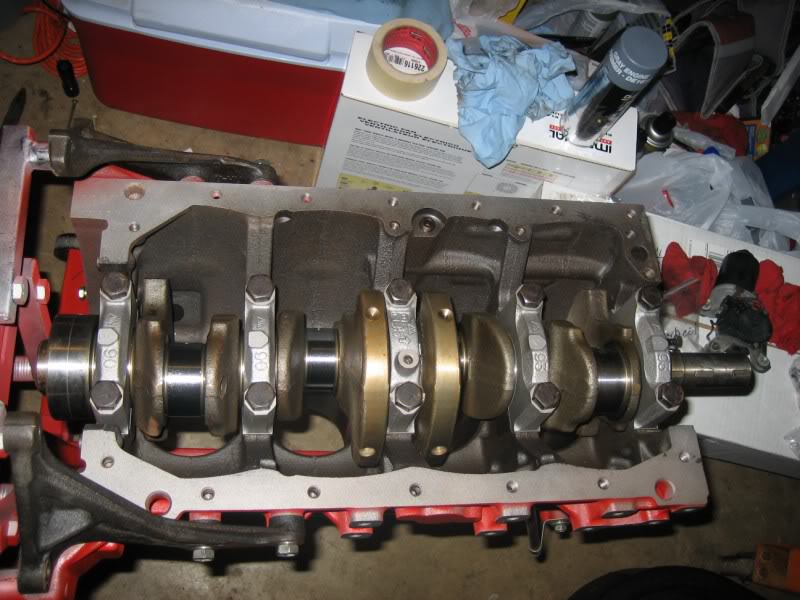
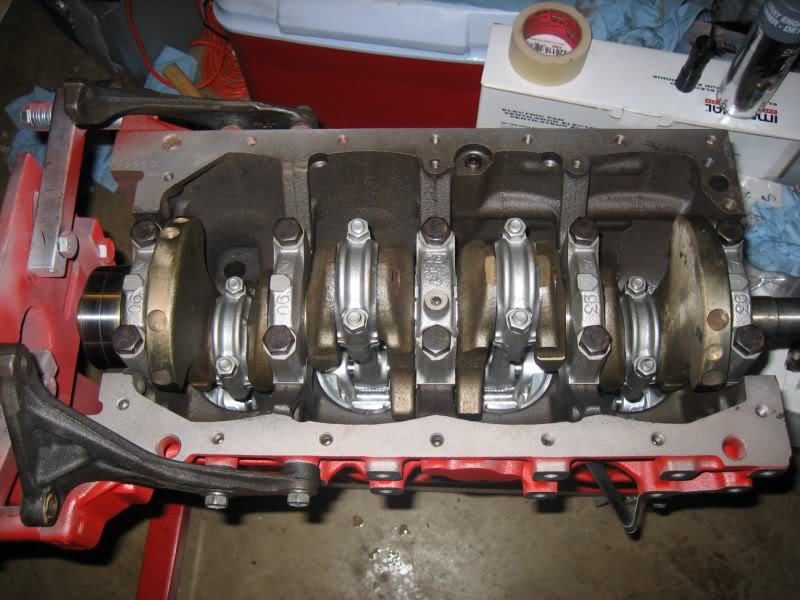
BUT, I stopped on my way home and picked up my mains, rods, and thrust washers
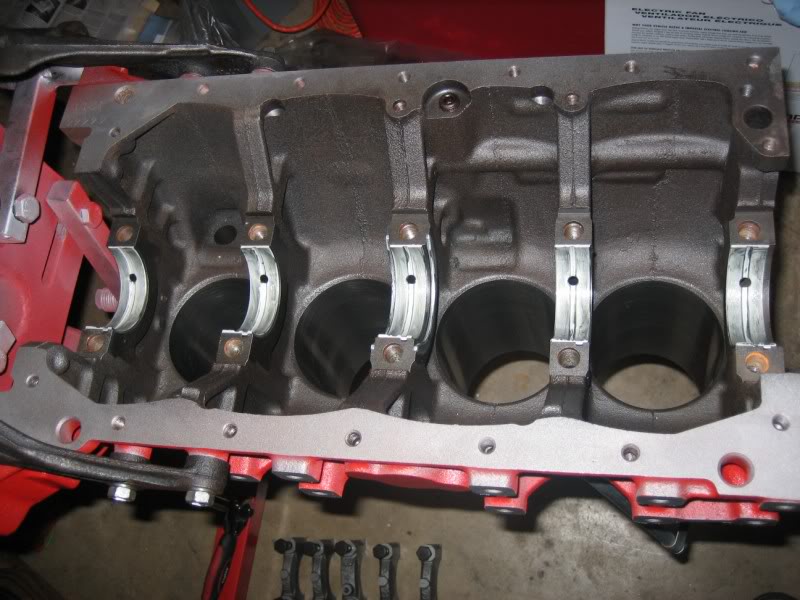
layed the block mains in
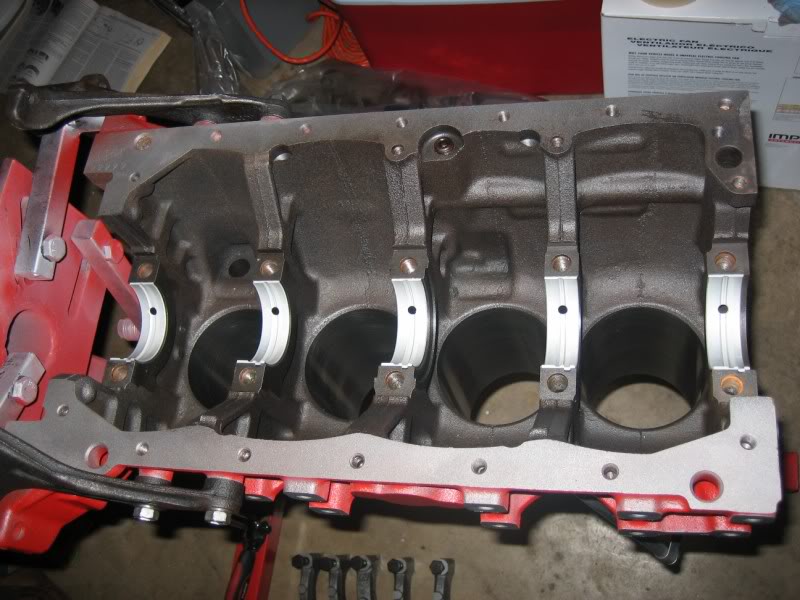
followed by the thrust washers and a good coating of moly lube
layed in the crank
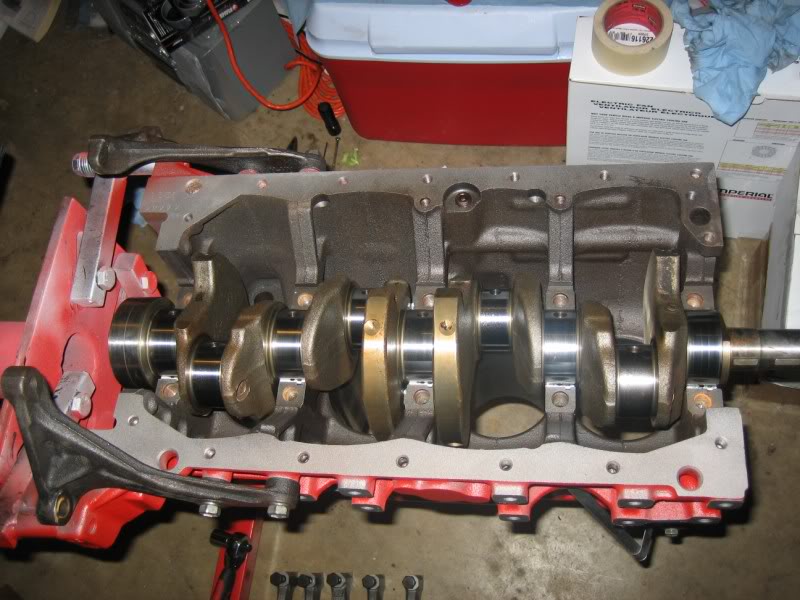
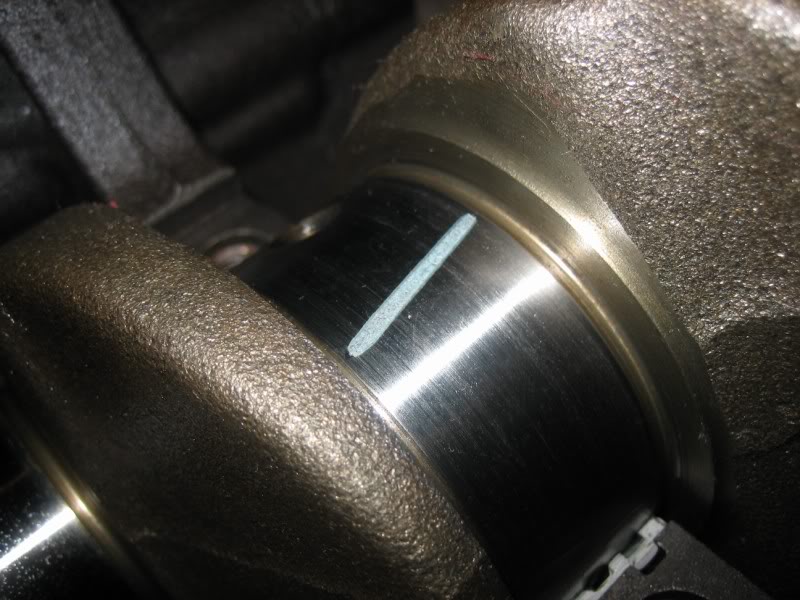
cut up and layed in some plastigauge
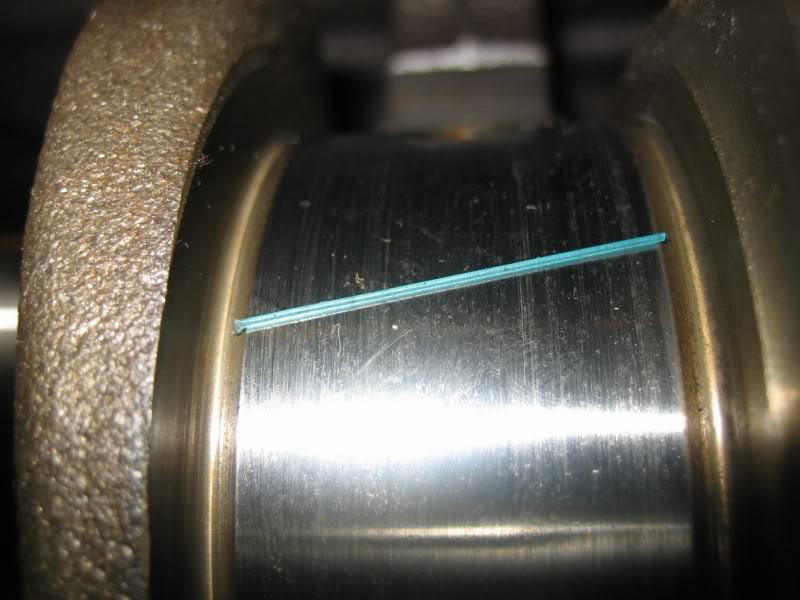
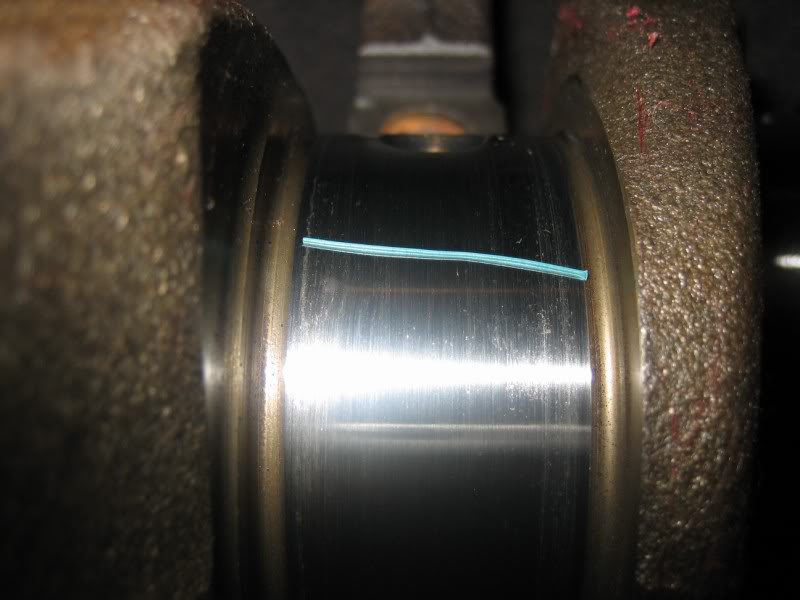
torqued er down, and came up perfectly within spec! don't have a picture to compare beside the plastigaue measurements though
but anywho, I cleaned off all the plastigauge, put the other half of the mains in the caps, layed the other two thrust washers in place, added plenty more moly lube, and torqued her back to 76ft/lbs, in the correct pattern, in 3 steps (35, 55, 76)
and then... the battery on my camera died I hadn't charged it since the wedding, lol
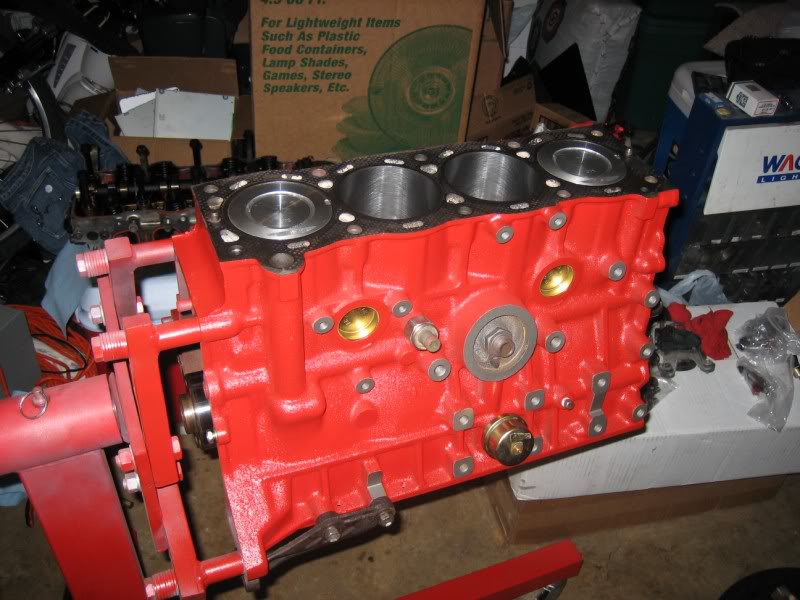
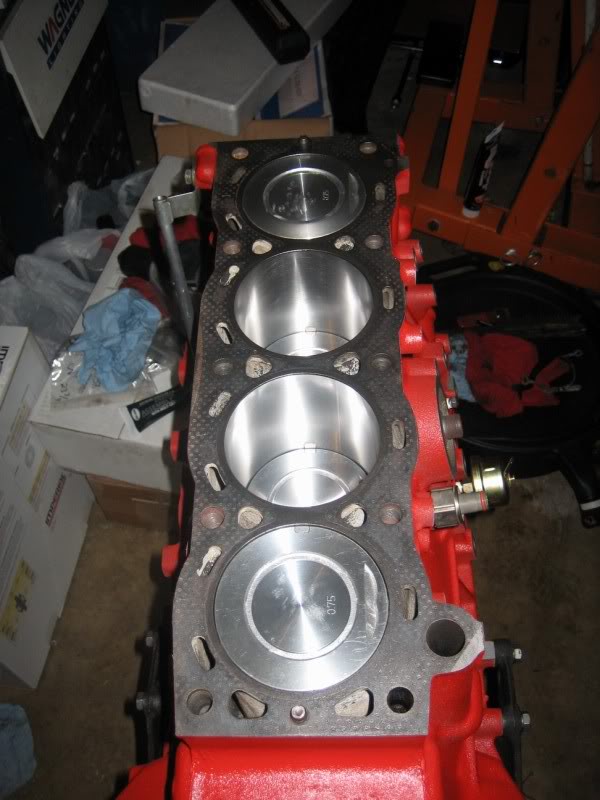
so while it was charging, I threw all the pistons in, and now WE'VE GOT AN ASSEMBLED SHORT BLOCK!!!
and how's about some ameture photography
lucky little brother had to run his sister's rented table cloths for her wedding an hour and a half accross down to return while they're off on their get-away in Tenessee BUT, I stopped on my way home and picked up my mains, rods, and thrust washers
layed the block mains in
followed by the thrust washers and a good coating of moly lube
layed in the crank
cut up and layed in some plastigauge
torqued er down, and came up perfectly within spec! don't have a picture to compare beside the plastigaue measurements though
but anywho, I cleaned off all the plastigauge, put the other half of the mains in the caps, layed the other two thrust washers in place, added plenty more moly lube, and torqued her back to 76ft/lbs, in the correct pattern, in 3 steps (35, 55, 76)
and then... the battery on my camera died
I hadn't charged it since the wedding, lolso while it was charging, I threw all the pistons in, and now WE'VE GOT AN ASSEMBLED SHORT BLOCK!!!
and how's about some ameture photography
Last edited by iamsuperbleeder; 06-15-2009 at 06:18 PM.


