
Bleeder-Dude's Official 22re Engine Rebuild Thread - TONS OF PICTURES!!!

 05-28-2009, 05:08 PM
#262
Contributing Member
Thread Starter
lmao, you know that would be weird if they were 
oh man, now I gotta to look up the lirics for the song, lol
tiz a purdy motor 
but I'm going to be painting mine Chrystler Red, matching the valve cover, but I'll just be getting back the machined block with brass plugs installed, finished crank and the specs on it so I can order the main and rod bearings, and the new pistons and rods pressed together.
oh man, now I gotta to look up the lirics for the song, lol
but I'm going to be painting mine Chrystler Red, matching the valve cover, but I'll just be getting back the machined block with brass plugs installed, finished crank and the specs on it so I can order the main and rod bearings, and the new pistons and rods pressed together.
05-28-2009, 05:55 PM
#264
Contributing Member
Thread Starter

OH, and I'm also taking my alternator to work with me, and giving it to the people we have rebuild all of out alternators and starters for the branch; they do good work. I talked to the guy today about it, and he says he doesn't think he could get ahold of any kit that'll boost the output amps, but once I get him the alt, he'll see what he can do about maybe finding one that is similar in how it mounts and the plugs, and specifically look for one with 80 or more amps
this one's still good, but I need something a little more beefy; I'm already running a 1000watt stereo, the 2 100watt lights, and the dual batteries, and with the motor rebuild I'm ditching the mechanical fan for an electric fan, AND in the future I'll have a winch and an aircompressor on board, so a little more amperage wouldn't hurt I'll let you guys know what I find on that; might come up with an easy upgrade  I mentioned to him about the Celica's with the 22re's, but he's going to look into it and see what he can find
05-28-2009, 06:19 PM
I mentioned to him about the Celica's with the 22re's, but he's going to look into it and see what he can find
05-28-2009, 06:19 PM
#265
Contributing Member
iTrader: (3)
Yeah, I didn't want to just go buy a turn key motor...I just would have NOT been satisfied with THAT! lol!! I figured, I'll tear it apart and turn it in to the pro's and put it all back in and do the whole job by myself and with a come-a-long!!! lol!!!
Oh yeah, here's what I did with my altenator and it was wicked easy and fairly cheap and works:
http://www.4x4wire.com/toyota/tech/alternator/
Oh yeah, here's what I did with my altenator and it was wicked easy and fairly cheap and works:
http://www.4x4wire.com/toyota/tech/alternator/
05-28-2009, 06:40 PM
#266
Registered User
Oh yeah, here's what I did with my altenator and it was wicked easy and fairly cheap and works:
http://www.4x4wire.com/toyota/tech/alternator/
05-28-2009, 07:07 PM
#267
Contributing Member
iTrader: (3)
I'm not to hip on the 3.0, but you can try this:
http://www.4x4wire.com/toyota/tech/p...weralternator/
http://www.4x4wire.com/toyota/tech/p...weralternator/
05-28-2009, 07:27 PM
#268
Contributing Member
Thread Starter
Yeah, I didn't want to just go buy a turn key motor...I just would have NOT been satisfied with THAT! lol!! I figured, I'll tear it apart and turn it in to the pro's and put it all back in and do the whole job by myself and with a come-a-long!!! lol!!!
Oh yeah, here's what I did with my altenator and it was wicked easy and fairly cheap and works:
http://www.4x4wire.com/toyota/tech/alternator/
Oh yeah, here's what I did with my altenator and it was wicked easy and fairly cheap and works:
http://www.4x4wire.com/toyota/tech/alternator/
where's the pix?
that's freek'n awsome man! I maye be looking into that option too; the guy wants to charge me $60 to rebuild this one to stock
and for a different type one, well I'd be paying for an entire brand new alt, so...dude, that's awesome, thanks!
05-28-2009, 07:31 PM
#269
Contributing Member
iTrader: (3)
I think I paid like $55 for the new armature. Now it's not gonna give you 160 amps, but it's way better than stock. I havent tested my altenator in a while to see what it's putting out after all these years.
05-29-2009, 07:17 PM
#271
Contributing Member
Thread Starter
 not funny
lol
Well, I delivered everything to the machine shop today after work. What really cool is I know the owner and most of the guys that work at the shop, and I didn't even realize it! Back when I worked at Advance Auto, these guys use to come up there all the time, and there was only two people they would talk to behind the counter for any help; my buddy who is a freek'n Ford fanatic and has about 5 Mustangs that he drags, and me
so at least we've got a little bit of history, and I know it's in good hands, cause I know the guy does good workOH, and right next door is the local 4x4 shop in the area, called T.J.'s 4X4 (anybody local this area knows the place), and he says he thinks he has the front portion of a bracket lift he'll sell me
we'll have to see about that though; I need to look at it and see who it's made by, and what kinda shape it's in
Last edited by iamsuperbleeder; 05-29-2009 at 07:19 PM.
05-29-2009, 07:53 PM
#273
Contributing Member
Thread Starter
but I've got a LOT of other work left to do we're getting hot-tanked, bored and honed, freeze plugs installed, crank polished, and the wrist pins pushed through the pistons and rods, cause it's really tight clearances and a little too hard for mr to get the wrist pins into the rods with the bew bushings. They're just pretty backed up as it is, so that's the only reason for the wait. The guy had 5 V8 blocks he was working on that I could see, and probably 12-13 more lined up agains the wall
I mean sure my motor's probably only one days hard work, but it's first come first serve, and I'm in no big rush; I've got PLENTY of other things to keep me occupied for now, lolyeah, about the bracket kit, I dunno, I'll have to see, because I really wanted to get the ProComp II with the kicker-bars if I were to go bracket... I still have my 1" diff drop which I'm definately installing while the motor's out and it's easy to get to, cause just with my slightly tweaked T-bars, my CV angles are like ^ lol, but I've also got my Rancho UCA's sitting here, and I'm HIGHLY considering installing those too, while everything's out of the way and it's really easy to get in and around that area; I just need to dig up some instrustions for them; I'd like to get some torque specs and what-not
05-29-2009, 08:52 PM
#274
Contributing Member
iTrader: (3)
Well, shoot, if you all ready have the Rancho's and whatnot I'd probably go with that unless they 4x4 shop hooks you up with a good price and it's the Procomp II kit. I really like my Procomp kit, it's beefy! 
The speed shop I went to with my motor was about the same, backed up like a mofo. Which I looked at as good, plus they had other 22Rs there getting full rebuilds as well. They were building a motor for a right hand drive 2nd gen 4Runner for a guy who gave them all sorts of aftermarker this and that. Man, I wish I could have seen the finished product on that one! It was gonna be sweet!
The speed shop I went to with my motor was about the same, backed up like a mofo. Which I looked at as good, plus they had other 22Rs there getting full rebuilds as well. They were building a motor for a right hand drive 2nd gen 4Runner for a guy who gave them all sorts of aftermarker this and that. Man, I wish I could have seen the finished product on that one! It was gonna be sweet!
05-29-2009, 09:17 PM
#275
Registered User
just an fyi bleeder. the reason those pins dont fit into the bushing is becouse there a "honed fit". meaning they have to hone that bushing out to spec, so those pins will fit perfect.
05-29-2009, 09:57 PM
#276
Contributing Member
Thread Starter
05-31-2009, 03:59 PM
#277
Contributing Member
Thread Starter
got a lil more cleaning and paint work done today
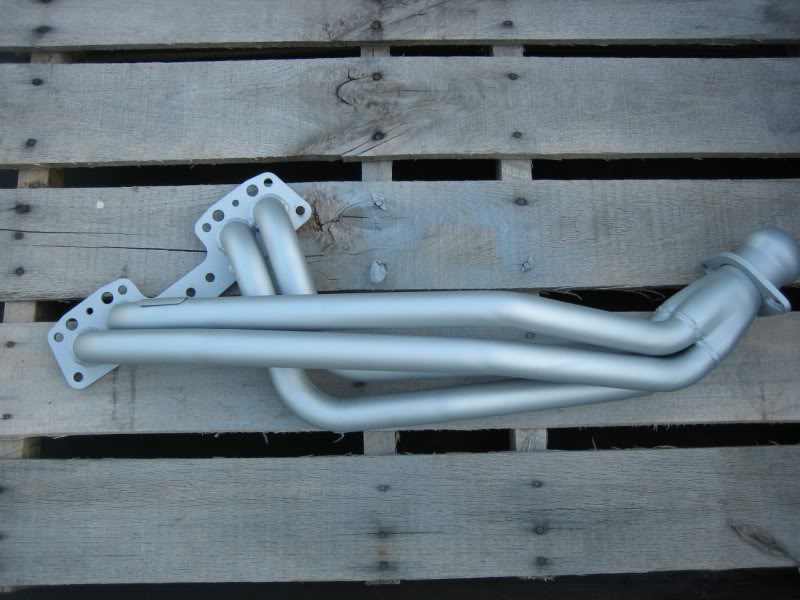


and so they shall "hang out" and cure for a little while
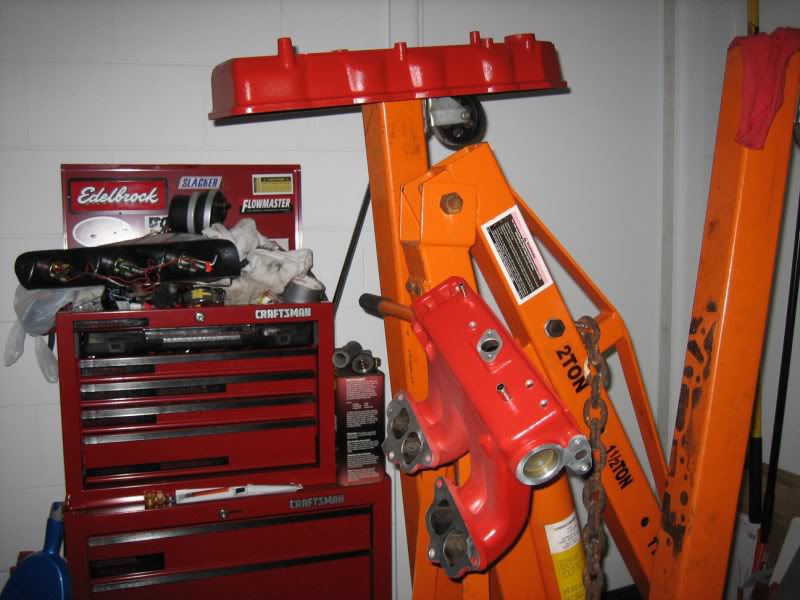
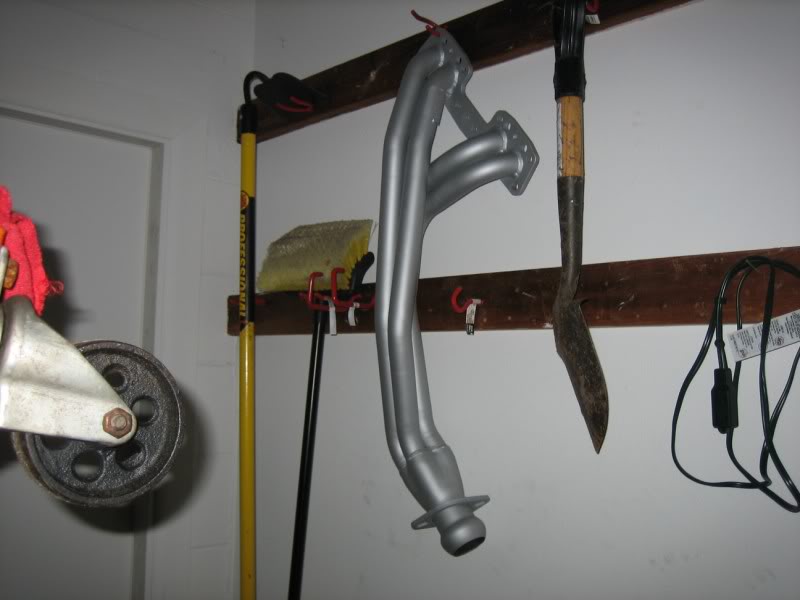
Not bad fer the ol right wrist and a rattle can eh?
and so they shall "hang out" and cure for a little while
Not bad fer the ol right wrist and a rattle can eh?
Last edited by iamsuperbleeder; 05-31-2009 at 05:25 PM.
05-31-2009, 05:14 PM
#279
Registered User
 05-31-2009, 05:21 PM
#280
Contributing Member
Thread Starter
Thank ya!
I used VHT Header Paint

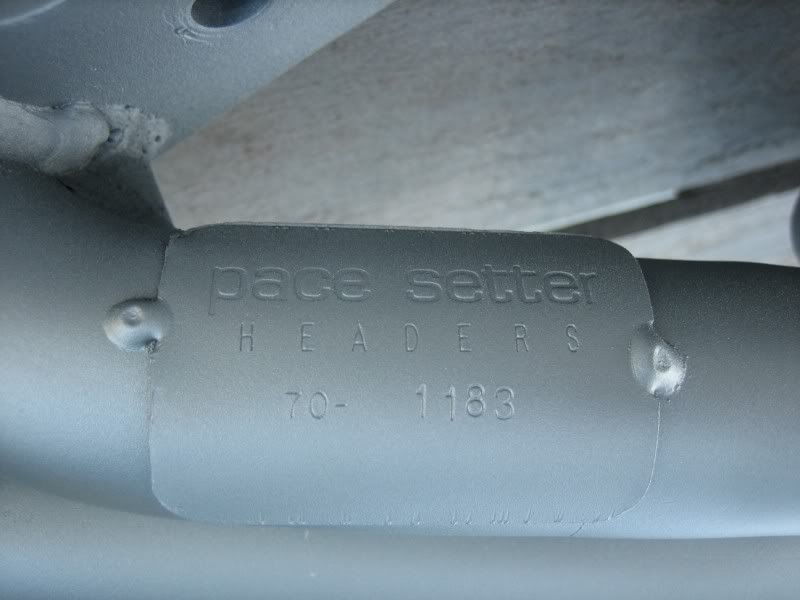
The stuff lays on pretty good! I scrubbed the entire thing down with a red scotchbright pad, gave it a coat of brake cleaner to get any dust or residue off, loosely bolted it to my engine stand, and gave it about 5 light coats it should hold better than that crap Pacesetter puts on them
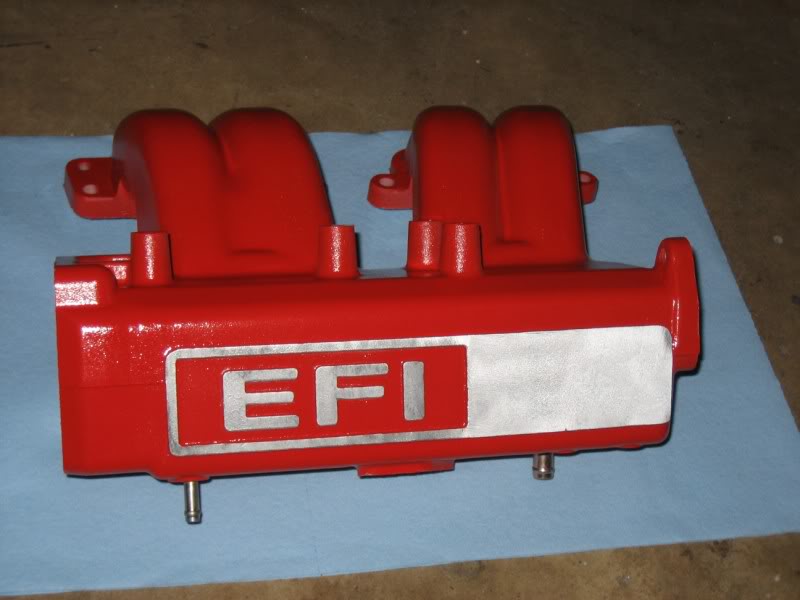
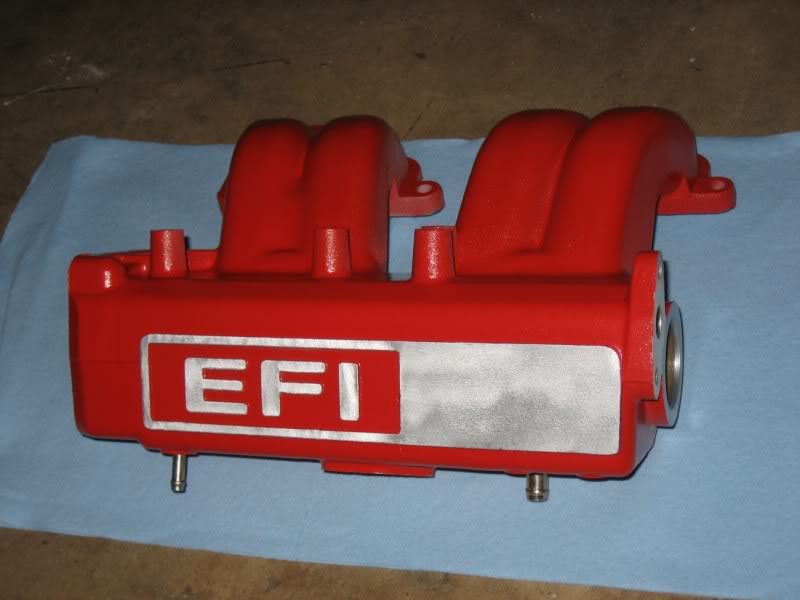
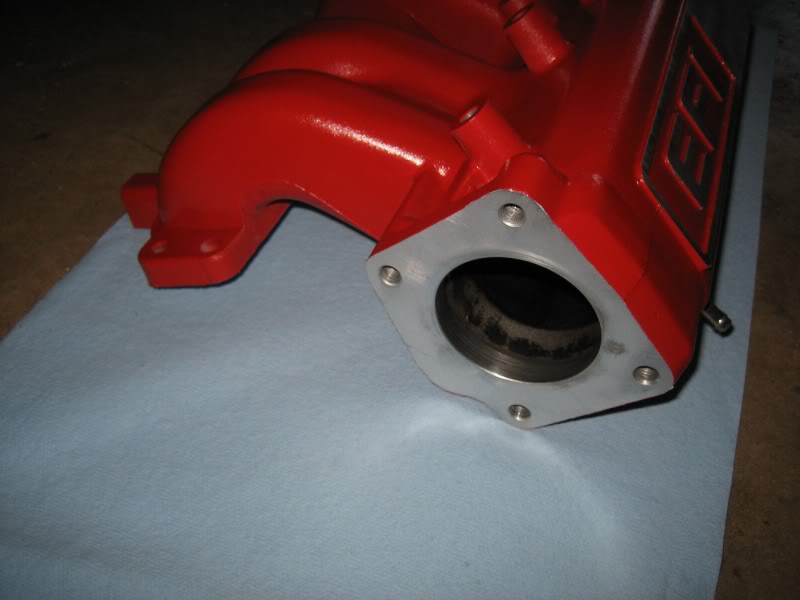
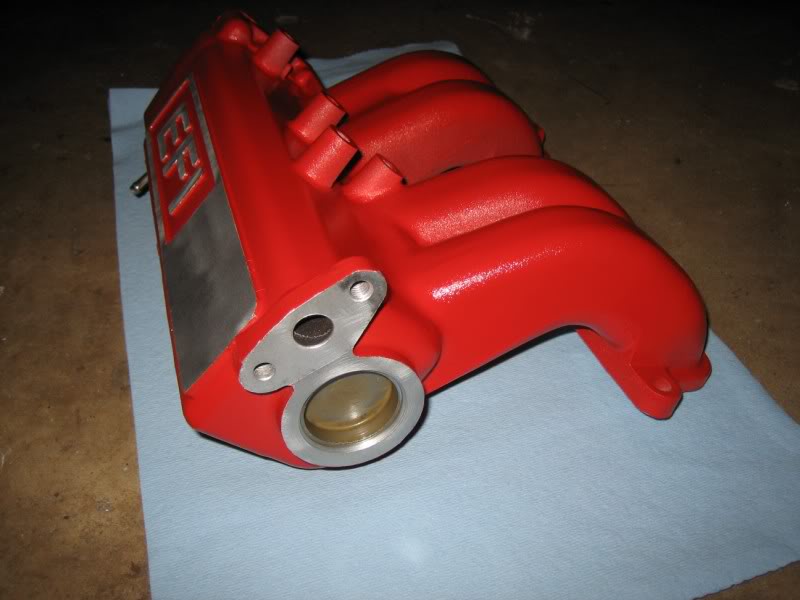
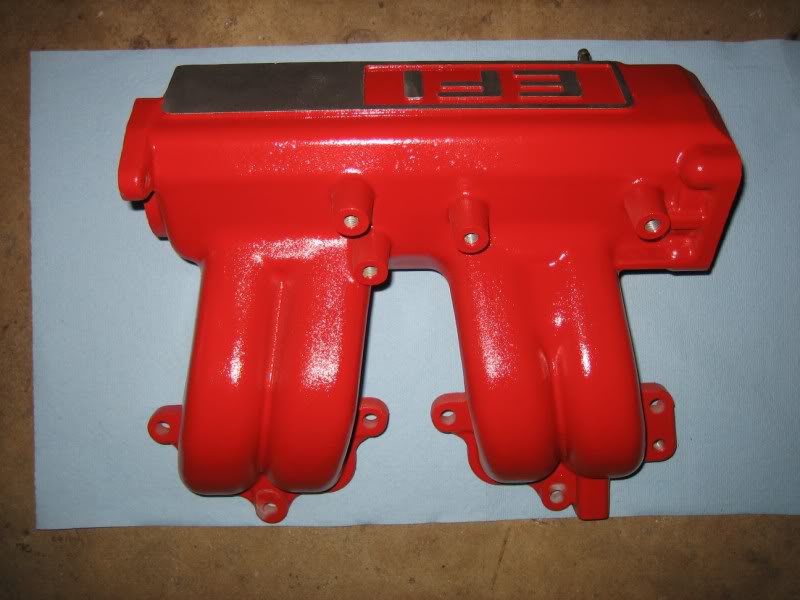
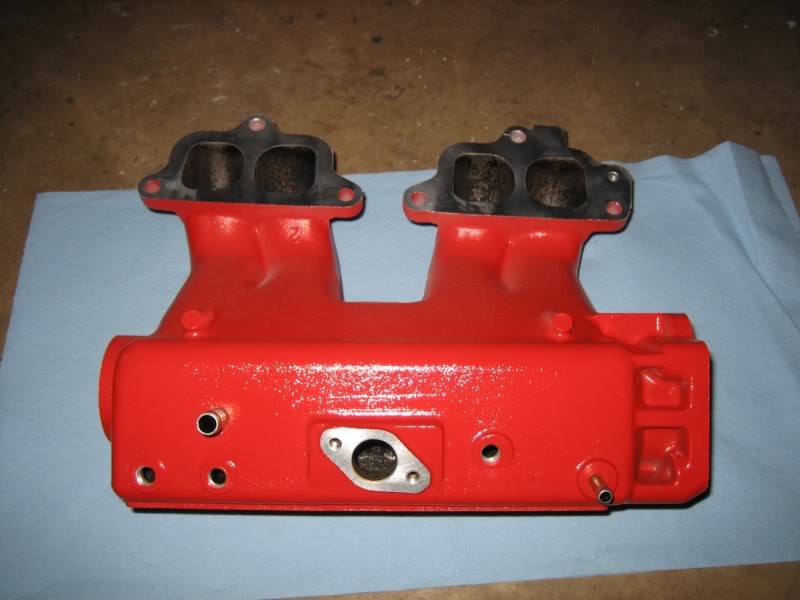
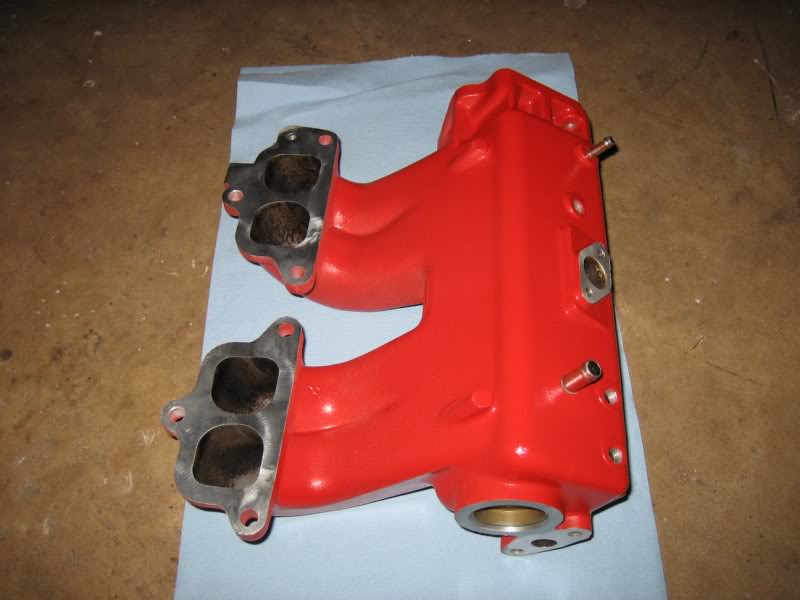
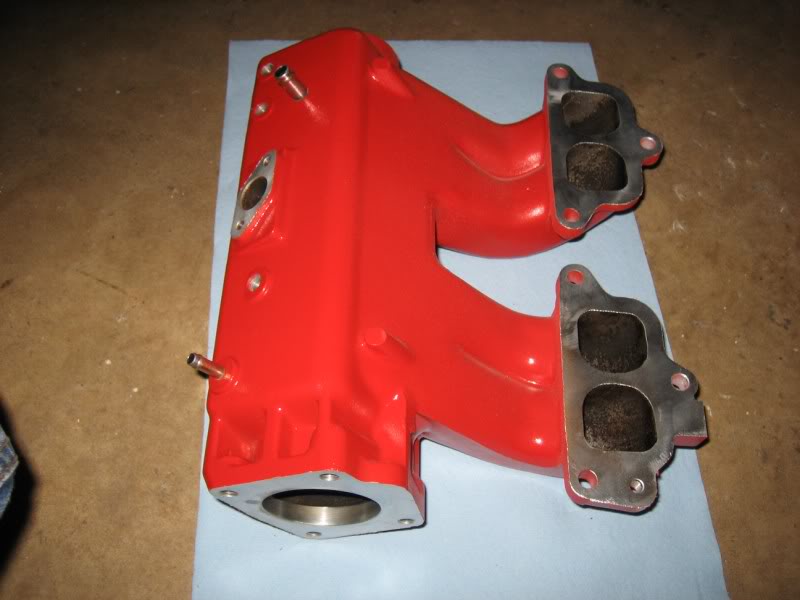
And the manifold; that consisted of a thorough cleaning with a degreaser-soaked scotchbright pad, a rinse off with water, wire-wheeling the "EFI" lettering and raised area on top, then a coating of brake cleaner to remove anything left. Then taped off all the openings I didn't want paint on, and masked off and cut out the "EFI" letters and raised area on the top, gave a few light coats of self-etching primer, them about 3 coats of the Chrystler Red engine paint (same as the valve cover), followed by 2 clear-coats for that extra shine and durability
HEY, not a bad idea... HAHA, no... It's going to look good, and it's going to perform good, but I'm not going to rice it out, lmao
Also, unlike most people apparently do, I plan on painting the lower intake too
I used VHT Header Paint
The stuff lays on pretty good! I scrubbed the entire thing down with a red scotchbright pad, gave it a coat of brake cleaner to get any dust or residue off, loosely bolted it to my engine stand, and gave it about 5 light coats
it should hold better than that crap Pacesetter puts on them And the manifold; that consisted of a thorough cleaning with a degreaser-soaked scotchbright pad, a rinse off with water, wire-wheeling the "EFI" lettering and raised area on top, then a coating of brake cleaner to remove anything left. Then taped off all the openings I didn't want paint on, and masked off and cut out the "EFI" letters and raised area on the top, gave a few light coats of self-etching primer, them about 3 coats of the Chrystler Red engine paint (same as the valve cover), followed by 2 clear-coats for that extra shine and durability
Also, unlike most people apparently do, I plan on painting the lower intake too
Last edited by iamsuperbleeder; 05-31-2009 at 06:50 PM.


