
anyone interested in seeing a paint how-to on my 87?
 06-20-2009, 10:06 PM
#141
Registered User
Thread Starter
Join Date: Mar 2009
Location: indiana
Posts: 257
Likes: 0
Received 0 Likes
on
0 Posts
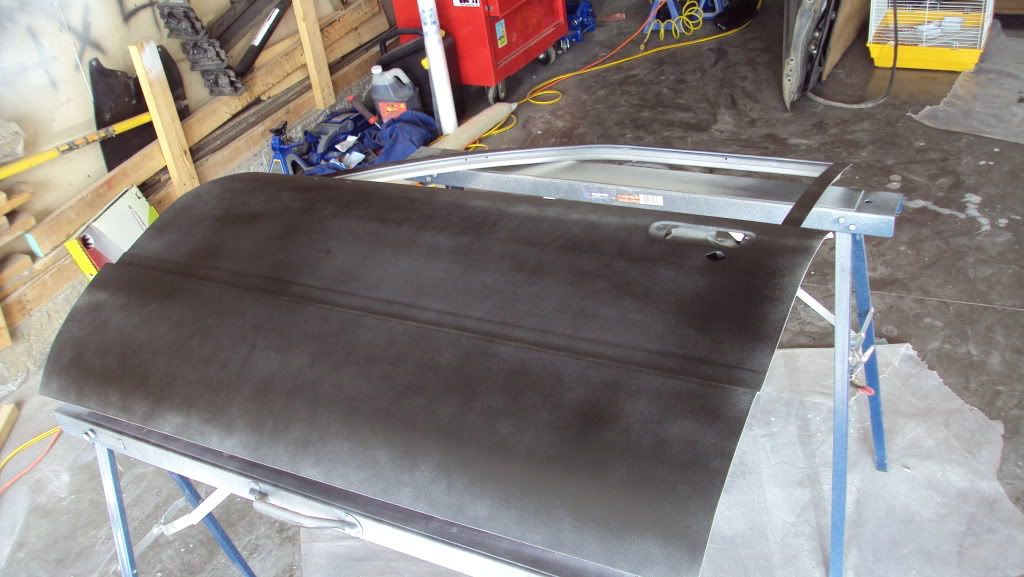
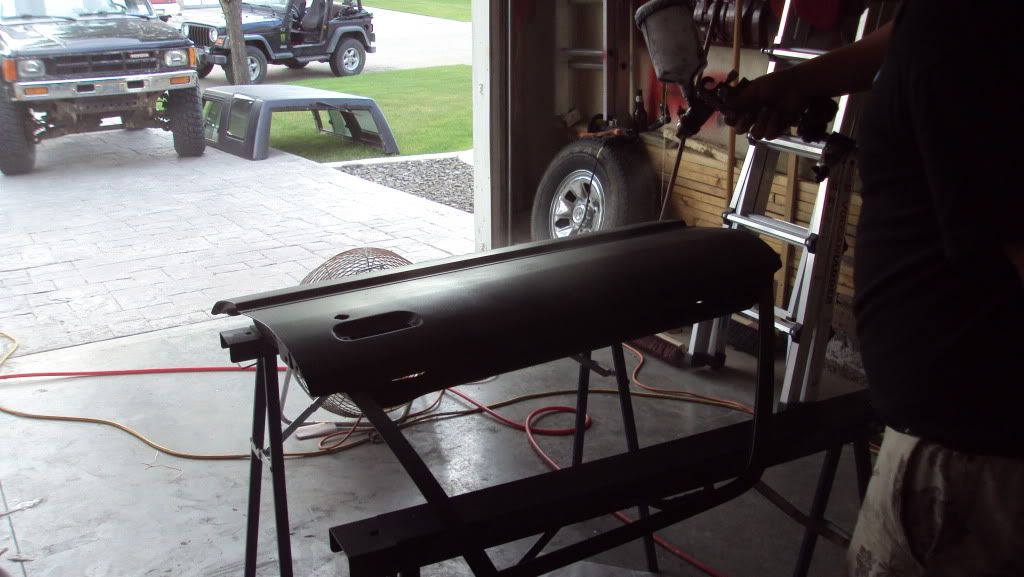
ok sorry for glazing over the buffing how-to early (no pun intended) but i wanted to get some pics up before i left. i used the electric polisher for all of my buffing and the pads are from Meguiars, the red one is a coarse cut and the white one is a polisher. i have always used 3M pads before never the Meguiars but they worked really well and i would recommend them to anyone with buffing to do.
it has been quite a few weeks since the truck has been painted and we have had some hot days so the clear was pretty well cured and really hard. it is MUCH easier to buff on fresher paint. to make matters worse i didn't have any sandpaper finer than 1000 grit so i had a lot of work to do with the buffer and compound. normally i would work my way up 600-1000-1500-2000 and polish it up from there. you need to be very thorough and get all of the coarser sand scratches out as you work up or you will be frustrated trying to get them out later. it is now fun getting a couple steps along and finding scratches that you have to sand back out. by the way they make a 3000 grit sandpaper but i am not too fond of it, i would rather just work it up with the buffer and compound.
note: buffing pads work better if they are a little damp but be careful not to get them to wet or they will going flying off and shoot across the shop. also always clean your pad before you begin buffing be it right after you finish (it is easier at this point) or before you buff again. if the compound is allowed to dry it gets really hard and if you put it on a fresh surface it can cut some really deep scratches. do NOT use those metal spur cleaning wheels on foam pads it will destroy them. do NOT buff in the sun, the compound will etch into the finish of your vehicle. the same goes for tape, do not leave tape on paint in the sun.
to begin make sure you surface is nice and clean. any dust that is on the surface can do some real damage if it is not removed first. if i have my choice i will start by washing the vehicle first. if you have been sanding you will need to get the slurry off anyway, just make sure your bucket and rag are clean. i didn't have access to water to wash my truck so i just cleaned it up with paper towels and a bucket of water.
once the surface is clean you can begin. it is a good idea to wear an apron because buffing is really messy. i like to start with an agressive cutting compound like the 3M extra cut and the red pad like in the pic above but if you are a little more timid you can just start with a regular rubbing compound. apply a generous amount to begin with as the pad will need to load. the pad needs to be spinning at a pretty good rate to be effective, i think i was using this milwaukee and level 4. use long strokes if you stay in one place too long you can heat up the panel enough to yellow the clear. be especially careful on panel edges and hard body lines because you can cut through very easily. i turn the buffer up on its edge and work around these areas which i do last. on edges and hard body lines make sure the pad is rotating off the panel and not in to it. if you allow the pad to rub in to the edge it may pull the paint off or burn through or discolor the edge very quickly. work thoroughly over the panel. do not try to buff to big of an area at once, i do hoods half at a time. when you are satisfied that you have removed all of the sand scratches you can move to another panel. make sure you remove any compound that has accumulated in the area you are going to buff. i like to just use the wash mitt, rinse it off, and remove most of the water with a chamois. you don't have to get the panel completely dry though. if you are concerned about burning through and edge of if you are buffing against plastic you can run a piece of masking tape over the edge about 1/8 - 1/4 of an inch. you can also do this to keep compound out of jambs. once you are finished with one compound wash the vehicle again to remove any residue and rinse out your pad. be sure to get the compound out of the jambs because it is like concrete when it dries and difficult to remove.
once everything is clean and ready for the next step repeat with a finer compound and possibly switch pads. if you are using the same pad make sure you rinse it thoroughly.
you do not have to apply much pressure when buffing let the roatation of the pad and the compound do the work.
any questions just ask, this is a lot of info and i have left a lot out.
 06-20-2009, 10:15 PM
#142
Registered User
Thread Starter
Join Date: Mar 2009
Location: indiana
Posts: 257
Likes: 0
Received 0 Likes
on
0 Posts
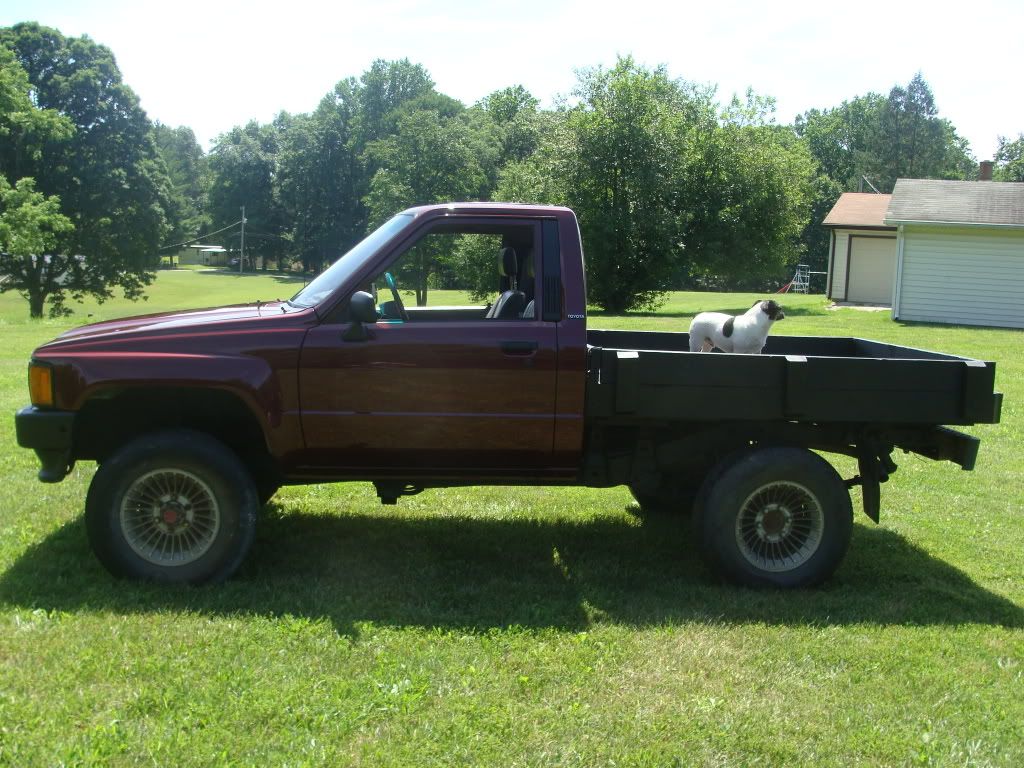
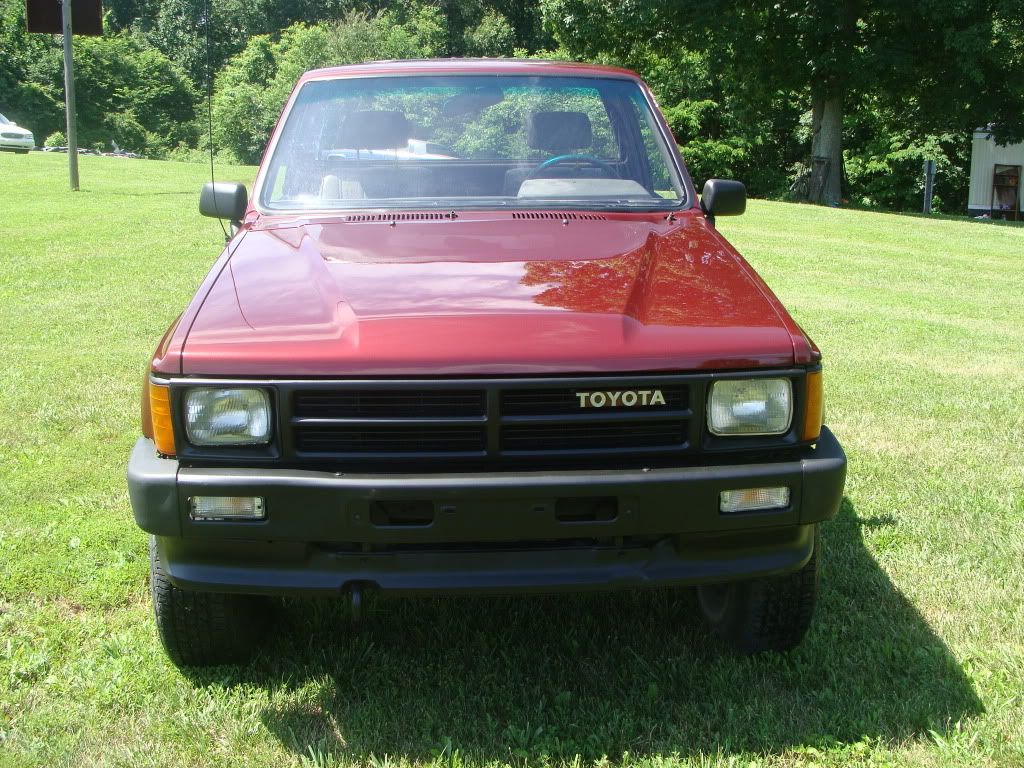
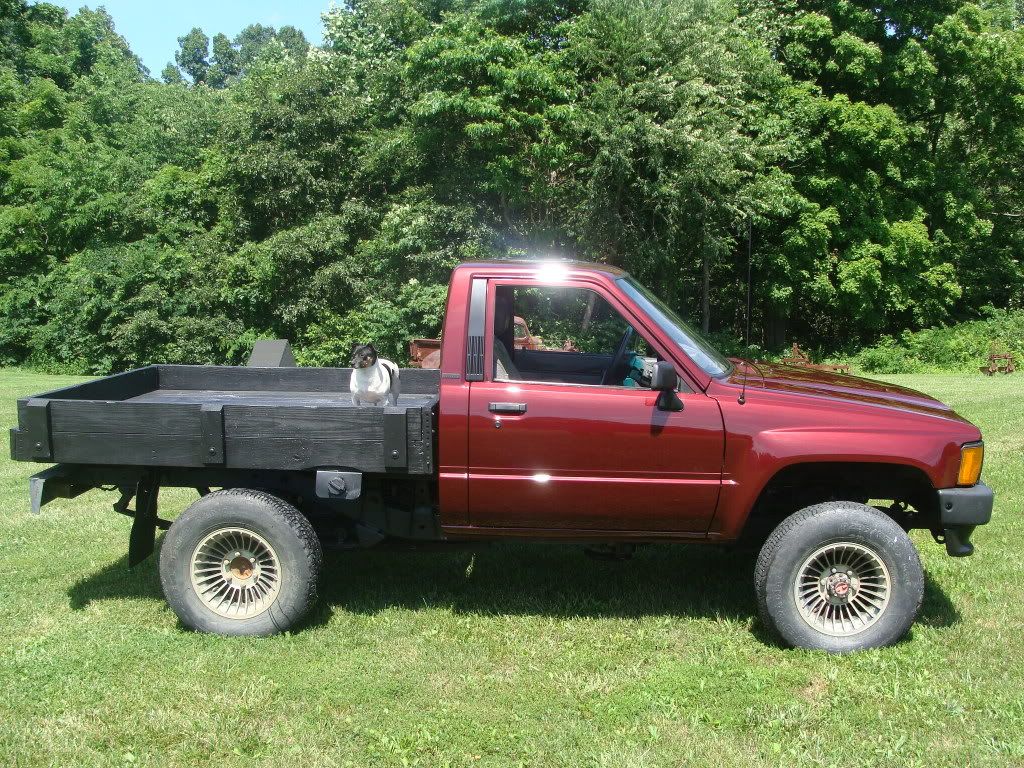
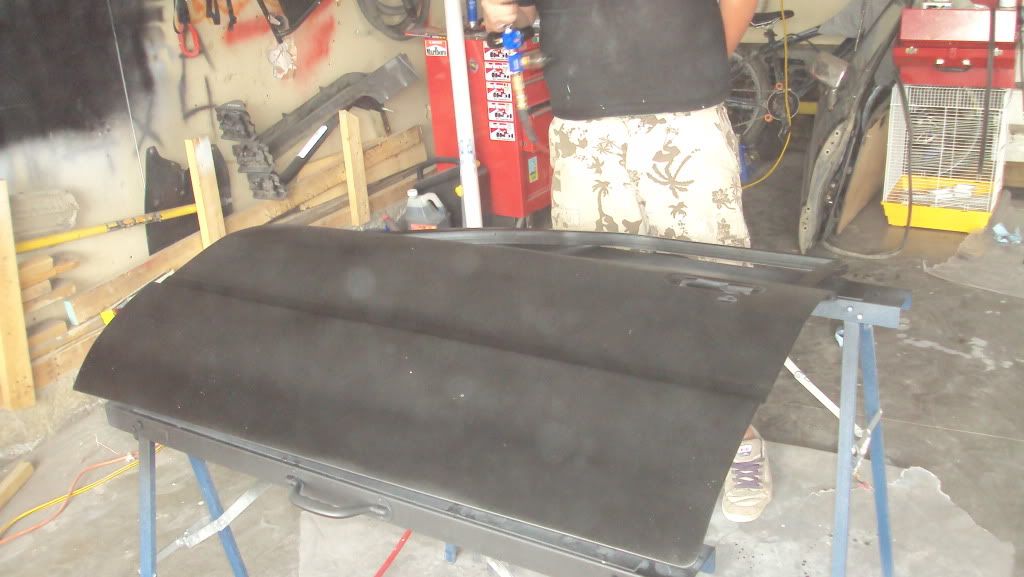
well this is pretty much the final product. the paint is just as nice or nicer than you would get from most shops. just a basic quicky bumper. now i just need to figure out what to do for taillights.
Last edited by wheatus; 06-20-2009 at 10:20 PM.

 06-21-2009, 05:48 PM
#145
Registered User
Thread Starter
Join Date: Mar 2009
Location: indiana
Posts: 257
Likes: 0
Received 0 Likes
on
0 Posts
my total material cost for the paint and body work was $75. the only things i actually bought was body filler, dura glass, etch prime and trim black. the base coat was scraps that i got from a body shop. the primer and clear were free as well. they were left over from when a paint company came in and demonstrated their products. if i had to buy everything for this it would have easily been over $500 and there is no way i would have painted my truck for this price it is just not worth it.

 06-22-2009, 09:09 PM
#152
Registered User
Alright so, i did couple coats of primer.. each time sanding it down making it all even and nice. then i laid down 4 coats of black, wet sanded every 2nd coat to make it nice.. maybe i should have thinned it out? it looked pretty good to spray, so i dunno.. then wait 2 hours to dry. then laid down the clear.
06-23-2009, 01:38 AM
#153
Registered User
any one ever try the duplicolor paintshop paint the stuff you dont have to reduce . i wanna try it on mine i just dont want to get in over my head and it turn out like crap
06-23-2009, 05:37 AM
#154
Registered User
Thread Starter
Join Date: Mar 2009
Location: indiana
Posts: 257
Likes: 0
Received 0 Likes
on
0 Posts
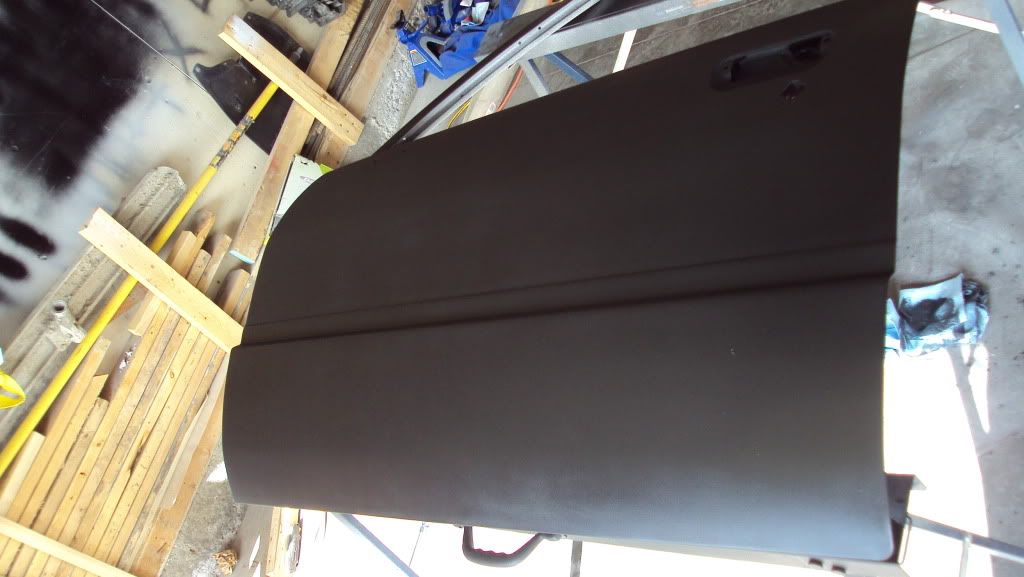
personally i have never used the duplicolor stuff but 874runnersr5 just used it on his door. the door came out flat looking from the picture and i don't think it was his fault just cheap paint.
06-23-2009, 06:29 AM
#155
Registered User
thats what i used, the duplicolor paint shop
"its ready to spray"
i call it junk, its lacquer based and i did some reading on it before i painted it and not alot of people liked it.. i paid 0$ for it tho so im not complaining.
"its ready to spray"
i call it junk, its lacquer based and i did some reading on it before i painted it and not alot of people liked it.. i paid 0$ for it tho so im not complaining.
06-23-2009, 10:25 AM
#156
Registered User
Thread Starter
Join Date: Mar 2009
Location: indiana
Posts: 257
Likes: 0
Received 0 Likes
on
0 Posts
ok that explains a lot, it is the same stuff they put in the spray cans. i would pass on this stuff. i don't know how much it costs but almost any ployurethane paint and clear are going to be much better. lacquer based paint is not what you want on your vehicle unless you just don't care or like to spend time buffing and waxing. if you are wanting to paint cheap try and get body shop scraps, base coat is expensive and if you can get it free then even with the cost of clear you should get off prettly cheaply. although i have never tried it or seen the results of the roll on stuff first hand it looks like an good option if you don't have an air compressor,don't want to invest in a paint gun, or have a place to spray.
874runnersr5 you might be able to buff that stuff up to make it look better.
874runnersr5 you might be able to buff that stuff up to make it look better.
06-23-2009, 10:44 AM
#157
Registered User
normally i paint with the dupont nason line of paint, its cheep, but it comes out looking good every time. it might not be as durable as some paints, but we have an work van i painted 3 years ago with it and it still looks great. as far as the roll on paint the thread $150 paint job the guy used roll on paint, in the picture it looks great so it is an option, but 24 hours dry time in between coats, plus the amount of time it must take to put on an coat, i would rather spray given the option, considering i can spray an car in a bout 1-2 hours depending on the size
Last edited by Ezrider_92356; 06-23-2009 at 10:48 AM.
06-23-2009, 09:50 PM
#160
Registered User

Join Date: Mar 2009
Location: OLYMPIA,WA
Posts: 18
Likes: 0
Received 0 Likes
on
0 Posts
hey wheatus! was that a urethane base paint you used for this project? also im refinishing my 92 4runner and i got it all sanded down,pretty close to priming and on a couple areas i had to strip the paint with chemicals and i got pretty lucky as far as not going down to bare mteal but i do have a couple spots it is a bare but its no bigger than a sand dollar do you think i should by like pint of etching primer or do you think i should chance it and prime it with the crossfire 15222 primer filler?thanks!


