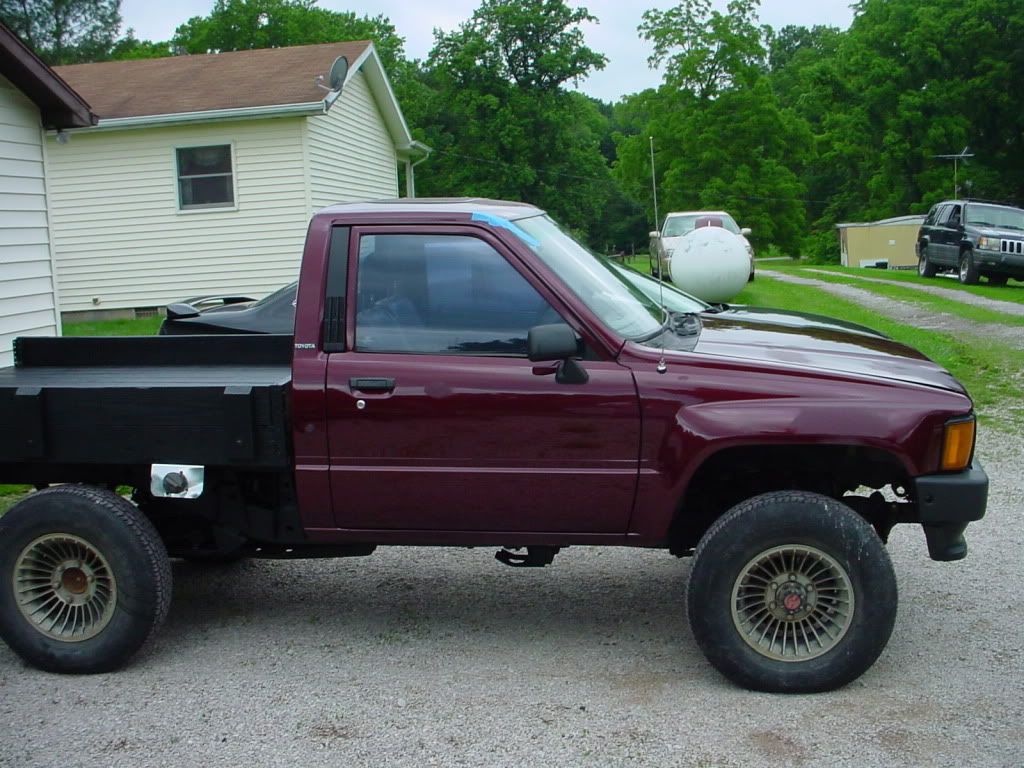
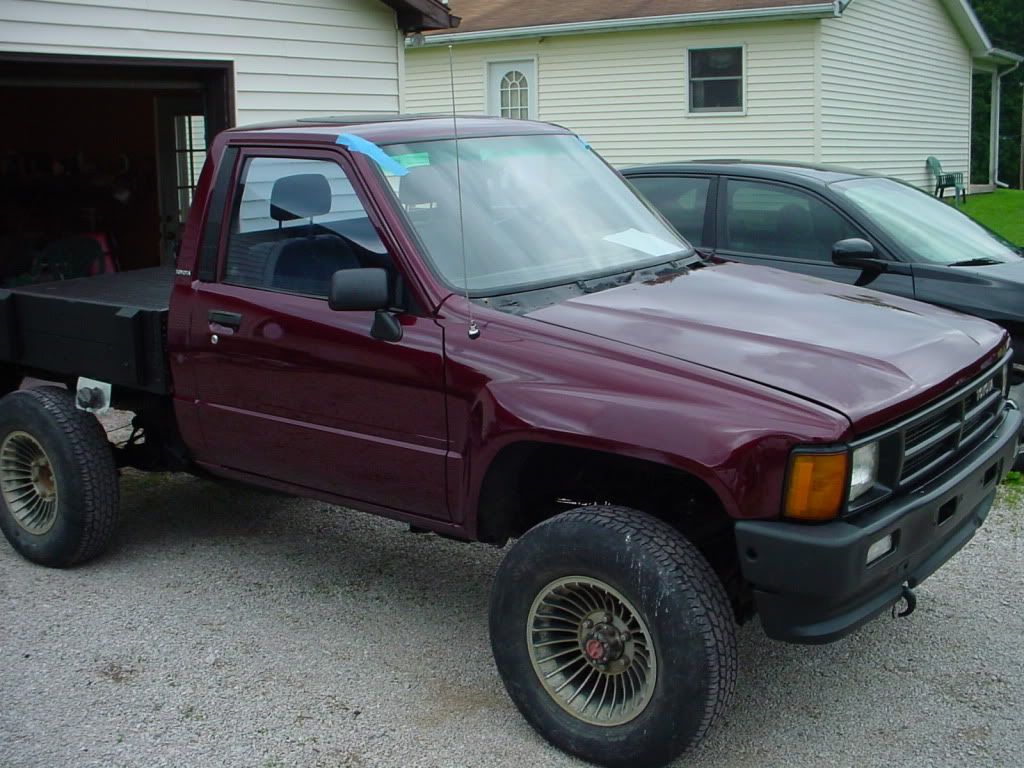
anyone interested in seeing a paint how-to on my 87?


 06-13-2009, 08:03 PM
#123
Registered User
het wheatus, i picked up some black dupli color paint, so ill see how it turns out.
if it turns out crap, i guess il just have to go buy good paint.
if it turns out crap, i guess il just have to go buy good paint.
06-14-2009, 05:44 PM
#124
Registered User
Thread Starter
Join Date: Mar 2009
Location: indiana
Posts: 257
Likes: 0
Received 0 Likes
on
0 Posts
i need some help figuring out the taillight situation. i can't figure out any good way to mount the factory lights to make them look good. i will probably buy LEDs but not sure what to get. anybody have any suggestions?
06-15-2009, 12:20 AM
#125
Registered User
Join Date: Mar 2009
Location: Gray,GA
Posts: 196
Likes: 0
Received 0 Likes
on
0 Posts
hey man,
Well im 90% done with body work and on the side of the bed and my cab im having a real hard time with wavy body work on them.Is there a trick you reccomend for checking wavy body work and a way to not do it?
Well im 90% done with body work and on the side of the bed and my cab im having a real hard time with wavy body work on them.Is there a trick you reccomend for checking wavy body work and a way to not do it?
06-15-2009, 03:15 AM
#126
Registered User
Join Date: Oct 2008
Location: Burlington, VT
Posts: 1,584
Likes: 0
Received 0 Likes
on
0 Posts
I'm a big fan of these type LED marker/turn signals and theyrenot too pricey...
http://www.ledtrailerlights.com/stt/stt_h60013RCSDM.htm
http://www.ledtrailerlights.com/stt/stt_h60013RCSDM.htm
06-15-2009, 07:37 AM
#127
Registered User
Thread Starter
Join Date: Mar 2009
Location: indiana
Posts: 257
Likes: 0
Received 0 Likes
on
0 Posts
i saw some lights similar to those in the farm store. do you know if they are combination brake/tail/turn lamps? and how to wire them?
wavy body work? well that is the whole trick isn't it? first, what stage are you in with you body work? getting the sheet metal straight enough for filler is the first step, if you hurry through this part everything else is much more difficult. you need to use a body hammer and dolly for this stage. the pick is for knocking down high spots and the flat side is for flattening and stretching the metal.
once the metal work is done is when you can apply your filler. the smoother you put on your filler the easier it is to work with. i am assuming you are still in this stage of the process. once you filler is on you need to get to work on it because the longer it sets the harder it gets and becomes a real pain to work with. if the filler is rough or is wavy i would get a coarse grit paper like 80 to rough it out. make sure you are using a long enough block, you will never be able to get the waves out if you are using a 6 inch block. when choosing blocks the longest that will work is best.
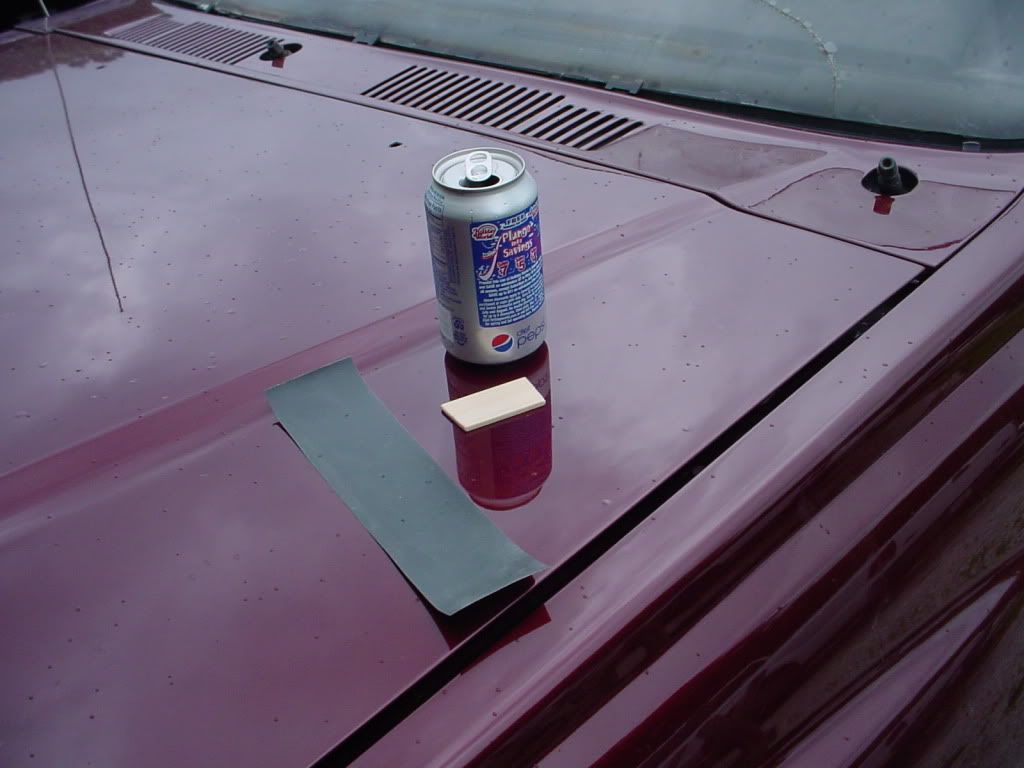
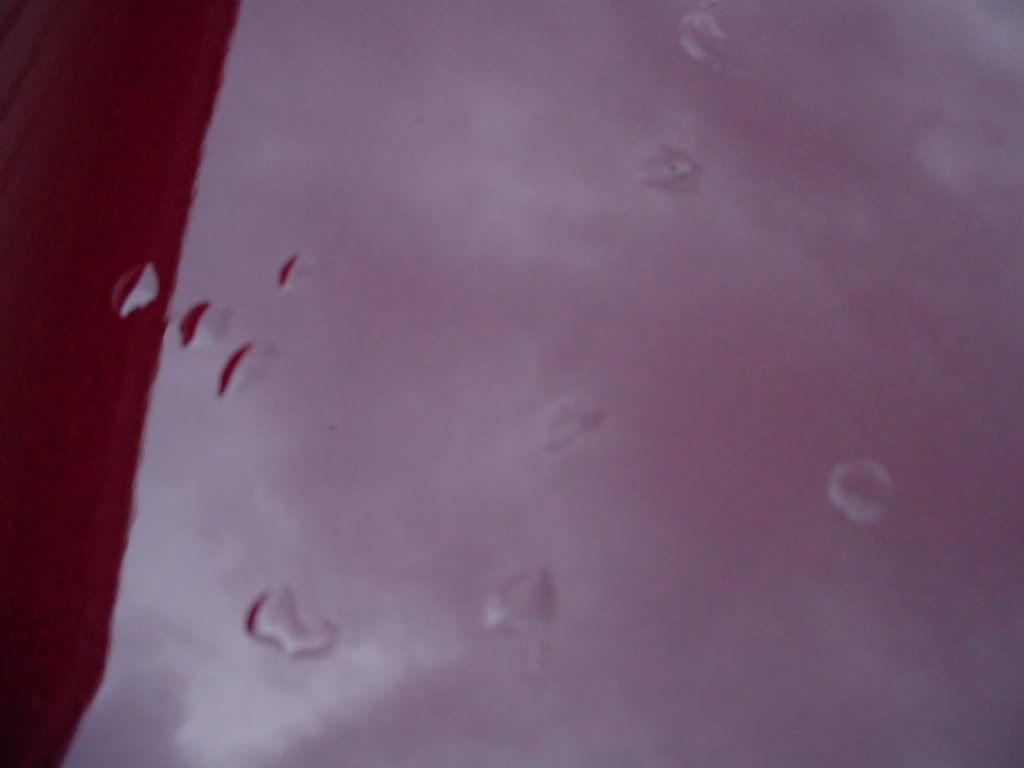
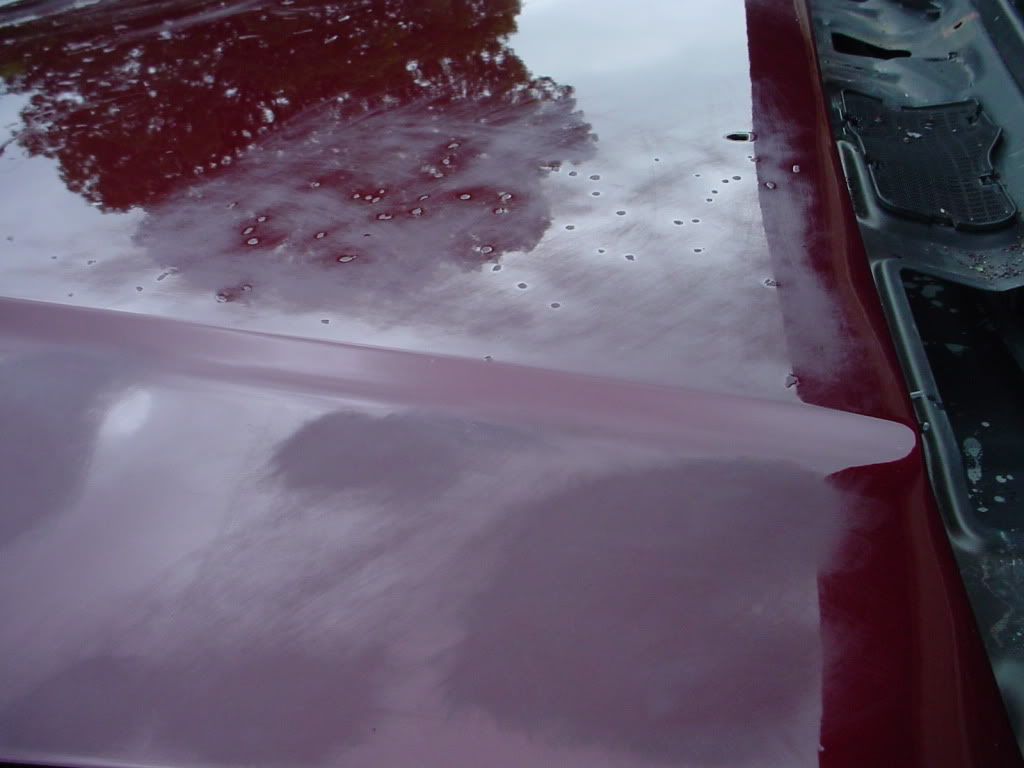
a good way to check wavy body work or eliminate it to begin with is to use a guide coat. you can use black spray bomb or a dry guide coat which is easily the best and great to help you see the waves. spray the panel so that it is uniformly covered with black paint splatter or if you are using the dry guide coat use the applicator and cover the entire area. with a fresh piece of paper on your block make one down and back pass over the area as diagramed earlier in this thread. now stop and wipe or blow the dust off so you can see what you are working with. if there is still a uniform pattern to the guide coat make another pass and reevaluate. if there are areas where the paint splatter still uniformly remains these are low and need more work. if there is an area where no splatter remains but is still surrounded by a uniform pattern of guide coat that area is high and needs blocked down further. after some further blocking reapply the guide coat, make another down and back pass, and reevaluated. as the panel gets straighter you will need to use increasingly finer grits of sandpaper. the panel is straight when after you do this the panel looks uniform. a good progression is 80, 150, 220, and finish with 320. at this point you will be ready for primer.
blocking out primer basically picks up where you left off with the filler. start with 220 or 320 depending on how good the body work feels. the process is the same use guide coat at every step and you should have good results.
just a reminder that dark colors show bad body work much worse than lighter colors.
wavy body work? well that is the whole trick isn't it? first, what stage are you in with you body work? getting the sheet metal straight enough for filler is the first step, if you hurry through this part everything else is much more difficult. you need to use a body hammer and dolly for this stage. the pick is for knocking down high spots and the flat side is for flattening and stretching the metal.
once the metal work is done is when you can apply your filler. the smoother you put on your filler the easier it is to work with. i am assuming you are still in this stage of the process. once you filler is on you need to get to work on it because the longer it sets the harder it gets and becomes a real pain to work with. if the filler is rough or is wavy i would get a coarse grit paper like 80 to rough it out. make sure you are using a long enough block, you will never be able to get the waves out if you are using a 6 inch block. when choosing blocks the longest that will work is best.
a good way to check wavy body work or eliminate it to begin with is to use a guide coat. you can use black spray bomb or a dry guide coat which is easily the best and great to help you see the waves. spray the panel so that it is uniformly covered with black paint splatter or if you are using the dry guide coat use the applicator and cover the entire area. with a fresh piece of paper on your block make one down and back pass over the area as diagramed earlier in this thread. now stop and wipe or blow the dust off so you can see what you are working with. if there is still a uniform pattern to the guide coat make another pass and reevaluate. if there are areas where the paint splatter still uniformly remains these are low and need more work. if there is an area where no splatter remains but is still surrounded by a uniform pattern of guide coat that area is high and needs blocked down further. after some further blocking reapply the guide coat, make another down and back pass, and reevaluated. as the panel gets straighter you will need to use increasingly finer grits of sandpaper. the panel is straight when after you do this the panel looks uniform. a good progression is 80, 150, 220, and finish with 320. at this point you will be ready for primer.
blocking out primer basically picks up where you left off with the filler. start with 220 or 320 depending on how good the body work feels. the process is the same use guide coat at every step and you should have good results.
just a reminder that dark colors show bad body work much worse than lighter colors.
06-15-2009, 02:42 PM
#128
Registered User
Join Date: Mar 2009
Location: Gray,GA
Posts: 196
Likes: 0
Received 0 Likes
on
0 Posts
Great information 
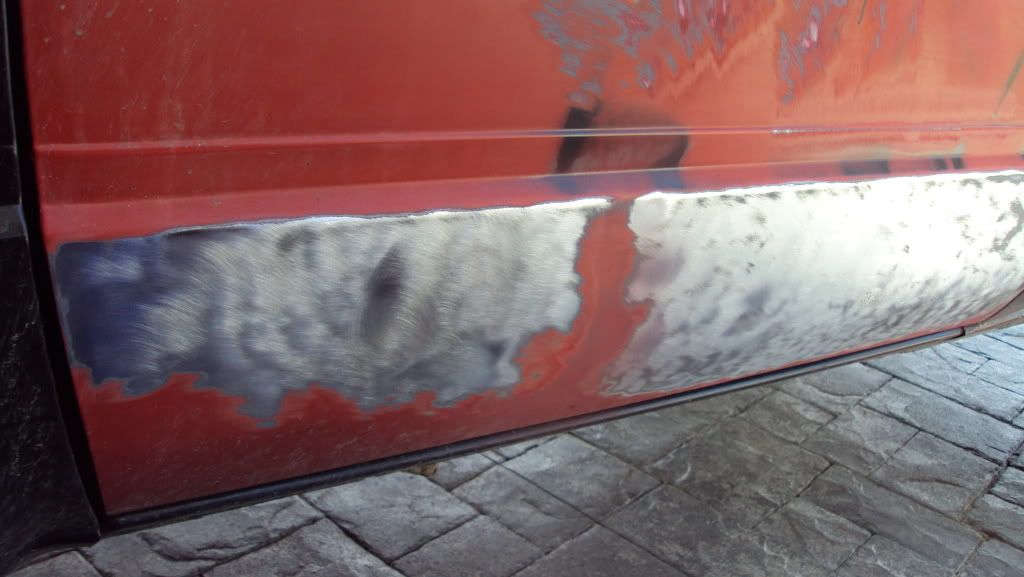
I see i wasn't very specific in my question.So here goes should help you understand better.I hit a tree under my ext cab rear window.I conpletely mangled the cab.I used a dent puller that you drill a hole into the metal with and then pull them out.after abou 100 holes drilled I finally got a nice surface to work with So I start filling the holes with bondo hair.Then sand off the excess and move onto the body filler.well after 2 layers the side panel gave in and there was the dent again.after a few hours of body work i was not about to redo it all.So i was like wth why not just fill it with a ton a body filler.well,after about 10 layers i relized it would have been quicker to pull it back out and brace the back of it.Ive finally got rid of 90% of the waves and i just put another cote on and will go sand it in a few.I used a da sander for the first 8 or so layers to get the shape and all quicker.and now to remove the waves im using about a 10-14 inch block of 2x4 haha but its getting it looking nice no doubt.
Where can I this quide coat you speak of?
06-15-2009, 03:05 PM
#129
Registered User
Thread Starter
Join Date: Mar 2009
Location: indiana
Posts: 257
Likes: 0
Received 0 Likes
on
0 Posts
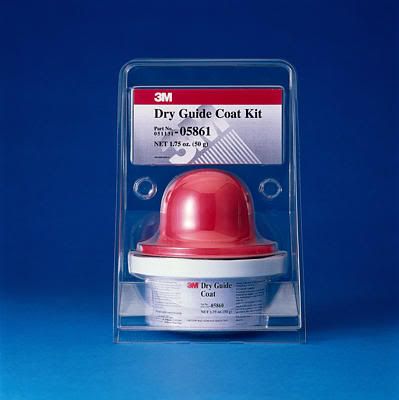
the 3M stuff might be a little expensive but any auto body supply shop should carry it and walmart has $.97 cans of spray bomb.
it is difficult to explain the method that i use, hope you figured it out. its one of those things that you can try to explain forever but you can show someone how to do in 2 minutes.
the roof of my truck did the same thing, always heard it called "tin canning," but stiffened up when we glued the sunroof back in. a 2x4 would work all you need is a good flat surface. i break off about 2 inches of a paint stick and round over the corners with a DA when i am sanding dirt or runs to buff. if you have a plane you could level it up pretty quickly and have a nice block.
here is a pic of the guide coat, it was like $45 at the website i got this pic from.
06-16-2009, 04:50 PM
#130
Registered User
Thread Starter
Join Date: Mar 2009
Location: indiana
Posts: 257
Likes: 0
Received 0 Likes
on
0 Posts
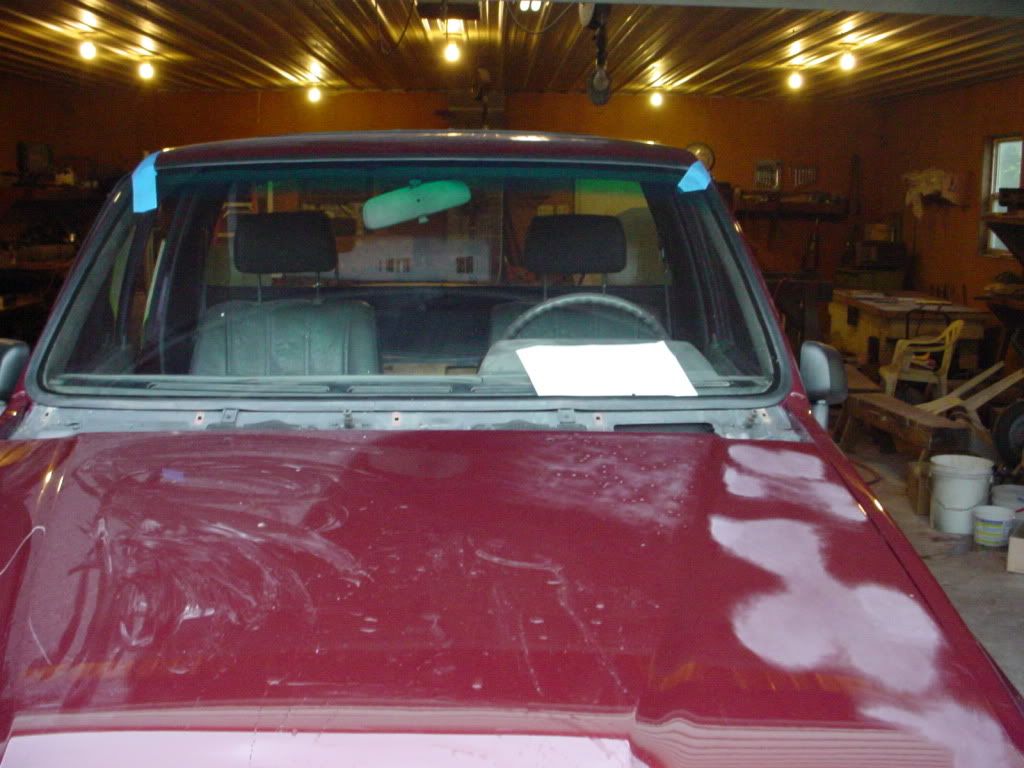
just about done. stained the bed today with Cabot solid black deck stain, finished blacking out frame, installed dash pad, new antenna, glued in weatherstripping, new windshield, and started the buffing process.
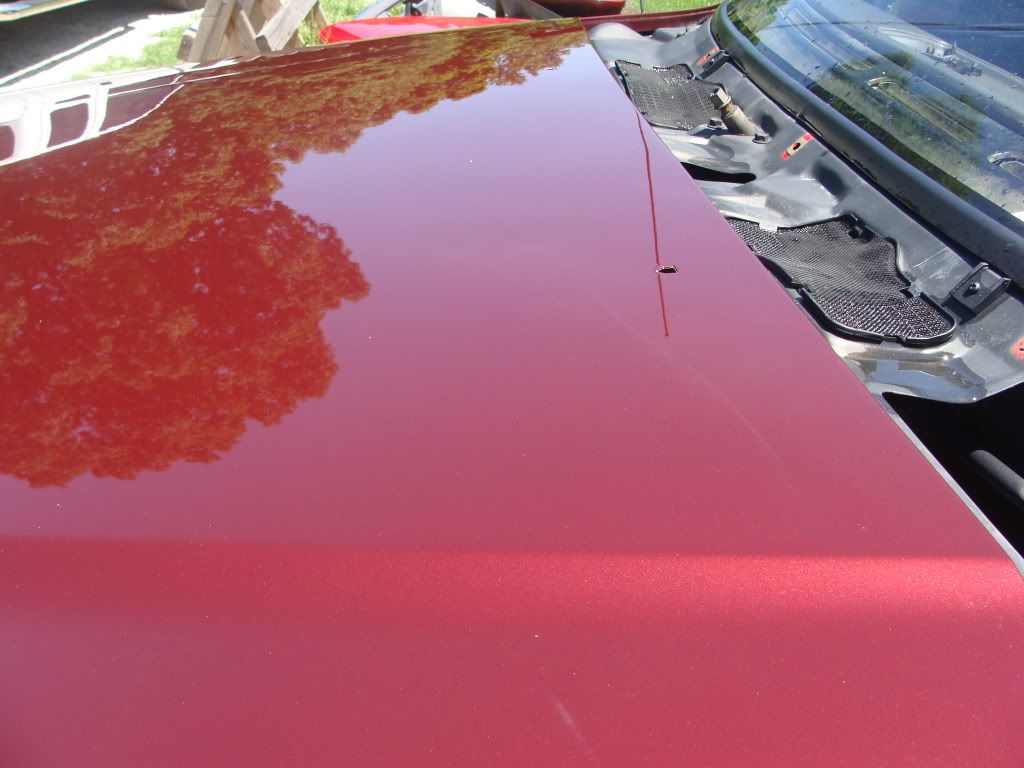
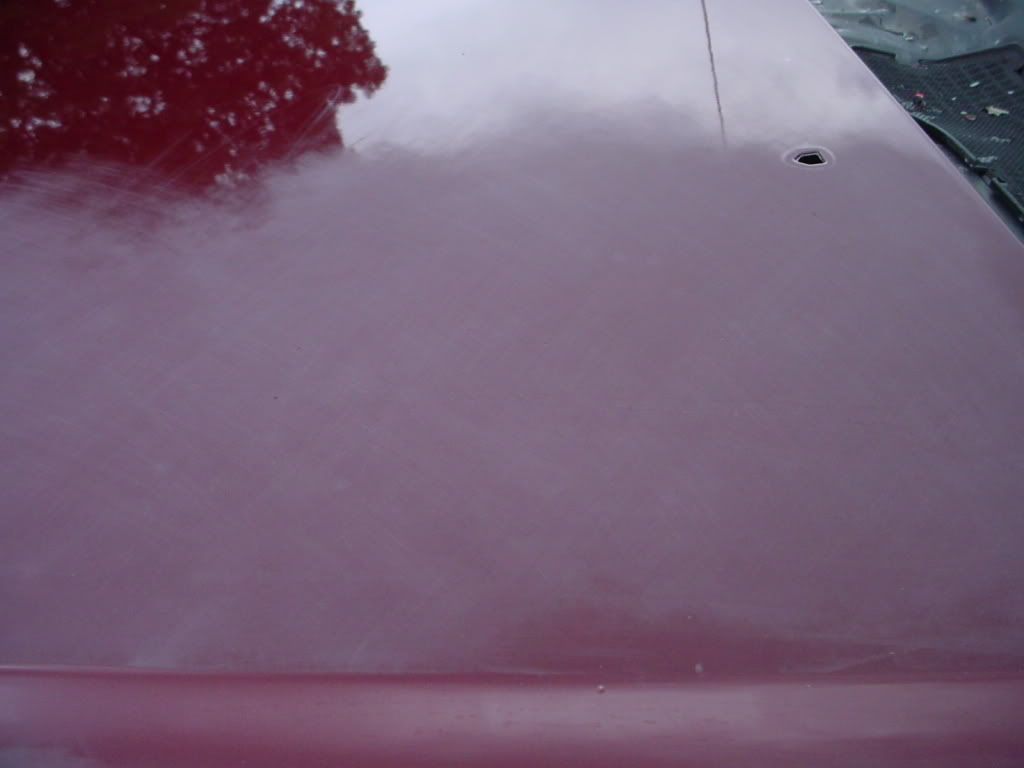
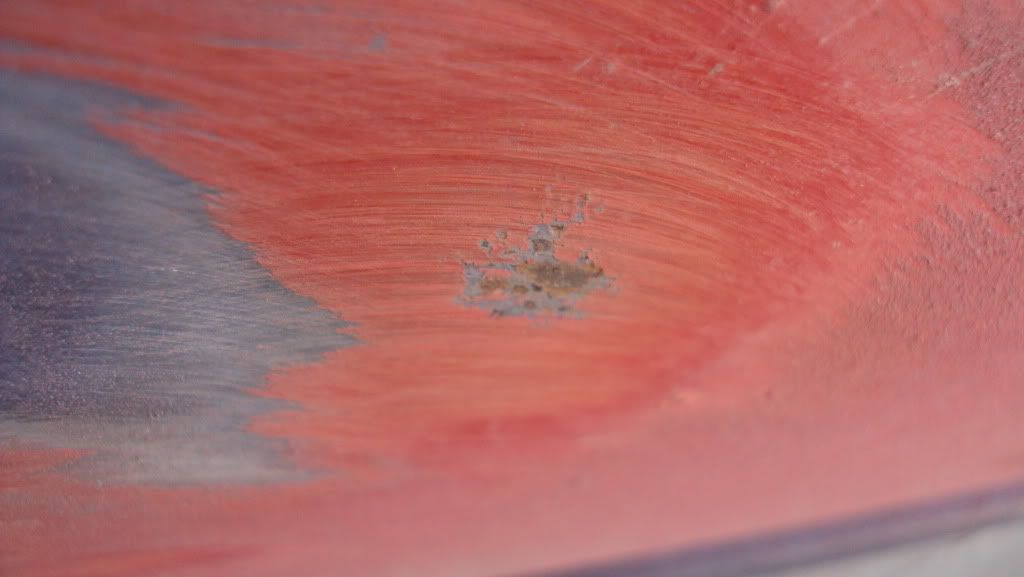
how i deal with runs, dirt, and fisheyes. the paint turned out really well until dad was cleaning out his gun and blew thinner all over the clear. it caused some wicked fisheyes which he filled by using a small brush and dabbing with clear. that is what these big bubble looking things are.
they make scrappers for runs or you can use a razor blade to scrape off some of the clear but i have never had much luck with these methods. i just cut down a paint stick and round over the edges and corners to make a little block. i started with 600 grit sandpaper and use the same blocking technique its just on a smaller scale. if you look closely in the fourth pic you can see the cross hatch marks from the blocking. notice they are at 45 degree angles to the edge of the hood and intersect at 90 degrees exactly like i illustrated on blocking primer.
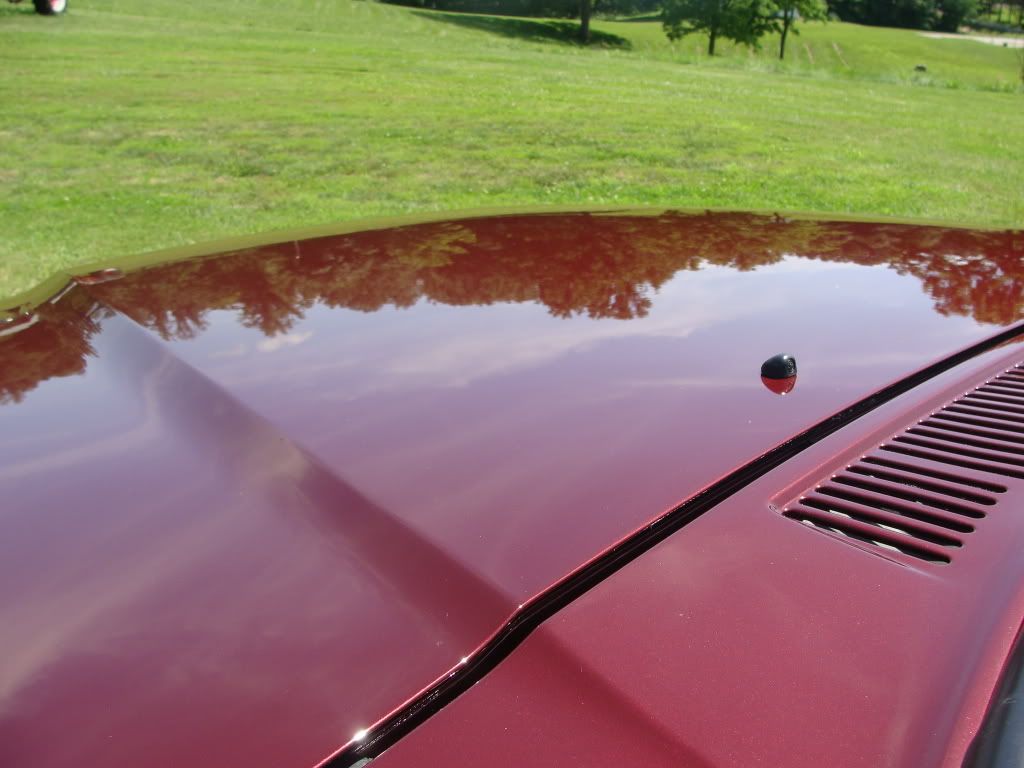
a close up of the filled fisheye and some pics of my spotted dog. a pic of the work in progress. the center of the hood i just started on so you could really see the extent of the problem while the edge has been block flat and is ready to go over with some 1000 grit. the old man shows up after work a little late to be much help.
how i deal with runs, dirt, and fisheyes. the paint turned out really well until dad was cleaning out his gun and blew thinner all over the clear. it caused some wicked fisheyes which he filled by using a small brush and dabbing with clear. that is what these big bubble looking things are.
they make scrappers for runs or you can use a razor blade to scrape off some of the clear but i have never had much luck with these methods. i just cut down a paint stick and round over the edges and corners to make a little block. i started with 600 grit sandpaper and use the same blocking technique its just on a smaller scale. if you look closely in the fourth pic you can see the cross hatch marks from the blocking. notice they are at 45 degree angles to the edge of the hood and intersect at 90 degrees exactly like i illustrated on blocking primer.
a close up of the filled fisheye and some pics of my spotted dog. a pic of the work in progress. the center of the hood i just started on so you could really see the extent of the problem while the edge has been block flat and is ready to go over with some 1000 grit. the old man shows up after work a little late to be much help.
 06-18-2009, 10:58 AM
#133
Registered User
Thread Starter
Join Date: Mar 2009
Location: indiana
Posts: 257
Likes: 0
Received 0 Likes
on
0 Posts
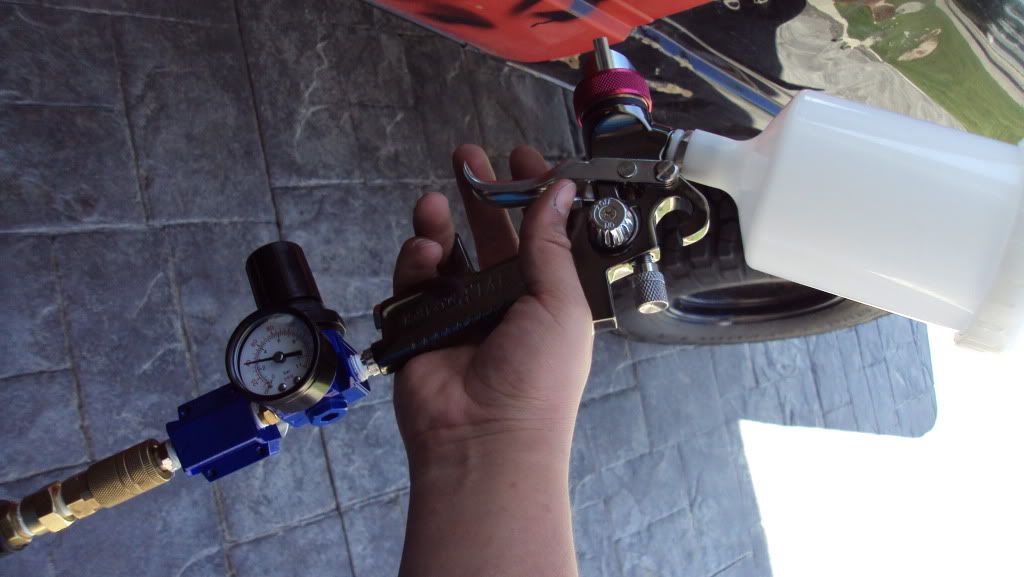
1. is the air pressure adjustment. turning this knob counterclockwise will increase air pressure at the tip while turning clockwise will reduce pressure. more pressure will result in a jet like fan pattern and lower pressure will give you a wide fan.
2. is the material adjustment. this knob seats the needle against the air cap allowing you to control the size of the drops of material.
3. is NOT an adjustment
first you will need to get an external air pressure regulator to set the air pressure to the gun to the manufacturer's specs.
before i "tuned" the gun i would thoroughly clean it with laquer thinner. get a scrap piece of cardboard or a piece of masking paper to spray fan tests on. to "tune" your gun start with the air pressure adjustment screw (1) turned completely clockwise and the material adjustment screw (2) seated against the air cap but be careful not to tighten it too much or you could damage the needle and cap. fill the paint cup with scrap paint thinned to the consistency you will be spraying with or for an initial setup just use thinner.
attach the air line and check that the pressure is at the right PSI. if you pull the trigger there should not be any spray the material should just dribble out. turn the air pressure adjustment screw (1) full clockwise getting a feel for how far you turned. now if you pull the trigger you should get a jet of spray. now turn (1) back counterclockwise about halfway and spray onto the cardboard or masking paper holding the gun 8-10 inches away and just giving a quick full burst. the ideal fan setting will give you a vertically shaped cigar spray pattern with complete coverage in the center. if the pattern is more rounded you have to much pressure and need to turn the air pressure adjustment screw clockwise. if the pattern looks good but the center is not covered not enough material is being applied. back the material adjustment screw (2) off by 1/4 turns until you get the center covered without runs. if there are runs you are applying to much material and need to tighten the material adjustment screw (2).
once you get the gun set don't adjust anything and you will be really close when you are ready to spray. before you spray its a good idea to make final adjustments with the actual paint you are using.
06-18-2009, 01:16 PM
#135
Registered User
Join Date: Dec 2008
Location: DFW, Texas!
Posts: 1,015
Likes: 0
Received 0 Likes
on
0 Posts
Yeah, you see "3" on many air tools (e.g. impact wrenches).
I know nothing about air guns and knew that it wasn't an adjustment.
awesome post explaining the dials, thanks!
I know nothing about air guns and knew that it wasn't an adjustment.
awesome post explaining the dials, thanks!
06-19-2009, 04:38 PM
#136
Registered User
Thread Starter
Join Date: Mar 2009
Location: indiana
Posts: 257
Likes: 0
Received 0 Likes
on
0 Posts
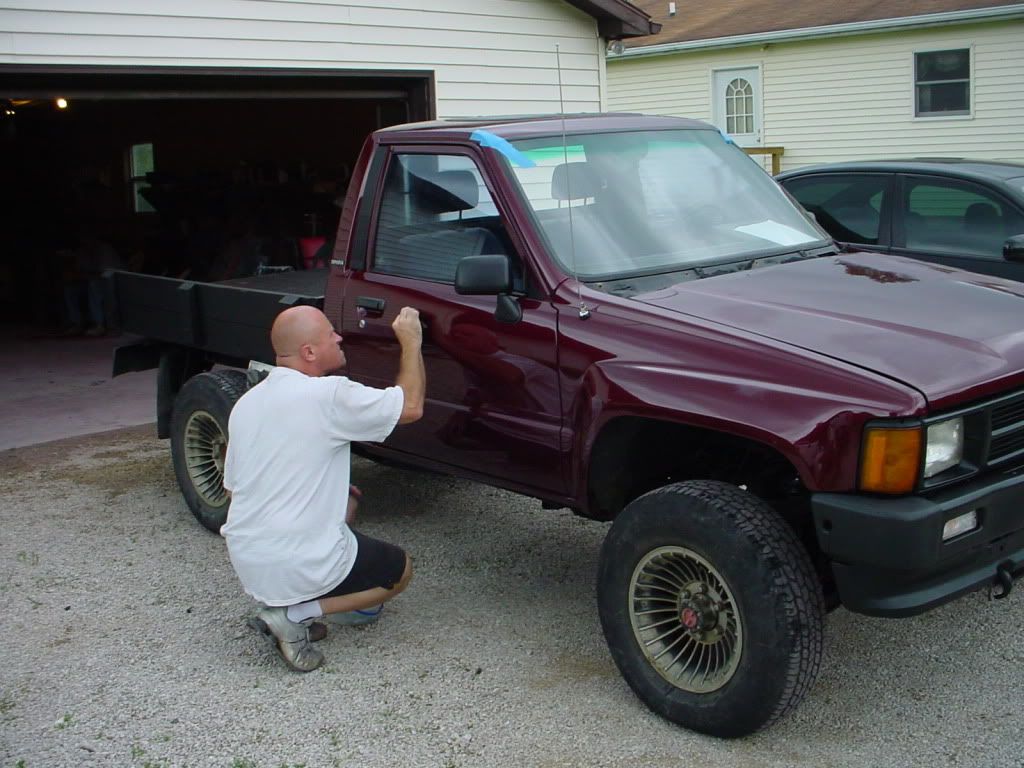
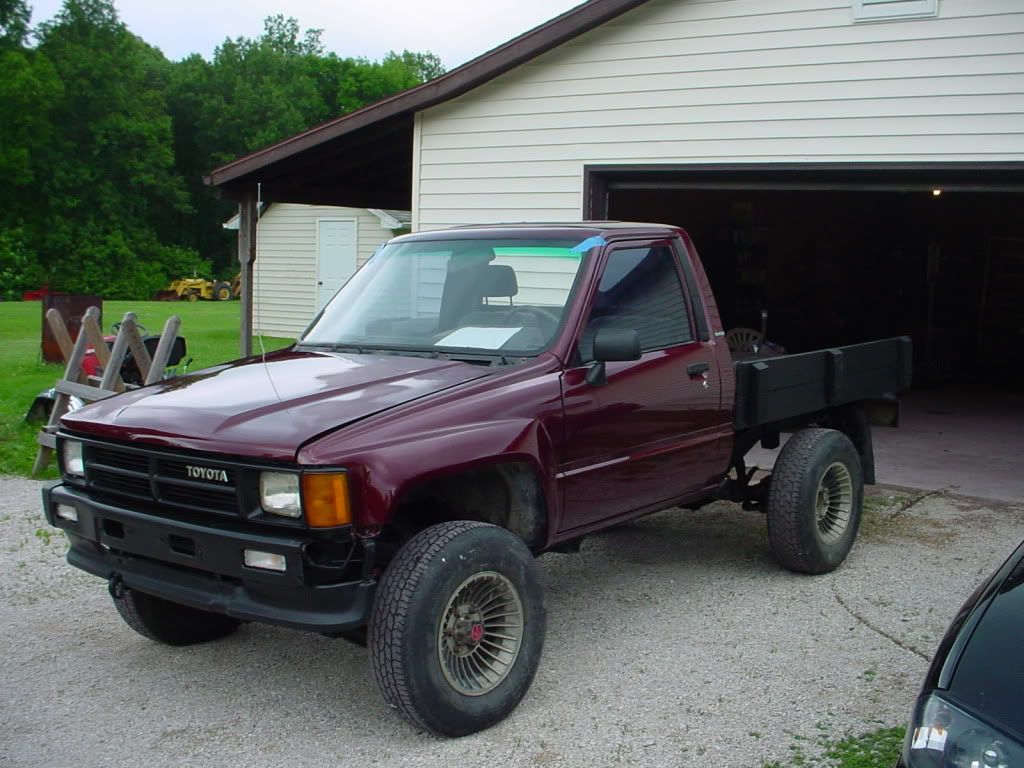
finally got the rest of my parts, well almost. one of the belt mouldings is for vent windows but the other one is the right one so i will go finish buffing tomorrow. the guy doing my bumper will be out of town next week so it will be a little while on that. i guess i am going back to work next week so it is good that i am all but finished. i am going to put tires on my other set of wheels and air bags in the rear and i think it will be done.
06-19-2009, 08:02 PM
#137
Registered User
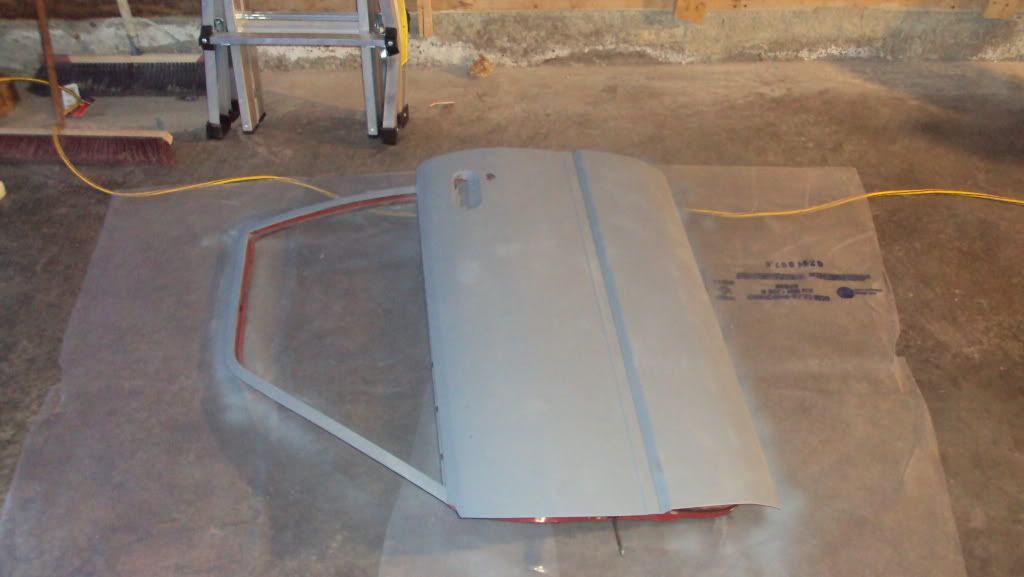
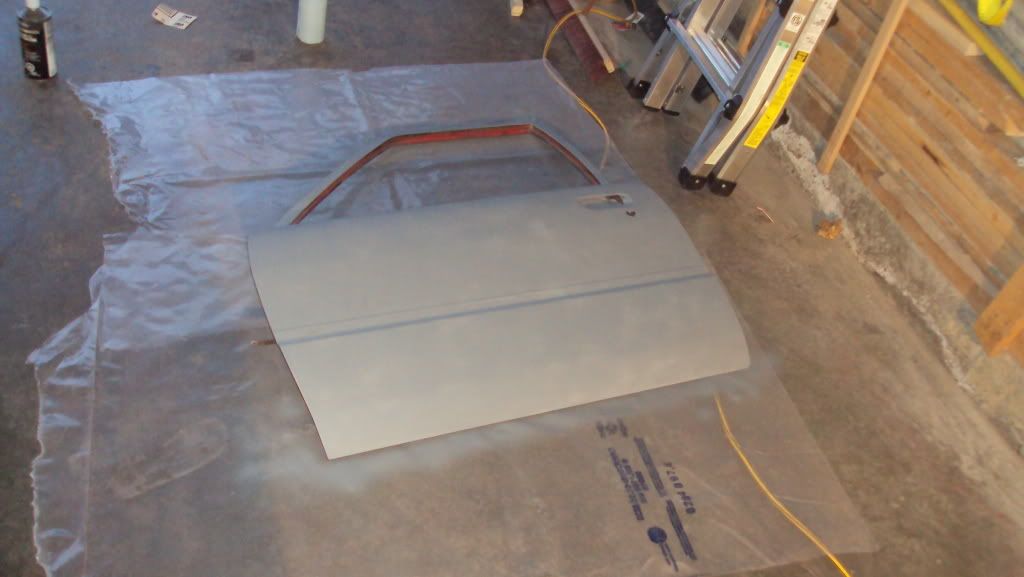
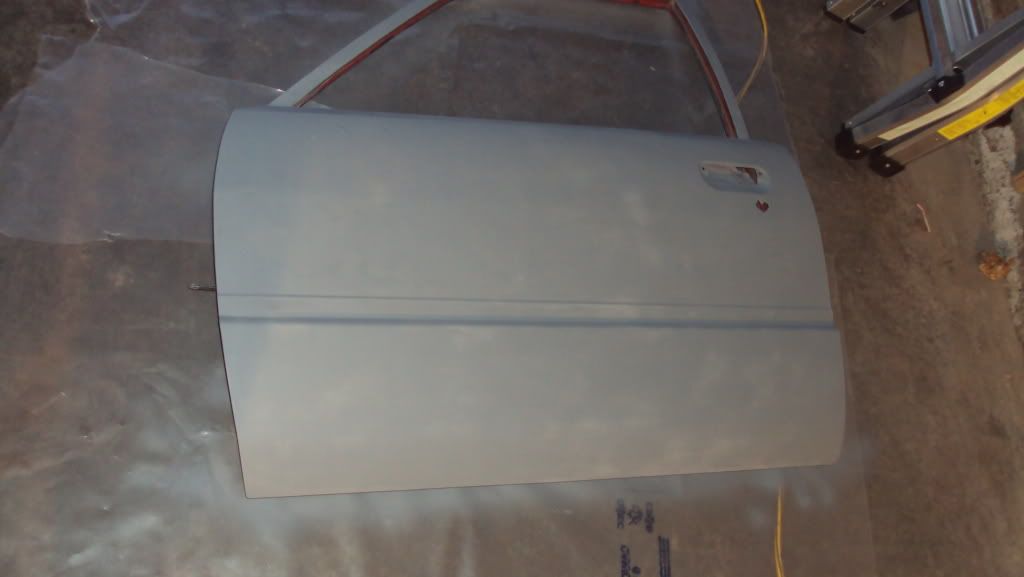
Here is what i got done today
Had to run around all day to get stupid things for my gun/airlines
Started sanding, got it all smooth after i got the DA sander.
here are the pics!
Had to run around all day to get stupid things for my gun/airlines
Started sanding, got it all smooth after i got the DA sander.
here are the pics!
06-20-2009, 02:47 AM
#138
Registered User
Thread Starter
Join Date: Mar 2009
Location: indiana
Posts: 257
Likes: 0
Received 0 Likes
on
0 Posts
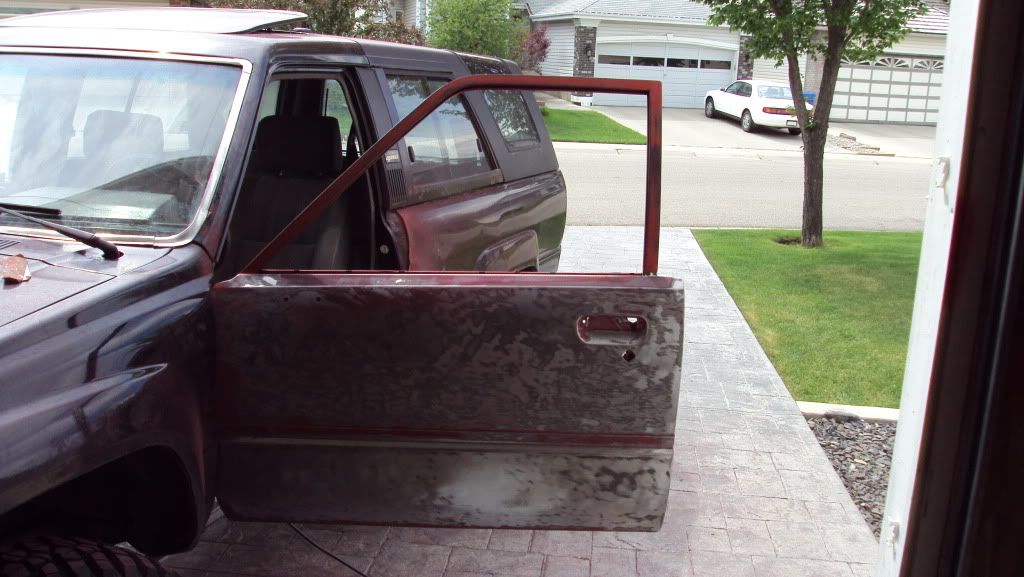
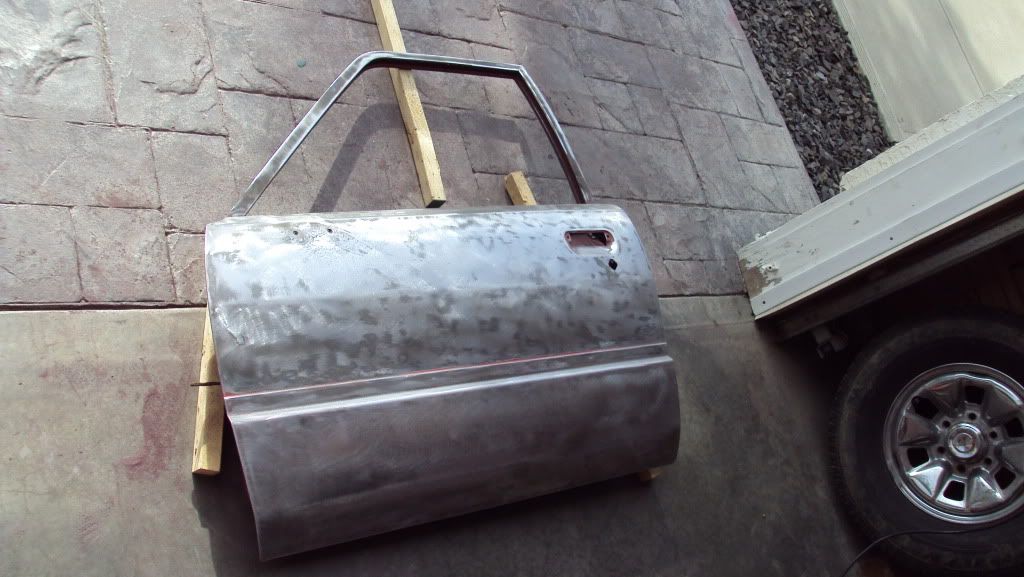
looking good. when you put the etch primer on all you need is one coat. this stuff is usually pretty thin so it is ok if it is semi-transparent. the purpose of etch primer is to treat the metal, it is not meant to fill any imperfections. for those tempted to skip this step don't because you will be kicking yourself when the panel starts rusting.
if you want to get everything stripped down before you start your mud work you can use an etch prime and then spray an epoxy sealer. the cool thing about this method, which is recommended by manufacturers, is that you can apply body filler directly over the sealer. if i had the space, time, and was doing a full resto on something nice this is the process i would use. just another bit of useful paint info for everyone.
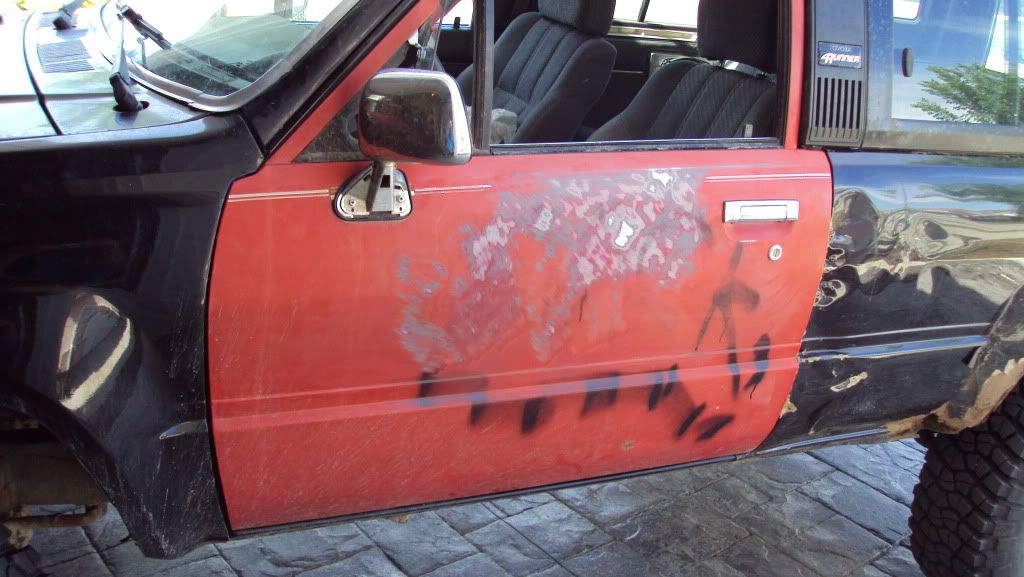
i like the fact that you used the door as a test panel, the fan pattern looks good. after you finish your door it looks like you need to start on the quarter. btw i love your driveway
if you want to get everything stripped down before you start your mud work you can use an etch prime and then spray an epoxy sealer. the cool thing about this method, which is recommended by manufacturers, is that you can apply body filler directly over the sealer. if i had the space, time, and was doing a full resto on something nice this is the process i would use. just another bit of useful paint info for everyone.
i like the fact that you used the door as a test panel, the fan pattern looks good. after you finish your door it looks like you need to start on the quarter. btw i love your driveway
06-20-2009, 07:03 AM
#139
Registered User
Thanks dude! Yeah, i was sick and tired of that stupid red door. So why not hey? gotta start somewhere. Thanks, ill pass it onto my dad, he does concrete finishing so he did our dirveway.
Ive yet to spray pattern lol, that was from two nights ago i decided to spray paint BLACK over my door lol. But, i have been messing around with paint thinner in my gun to see the difference and getting the feel.
Ive yet to spray pattern lol, that was from two nights ago i decided to spray paint BLACK over my door lol. But, i have been messing around with paint thinner in my gun to see the difference and getting the feel.
06-20-2009, 03:21 PM
#140
Registered User
Thread Starter
Join Date: Mar 2009
Location: indiana
Posts: 257
Likes: 0
Received 0 Likes
on
0 Posts
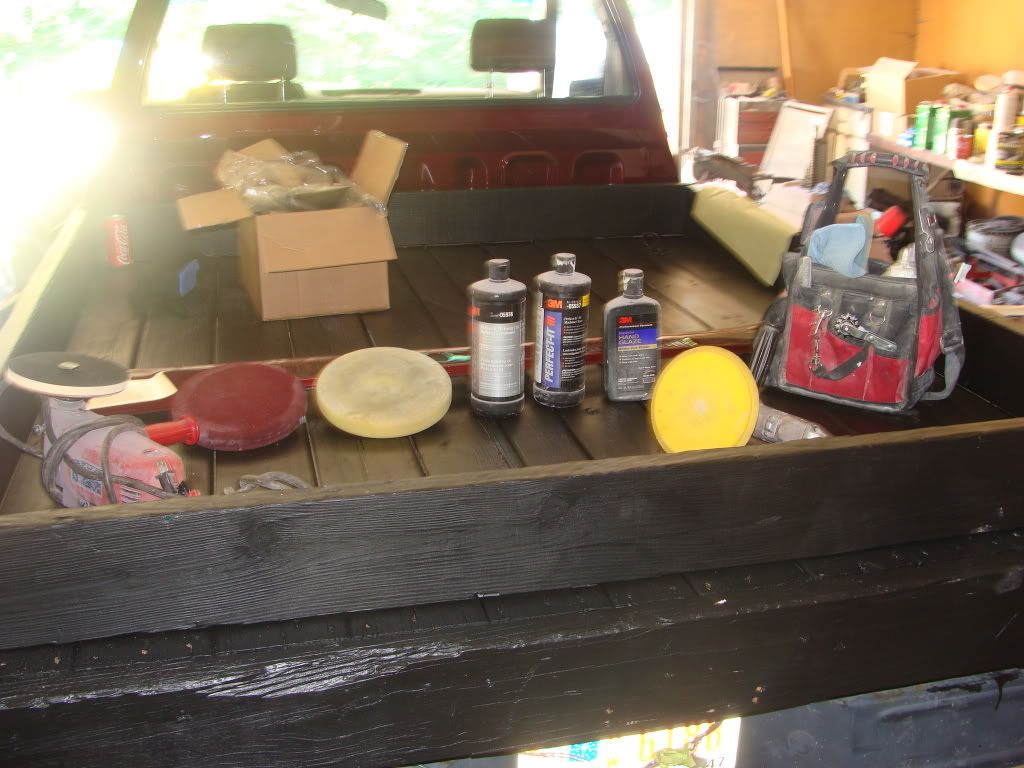
here is the buffing stuff. make sure you mask off things like the mirrors and grills because sanding slurry and compound will eat into them. the finished product.