
Another 88 rebuild/questions thread (in Hawaii)
 03-26-2010, 07:02 PM
#181
Registered User
Thread Starter
Join Date: Jul 2005
Location: Currently Hilo Hawaii, Saipan 670 Is Home
Posts: 195
Likes: 0
Received 0 Likes
on
0 Posts
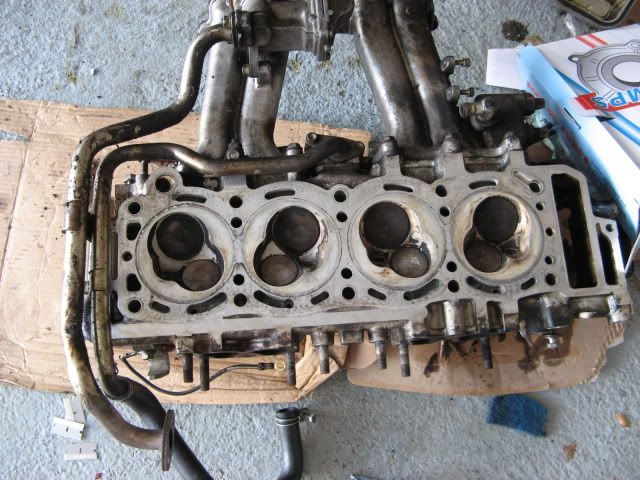
Yeah so not much to show today. I spent most of it cleaning gaskets off the block, head, timing cover, and oil pan mating surface. After that I set up the timing components. Such as the dampeners, tensioner, chain and, sprockets. After that I came to a loss and decided to do the cover instead of the head (reading the fsm).. I was about to hook up my bright and shiny timing cover to only realize that i need to swap studs. Pb blasted and no worky. I'm gonna reuse my cover but use the new oil pump. Other than that Not much happening. I really wanna get this thing done by sunday but that looks bleak considering I have to wait for the knock sensor and do alot more work... some pictures for your enjoyment.
Torque specs so far:
Tensioner: 14 ft/lbs
Dampeners: 16 ft/lbs.
Torque specs so far:
Tensioner: 14 ft/lbs
Dampeners: 16 ft/lbs.
 03-27-2010, 04:19 PM
#184
Registered User

Join Date: Jan 2009
Posts: 175
Likes: 0
Received 0 Likes
on
0 Posts
an easy way to remove the water pump studs: take the two NUTS that belong to the studs and screw both of them onto one stud. Take two wrenches and tighten the two nuts to each other (on the stud). Use a wrench on the lower nut and unscrew the stud. To remove the nuts from the stud, simply use two wrenches again to loosen the two nuts from each other, but do not remove from stud until you have mounted the stud to the new housing, as you will need it to tighten the stud. DO NOT USE VICE GRIPS, or you risk damaging the stud. No thanks needed, just send me some malasadas, or hermans pan toastas.....esta......
03-27-2010, 04:50 PM
#185
YotaTech Milestone-Two Millionth Post
yeah that's why I said "gentle" on the "non threaded" areas....worked for me.....let the PB Blaster soak in a bit more.
03-27-2010, 04:52 PM
#186
Registered User

The 2 nut trick can work. Or not if the stud is really stuck in there. The nuts stripped my EGR stud in the head.
I got those water pump studs out using channel locks on the smooth part without threads. I used some folded rubber innertube for padding/gripping. Still chewed up the smooth part a little, but that doesn't matter. Just avoid mangling the threads.
It's hard to tell from your picture, but if the grooves in your old cover are more than a hair deep I'd use the new cover. Not much thickness separates water from oil. It would suck to get this all back together only to have it spring a leak.
03-27-2010, 04:58 PM
#188
Registered User
Ted (Engnbldr) advises no more than 12 ft/lbs on the tensioner bolts, the idea being that overtightening can distort the pump body and interfere with piston movement. There has been some debate about that, but I torqued mine to 12.
Last edited by flyingbrass; 03-27-2010 at 05:00 PM.
03-27-2010, 05:14 PM
#189
Registered User
Thread Starter
Join Date: Jul 2005
Location: Currently Hilo Hawaii, Saipan 670 Is Home
Posts: 195
Likes: 0
Received 0 Likes
on
0 Posts
@#$% I put everything back together (timing cover+head) used 14ft/lbs
HOW THE %^&* DO YOU PUT THE OIL PAN BACK ON!?!?!!?!?!? I'M CUT AND OILY AND PISSED TO HIGH HELL.
HOW THE %^&* DO YOU PUT THE OIL PAN BACK ON!?!?!!?!?!? I'M CUT AND OILY AND PISSED TO HIGH HELL.
03-27-2010, 05:22 PM
#191
Registered User
As long as the tensioner piston moved back and forth ok, I'd think it should be ok.
I can't offer much advice about doing a pan from underneath. I had it easy with the engine upside down on a stand.
I can't offer much advice about doing a pan from underneath. I had it easy with the engine upside down on a stand.
03-27-2010, 06:32 PM
#193
Registered User
Thread Starter
Join Date: Jul 2005
Location: Currently Hilo Hawaii, Saipan 670 Is Home
Posts: 195
Likes: 0
Received 0 Likes
on
0 Posts
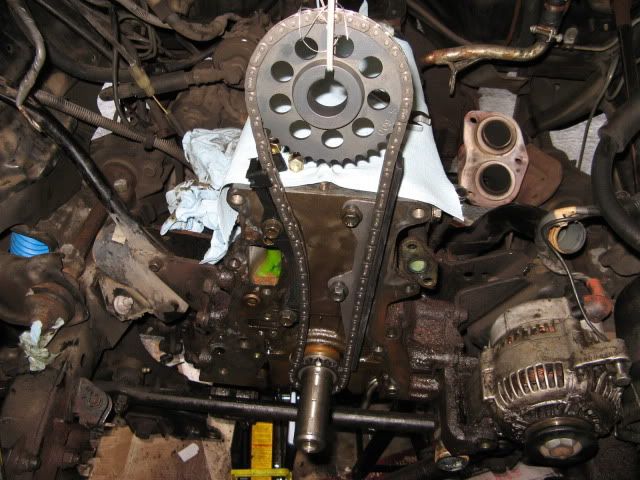
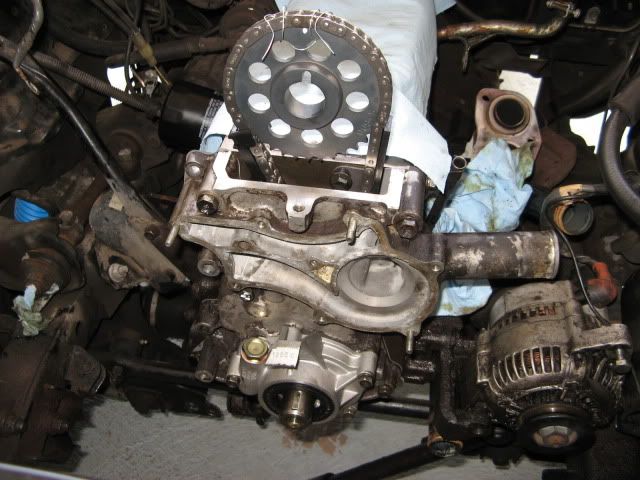
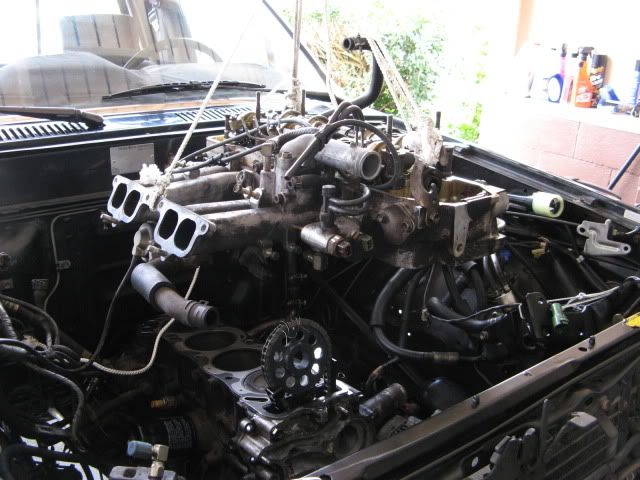
The grooves are pretty deep on the old cover which I reused. I gotta get this thing together pronto. I wish I had thought of the two nut trick sooner  Anyways, I got the head and timing cover back on today. I also tried both means of timing chain replacement (with and without head on) The trick with the head on is to rock the crank back and forth while pulling up on the cam sprocket, if you have an extra hand it's decently easy. I did that and then noticed that it was not TDC so that means the chain skipped a tooth :| (by this time the head was on and torqued.) So I removed the timing cover (old one) and did the timing chain with the head on.. Trick to that is compressing the tensioner (3rd hand works here too) and working the chain. After that I put it back together and Was real confident that I was going to make some real progress today.
Not gonna happen for Roger. Installing the Oil pan is an absolute nightmare. I can get it on without the pick up but with the pickup installed it's almost impossible (possible: Removing whole front diff assembly) I spent more time tying to get that crapo on today then putting the head on. Right now things are at a standstill and I'm cut the shizzle dizzle up (not in the good way, and yes I'd love a bandaid) My girlfriend comes in tomorrow and I was (unrealistically) hoping I'd be done by today. I have tomorrow to work before I have to wait till the weekends. My deadline is april 10th.
To make things a little more stressful my Brother Jon is shipping off to Afghanistan today. He's rolling with 3/7 [Marines] and they are rolling solo, no other help into some uncharted territory . Thank you to our president.
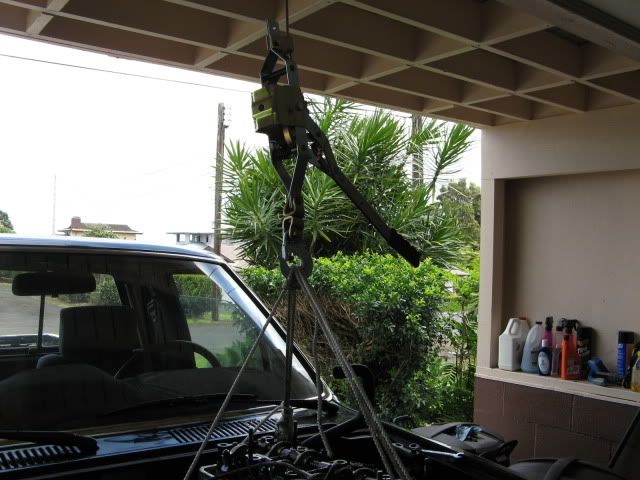
here are some pictures:
My ridiculed hoist in action:

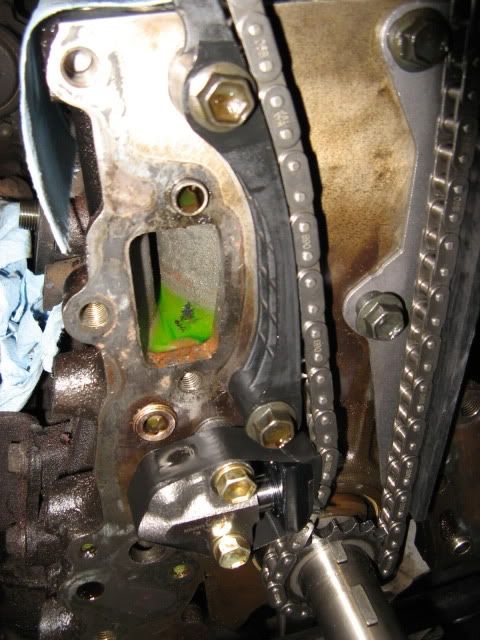
I really need to research how to get that oil pan on without removing the front diff. The only reason why I'm not worried about the old cover is because of the new metal guide. Maybe I'm being foolish and not thinking straight.
Comments and questions appreciated.
Anyways, I got the head and timing cover back on today. I also tried both means of timing chain replacement (with and without head on) The trick with the head on is to rock the crank back and forth while pulling up on the cam sprocket, if you have an extra hand it's decently easy. I did that and then noticed that it was not TDC so that means the chain skipped a tooth :| (by this time the head was on and torqued.) So I removed the timing cover (old one) and did the timing chain with the head on.. Trick to that is compressing the tensioner (3rd hand works here too) and working the chain. After that I put it back together and Was real confident that I was going to make some real progress today. Not gonna happen for Roger. Installing the Oil pan is an absolute nightmare. I can get it on without the pick up but with the pickup installed it's almost impossible (possible: Removing whole front diff assembly) I spent more time tying to get that crapo on today then putting the head on. Right now things are at a standstill and I'm cut the shizzle dizzle up (not in the good way, and yes I'd love a bandaid) My girlfriend comes in tomorrow and I was (unrealistically) hoping I'd be done by today. I have tomorrow to work before I have to wait till the weekends. My deadline is april 10th.
To make things a little more stressful my Brother Jon is shipping off to Afghanistan today. He's rolling with 3/7 [Marines] and they are rolling solo, no other help into some uncharted territory . Thank you to our president.
here are some pictures:
My ridiculed hoist in action:
I really need to research how to get that oil pan on without removing the front diff. The only reason why I'm not worried about the old cover is because of the new metal guide. Maybe I'm being foolish and not thinking straight.
Comments and questions appreciated.
Last edited by rogerman; 03-27-2010 at 06:33 PM.
03-27-2010, 10:26 PM
#194
Registered User
Thread Starter
Join Date: Jul 2005
Location: Currently Hilo Hawaii, Saipan 670 Is Home
Posts: 195
Likes: 0
Received 0 Likes
on
0 Posts
I'm calm now. You guys can post again :p haha! I still can't figure out how i'm going to get that pan back on. It's bugging me. I looked at it for a while and I guess the only way I can get it on there without screwing up the gasket maker (which I did already) is to drop the front diff.
Does anyone have experience with reinstalling the oil pan on a 22re with the block in the the truck? if so please do chime in.
Does anyone have experience with reinstalling the oil pan on a 22re with the block in the the truck? if so please do chime in.
03-28-2010, 10:54 AM
#197
Registered User
Thread Starter
Join Date: Jul 2005
Location: Currently Hilo Hawaii, Saipan 670 Is Home
Posts: 195
Likes: 0
Received 0 Likes
on
0 Posts
I guess I'm not searching properly. I created a thread on how to reinstall the oil pan and it got deleted. Damn... bump for 22re on truck oil pan reinstallation
03-28-2010, 11:32 AM
#198
Just to clarify. You still have the diff lowered? If yes, then you still have the driveshaft detached, the diff mounts detached, and the crossmember detached?
If yes, then just remove the darn thing and get done with it. The time you've spent struggling to put the pan on is likely longer than the time to remove and re-install the diff. All you have left on the diff is 6 nuts per side on the inner portion of the CV. You shouldn't even have to fiddle with the wheel end of the CV.
These ones
03-28-2010, 02:20 PM
#199
Registered User
Thread Starter
Join Date: Jul 2005
Location: Currently Hilo Hawaii, Saipan 670 Is Home
Posts: 195
Likes: 0
Received 0 Likes
on
0 Posts
You're absolutely right blkn. I admit my arrogance. I'm gonna get started in a little bit and remove that damn diff. I hope to get this thing running today.


