
22R Rebuild
 03-24-2010, 06:30 AM
#341
Registered User
Join Date: Oct 2009
Location: NW Phoenix
Posts: 134
Likes: 0
Received 0 Likes
on
0 Posts
Hey Brass,
I'd just use the Gates belts you have, keep spares handy. 1stToyotaParts sent my belts, $6, $7, and $9 for all new Toyota belts. A/C, Alt, PS respectively. (What did you pay at Checker?, years ago I spent $27 for 2 belts at Napa)
PS, Nice score on the cable!
I'd just use the Gates belts you have, keep spares handy. 1stToyotaParts sent my belts, $6, $7, and $9 for all new Toyota belts. A/C, Alt, PS respectively. (What did you pay at Checker?, years ago I spent $27 for 2 belts at Napa)
PS, Nice score on the cable!
Last edited by Staceman1; 03-24-2010 at 06:31 AM.
 03-24-2010, 06:49 PM
#344
Registered User
Thread Starter

I paid about double that at Checker for belts. I'm amazed they are so cheap from Toyota. I assumed they'd want even more. I should have checked.
Today we got the last few things buttoned up. Ended up rotating one of the heater hose clamps out of the way to provide enough clearance to get the valve cover off. Even then, it was a hassle with these new motor mounts.
Added about 1.75 ounces of Cam-Shield to 5 quarts of cheap Supertech oil. 1/4 ounce of Cam-Shield adds 800 ppm zinc to a quart of oil. Poured some over the rockers and the rest through the fill hole after reinstalling the valve cover.
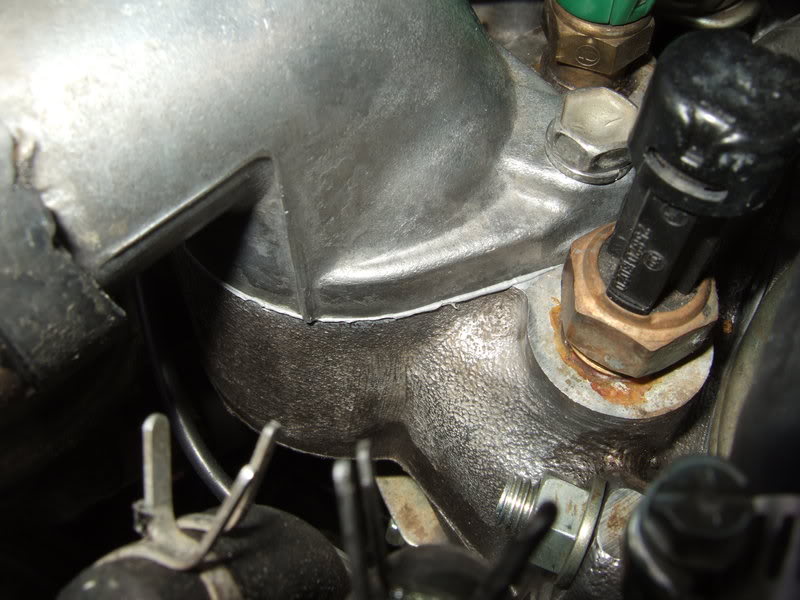
The ledge where the t-stat rides is eroded and required some RTV on the housing before. I tried installing it without RTV because I had wire wheeled some deposits away. Thought it might seal OK with everything cleaned up.
With plugs out, I cranked the motor. Took maybe 10-15 seconds to build enough oil pressure to turn off the idiot light.
I checked the sight glass in the carb to find it completely empty. Cranked several times more. Still empty. Hmm.
Noticed coolant leaking from the thermostat housing. Drained some coolant, redid the housing with a little RTV. I'm letting it cure overnight. 5 months into this, what's one more day?
Back to no gas showing in the sight glass after close to a minute total of cranking, I took the fuel line off of the fuel pump that goes to the carb. I could blow air through it into the carb. I shot some gas in using a syringe, which went in no problem. Whew. I was thinking maybe the float had become stuck up/closed with varnish.
Then, put the line back on and spun the engine some more, which brought the fuel up to the top of the sight glass. Not sure what's going on there.
Tomorrow we'll put the coolant back in, install the plugs and see what happens. If it runs but dies, I'll check to see if the fuel pump is putting out enough gas.
Looks pretty much the same as before. Cleaner, with a few spots of the red block showing through:
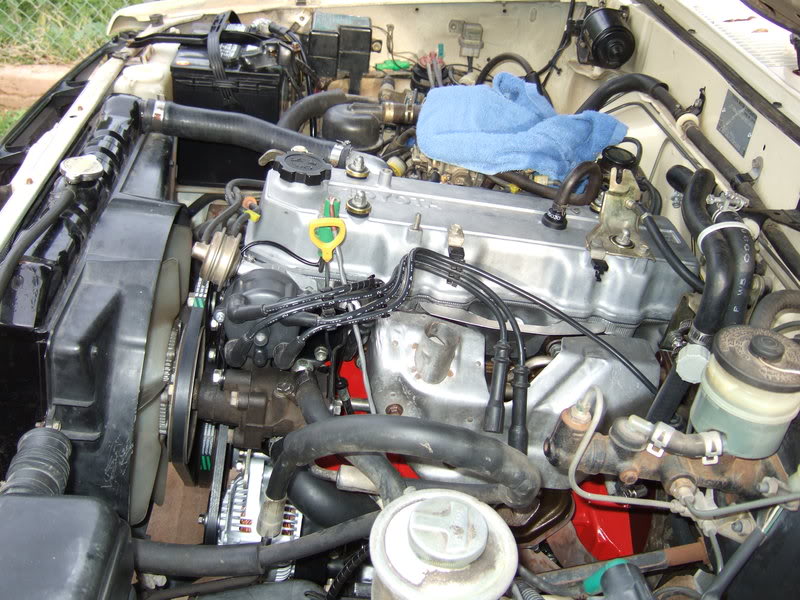
Only a thin coating of RTV on the thermostat housing (I applied it to the manifold side). You sure don't want globs of it in the cooling system. You don't need to use anything here unless the sealing area around the gasket is eroded enough to be a problem. Ideally, and normally, the gasket on the outside of the t-stat seals everything up fine. Mine is bad (see a pic back here), so I have to make it seal at the housing.
Today we got the last few things buttoned up. Ended up rotating one of the heater hose clamps out of the way to provide enough clearance to get the valve cover off. Even then, it was a hassle with these new motor mounts.
Added about 1.75 ounces of Cam-Shield to 5 quarts of cheap Supertech oil. 1/4 ounce of Cam-Shield adds 800 ppm zinc to a quart of oil. Poured some over the rockers and the rest through the fill hole after reinstalling the valve cover.
The ledge where the t-stat rides is eroded and required some RTV on the housing before. I tried installing it without RTV because I had wire wheeled some deposits away. Thought it might seal OK with everything cleaned up.
With plugs out, I cranked the motor. Took maybe 10-15 seconds to build enough oil pressure to turn off the idiot light.
I checked the sight glass in the carb to find it completely empty. Cranked several times more. Still empty. Hmm.
Noticed coolant leaking from the thermostat housing. Drained some coolant, redid the housing with a little RTV. I'm letting it cure overnight. 5 months into this, what's one more day?
Back to no gas showing in the sight glass after close to a minute total of cranking, I took the fuel line off of the fuel pump that goes to the carb. I could blow air through it into the carb. I shot some gas in using a syringe, which went in no problem. Whew. I was thinking maybe the float had become stuck up/closed with varnish.
Then, put the line back on and spun the engine some more, which brought the fuel up to the top of the sight glass. Not sure what's going on there.
Tomorrow we'll put the coolant back in, install the plugs and see what happens. If it runs but dies, I'll check to see if the fuel pump is putting out enough gas.
Looks pretty much the same as before. Cleaner, with a few spots of the red block showing through:
Only a thin coating of RTV on the thermostat housing (I applied it to the manifold side). You sure don't want globs of it in the cooling system. You don't need to use anything here unless the sealing area around the gasket is eroded enough to be a problem. Ideally, and normally, the gasket on the outside of the t-stat seals everything up fine. Mine is bad (see a pic back here), so I have to make it seal at the housing.
Last edited by flyingbrass; 03-25-2010 at 01:27 AM.
03-24-2010, 07:05 PM
#345
Registered User
Great work can't wait to see it up and running!
I have an 81 bored 60 over waiting in the wings. I am just waiting on the engine kit, head and crank! It goes in my newly bought 82.
I have been watching your thread since the start.
Good luck.
I have an 81 bored 60 over waiting in the wings. I am just waiting on the engine kit, head and crank! It goes in my newly bought 82.
I have been watching your thread since the start.
Good luck.
03-24-2010, 07:13 PM
#346
Registered User
Thread Starter
.060" over is a lot. Are pistons and rings much more expensive that big?
It isn't beautiful now, but certainly cleaner than before. Here's a picture from last May.
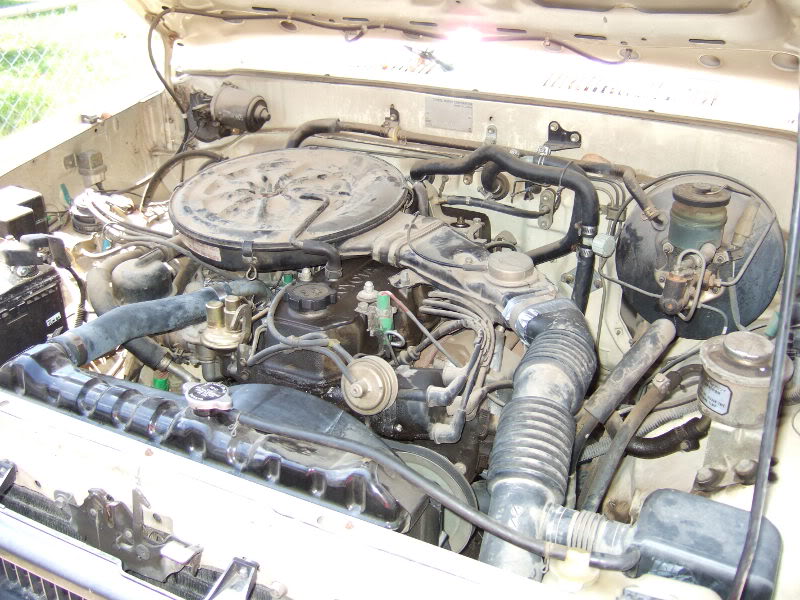
It isn't beautiful now, but certainly cleaner than before. Here's a picture from last May.
Last edited by flyingbrass; 03-24-2010 at 07:34 PM.
03-24-2010, 07:39 PM
#347
Registered User
Thread Starter
A tip to fellow newbies: Keep your holes covered. They attract foreign objects. Immediately after removing the air cleaner I poked some paper towels in the carb. Later added a baggie.
I zip tied a few things yesterday. An end I clipped off flew up and landed on the baggie on the carb. It would have fallen in otherwise.
I zip tied a few things yesterday. An end I clipped off flew up and landed on the baggie on the carb. It would have fallen in otherwise.
 03-24-2010, 09:55 PM
#349
Registered User
Join Date: Jan 2010
Posts: 38
Likes: 0
Received 0 Likes
on
0 Posts
.060 over is only .030 a side 
lesson learned the hard way though. when buying a "built" engine from a company. dont buy the one that has been bored .040 over........specify you want a block bored .020....
just in case you happen to have a problem down the line you arent out there at .060 just a suggestion.......
smart of you to leave the plugs out and turn it over to get oil pressure....well done gl on the start up, JJ
lesson learned the hard way though. when buying a "built" engine from a company. dont buy the one that has been bored .040 over........specify you want a block bored .020....
just in case you happen to have a problem down the line you arent out there at .060 just a suggestion.......
smart of you to leave the plugs out and turn it over to get oil pressure....well done
gl on the start up, JJ
03-25-2010, 01:02 AM
#350
Registered User
Thread Starter
Is that like a flat tire only being flat on the bottom?
From what I've read, oil priming can be a problem with these motors. I packed the oil pump gears with Vaseline, then later shot a little oil using a straw (fresh oil doesn't taste bad) down the bottom oil hole where the filter fits on. Lifted the back of the stand to help it run down the galley toward the front.
I've read of people who did nothing to help prime cranking for minutes and failing to build oil pressure. Vaseline, grease, whatever -- give it something.
Last edited by flyingbrass; 03-25-2010 at 01:14 AM.
03-25-2010, 01:49 AM
#351
YotaTech Milestone-Two Millionth Post
I guess after I've had carb cleaner in the eyes, PB Blaster in my nose and mouth, a little sip of oil may be delicious.....ewwww.
still watching and waiting bud....good luck....looks awesome....great technical stuff on this thread.....my thread is not as technical as it is putzy and crabby and whiney and "how the hell do i.....?"....so great stuff you've got here.
still watching and waiting bud....good luck....looks awesome....great technical stuff on this thread.....my thread is not as technical as it is putzy and crabby and whiney and "how the hell do i.....?"....so great stuff you've got here.
03-25-2010, 02:07 PM
#352
Registered User
Thread Starter
It runs. It fired up and ran ok, but not quite right. It stuttered at first, wanting to die. I hit the gas a few times to keep it going. When I let off the gas pedal engine died. Also died when I turned the AC on. We had the air cleaner off. Two vacuum lines connect to it. Putting the cleaner on and attaching those lines solved the problem.
I let it run about 10 minutes around high idle speed, varying a bit. Sounded good. No odd noises, and the rockers were reasonably quiet. Initial timing was about 5 BTDC with vacuum lines disconnected from distributor. That was with the hold down bolt roughly centered. I set it to 0. I should learn about adjusting timing by ear.
I had planned to change the oil immediately after, but decided to go for a drive first. Only went about 5 miles, but all of it was repeatedly accelerating hard and laying off. Alternated between flooring it and engine braking. Mostly 2nd and 3rd gear.
At the end, the temp gauge was up a little higher than it usually rides. That may have just been from the hard, relatively low speed driving. When it cools down I'll back into the gutter (makes the front end higher) and burp any remaining air out of the cooling system.
Changed the oil and filter. The oil looked ok. No chunks came out. I need to recheck the torque on the head bolts and check/adjust the valves. When I tried adjusting valves hot years ago I got burned and gave up.
The fuel level in the sight glass is near the top. It used to ride about middle. If anything, with the motor tipped up slightly higher in the front than before, the level should be lower. Have to keep an eye on it. I need to rebuild the carb soon. I notice my AAP being deactivated now -- can tell the engine could use an extra squirt of gas when stomping on the pedal.
She fires right up and idles nicely. I started the engine after the oil change. No cranking at all, just almost instantaneous ignition.
The transmission shifts much better. Whew. I was concerned because before the rebuild I was having a hard time getting into 1st and sometimes 2nd. Replacing the clutch, master, slave and hose seems to have solved it.
So far, after sealing the thermostat housing, I haven't seen a drop of any fluid anywhere. No detectable leaks so far. Knock on wood.
My registration expired in February. I got a 3 day permit for now. They must skip weekends, because it's good through Tuesday. Need to get emission tested soon. I hope it will pass with so little break-in time.
I let it run about 10 minutes around high idle speed, varying a bit. Sounded good. No odd noises, and the rockers were reasonably quiet. Initial timing was about 5 BTDC with vacuum lines disconnected from distributor. That was with the hold down bolt roughly centered. I set it to 0. I should learn about adjusting timing by ear.
I had planned to change the oil immediately after, but decided to go for a drive first. Only went about 5 miles, but all of it was repeatedly accelerating hard and laying off. Alternated between flooring it and engine braking. Mostly 2nd and 3rd gear.
At the end, the temp gauge was up a little higher than it usually rides. That may have just been from the hard, relatively low speed driving. When it cools down I'll back into the gutter (makes the front end higher) and burp any remaining air out of the cooling system.
Changed the oil and filter. The oil looked ok. No chunks came out.
I need to recheck the torque on the head bolts and check/adjust the valves. When I tried adjusting valves hot years ago I got burned and gave up.The fuel level in the sight glass is near the top. It used to ride about middle. If anything, with the motor tipped up slightly higher in the front than before, the level should be lower. Have to keep an eye on it. I need to rebuild the carb soon. I notice my AAP being deactivated now -- can tell the engine could use an extra squirt of gas when stomping on the pedal.
She fires right up and idles nicely. I started the engine after the oil change. No cranking at all, just almost instantaneous ignition.
The transmission shifts much better. Whew. I was concerned because before the rebuild I was having a hard time getting into 1st and sometimes 2nd. Replacing the clutch, master, slave and hose seems to have solved it.
So far, after sealing the thermostat housing, I haven't seen a drop of any fluid anywhere. No detectable leaks so far. Knock on wood.
My registration expired in February. I got a 3 day permit for now. They must skip weekends, because it's good through Tuesday. Need to get emission tested soon. I hope it will pass with so little break-in time.
Last edited by flyingbrass; 03-28-2010 at 11:30 PM.


 :hil lbill:


 :c on:


 :bounce :
 03-25-2010, 02:27 PM
#354
Registered User
.060 over is only .030 a side
lesson learned the hard way though. when buying a "built" engine from a company. dont buy the one that has been bored .040 over........specify you want a block bored .020....
just in case you happen to have a problem down the line you arent out there at .060 just a suggestion.......
JJ
lesson learned the hard way though. when buying a "built" engine from a company. dont buy the one that has been bored .040 over........specify you want a block bored .020....
just in case you happen to have a problem down the line you arent out there at .060 just a suggestion.......
JJ
Last edited by toyospearo; 03-25-2010 at 02:34 PM.
03-25-2010, 02:59 PM
#356
Registered User
Join Date: Jan 2010
Posts: 38
Likes: 0
Received 0 Likes
on
0 Posts
heres an additional "just so you know" you can put a 3 core radiator in the older 22r's that come stock with a 2 core. i believe the 88 4runner with auto tranny had a 3 core instead of 2 they are interchangeable. makes a world of difference if you ever tow anything and its 100+ outside. nice job on the rebuild, JJ
03-25-2010, 04:56 PM
#357
Registered User
Join Date: Jul 2009
Location: Eastern NC
Posts: 832
Likes: 0
Received 0 Likes
on
0 Posts
Bravo, nice job. cant wait to see a video. I plan to follow a lot of what you have done with the mix of quality parts store items, toyota brand, and rock brand.
Great build
Great build
03-25-2010, 06:27 PM
#358
Registered User
Thread Starter
Thanks guys. I still don't comprehend that I can actually drive my truck now. Though, I should retorque the head bolts and check valve lash first. Also, I'd like to avoid short trips in the immediate future.
Looking back through my pictures, I discovered today is 6 months to the day from when we first started pulling the engine. Long time. Originally I thought maybe 6 weeks. If I hadn't got caught up examining some side issues I could have shaved maybe 2 months off this. I'm sure another rebuild would go much quicker now that I have more of a clue what I'm doing and how it goes.
For the oil change I poured 1 ounce of Cam-Shield in 5 quarts of oil, which should put zinc around 1450 ppm if the oil had 800 ppm originally.
My radiator is a 3 row. Figured I'd go slightly heavier duty when I replaced it 2-3 years ago. I'm not so sure 3 are better than 2. A good 2 row probably works just as well.

 03-25-2010, 06:41 PM
#360
Registered User
Correct me if I am wrong but if you used a machine shop to hone the cylinders and they used a torque plate during the process I don't think you need to re torque your head bolts.
What were they torqued to?
What were they torqued to?


