
$150 paint job

 10-29-2008, 02:23 PM
#42
Registered User
personaly i would stick with the brown collor it will save you alot of time in painting door jams and such. if you do a collor change though i would remove the doors compleetly off the truck to do the jams
11-01-2008, 08:06 AM
#44
Registered User
Thread Starter
Join Date: Oct 2007
Location: Bismarck, ND
Posts: 296
Likes: 0
Received 0 Likes
on
0 Posts
12-31-2008, 08:06 AM
#45
Registered User
Thread Starter
Join Date: Oct 2007
Location: Bismarck, ND
Posts: 296
Likes: 0
Received 0 Likes
on
0 Posts
So I haven't been able to paint my truck because of the cold, I have to have it about 25 degrees outside for my garage to be warm enough for the paint. All the body work is done except for one little spot.
It's been below zero for almost the whole month of december so I haven't had a chance to paint at all, my truck is just sitting in my garage waiting. I miss driving it. At least gas is cheap enough now so driving my fullsize chevy every day doesn't hurt the wallet as much.
It's been below zero for almost the whole month of december so I haven't had a chance to paint at all, my truck is just sitting in my garage waiting. I miss driving it.
At least gas is cheap enough now so driving my fullsize chevy every day doesn't hurt the wallet as much.
12-31-2008, 10:35 AM
#46
Registered User

Join Date: Dec 2008
Posts: 200
Likes: 0
Received 0 Likes
on
0 Posts
When I was a kid, the Jr high (shows how old I am, we didn't have "middle" school back then) band director had a 63 or 64 Falcon station wagon that he painted with very light, puke yellow paint and a brush. Wisconsin in the winter time -- the paint job was an improvement.
I've seen some write-ups on the web about people painting vehicles with rust-o-leum and a roller. It sounds funny, as you say, but the pictured results don't look nearly as bad as it sounds. Seems like those with the best results spend a lot of time sanding in between coats. My experience with this sort of paint (on steel fences, not autos) is that it will fade pretty quickly.
I've seen some write-ups on the web about people painting vehicles with rust-o-leum and a roller. It sounds funny, as you say, but the pictured results don't look nearly as bad as it sounds. Seems like those with the best results spend a lot of time sanding in between coats. My experience with this sort of paint (on steel fences, not autos) is that it will fade pretty quickly.
12-31-2008, 03:07 PM
#47
Registered User
Join Date: Oct 2008
Location: Sacramento, Crawlifonia
Posts: 1,621
Likes: 0
Received 7 Likes
on
4 Posts
rubbing alcohol and an old T-shirt for your final wipe down after you blow off the surface with compressed air. alcohol leave a perfectly clean surface. I noticed some orange peal in the pics. you posted, so solve that just thin down your material a little. Also it looked like there where tiny bubble, I'm not quite sure if that is true but if so some reducer or retarder will solve that, that will cause it to dry slower.
hope that can help you, but most important you must enjoy the process
hope that can help you, but most important you must enjoy the process
03-17-2009, 03:47 PM
#48
Registered User
Thread Starter
Join Date: Oct 2007
Location: Bismarck, ND
Posts: 296
Likes: 0
Received 0 Likes
on
0 Posts
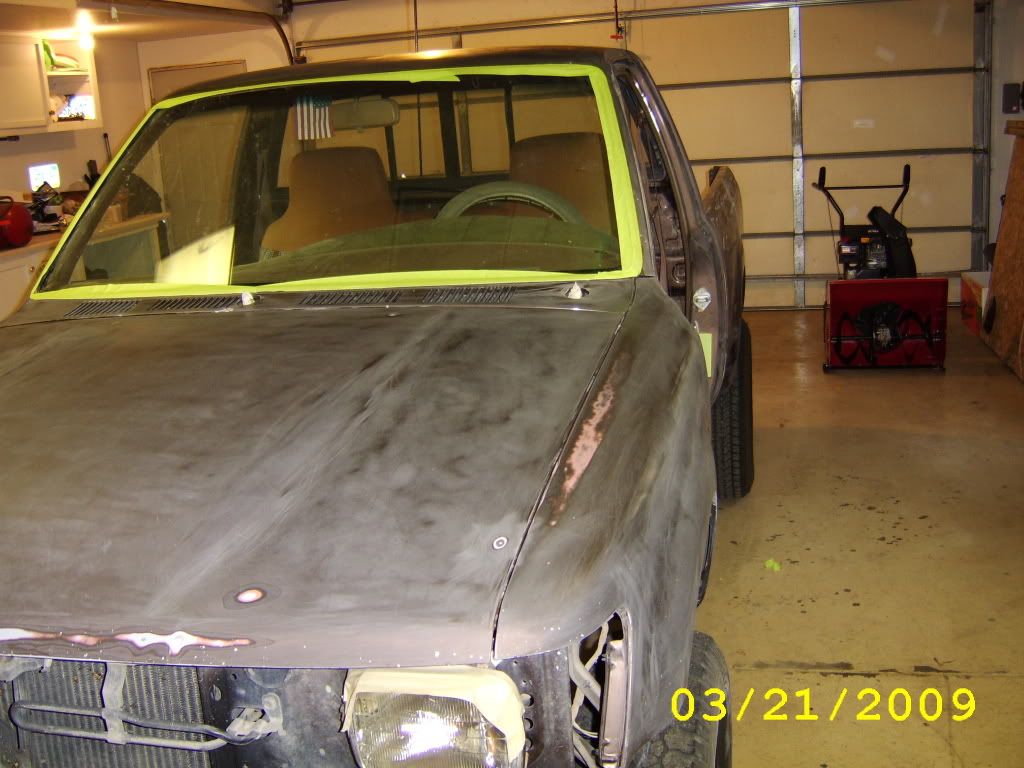
yes its finally warm enough to paint busted above 50 yesterday. so i did some taping on my truck and wet sanded and painted a second coat on the tail gate.
gonna try for the first coat this weekend.
gonna try for the first coat this weekend.
Last edited by toy89yota; 03-17-2009 at 03:50 PM.

 03-17-2009, 09:32 PM
#51
Registered User

Join Date: Feb 2009
Location: South Shore, MA
Posts: 157
Likes: 0
Received 0 Likes
on
0 Posts
A great product for removal of the sanding dust etc is this cloth i think they call it cheese cloth? it's a tack cloth, you can get it at a body store, it has a tack to it, and the dust will be picked right up.
Looks awesome though! Can't wait to see a final finish. Good job!
Rob
Looks awesome though! Can't wait to see a final finish. Good job!
Rob
03-18-2009, 09:56 AM
#53
Registered User
Thread Starter
Join Date: Oct 2007
Location: Bismarck, ND
Posts: 296
Likes: 0
Received 0 Likes
on
0 Posts
i didn't fix all the little rock chips or small dents, i got the big stuff but it will be no where near what you would get from a body shop. this is my first time doing any of this so it might turn bad.
I just want to drive it again, i have been stuck driving my 97 chevy pickup for months now.
I just want to drive it again, i have been stuck driving my 97 chevy pickup for months now.
03-18-2009, 11:30 AM
#54
Registered User
Join Date: Mar 2009
Location: indiana
Posts: 257
Likes: 0
Received 0 Likes
on
0 Posts
i have some tips for you:
first get some red scratch pads and make sure you get all the edges really well. this is where most paint problems begin poor adhesion around the edges.
second one quart is probably not going to do it especially if you are not using any type of sealer. go to some local body shops and see if you can get some scrap base coat this is haz mat and they have to pay to dispose of it most will be glad to set some aside for you. light gray would probably be best just ask the painter what he recommends. solid white and black that you could mix yourself will allow you to get the color you want. you can spray that first to get your coverage and not waste your paint trying to cover. for anyone else that is going to spray their own i would try body shops before buying paint. they can set aside scraps and get you any color you want just keep the leftover because it would be impossible to match.
solid colors are more forgiving than metallics. if you are going to be spraying a solid color you can get away with finishing with 600 grit. metallics require a finer finish around 800-1000 grit because the metal flakes will sit in the sand scratches and not lay evenly. remember the edges.
for rock chip prone areas get a can or two of aerosal rock chip guard. take your time and it will look factory.
buy and use good masking tape. cheap tape is harder to work with, doesnt adhere as well and can allow paint to seep underneath it. also do not leave masking tape on painted surfaces especially in the sun. tape adhesives contain chemicals that etch the surface. masking tape on fresh paint can trash a paint job quickly. when you are unmasking go slowly. i know you are in a hurry to see the finished project but the layers of paint build up over the surface of tape and if you pull too quickly it can pull the finish off right along with it. go slowly and pull at a 90 degree angle. it it starts to lift just use a razor blade and cut the edge and you should be good.
take you time while spraying. let it flash before adding additional coats. this is one of the biggest causes of runs, it is basically like a mudslide. the first coat or two look great but without enough flash time eventually that last coat will be too much and gravity will take over. if you are using basecoat/clearcoat you have almost unlimited time between coats. you can spray a coat and come back and sand dust nibs the next day and spray another coat.
sand inside door jambs, under hoods, fenders about a quarter of an inch. if you wait and do this when you do you final mask there will be no stray sand marks and you will have a nice clean line that you could sand down and buff if you were so inclined.
one of the best ways to eliminate dust is to do your final sand wet. use the sandpaper first and get a can of comet and use a scuff pad, it leaves the surface super clean. make sure you rinse all of the jambs thoroughly and use a blow gun to get all the water out. use a wax and grease remover and clean lint free towels. soak one rag for wet wipe and a dry one to dry. a mixture of alcohol and water as a wipe after wax and grease remover helps to reduce static electricity that draws dust to the surface. make sure you wear rubber gloves to prevent contamination from oily skin. wetting the floor also helps, dont use a hose there is too much pressure and it will stir up dust fill buckets and dump them slowly.
ok thats enough for now if you have any specific questions let me know. my dad and uncle are professional painters with 50+ years experience between them. what i dont know i can easily find out.
best of luck
03-18-2009, 11:46 AM
#55
Registered User
Join Date: Mar 2009
Location: indiana
Posts: 257
Likes: 0
Received 0 Likes
on
0 Posts
the little bubbles in the picture is solvent pop. basically the surface of the paint is drying before all the solvents can escape and they get trapped. you need to get some slower temp reducer the thinner flashes way to fast. i couldn't remember what paint you were using and didn't want to retype all of that but it is a single stage so no body shop scraps for you. you could get some tintable primer or sealer for your coverage problems.
03-19-2009, 09:27 AM
#57
Registered User
Join Date: Mar 2009
Location: indiana
Posts: 257
Likes: 0
Received 0 Likes
on
0 Posts
they sell different reducers for different temperatures so you can match the temperature that you are spraying at. don't spray unthinned it will go down like bedliner and it will never look even. keep spraying like you have been just give it a little longer between coats to flash and that should take care of the solvent pop.
03-19-2009, 01:34 PM
#58
Registered User
Thread Starter
Join Date: Oct 2007
Location: Bismarck, ND
Posts: 296
Likes: 0
Received 0 Likes
on
0 Posts
Thanks for the spraying tips, I'll be spraying my 75 cj5 when I fix all the holes in the body, but I'm actually rolling this paint on. The beauty of it is that it is self leveling paint.
I bought a urethane reducer made for colder temperatures so we will see how it works. I also ordered the correct reducer from Epifanes for this paint but it will not be here in time for the first coat.
I will have new pics after Saturday.
I bought a urethane reducer made for colder temperatures so we will see how it works. I also ordered the correct reducer from Epifanes for this paint but it will not be here in time for the first coat.
I will have new pics after Saturday.
03-19-2009, 06:38 PM
#59
Registered User
Join Date: Mar 2009
Location: indiana
Posts: 257
Likes: 0
Received 0 Likes
on
0 Posts
ok i got ya i must of missed that the first time through that you were rolling it on. i have never rolled on automotive paint before but i have rolled on primer. actually i think rolling on the primer is the best way to go in certain circumstances. i would try for the body shops scraps on the cj. good luck, i cant wait to see how it turns out.
03-21-2009, 02:04 PM
#60
Registered User
Thread Starter
Join Date: Oct 2007
Location: Bismarck, ND
Posts: 296
Likes: 0
Received 0 Likes
on
0 Posts
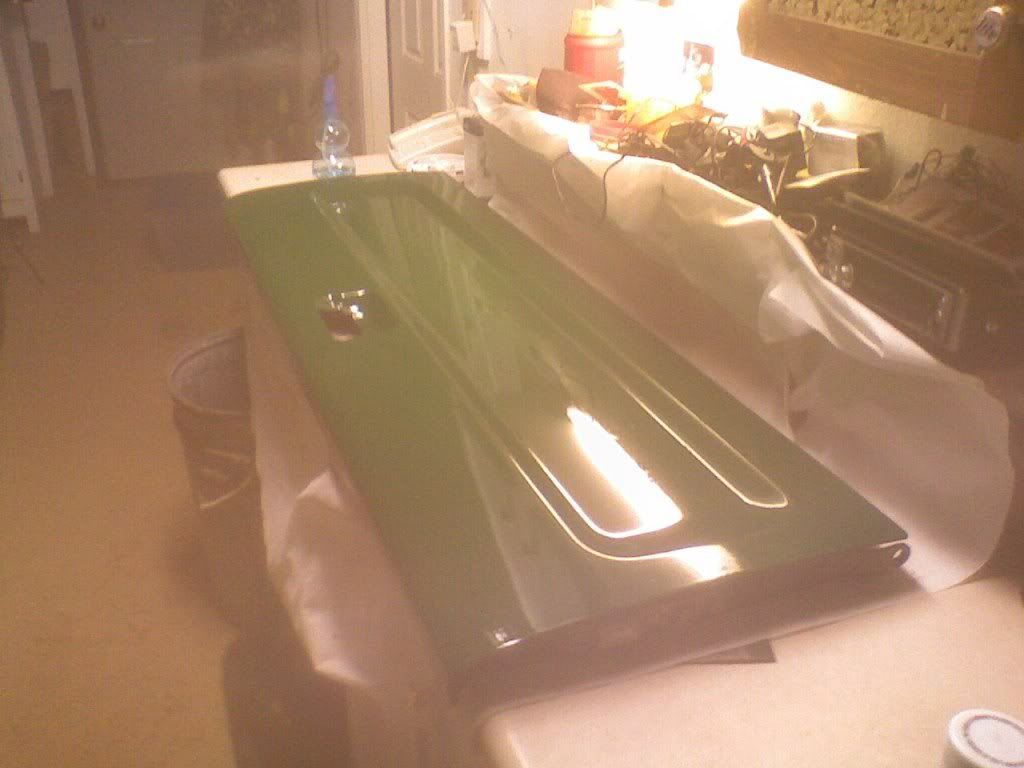
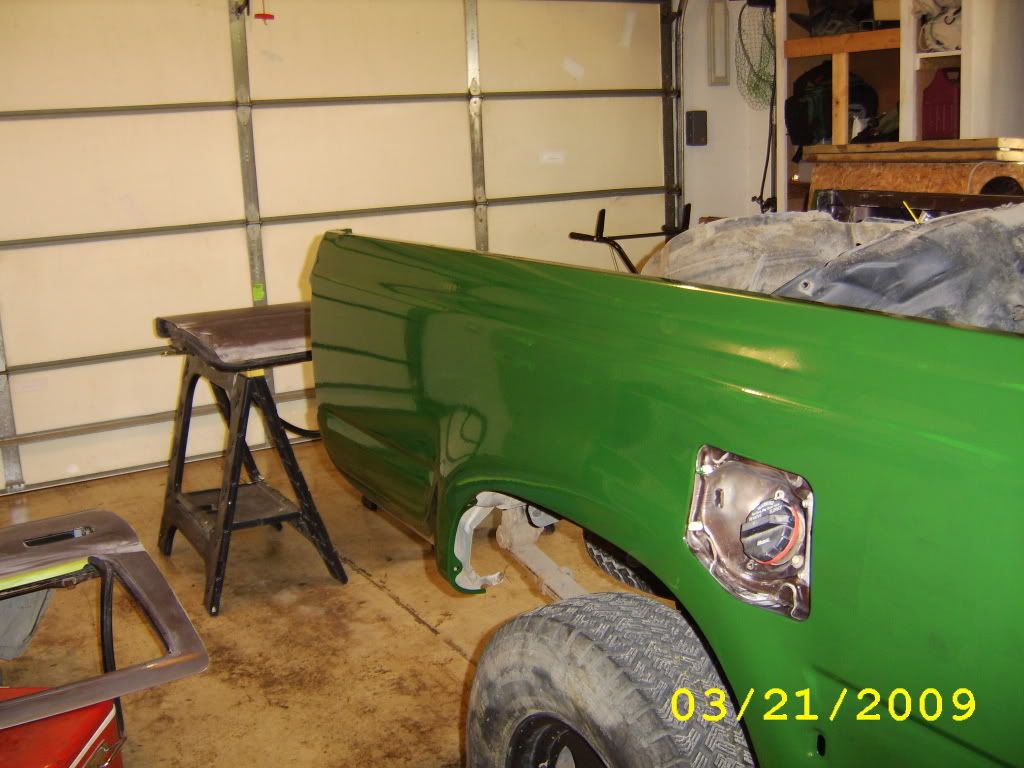
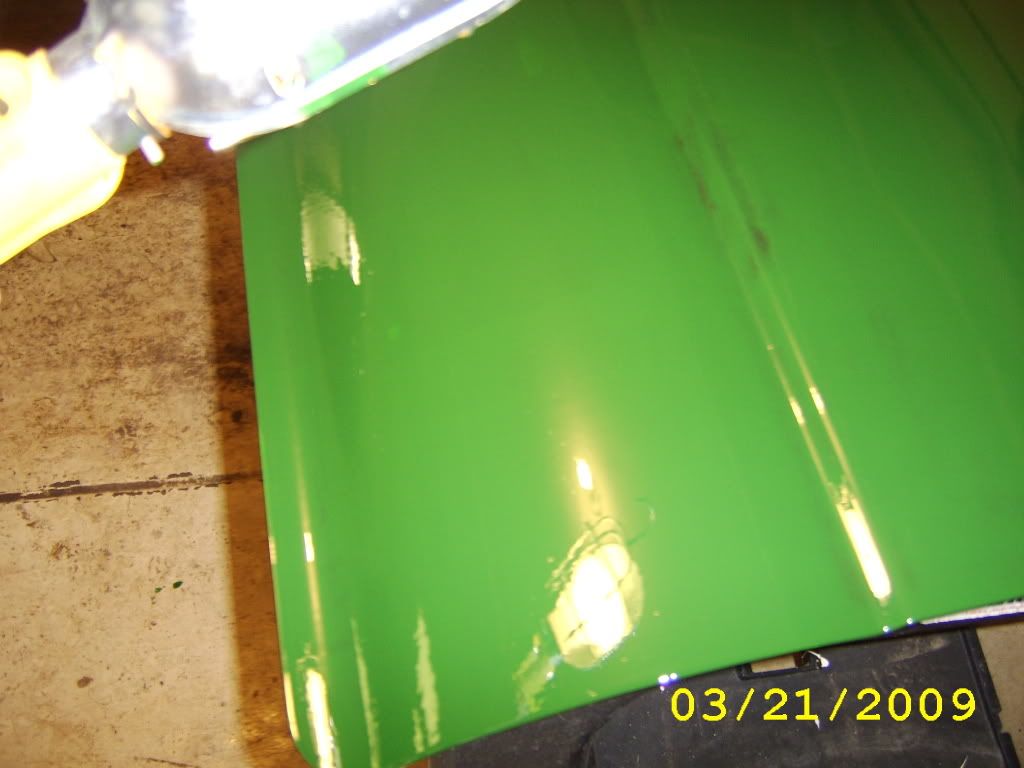
well I just finished the first coat, started my final wipe down at 11 this morning and finished up with paint at 4 p.m.
I used 4 inch dense foam rollers and my paint thinned 10%.
For my final wipe a tried two different products,Prep All made by Kleen-strip I bought at Wal-mart and a more expensive shop brand from the local auto paint store. The auto store stuff evaporated to quickly, while the Wal-mart stuff actually stays on the for more that thirty seconds so you can get a good wipe on it.
I found that roller lines could be prevented by making sure the roller had enough paint saturation so I would not be pushing down trying to make the paint stick. Runs could be remedied by lightly going back over them with the roller.
If anyone is going to do this make sure you get a good respirator. lots of fumes from the prep all and the paint.
Taped the windshield and other little things, I really should have done a better job of taping but i wanted to get it done.

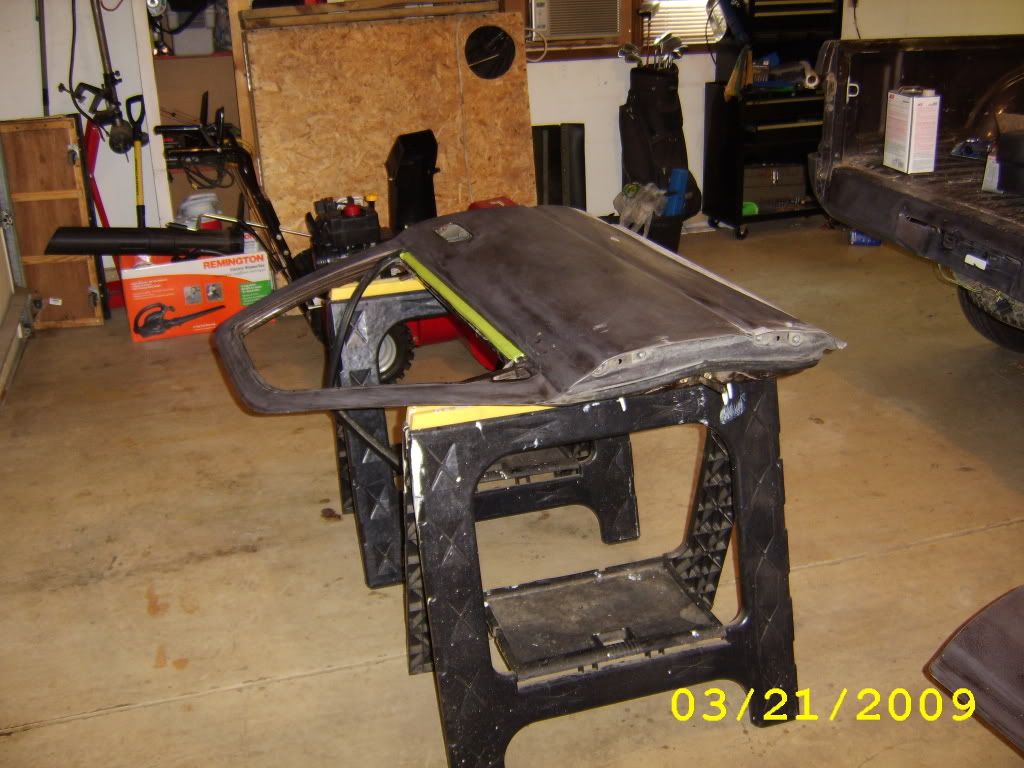
Took the doors of to do the jams.
first coat here we go
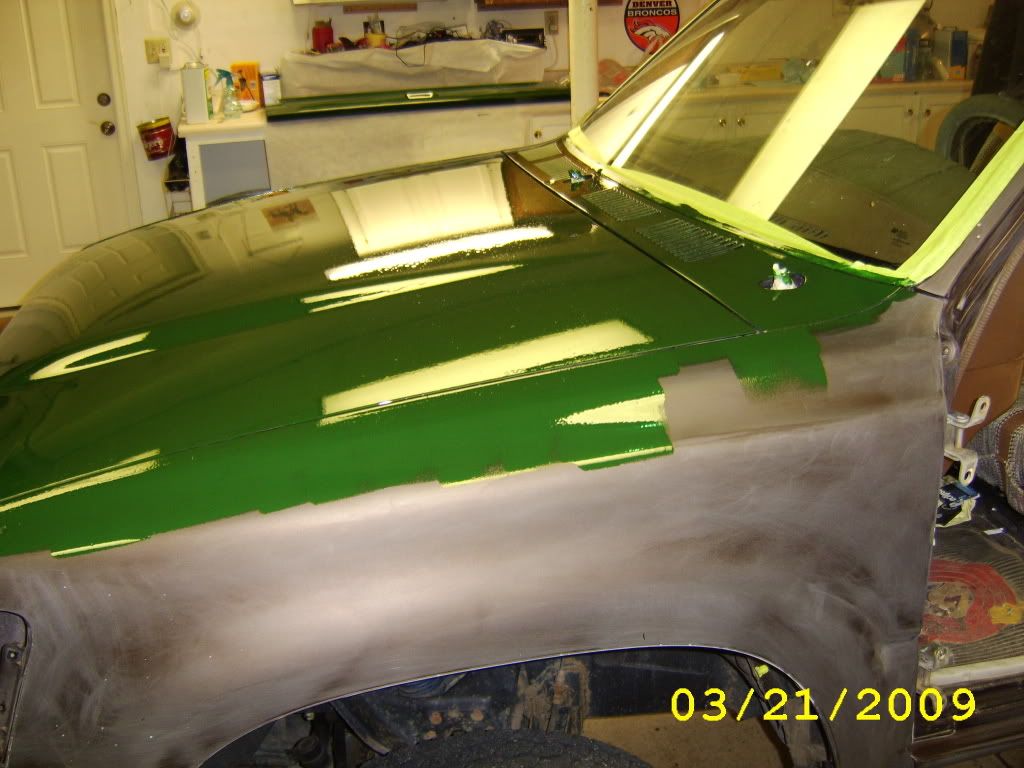
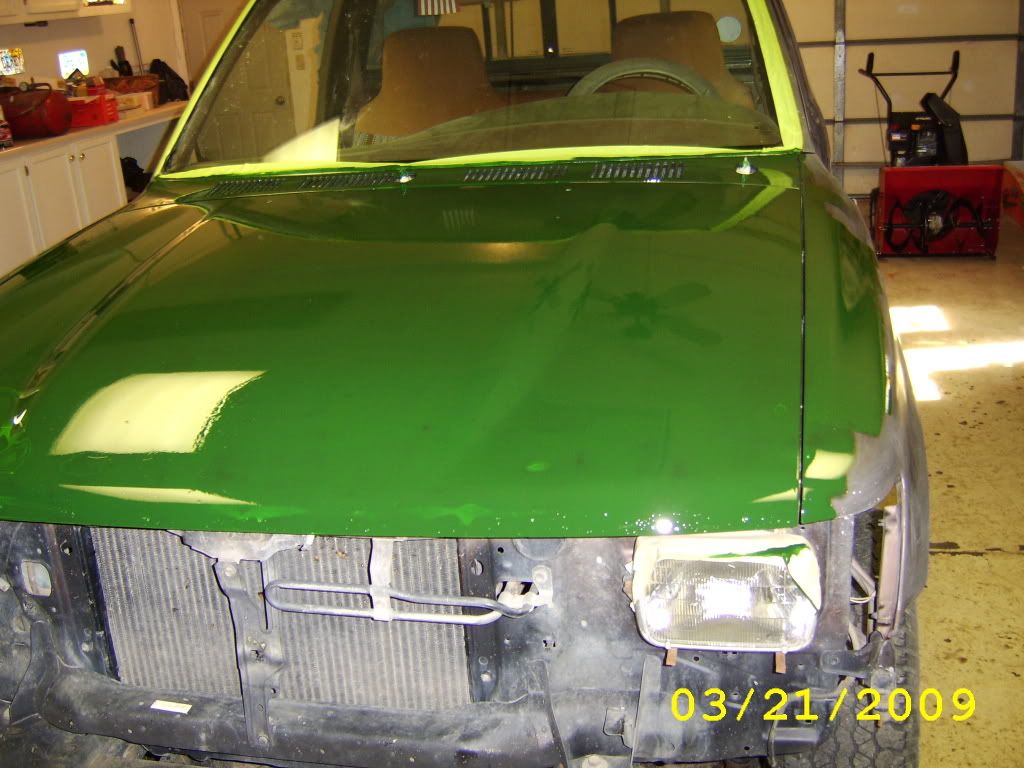
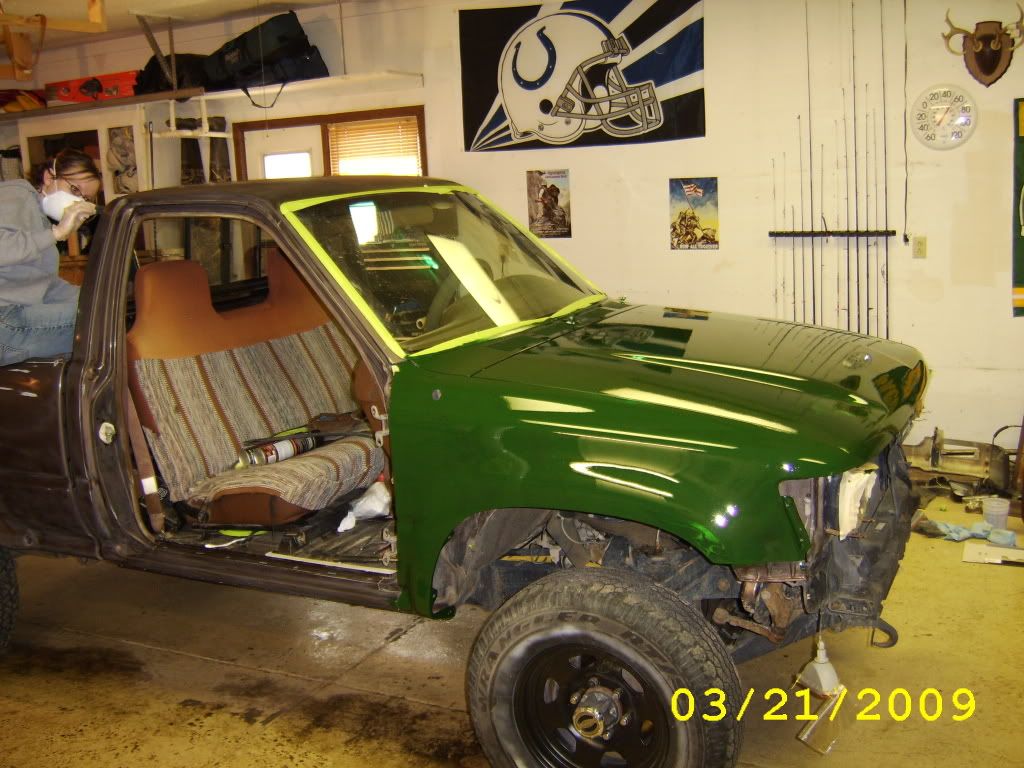
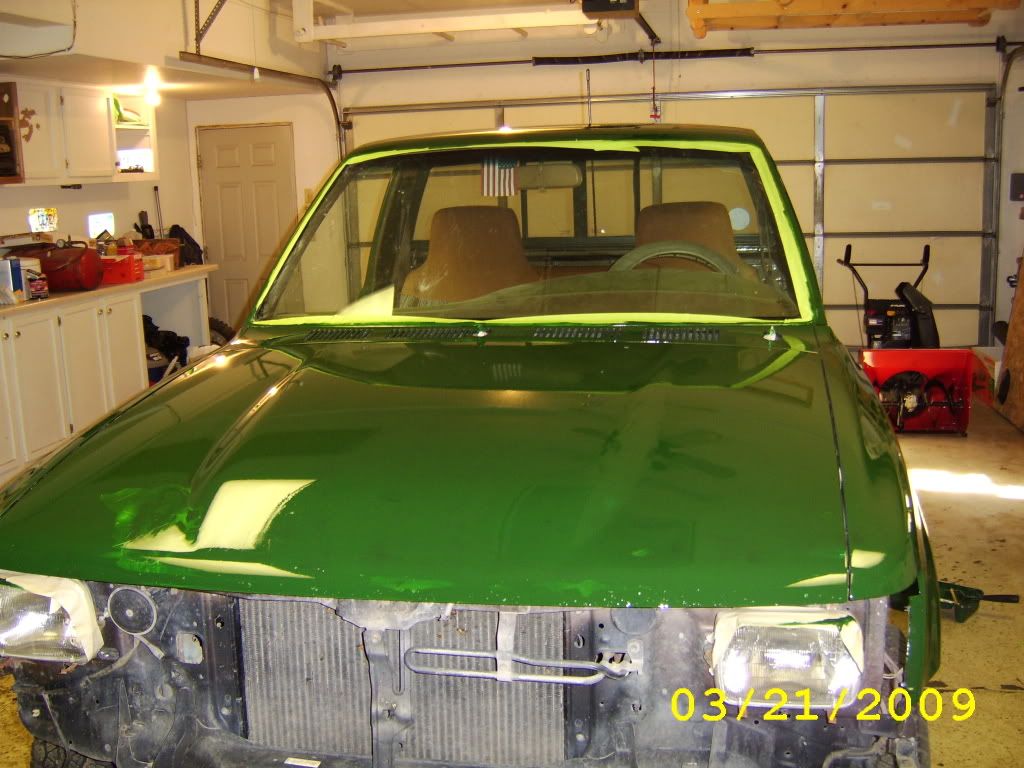
Don't know if you can see the thin spots in the pics but they are there, I guess why i will be doing 3 coats
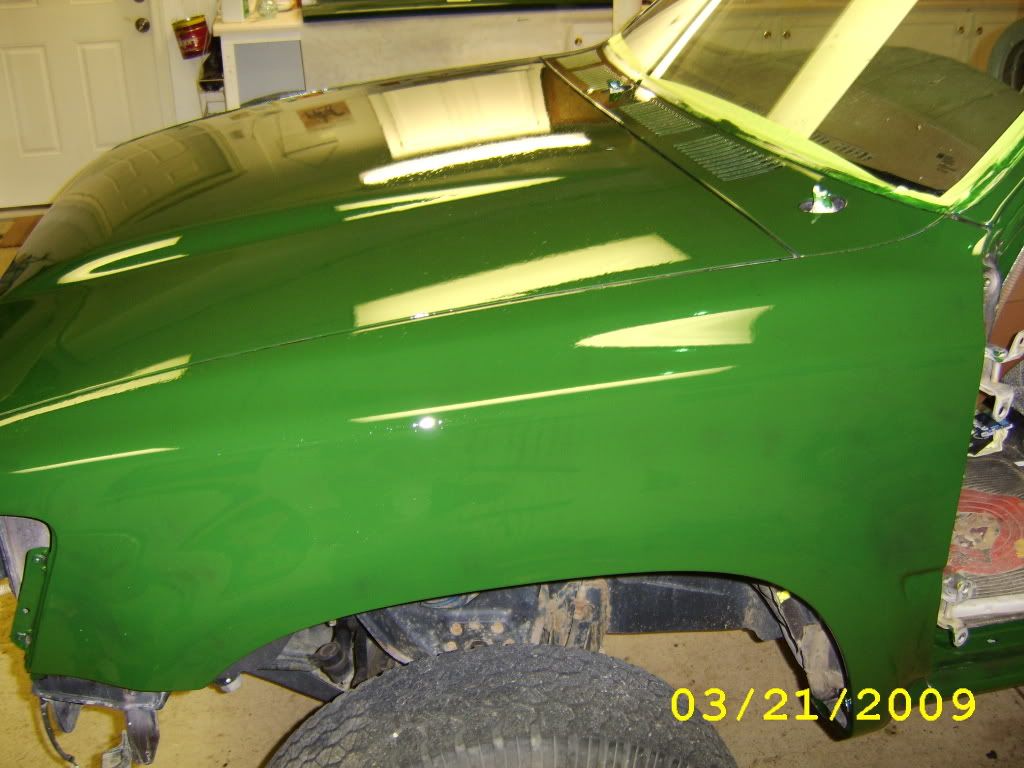
the door jams are quite difficult to coat evenly

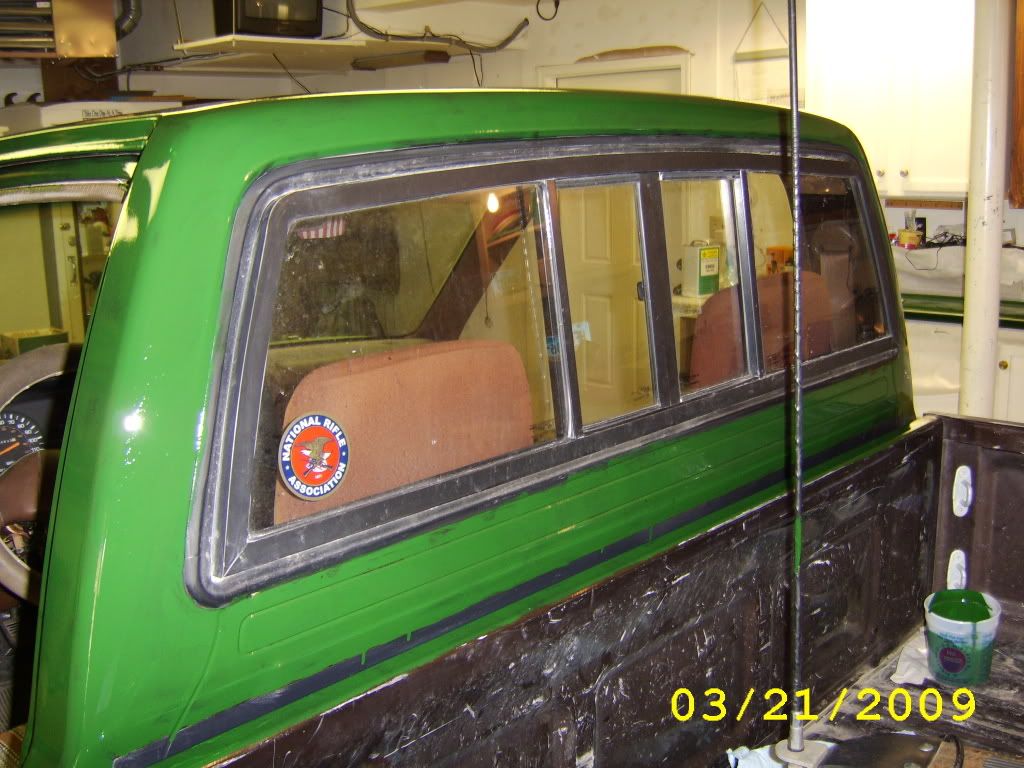
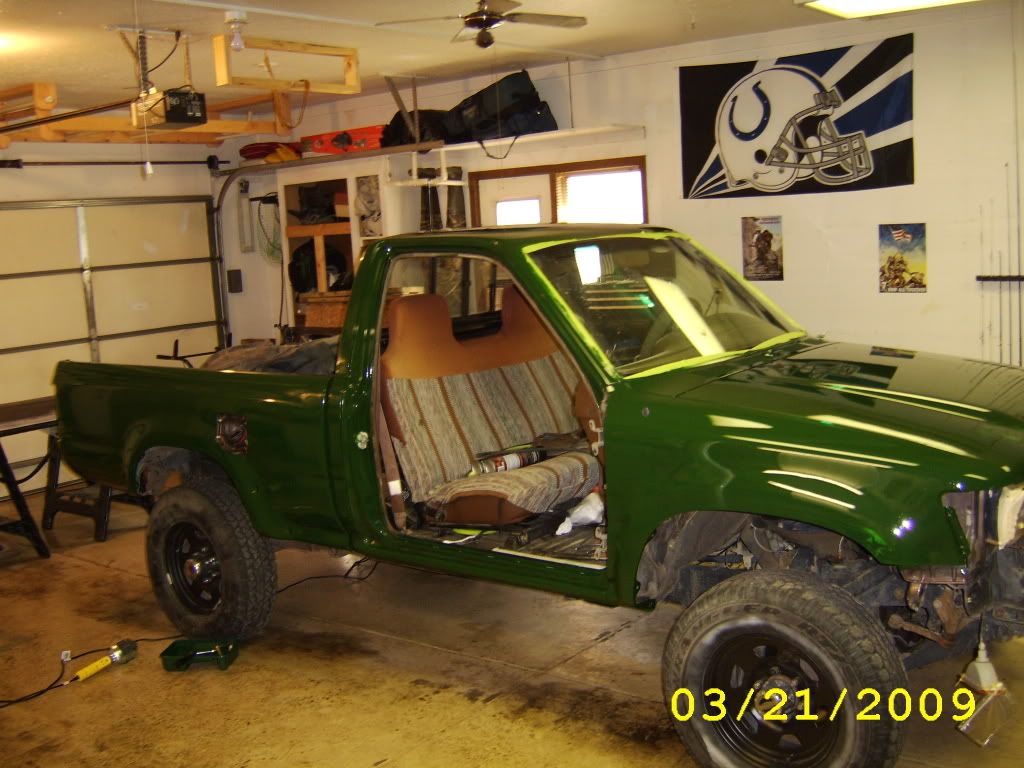
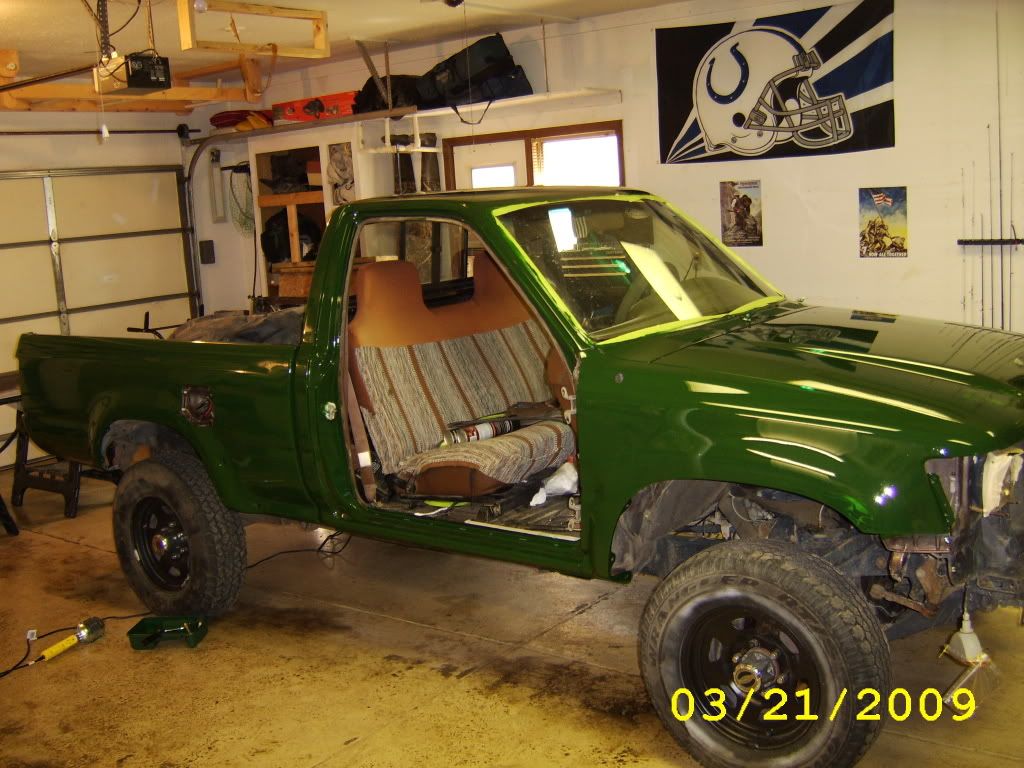
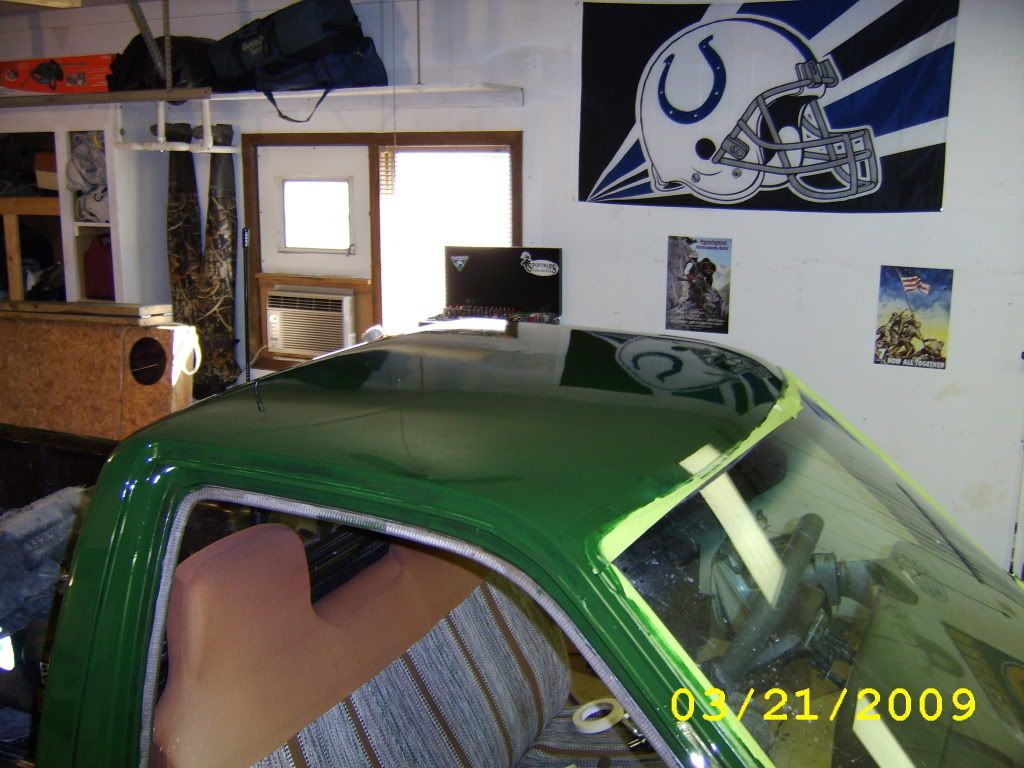
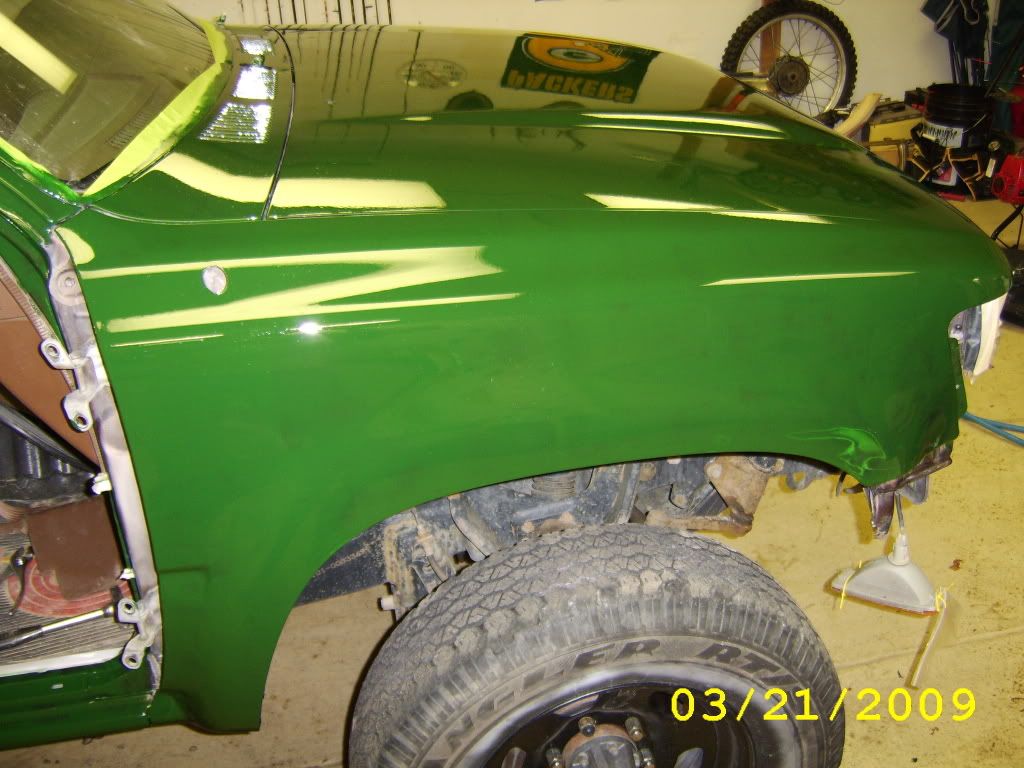
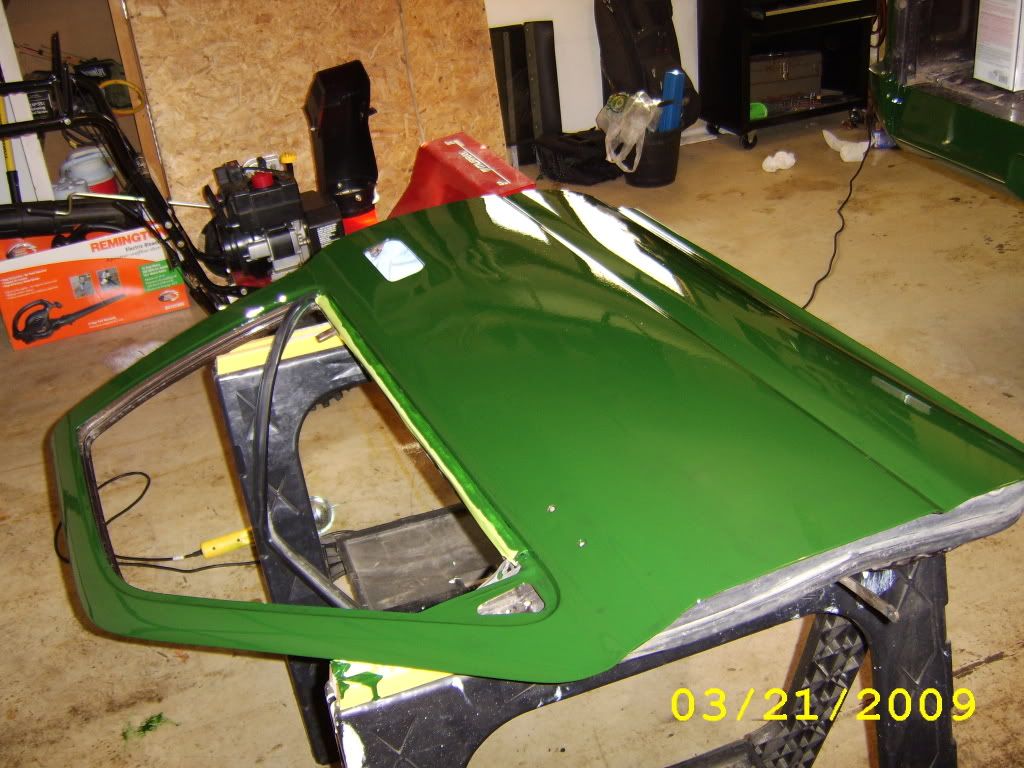
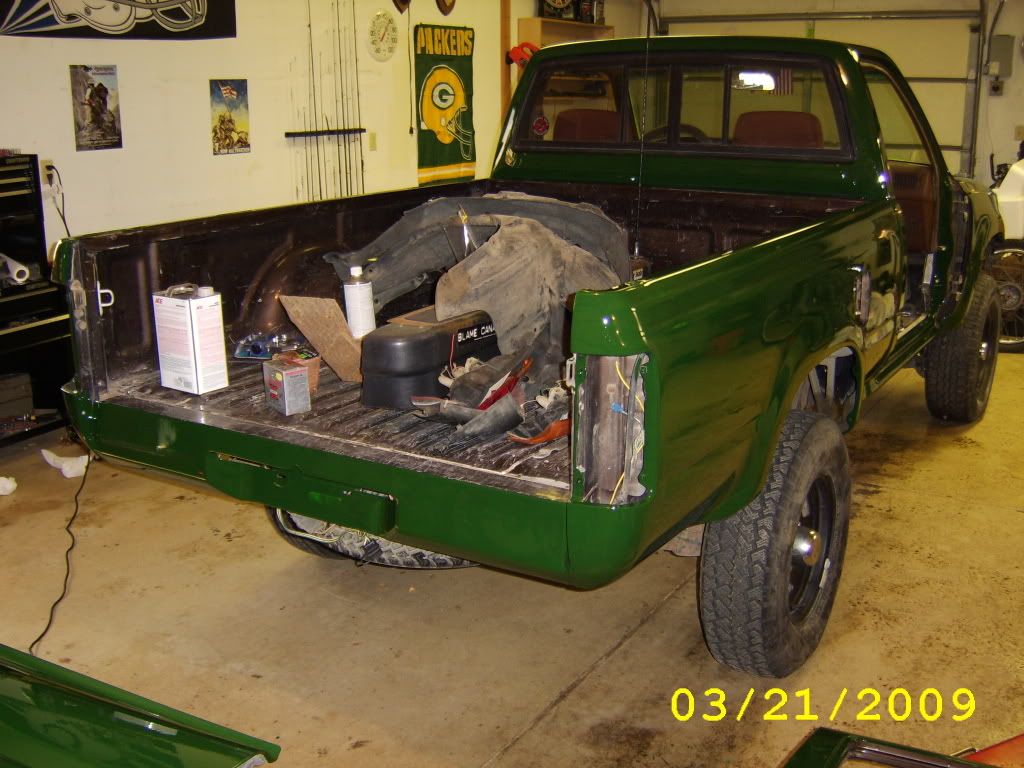
Another trick I used was to follow the roller with a trouble light as runs and roller lines were much easier to find.
I used 4 inch dense foam rollers and my paint thinned 10%.
For my final wipe a tried two different products,Prep All made by Kleen-strip I bought at Wal-mart and a more expensive shop brand from the local auto paint store. The auto store stuff evaporated to quickly, while the Wal-mart stuff actually stays on the for more that thirty seconds so you can get a good wipe on it.
I found that roller lines could be prevented by making sure the roller had enough paint saturation so I would not be pushing down trying to make the paint stick. Runs could be remedied by lightly going back over them with the roller.
If anyone is going to do this make sure you get a good respirator. lots of fumes from the prep all and the paint.
Taped the windshield and other little things, I really should have done a better job of taping but i wanted to get it done.
Took the doors of to do the jams.
first coat here we go
Don't know if you can see the thin spots in the pics but they are there, I guess why i will be doing 3 coats
the door jams are quite difficult to coat evenly
Another trick I used was to follow the roller with a trouble light as runs and roller lines were much easier to find.


