
Doing a partial rebuild, main seal question
 12-30-2011 | 04:20 PM
#1

Thread Starter
Registered User
Joined: Dec 2011
Posts: 19
Likes: 0
From: Carson City, Nevada
Doing a partial rebuild, main seal question
Hey guys, a little new to this Toyota forums (And 22r's themselves) and I'm doing a little it of a rebuild on it. Used to leak a bunch of oil by timing cover, head, pan, and towards the rear under the main seal.
Now I"m not for sure if the main seal is indeed leaking, but since I have the engine out and replaced the timing cover and head gasket I thought I might as well do the main seal while I've got the pan off. Question is, can I pull the rear oil bracket out without hurting the crank or messing any internal things up? If I do pull the rear seal out, do I need to RTV the rear oil assembly to the block or just apply the gasket that comes with the gasket set?
Thanks for the help.
12-30-2011 | 04:31 PM
#2
Registered User
Joined: Jan 2011
Posts: 288
Likes: 0
From: newnan georgia
12-30-2011 | 06:24 PM
#3

Registered User
Joined: Dec 2006
Posts: 31
Likes: 0
Just got done doing this. DEFINATELY use a factory rear main seal. Cost $27.00 but worth every penny. I got a new motor and used the aftermarket rear main seal, it leaked. Pulled the motor back out and used a factory seal, no leak. Worth the money. If you have the motor out just unbolt the oil seal retainer housing, clean old sealant off, rtv and gasket, reinstall. I used the black toyota FIPG (toyota factory rtv) and the paper gasket for the rear main seal retainer housing. No leak. I saw this post and thought I would try to save you a ton of work. Good luck.
12-30-2011 | 06:27 PM
#4
Thread Starter
Registered User
Joined: Dec 2011
Posts: 19
Likes: 0
From: Carson City, Nevada
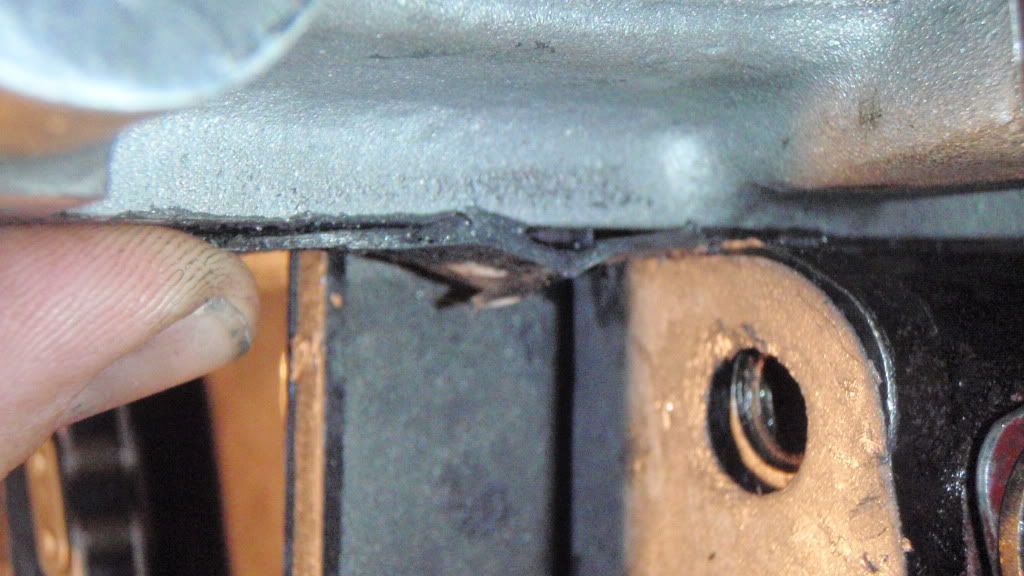
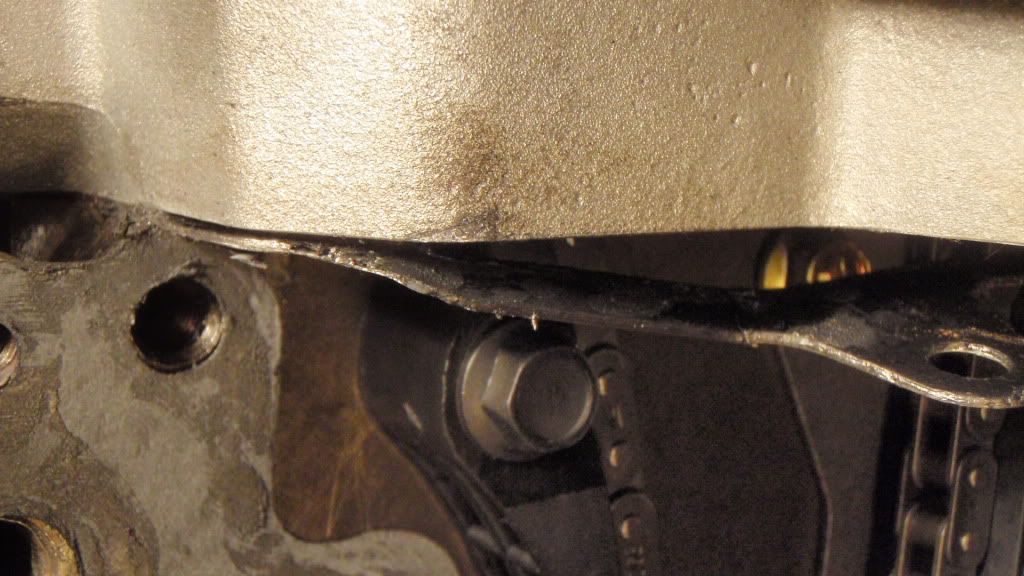
Hey, thanks man. Yeah, just decided to unbolt the rear seal now. Sadly, after pulling it I got all this gasket crapola all over the back of it. Starting to become a pain to remove it all. You got any tips? =p I'm just using a chisel and going very softly. You know the torque specs on the retainer bolts by the way?
12-30-2011 | 06:57 PM
#5
Registered User
Joined: Dec 2006
Posts: 31
Likes: 0
Add this website your favorites, now that you have a 22r you will reference it. http://personal.utulsa.edu/~nathan-buchanan/93fsm/ Go under 22re engine mechanical-cylinder block. Retainer bolt torque 13ftlbs. Get a gasket scrapper with the razor blade (get additional razor blades). They used to have gasket remover spray that worked but when I tried to find some I couldn't. Environmental BS. I just used some carb cleaner and scraped. Pull the oil pan since you have the motor out, so that you get a good seal at the retainer housing and pan, scrape and clean very good. Get FACTORY REAR MAIN SEAL AND TOYOTA FIPG. Cost a few bucks more but worth the money. Put rear main in retainer housing (use and block of wood to pound in), use FIPG and gasket on retainer housing, bolt to 13ft lbs. Reinstall oil pan using FIPG. Torque specs are in manual. Take you time and clean all gasket material very well for a leak free install. Just did not want anyone to have to do it twice like I did.
01-04-2012 | 06:32 PM
#7
Thread Starter
Registered User
Joined: Dec 2011
Posts: 19
Likes: 0
From: Carson City, Nevada
Aights, got another question for yall' this time on the engine mounts =p
Now a little while back while undergoing engine removal I decided to undo the 4 mount bolts from the engine and the engine bracket, now that I"m installing it I'm having a hell of a time trying to get the engine in. It seems to be hanging up on the mounts. Should I have taken the actual mounts off and left them on the engine? Or should I just give the damn thing a little more elbow grease?
Now a little while back while undergoing engine removal I decided to undo the 4 mount bolts from the engine and the engine bracket, now that I"m installing it I'm having a hell of a time trying to get the engine in. It seems to be hanging up on the mounts. Should I have taken the actual mounts off and left them on the engine? Or should I just give the damn thing a little more elbow grease?
Trending Topics
01-07-2012 | 11:04 AM
#8
Thread Starter
Registered User
Joined: Dec 2011
Posts: 19
Likes: 0
From: Carson City, Nevada
Jsut ran into a problem. Finally got the engine installed and everything running smoothly. Installing the clutch cylinder and realizing it doesn't like up to the clutch lever on the transmission. Double checked and it turns out the fork isn't even engaging. There a quick solution to this or am I gonna have to pull the engine again and take a gander (probably re-attach) at the transmission?
:/
:/
01-09-2012 | 08:34 PM
#10
Thread Starter
Registered User
Joined: Dec 2011
Posts: 19
Likes: 0
From: Carson City, Nevada
Keep running into damn problems. Finally got the engine completely in and hooked up today. Had a buddy put in the spark plugs while I was doing a final touch up on the vac lines. All is well and fine until he mentions #4 spoark plug not wanting, turns out it got stripped. =/
Ended up pulling the head off again (with his help) and took a small tear out of the headgasket. Question is, is the headgasket still good or should I just get another one : (
(Sorry for the bad quality pic
Ended up pulling the head off again (with his help) and took a small tear out of the headgasket. Question is, is the headgasket still good or should I just get another one : (
(Sorry for the bad quality pic
01-18-2012 | 10:07 AM
#11
Registered User
Joined: Dec 2006
Posts: 31
Likes: 0
You could take the head to a machine shop to fix the stripped threads or they make a helicoil set to repair the threads. #4 is at a weird angle. I alway hand thread it and put a little antiseize compound on the threads so that it does not get cross threaded. The clutch fork problem you are describing did you make sure that the fork was on the pivot ball in the transmission, it should snap on that and line up the fork. As for the head gasket, I have messed one up before and my recommendation is just like the recommendation for the rear main. Get a good part and do the job once, it sucks shelling out the cash but piece of mind and your time to do the work is worth it. I have been in your shoes before where nothing on the project seems to be going right. Take your time, it will eventually come out right, and you will have a sense of satifaction from overcoming the problems. Good luck.
01-18-2012 | 12:37 PM
#12
Thread Starter
Registered User
Joined: Dec 2011
Posts: 19
Likes: 0
From: Carson City, Nevada
Hey, thanks man :3 Just got a timing chain set from engnblr and now I'm on a spree to go find a new headgasket. I'll post some pics of where I'm at with this truck right now. As for the head, once I pulled it I just ran a plug chaser through spark #4 and the spark plug threads in with no trouble at all. Wondering if I should just leave the spark plug in the head in case that crap happens again. :o
And yeah, takin' my time with this one. As they say, slow and steady wins the race =p
And yeah, takin' my time with this one. As they say, slow and steady wins the race =p
01-23-2012 | 10:41 PM
#13
Thread Starter
Registered User
Joined: Dec 2011
Posts: 19
Likes: 0
From: Carson City, Nevada
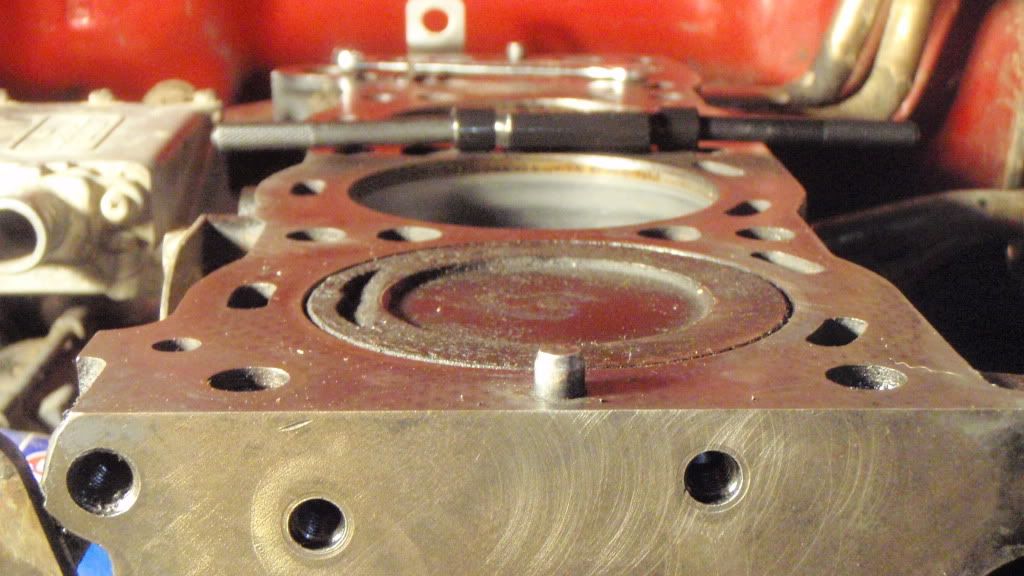
Getting so tired of doing all this. Ran into a couple other problems now.... Not sure if I got a warped head or what but I got the headgasket out on, worked my way slowly with a buddy getting the head on. Replaced my guides, tensioner and cams, and everything was going smoothly. :3
Finally got to putting the timing cover on and it was a no go. such a no go in fact that my idiot self screwed up yet another headgasket. Full of rage for right now I"m calling it quits for a bit until I tear it down yet another time =/
Thought I'd post a few pics though and see what you guys think. I'm hoping I don't have a warped head. It went on pretty smoothly. Anyway besides a straight edge to it to see if its warped? My timing cover seems to only want to go in cockeye'd now too.
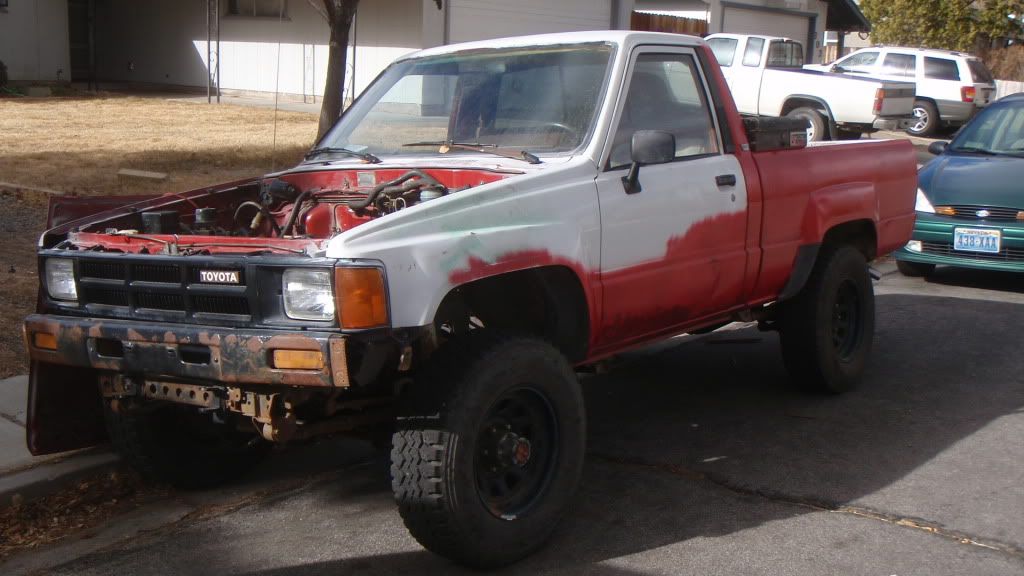
My truck the multi-colored beast of death :3
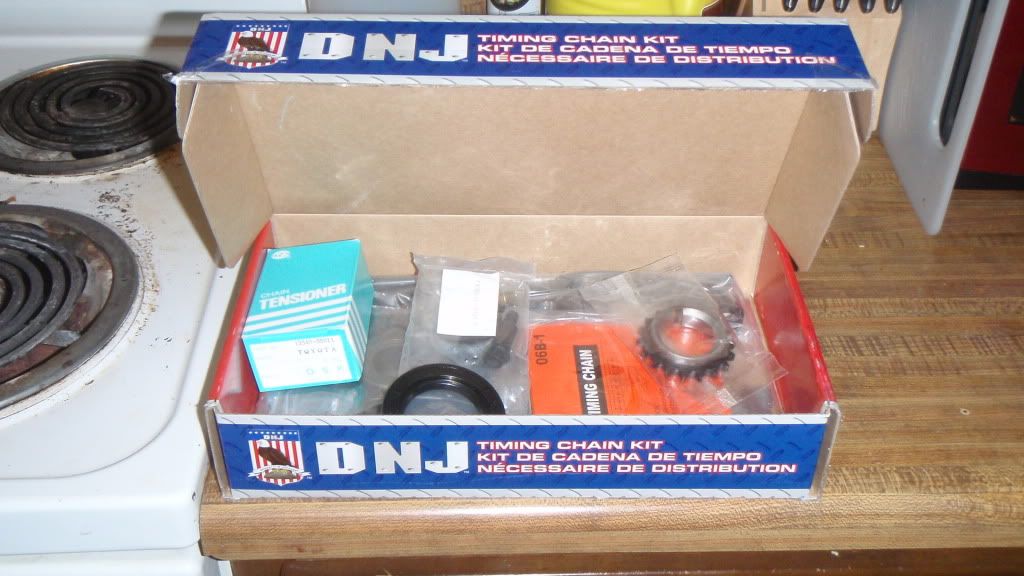
New kit that went in today
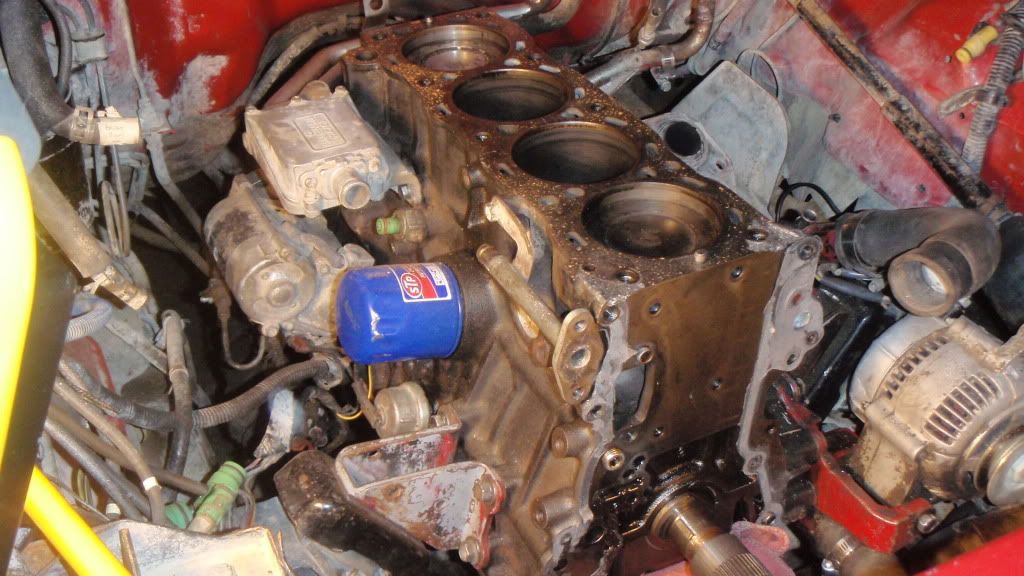
Engine yesterday morning (I don't have a picture of it cleaned up =/ )
And now my troubles yet again
probably end up tearing it down later tonight... after a cigarette and a beer.
Finally got to putting the timing cover on and it was a no go. such a no go in fact that my idiot self screwed up yet another headgasket. Full of rage for right now I"m calling it quits for a bit until I tear it down yet another time =/
Thought I'd post a few pics though and see what you guys think. I'm hoping I don't have a warped head. It went on pretty smoothly. Anyway besides a straight edge to it to see if its warped? My timing cover seems to only want to go in cockeye'd now too.
My truck the multi-colored beast of death :3
New kit that went in today
Engine yesterday morning (I don't have a picture of it cleaned up =/ )
And now my troubles yet again
probably end up tearing it down later tonight... after a cigarette and a beer.
01-24-2012 | 04:19 PM
#14
If at all possible, I found it easier to drop the oil pan if I wasnt taking the head off, when I replace just the timing cover gasket. It may be a bit of a pain, but its easier in the long run as you found out... Sorry it happened bro.
01-24-2012 | 04:42 PM
#16
Thread Starter
Registered User
Joined: Dec 2011
Posts: 19
Likes: 0
From: Carson City, Nevada
Yeah, I ended up dropping the pan afterwards =p Still a bit bummed out that I lost another headgasket. Didn't get around to pulling it last night so I'll probably have it off and out tonight. Then on to check it with a straight edge.
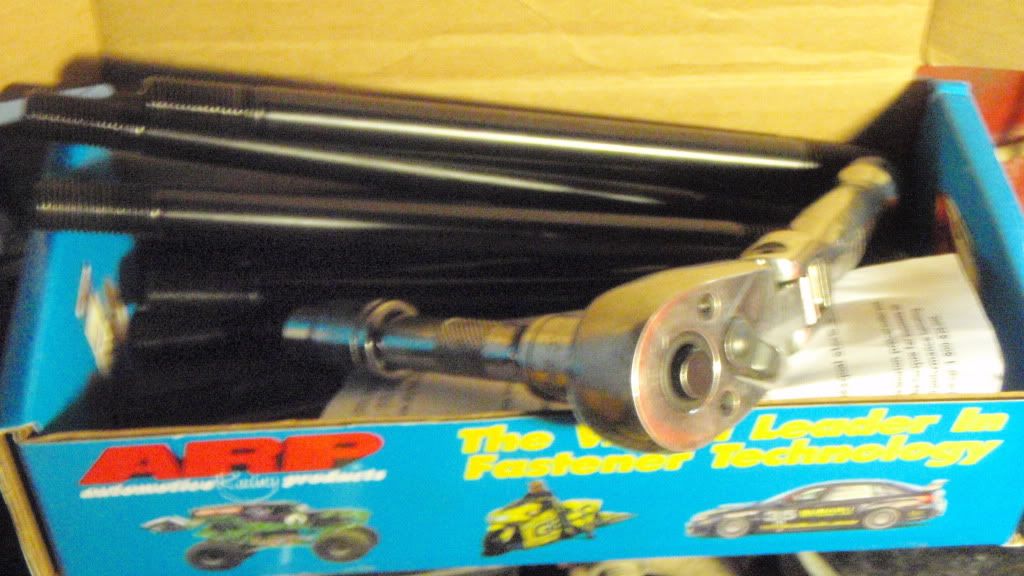
BTW, you guys hear anything about head studs that thread into the block? I was doing a little looking up on the internet about random things and found a guy who put ARP head studs in his 22r. Are they worth it at all? Since I"m pulling the head again; a few of the thread inserts into the block are a little rough and I'm debating chasing them if at all possible and my head bolts are a little worn. I might go down this route but I'm not entirely sure. Are torque values still the same for mounting the head on if I end up going studs? Are there any benefits or draw backs?
BTW, you guys hear anything about head studs that thread into the block? I was doing a little looking up on the internet about random things and found a guy who put ARP head studs in his 22r. Are they worth it at all? Since I"m pulling the head again; a few of the thread inserts into the block are a little rough and I'm debating chasing them if at all possible and my head bolts are a little worn. I might go down this route but I'm not entirely sure. Are torque values still the same for mounting the head on if I end up going studs? Are there any benefits or draw backs?
01-24-2012 | 04:46 PM
#17
Thread Starter
Registered User
Joined: Dec 2011
Posts: 19
Likes: 0
From: Carson City, Nevada
I got the kit from Ted at Engnbldr. It's actually not that bad. My old chain and cam gear had no identifying marks while this set does (Thankfully) Plus the guides aren't worn and cheesy like mine were. Almost looked like the PO didn't like guides and decided to make his own using milk crates =p
02-06-2012 | 05:15 PM
#19
Thread Starter
Registered User
Joined: Dec 2011
Posts: 19
Likes: 0
From: Carson City, Nevada
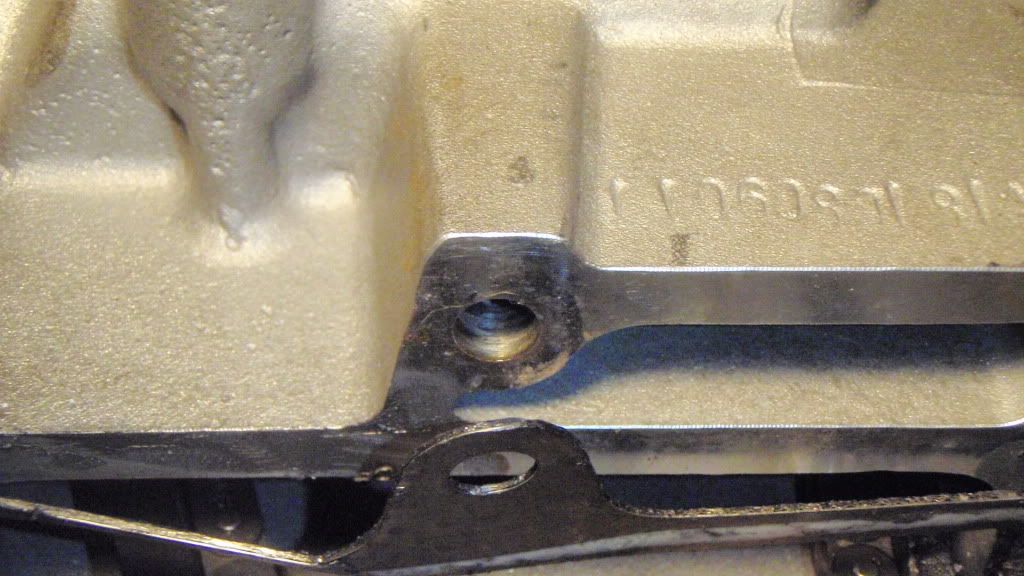
Been a while since I've done some work, had a sickness going around. Finally got my studs in today though so I've decided to start cleaning the top-o-the block again and removal all the gasket crap from the front.
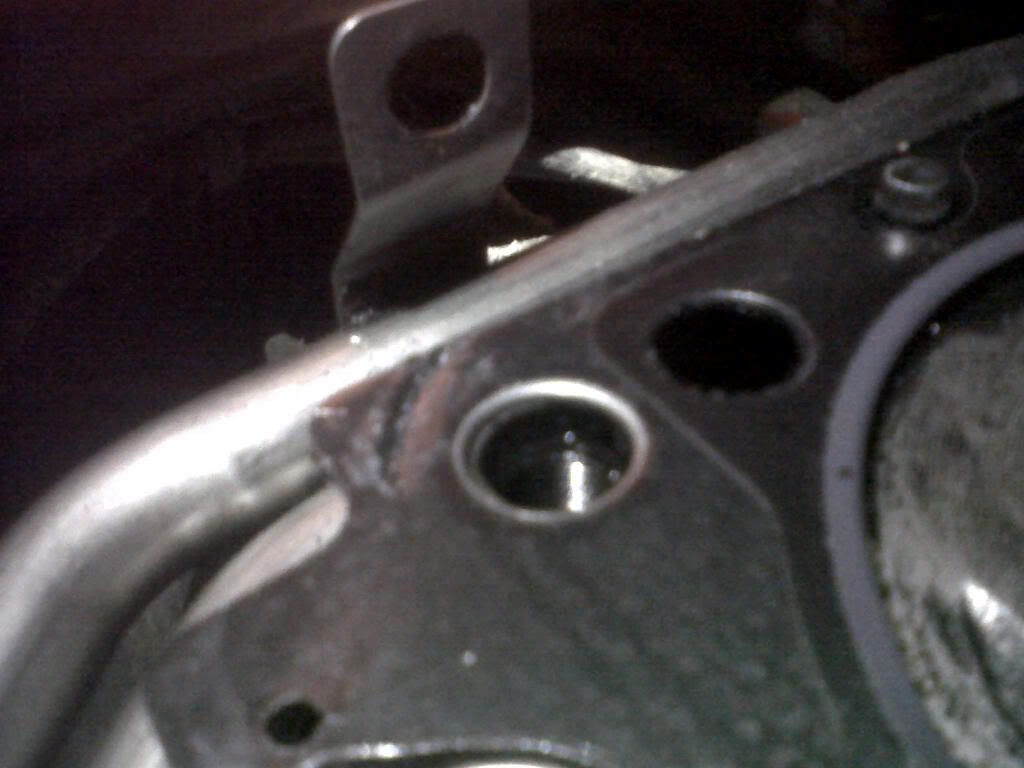
So happy for the ARP, gonna look better when they're in a little later. Ran into yet another problem though. Was re-tapping the block threads and a couple were really gunked up (glad I did it) Then I noticed on cylinder 3 (One of the holes I've had problems torquing in the past) was being a real pain. Turns out I'm missing a few threads and the very bottom threads are toasted. I really don't have the time or the patience to drill and heli-coil it so I'm most likely going to carefully drill out the crap thread so the stud can go all the way down and chase the old threads afterwards...
It's a horrible angle but you can just make out the booger in the thread at the bottom
Feels like 1 step forward 2 steps back... Square dancing with Toyotas.
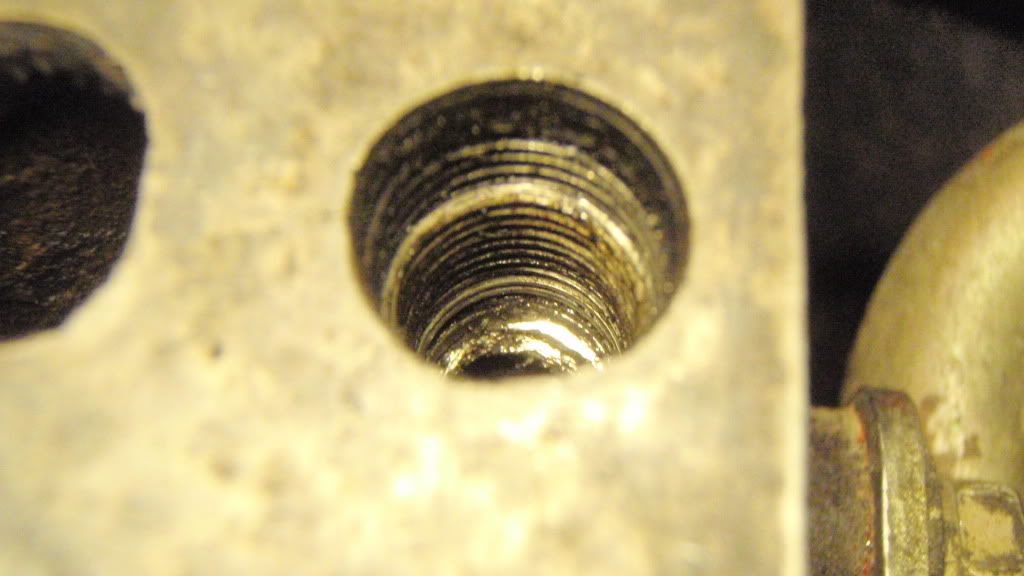
02-24-2012 | 05:45 PM
#20
Thread Starter
Registered User
Joined: Dec 2011
Posts: 19
Likes: 0
From: Carson City, Nevada
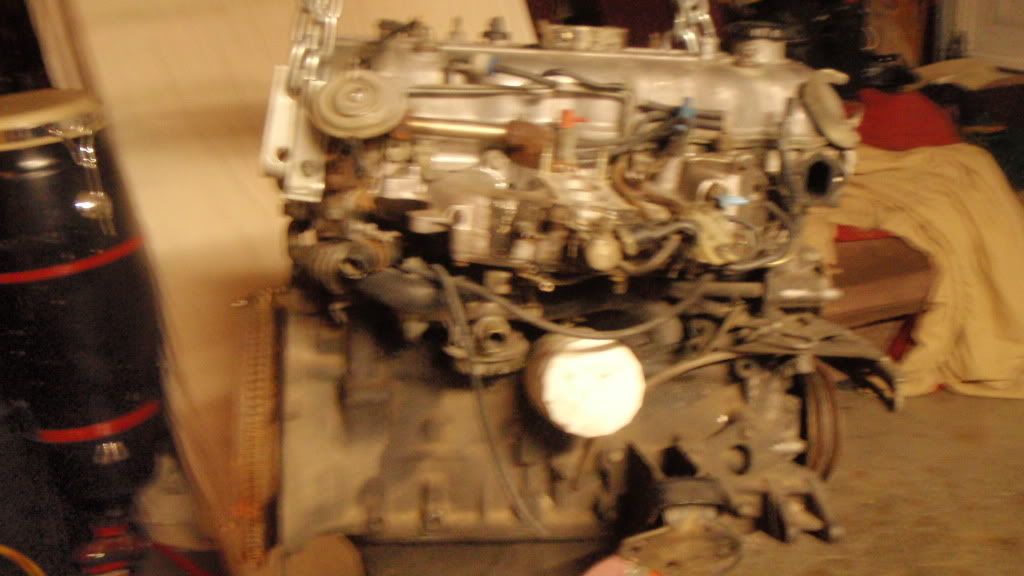
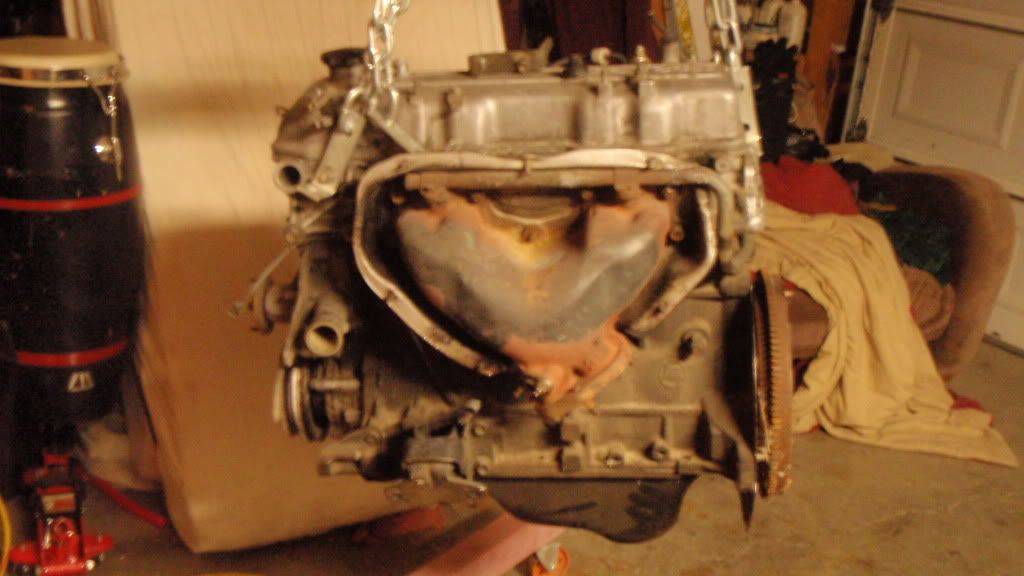
Been a while since I've been on this forum do to makin' money but I thought I'd post up of what I just got today.
Finally found myself another engine from a guy out in Reno. Poor thing has been left without water or oil for 4 years, and also hasn't had any covers on the intake as well as missing spark plugs.
I haven't checked much out about it just yet, I think it's an old 82 since it looks to have a dual row timing chain on it. Still a bit bummed out after doing some reading on pre 85 engines and realizing you can't switch in post 85 heads =/
couple photos of this little beast before I tear it down some and see if it's got some real damage =/

Thread
Thread Starter
Forum
Replies
Last Post
FS[PacSouthWest]: 2- 8"3rd members:4.88 ratchet lockers,new setup kit, rear axle rebuild kit,diff armor
jerusry
Axles - Suspensions - Tires - Wheels
1
10-19-2015 05:28 PM
88yodabasket
86-95 Trucks & 4Runners
15
07-13-2015 01:32 PM


