
Tracking down oil leaks
 10-13-2014, 05:43 PM
#1
Tracking down oil leaks
I've just got a 1982 4x4 pickup. After blowing the driveshaft off the rear end due to a bad vibrating u-joint and replacing both u-joints, I've scrubbed down the top end with enough mineral spirits to choke a horse and replaced the badly needed valve cover gasket and changed the oil. That gasket had been leaking long enough that there's a lot of greasy mud caking the engine and transmission below.
Tonight I got under there and tightened all the oil pan bolts which were concerningly loose. I noticed what looked like fresh oil dripping down above and around the clutch slave cylinder. I'm hoping this is leftover drippage from the cleaning job and not coming from the rear main seal. It's got 132k on the clock and I'm hoping that a rear main seal leak is out of the question for this many miles, and that the clock hasn't been messed with.
Everything else on the truck in the way of turn signal lever and stuff like lack of windshield wiper slop seems to point to it being a lower miles truck with a semi-abused history. I would like some advice on systematically tracking down oil leaks, starting with advice on how to blast away this grease mud cake on a lot of stuff underneath. I'm thinking of using some gunk engine degreaser and a coin operated care ash power washer nozzle since I don't own a pressure washer.
Also, since I have a straight front axle I'd like some pointers on removing the oil pan in case I have to change that gasket, I've only done it on my 2wd yota, where I had to remove the sway bar which was a pain in the ass.
Last edited by kawazx636; 10-14-2014 at 05:14 AM. Reason: watch the language
 10-14-2014, 06:27 AM
#2
Rear main seals aren't that hard to replace, they are just hard to get to. And just because the vehicle doesn't have a lot of miles on it doesn't mean that a main seal can't go bad. A lot of it has to do with the age and frequency driven. The seal is essentially rubber so if it isn't driven much then it can dry out a crack too. It likely won't make you feel any better, but I bought my truck with EXACTLY the same mileage as you have on yours and my rear main seal was leaking as well. However, I wasn't getting oil around the slave cylinder. It was simply dripping down and out of the bell of the tranny and actually looked more like a leak from the rear of the oil pan. You might be able to get a better idea of what is leaking by pulling the starter and peaking in there. Another spot to look at would be the back of the valve cover where the "half moon" gasket sits. That can leak and drip down the back of the engine onto the tranny and you'll never know. You can also look at the valve cover gasket itself to see if it is leaking. Other than those places, there is pretty much no other sources of oil on the back side of the engine. If you want to start narrowing down your leak possibilities, here are the steps I would take right now if I were you:
1-Get your parts first - you'll need a rear main seal, a seal saver sleeve (LCE has them), rear main seal retainer gasket and oil pan gasket (I'd steer clear of the cork gaskets from Fel-Pro. I use the synthetic rubber ones that come in the master gasket kit from Engnbldr - NEVER had a problem)
2-Drop the tranny (you'll need to do it eventually some day so you might as well start now). I've learned that if you don't have a tranny jack then it is easier to leave the crossmember bolted to the tranny. If you take the crossmember off then it tends to flip sideways when you set it down and when reinstalling it because of the offset transfer case. Plus it give you and a buddy something to hold on to while you're trying to reinstall that pig.
4-Remove the clutch and flywheel
5-Remove the oil pan. There's no need to remove the sway bar - I've always been able to get it out with no problem.
6-Now you can get to the rear main seal retainer. Typically, there is a groove carved into the crank from the old seal (Thus the leak). You can do one of two things 1) install the seal saver sleeve or 2) find a seal that is thicker or has a seal spacer thus making the seal ride on a "new" grove.
7-Reassemble. When you go to reinstall your oil pan, make sure that you mating surface on the block is clean - it doesn't have to be laser straight, but clean. I use a paint scrapper and some emery paper to remove all the old gasket and grime. Then make sure your oil pan mating surface is at least "flat" - By flat I mean that over time the bolt holes tend to get pulled out towards the block side of the oil pan which makes the surface between the bolts not seal up properly. I take a ball peen hammer and tap the bolt holes out so they sit slightly higher on the non-block side of the oil pan. That way when oil pan it is torqued down, the pan should lay completely flat on the block.
As far as your cleaning issue, I use Marine Clean from POR-15. It is no where near as caustic as other degreasers and I use it on EVERYTHING from greasy engine parts to wheels with caked on brake dust. A gallon of it will run you around $25, but you dilute it about 50/50 and it gives you 2 gallons. Spray it on, wire brush it and spray it off. I live by the stuff since I first used it - no more Gunk, Purple Power, Zep, etc...
Here's some shots of what Marine Clean has done for me
Before:
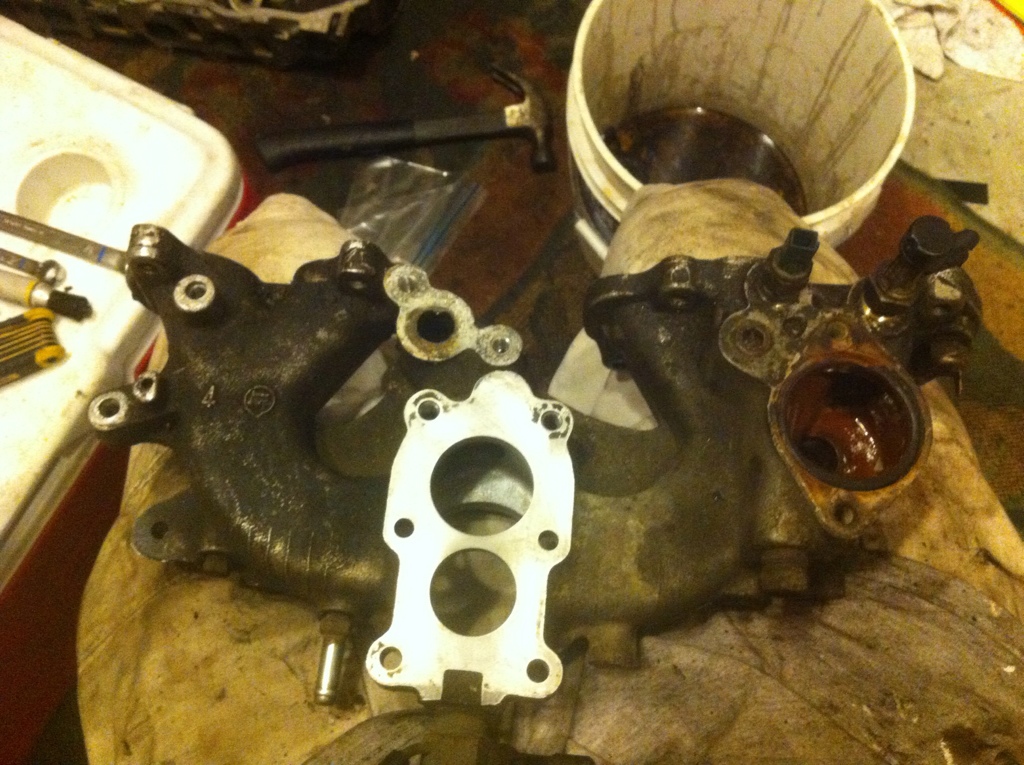
After:
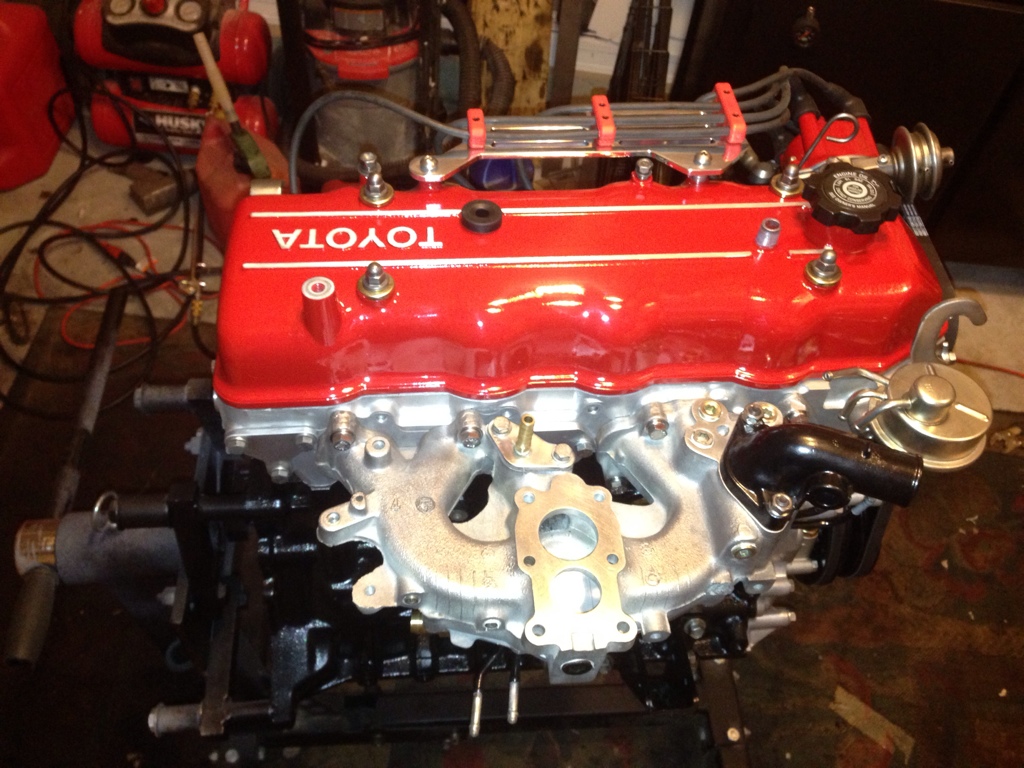
I don't have a before picture, but you can imagine what 30 years of grime looks like on a tranny. Here's the after:
 10-14-2014, 06:59 AM
#3
Registered User
If you pull all the stuff in the cab around your gearshift, you might be able to get a better view of what's leaking down onto the slave cylinder. It's definitely worth checking out before you go pulling the transmission, anyway. And you'd need to get all that stuff out and pull the gear shift to get the tranny out anyways, so why not.
Do you know what gear oil smells like, as opposed to engine oil? That's another good test.
Do you know what gear oil smells like, as opposed to engine oil? That's another good test.
10-14-2014, 07:21 AM
#4

Take your time and clean-up your engine. It will help you track down the leaks. In my 21 years of driving and maintaining the pre-84 vintage toyota truck, I've found that OEM gaskets/seals are vastly superior to jobbers. This is not to say there are not jobber parts that match OEM quality, but the ones I used didn't.
Here's a question, somewhat relating to the OP's; is it OK to use a GOOD gasket maker (The Right Stuff is what I have been using) in stead of an oil pan gasket on the pre-84's? This is what I have seen on later fuel injected 22r's and it seems to work well. Certainly better than the cork gasket.
And I just want to note here, as I already mentioned, I've owned, driven and wrenched on this vintage of toyota for 21 years now. I started 'lurking' about this forum about a year ago, and really appreciate the knowledge here, and a special thanks to kawazx636! I know my way around these trucks, but I am impressed with your knowledge and have learned more than a few things here .....
10-14-2014, 08:15 AM
#5
Thanks lledwod! You are 100% correct about aftermarket gaskets - Toyota gaskets, seals and bearings are your best bet, but there are other products out there that I trust for certain things - Like Marlin Crawler's EcoSeal for inner axle seals and what ever gasket kit I got from Engnbldr (I'll check tonight when I get home). Bottomline, cork sucks! Whoever thought it would be a good idea to use cork for gaskets should be shot.
And yes, you can use a gasket maker on an oil pan. Problem that most people have is that they use the wrong kind of gasket maker that doesn't hold up against oil and fuel and they don't properly prep the mating surfaces. Right Stuff is perfectly find to use on the oil pan. I actually use it in addition to a oil pan gasket to help seal up where the timing cover and rear seal retainer meet the block and the surface of the oil pan to help prevent leaks in those areas.
And yes, you can use a gasket maker on an oil pan. Problem that most people have is that they use the wrong kind of gasket maker that doesn't hold up against oil and fuel and they don't properly prep the mating surfaces. Right Stuff is perfectly find to use on the oil pan. I actually use it in addition to a oil pan gasket to help seal up where the timing cover and rear seal retainer meet the block and the surface of the oil pan to help prevent leaks in those areas.
10-14-2014, 09:14 AM
#6
Registered User
I think the later 22R's and RE's had a flat mating surface on the oil pan, where the pre-84 trucks have that annoying ridge on the surface. The later ones actually call for FIPG for the oil pans, but because of the surface of the early ones, they call for the cork gasket. But no, the cork doesn't seal well.
Like Dave said, I think you can get gasket maker to work, you just need know what you're doing. I didn't really know what I was doing when I did mine, and though it started leaking a bit, it leaked way less than the cork gasket did.
On solid front axle Toyotas, the oil pan slides right out. You don't have to remove anything else.
10-17-2014, 02:58 PM
#7
Thanks for the input, all of you.
Now I have something I'm afraid to swallow. The valves seemed to be making noise, so I adjusted them, hoping it would go away. Well, the noise persists. It seems to be coming from the bottom end. A light knocking. I got kind of depressed after hearing that noise still. So although it appears to be a 130,000 miles truck, it was obviously severely neglected at some point during it's life.
The quantity of hardened oil crustiness under the valve cover is further proof that these were 'hard miles'!
So if a connecting rod is knocking, it's probably being hard on the main bearings too, which means more slop and vibration is likely to be put on a new seal if I were to install one. So I'm wondering if I should even bother pulling the transmission and all that driveline stuff, or rather save for a rebuild and do it from the front side out.
Anyone know what I' might expect to pay for rebuilding service if I do all the removal and reinstallation myself? I'm just not so handy when it comes to mic'ing and boring engine cylinders and bearings of this size or grinding valves. I could do the timing chain kit myself though.
I'll probably put this off until late winter or spring since I was hoping to play in the snow (hoping it snows in NC) and all that.
I also need to check how dirty the new oil I just put in it is getting. I seem to remember it being dirtier sooner than in my '83... It's only been a few days so I'll have to check again, but if it's dirty way too soon, I'll suspect piston slap. In any case, a rebuild this year for this engine is imminent.
Trending Topics
10-17-2014, 07:54 PM
#8
These 22R engines are the easiest engines that I have ever rebuilt. If I had all the parts laying out in front of me and ready to go, I could easily build one in an afternoon - I don't even need a FSM to do it. If you follow the steps in the FSM then you'll have no problem rebuilding it yourself if you have the tools; more importantly, some of the specialty tools. Obviously, unless you own a machine shop, you're not going to do the machine work yourself so you'll be looking at anywhere from $250-400 for your block work depending on the shop and work needed. I paid $375 for my lower end work but that included bored .030 over, honed, decked, fitted bearings to the rods, crank, wrist pins and pistons, installed freeze plugs, cleaned and acid dipped. Then if you decide to do the head, you're looking at A minimum of $300 to do everything. Then you'll need a rebuild kit which will run you around $250 from engnbldr. If you need a new cam tack on another $100. Bad crank? Another $200 (it's cheaper to buy one than to have it ground and polished). So IF you're lucky you'll be spending around $600-700 to do just the lower end and rebuild kit, but if all hell has broken loose and you need head work and everything else you could easily run the bill up over $1,200 - and that's if YOU built it. Guaranteed $70/hour if you have a mechanic build it; minimum 4 hours.
So if you aren't too savvy with a wrench and you think your engine is pretty bad off, you might be better off buying a reman/rebuild engine. Ask around, there are plenty of companies thay rebuild these engines, but you'll want to make sure you find a good one. That's my 2�
So if you aren't too savvy with a wrench and you think your engine is pretty bad off, you might be better off buying a reman/rebuild engine. Ask around, there are plenty of companies thay rebuild these engines, but you'll want to make sure you find a good one. That's my 2�
10-17-2014, 07:56 PM
#9
Also, to give an even better idea... my engine wasn't all that bad, but I still racked up over $1,700 in parts and machine work on my rebuild. Granted, it isn't your typical slap it together rebuild, but it was still hefty on the wallet
Last edited by kawazx636; 10-20-2014 at 07:52 AM.
10-18-2014, 05:33 AM
#10
No, I think I could do all that stuff. I just haven't done things like use plasti-gage to check a crank before, and have a bit of grey area on what the machine shop is supposed to do and what I'm supposed to do/ when to buy what I have to buy. I want the process to go smoothly.
For example, I want to get the pistons taken care of. Do I take the engine apart and have shop measure bore and then decide what pistons to get and order them? Same for all he bottom end stuff. Do I usually need to provide spec sheets so they know what to measure?
I started out building single cylinder motorcycle engines, which is pretty simple. I even rebuilt an old Volvo transmission. I think I just need a little guidance in the sequence of how to go about it.
Thanks.
10-18-2014, 12:50 PM
#11
I think I have a course of action planned for the disassembly, cleaning, and inspection of the engine, followed by parts purchase(s) and trip to the machine shop.
what I'd still like to know is 1. where to get a crank for $200 as mentioned in case that becomes needed, and
2. photos of people pulling 22rs from their pickups so I know some tips on little odds and ends that may be helpful to know in advance of diving in. Then I can write my own little how-to/ build thread.
Kawazaki, I saw yours and it's really amazing. But you pulled the cab off and I won't be able to do that/ I'm satisfied with a "work with what I have" kind of build, and compared to yours, yes, will be "slap-it-together" by comparison.
Although, I will be cleaning the living hell out of everything, as I have a similar type of OCD, but old bolts polished and cleaned are good enough for me.
10-20-2014, 07:31 AM
#13
The carbed 22r's are easy to pull. Separate from the bellhousing and remove the radiator and the hood. Everything else should be pretty self explanatory. Drain the fluids. There is a drain cock on the drivers side of the block behind the exhaust manifold. (Support the transmission as you lift and slide the engine forward) When you remove the head don't forget the bolt in the front, under the distributer drive gear. It can be hidden under oil.
Have fun and good luck!
Have fun and good luck!
10-25-2014, 09:01 PM
#14
I've probably got my old '83 2wd sold tomorrow, so I'll have funds to rebuild the new '82 4x4. Fortunately I live within biking distance to work and still have a functional truck to drive too.
I'm thinking more and more about buying a reman longblock and saving a lot of time getting that instead of fretting over all the details of rebuilding myself. After a google search led me back here, the best warranty and core return policy lead me to Oregon engine rebuilders. The search led me to a post about someone doing a swap on a 3.0 engine which a lot of people shots own on the idea that the 3.0 was not that great of an engine to rebuild in the first place. A lot of folks also complained of head gasket issues, which left me wondering if they re torqued their head bolts after the first 500 miles.
There is also a place in new jersey that seems to know what they're doing very well, but I like Oregon engine rebuilders because the timing cover is installed which saves me the debate of head installed first or timing cover intstalled first. When I redid the timing chain on the '83, I did not remove the head, and after working as much RTV into the crevices as possible and allowing the RTV to dry for full cure time, still left me with a tiny weep of oil at the corner. I hate oil leaks.
Here and now is the time and place to advise me on engine re manufacturers, I can do the rest...

Thread
Thread Starter
Forum
Replies
Last Post


