‘82 4x4, GM LV3 4.3l Engine Swap
 10-24-2018, 04:28 AM
#21
Registered User
Thread Starter
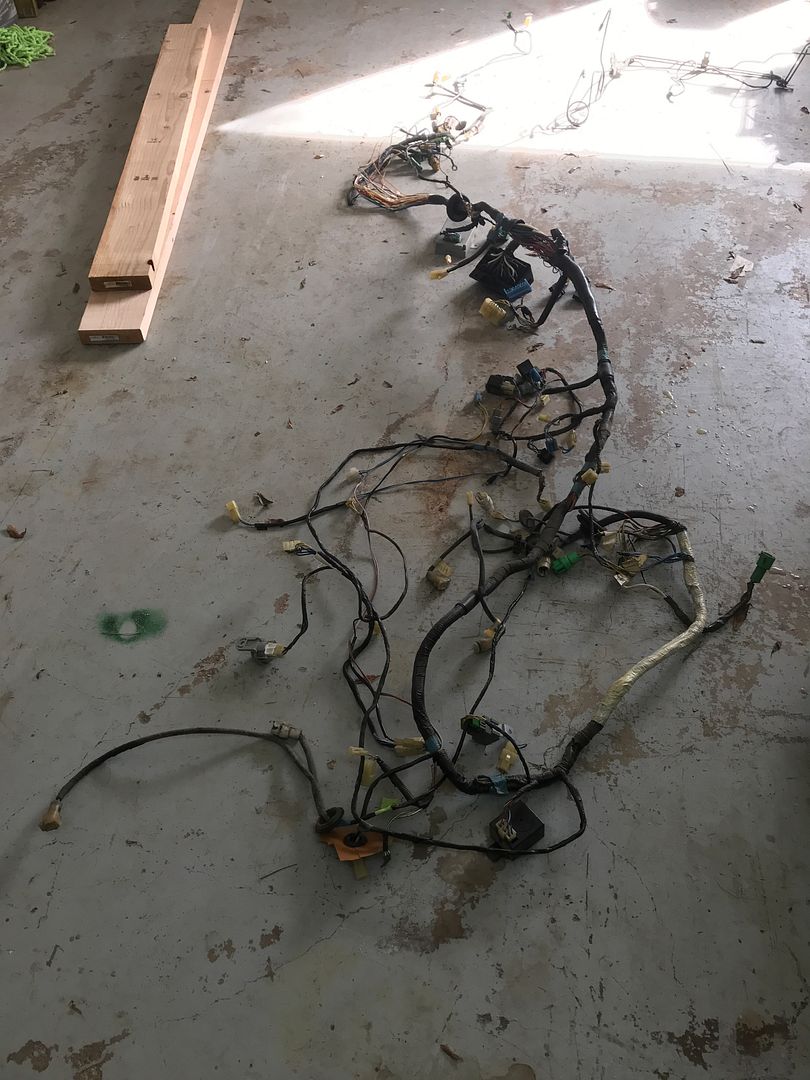
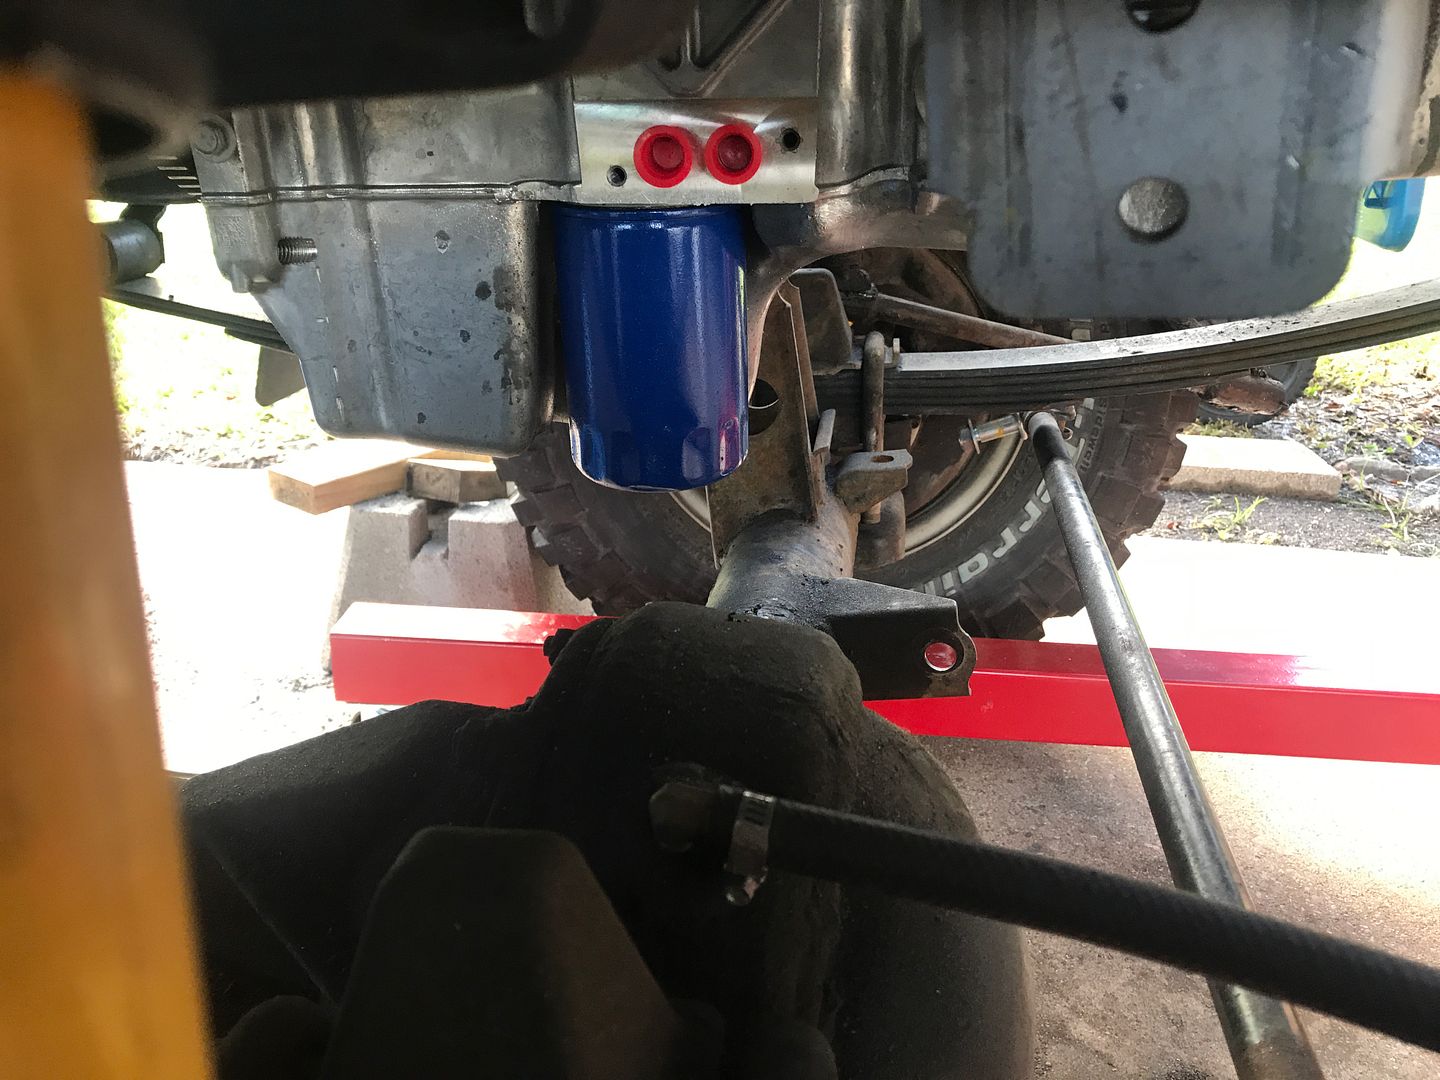
Nope on the harness. I spent an hour trying to follow the different wires I would need and realized it is way above my pay grade. Im definitely going to order a stand alone harness from Howell. I ordered the Dirty Dingo setup. Stuff is rolling in every day or so. I’m finally going to get that old 22r out of there in the morning. I’ll have two of my sons to help. I ordered The OME add a leaf spring for my CS008F A/B. Hopefully that will be enough spring rate combined with a 5 inch shackle to give it enough height to clear the oil pan. Depending on the test fit I may have to drill the spring perch to move the axle forward a bit.
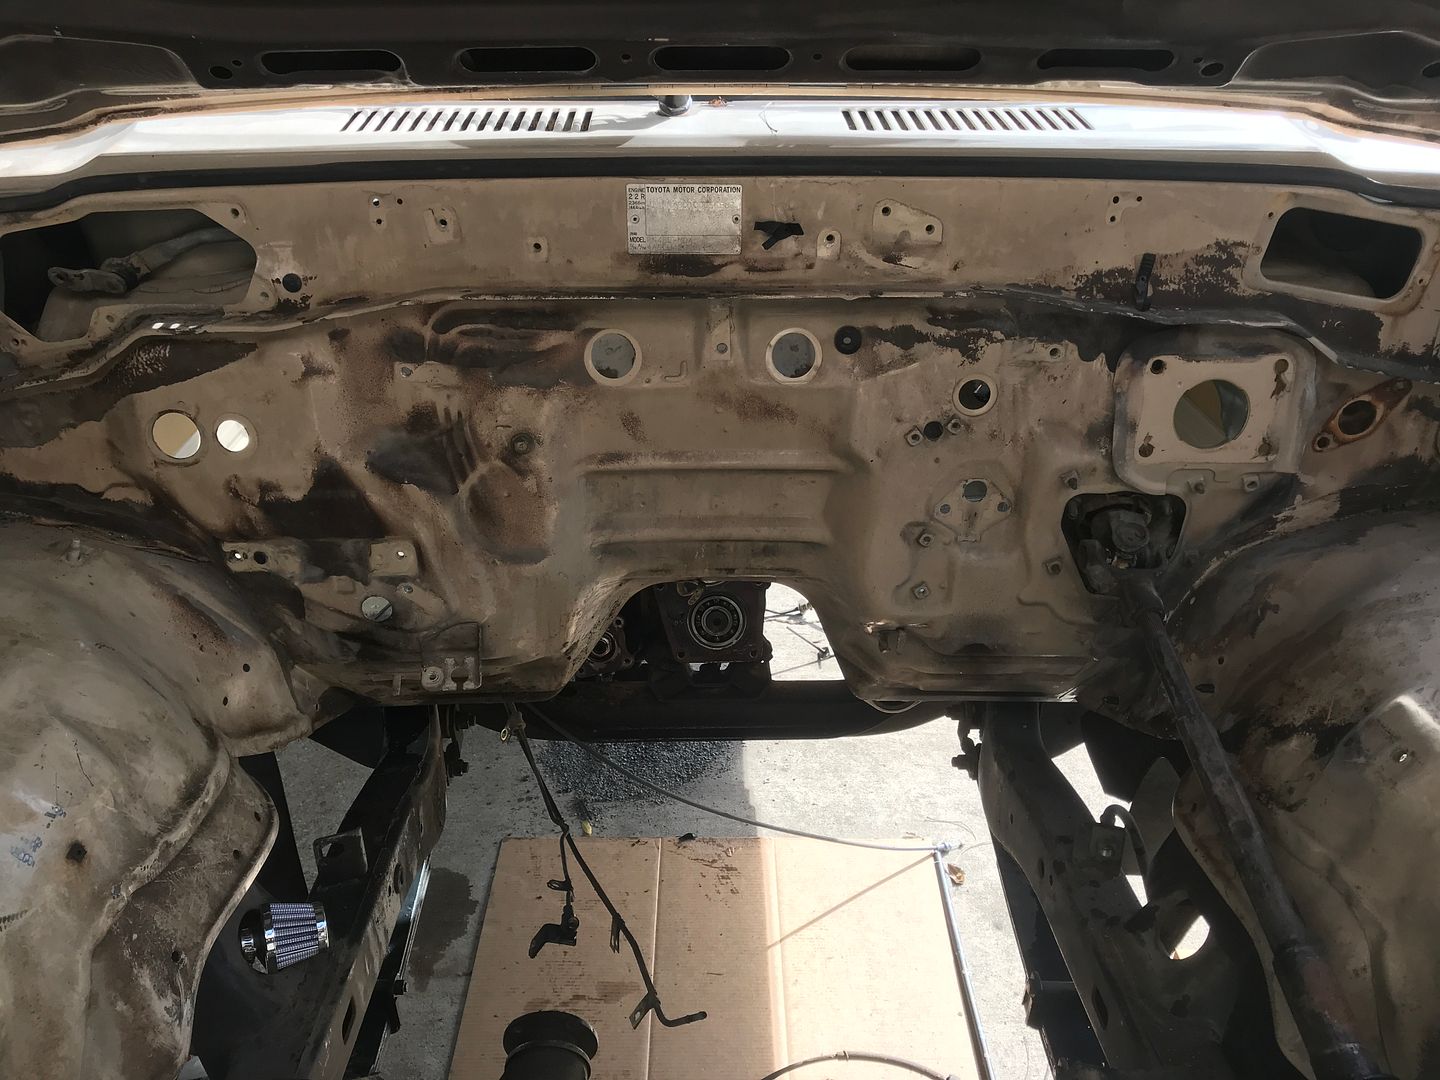
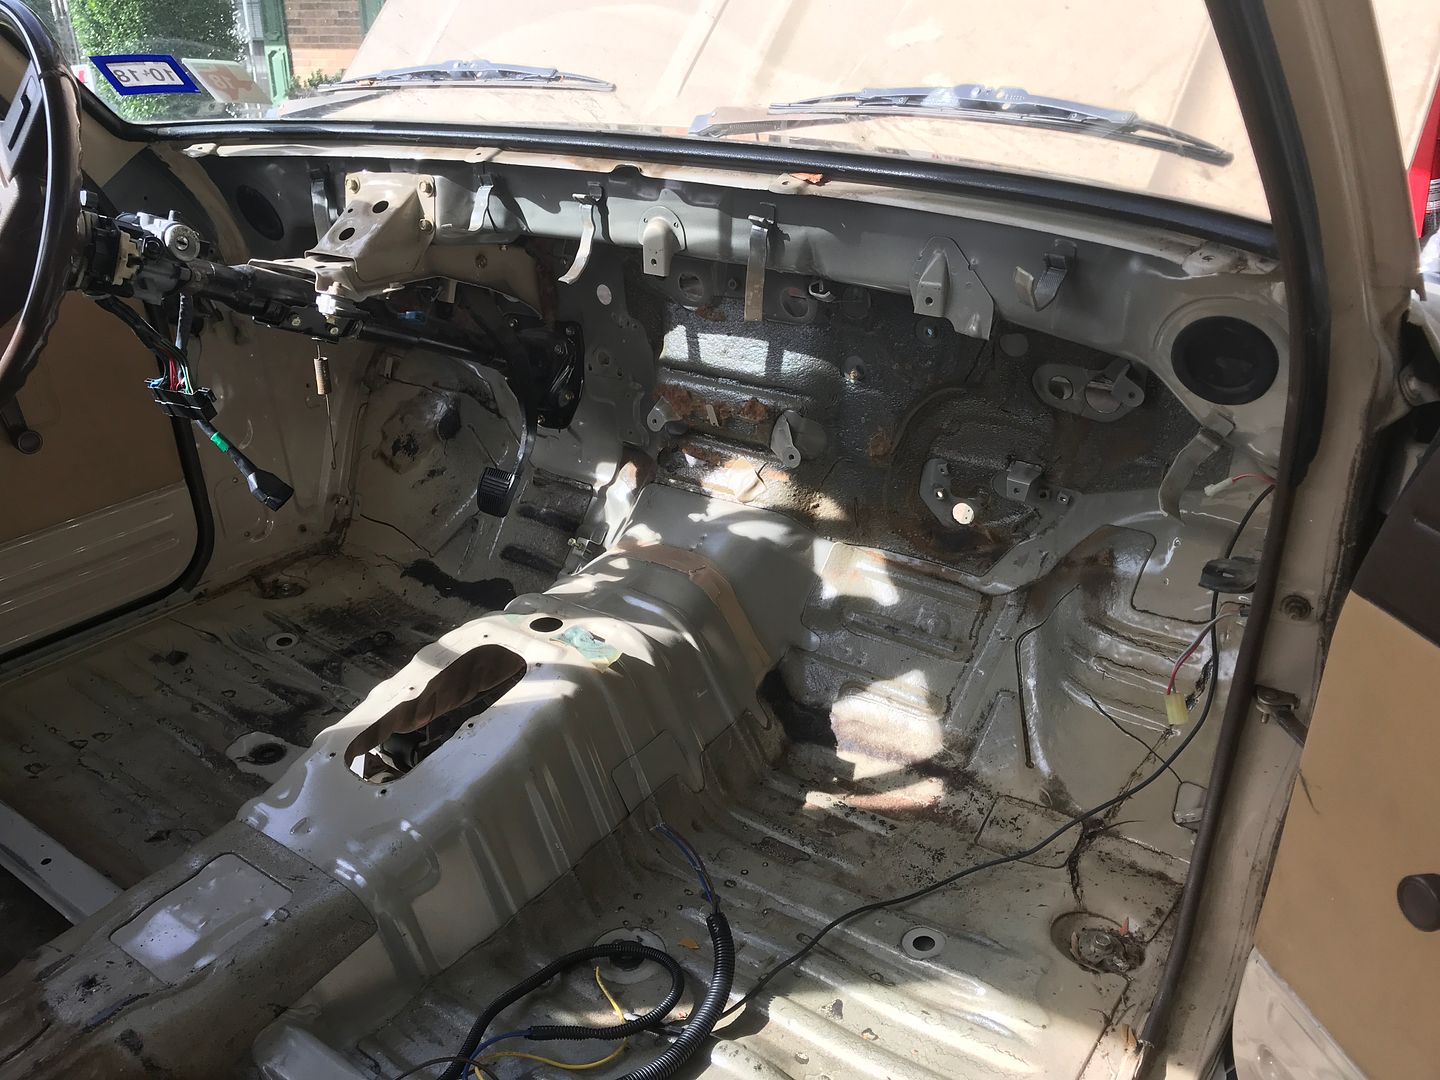
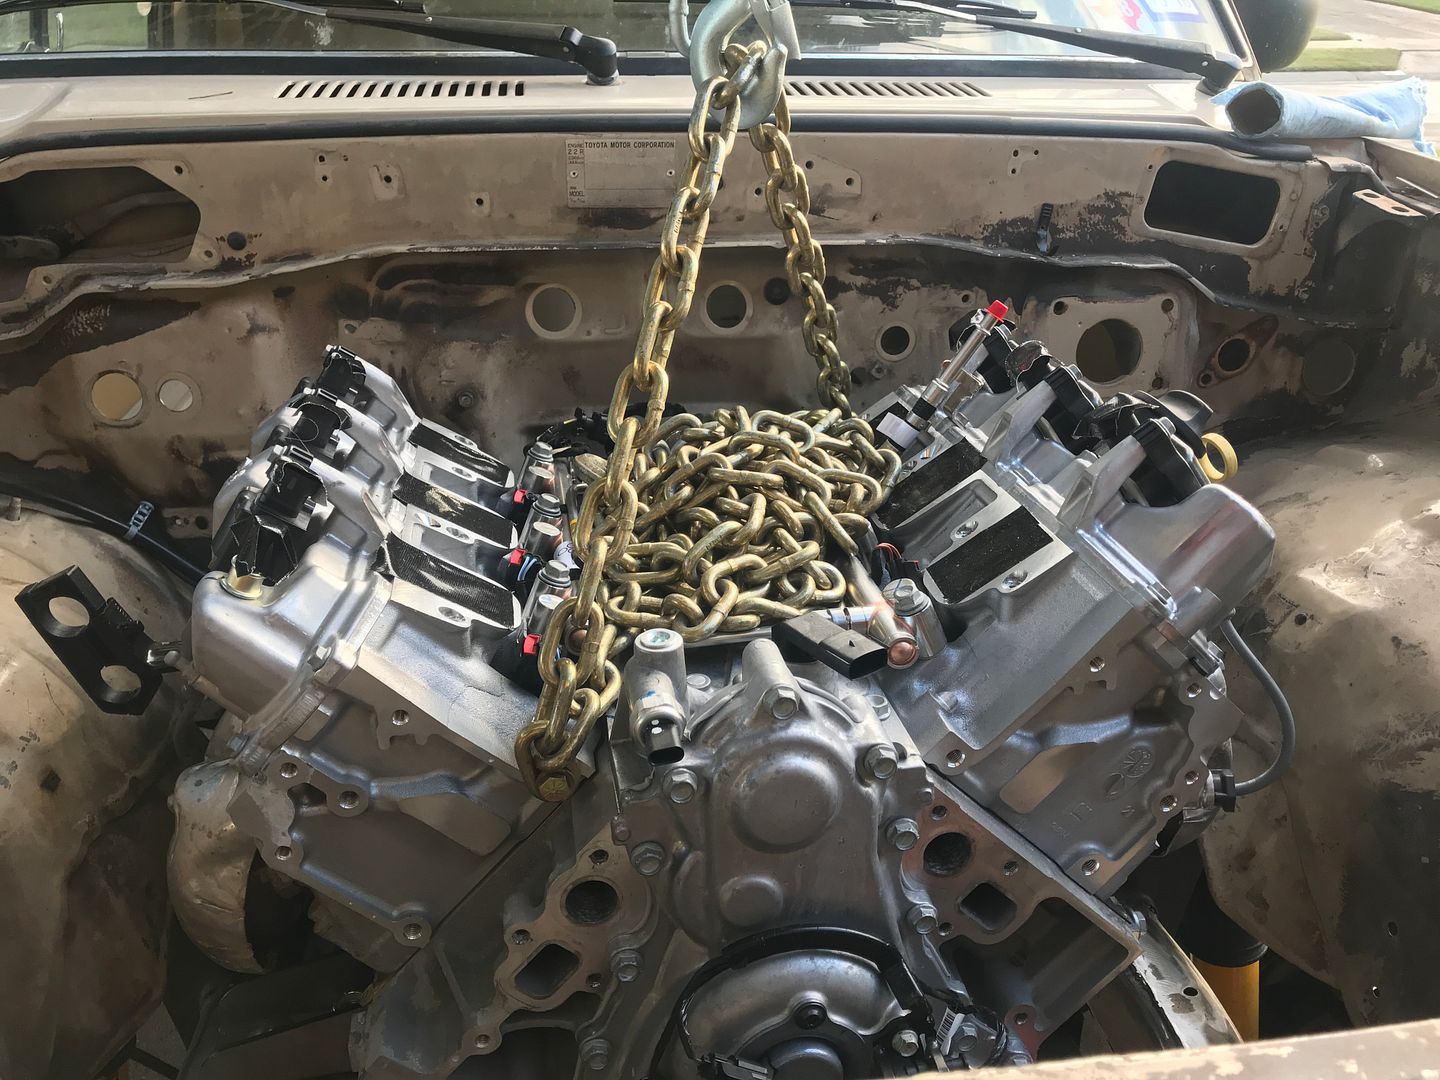
Ha! I’ve been working on this post for days now. I just couldn’t find the time to complete it. We finally had a break in the weather and I took much advantage of it. The motor is out, along with everything else in the engine bay and interior. Just the steering column is left. I cut the 22r motor mounts out and just need to grind the welds down to the frame. I’m calling that mobile wet blaster when I finish doing that.
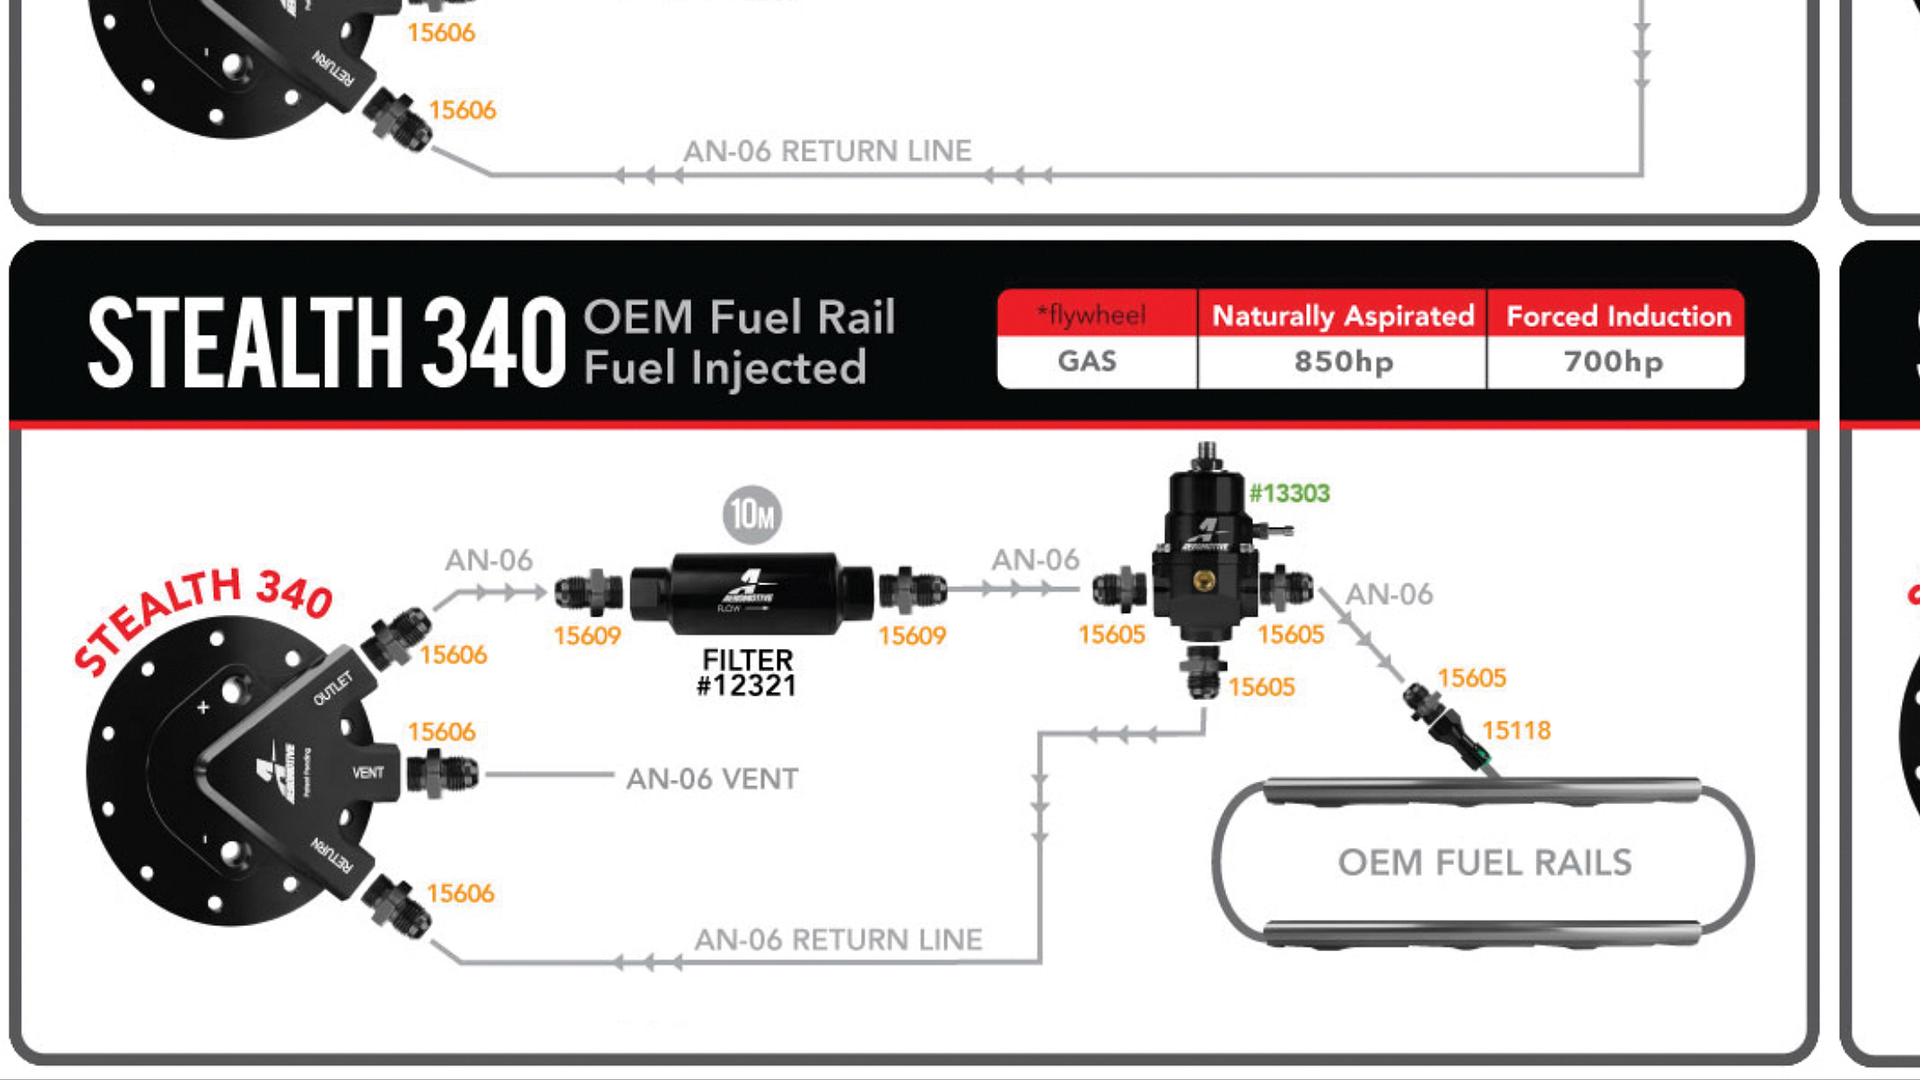
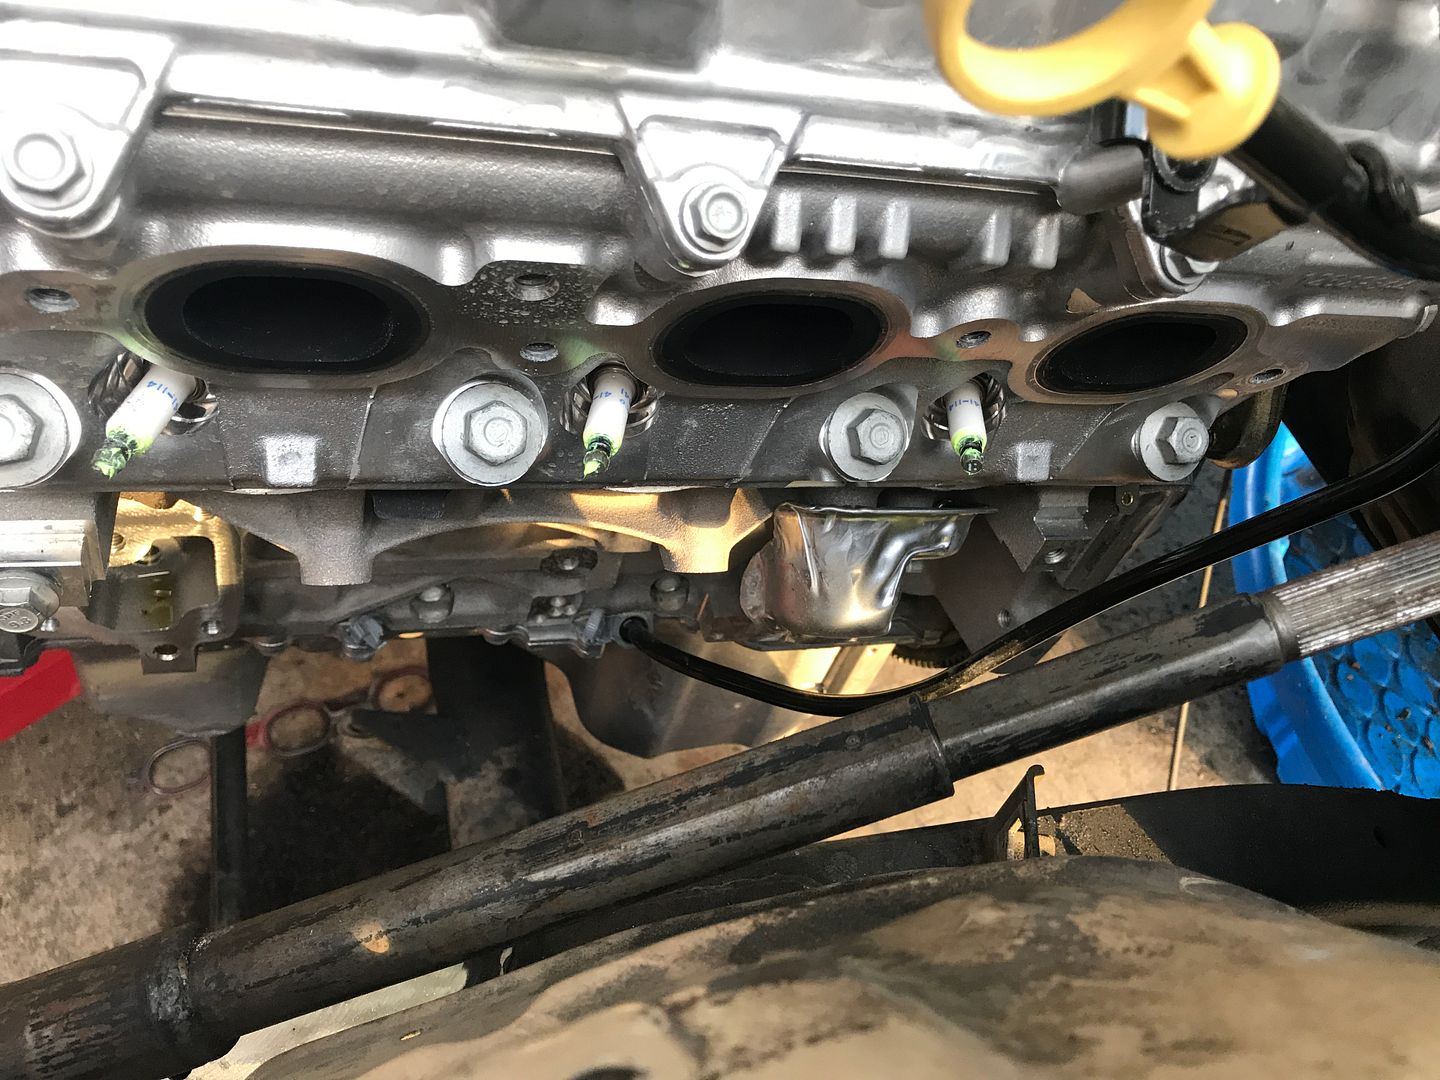
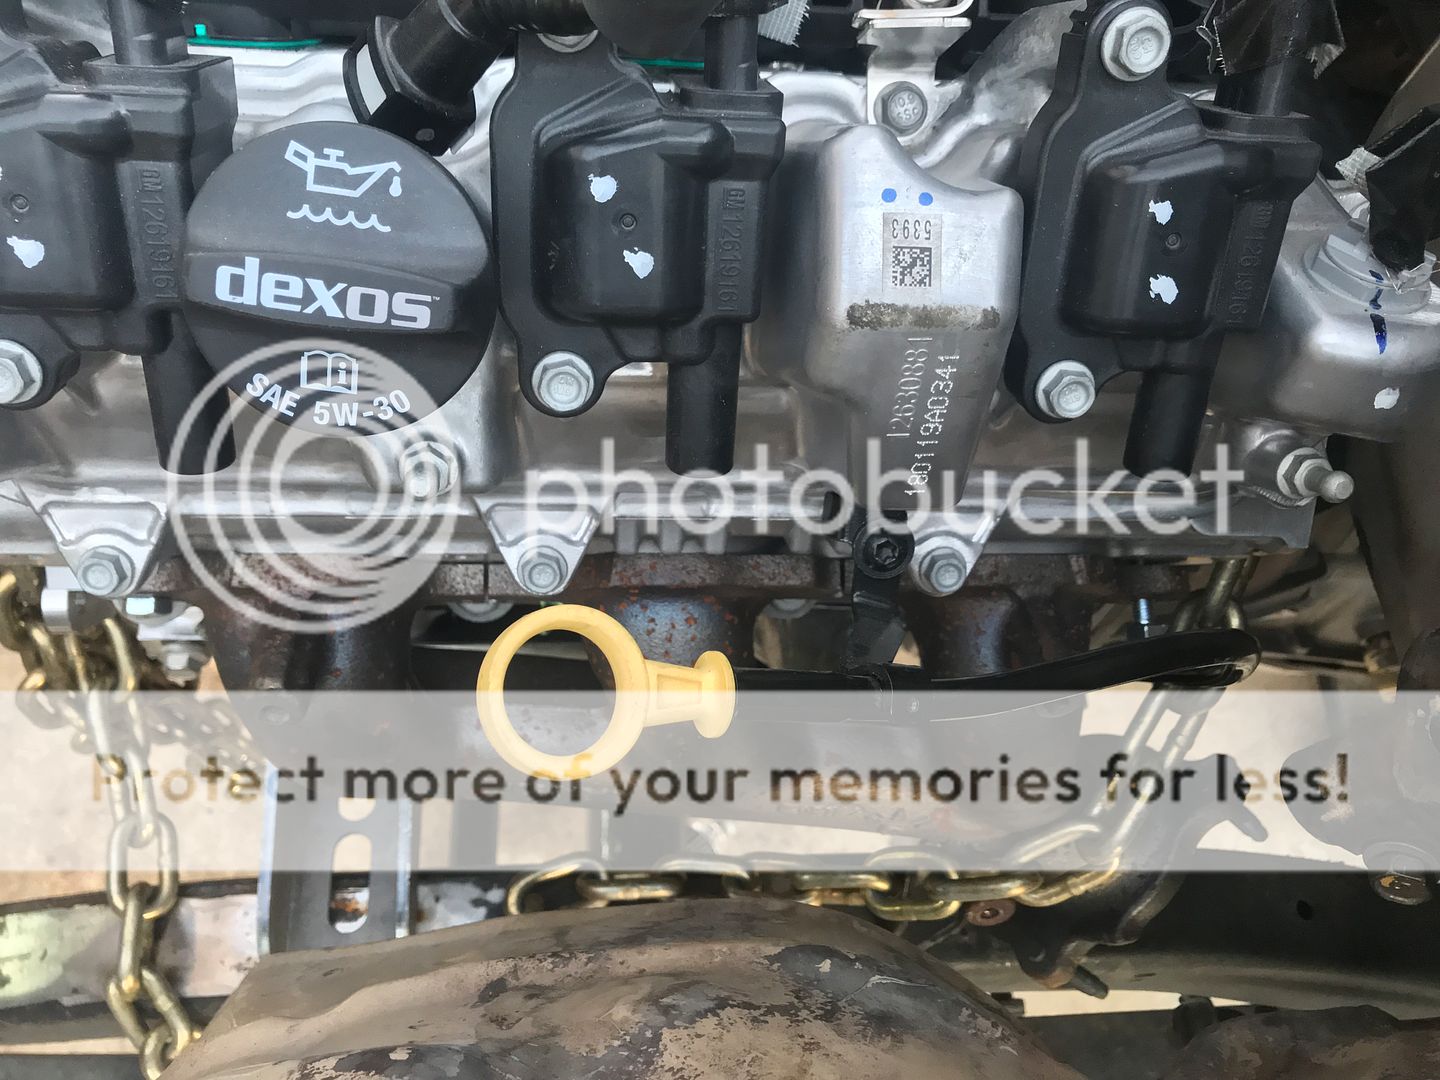
On the fuel delivery for new motor, the factory returnless system is not going to happen. The programming from Howell EFI will need a return style setup. Aeromotive makes a great one......it just costs an arm and a leg. Here are some pics.
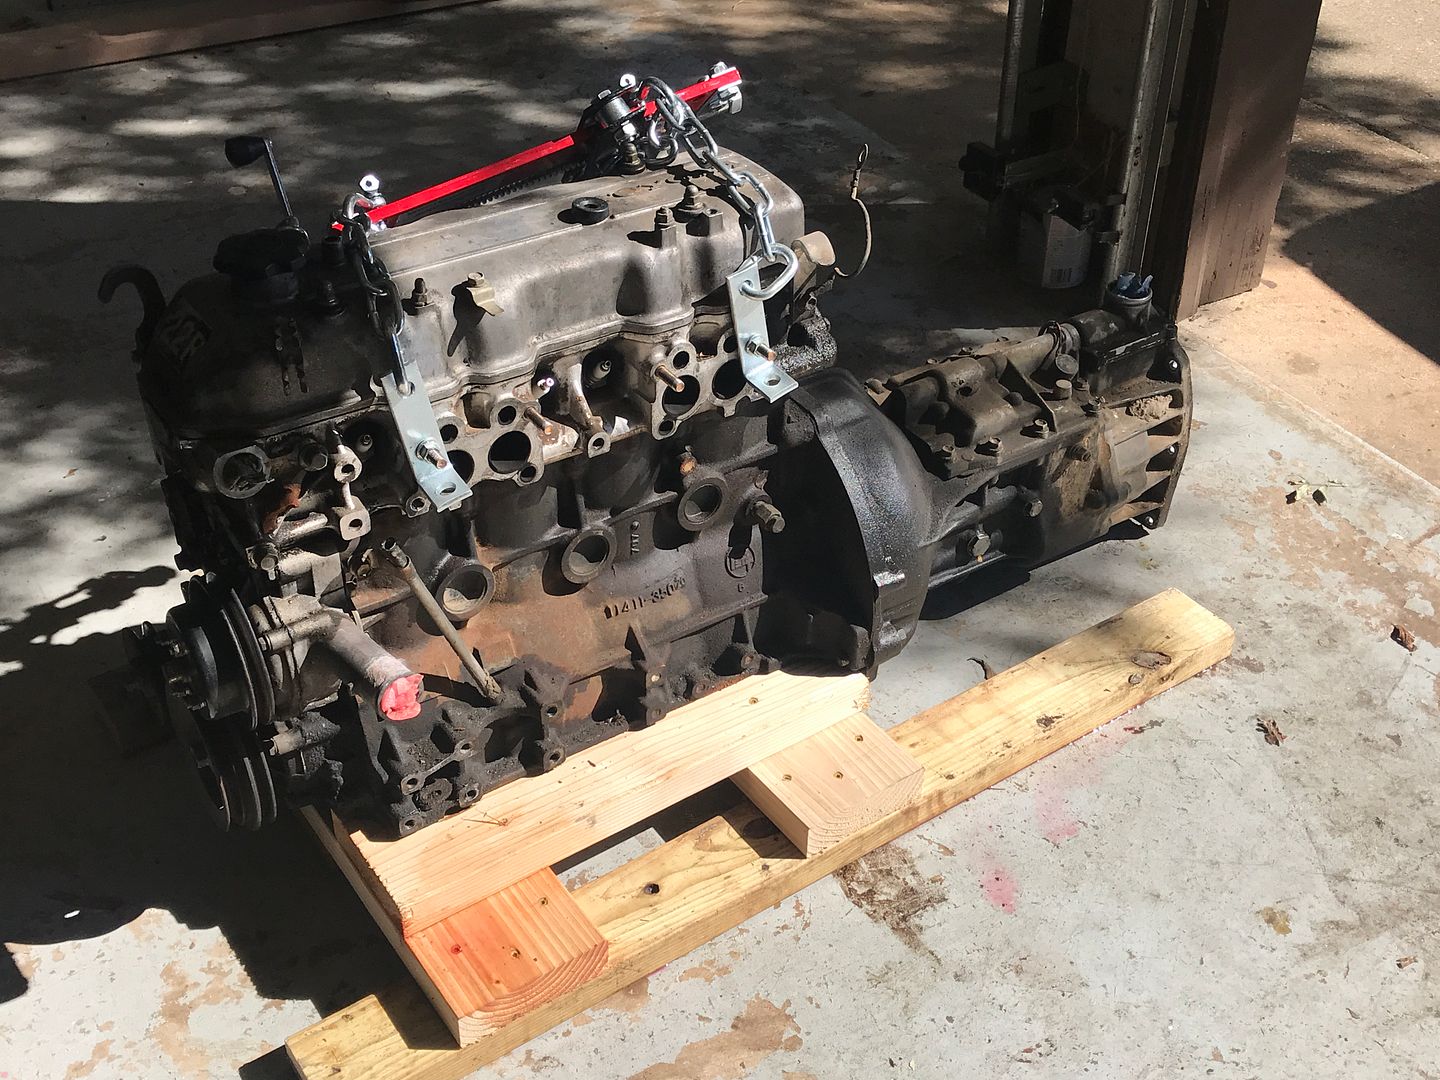
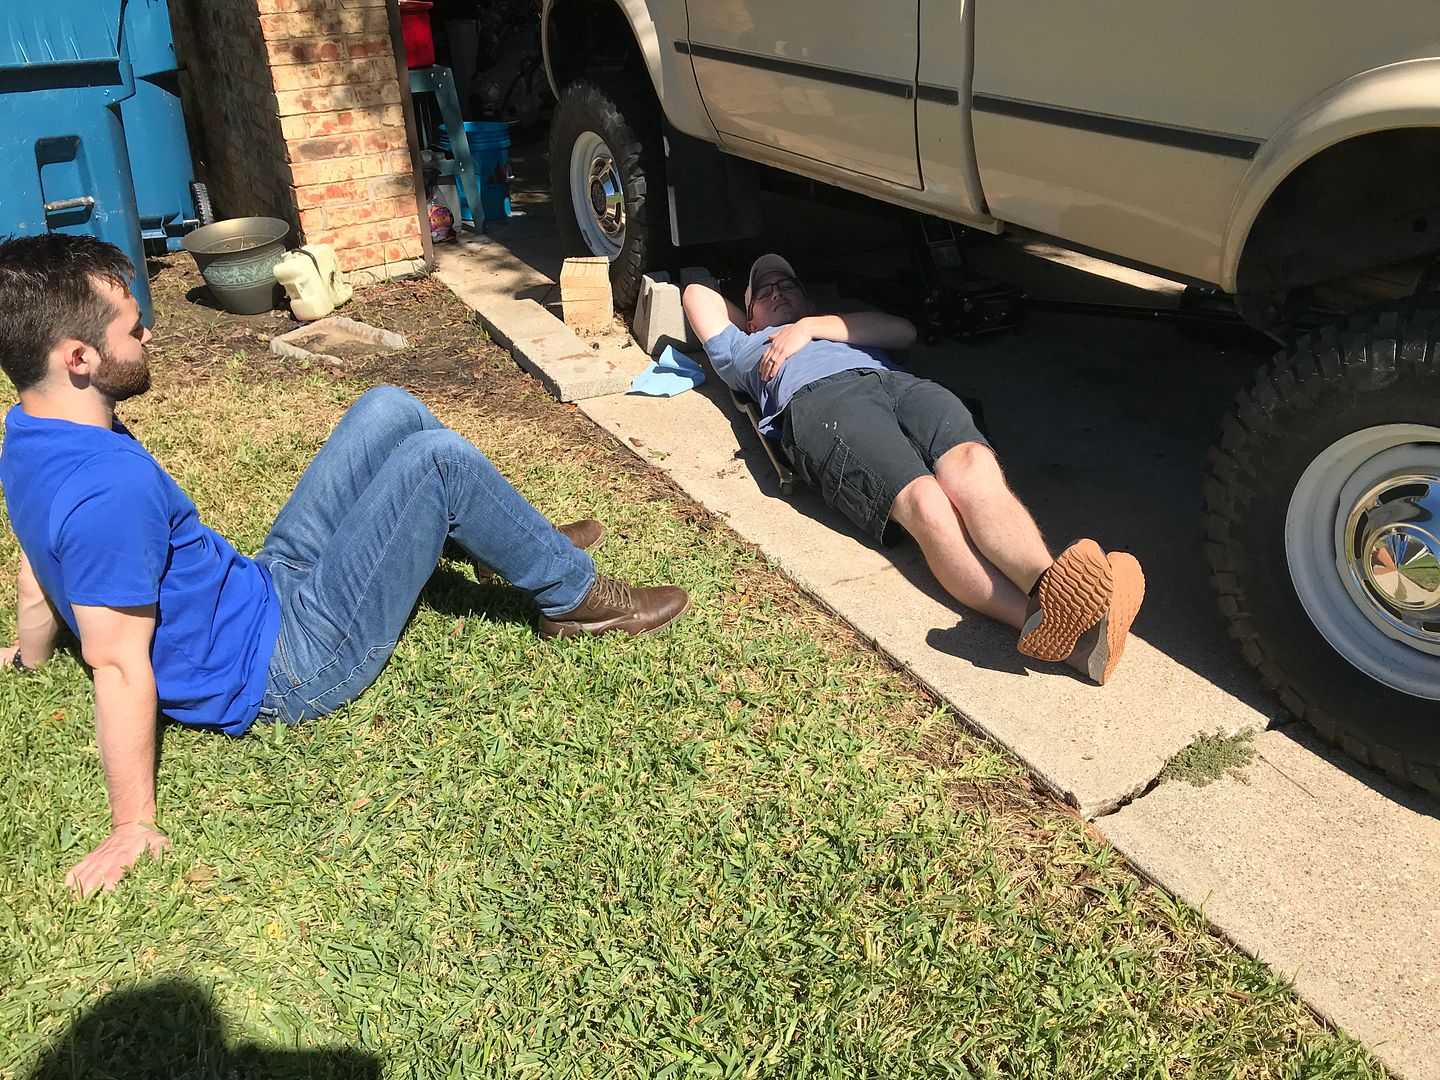
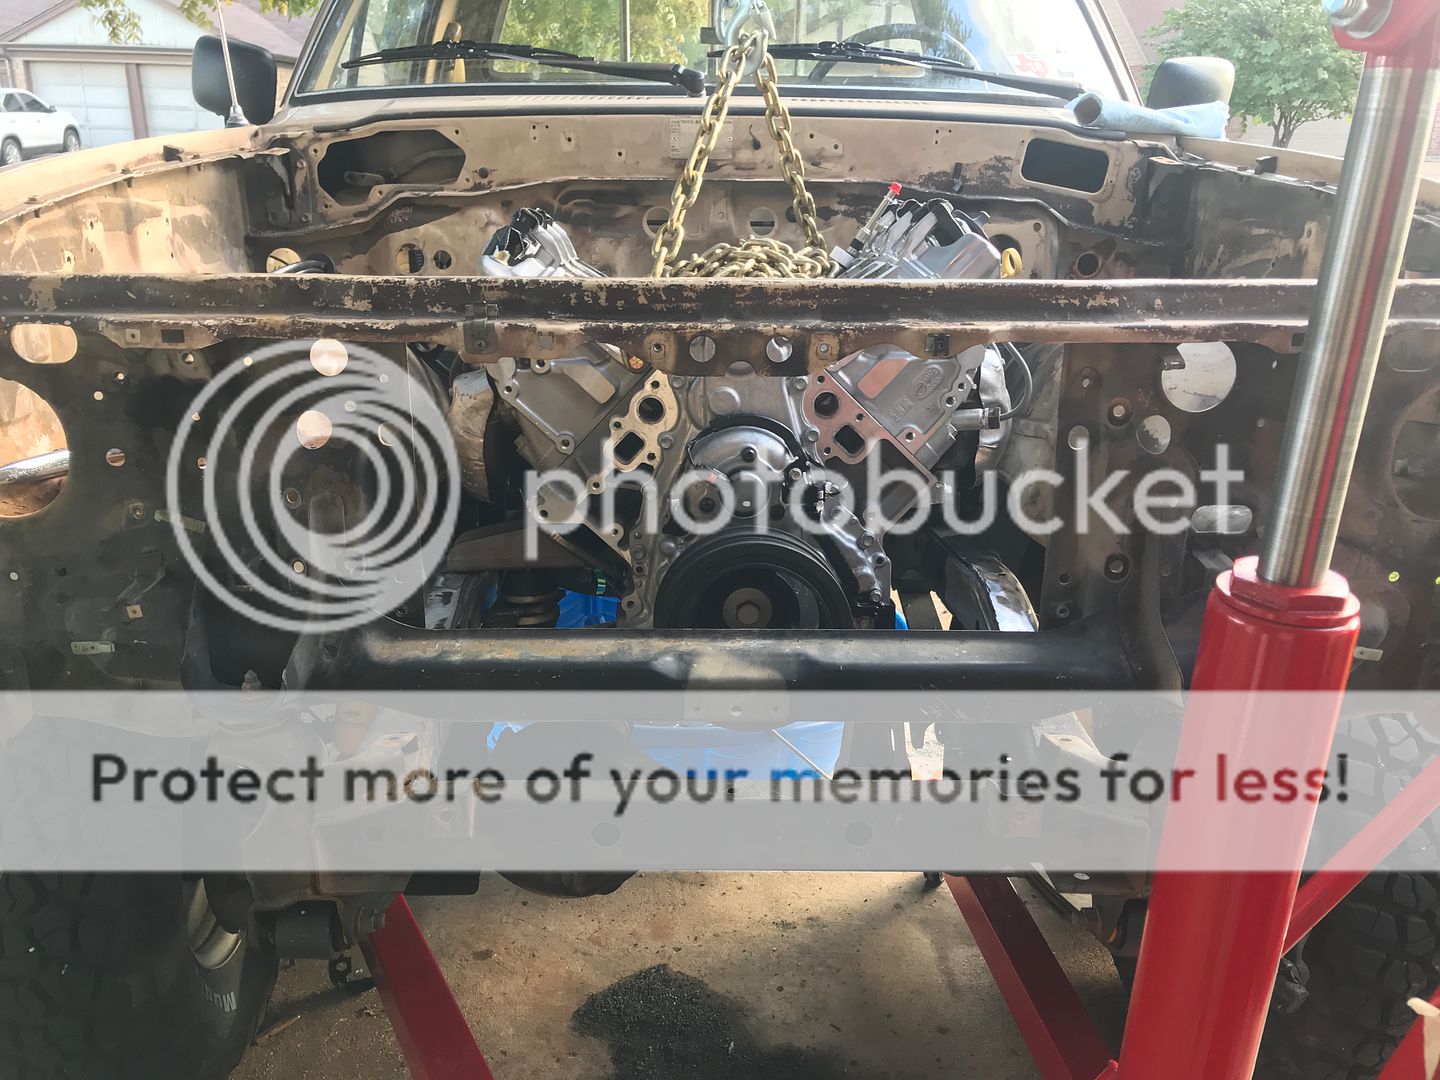
Two of my sons helping to pull the motor
Ha! I’ve been working on this post for days now. I just couldn’t find the time to complete it. We finally had a break in the weather and I took much advantage of it. The motor is out, along with everything else in the engine bay and interior. Just the steering column is left. I cut the 22r motor mounts out and just need to grind the welds down to the frame. I’m calling that mobile wet blaster when I finish doing that.
On the fuel delivery for new motor, the factory returnless system is not going to happen. The programming from Howell EFI will need a return style setup. Aeromotive makes a great one......it just costs an arm and a leg. Here are some pics.


Two of my sons helping to pull the motor


 10-25-2018, 05:13 PM
#22
Registered User
Thread Starter
Starting the day off right.
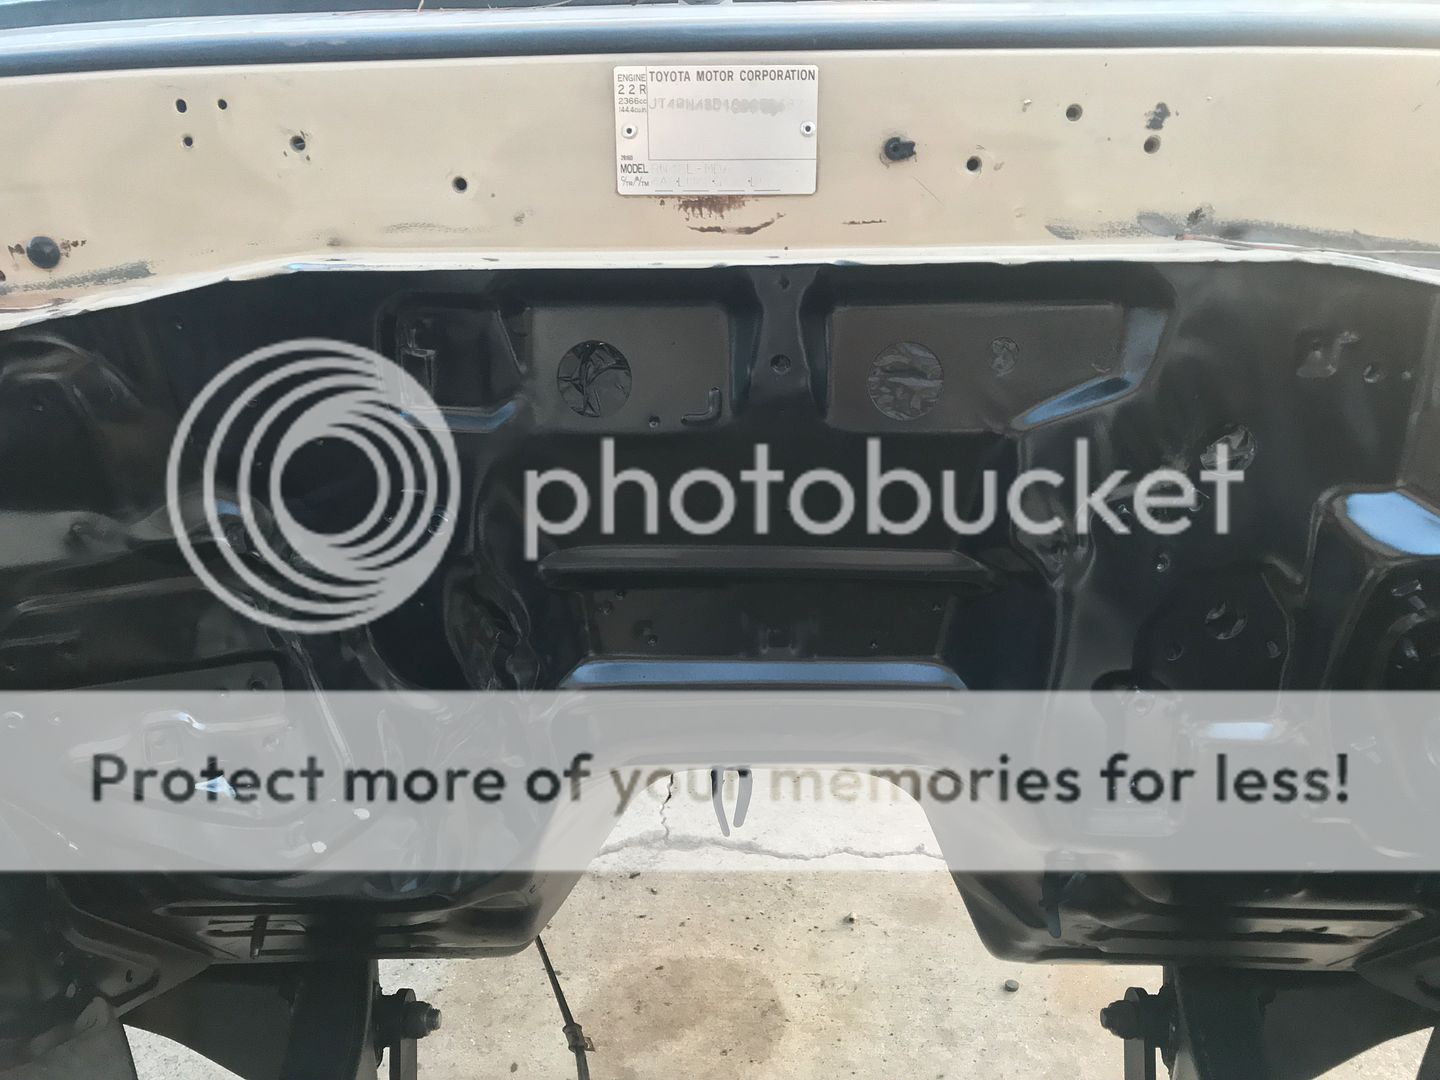
I finished prepping the frame and removing the motor mounts.
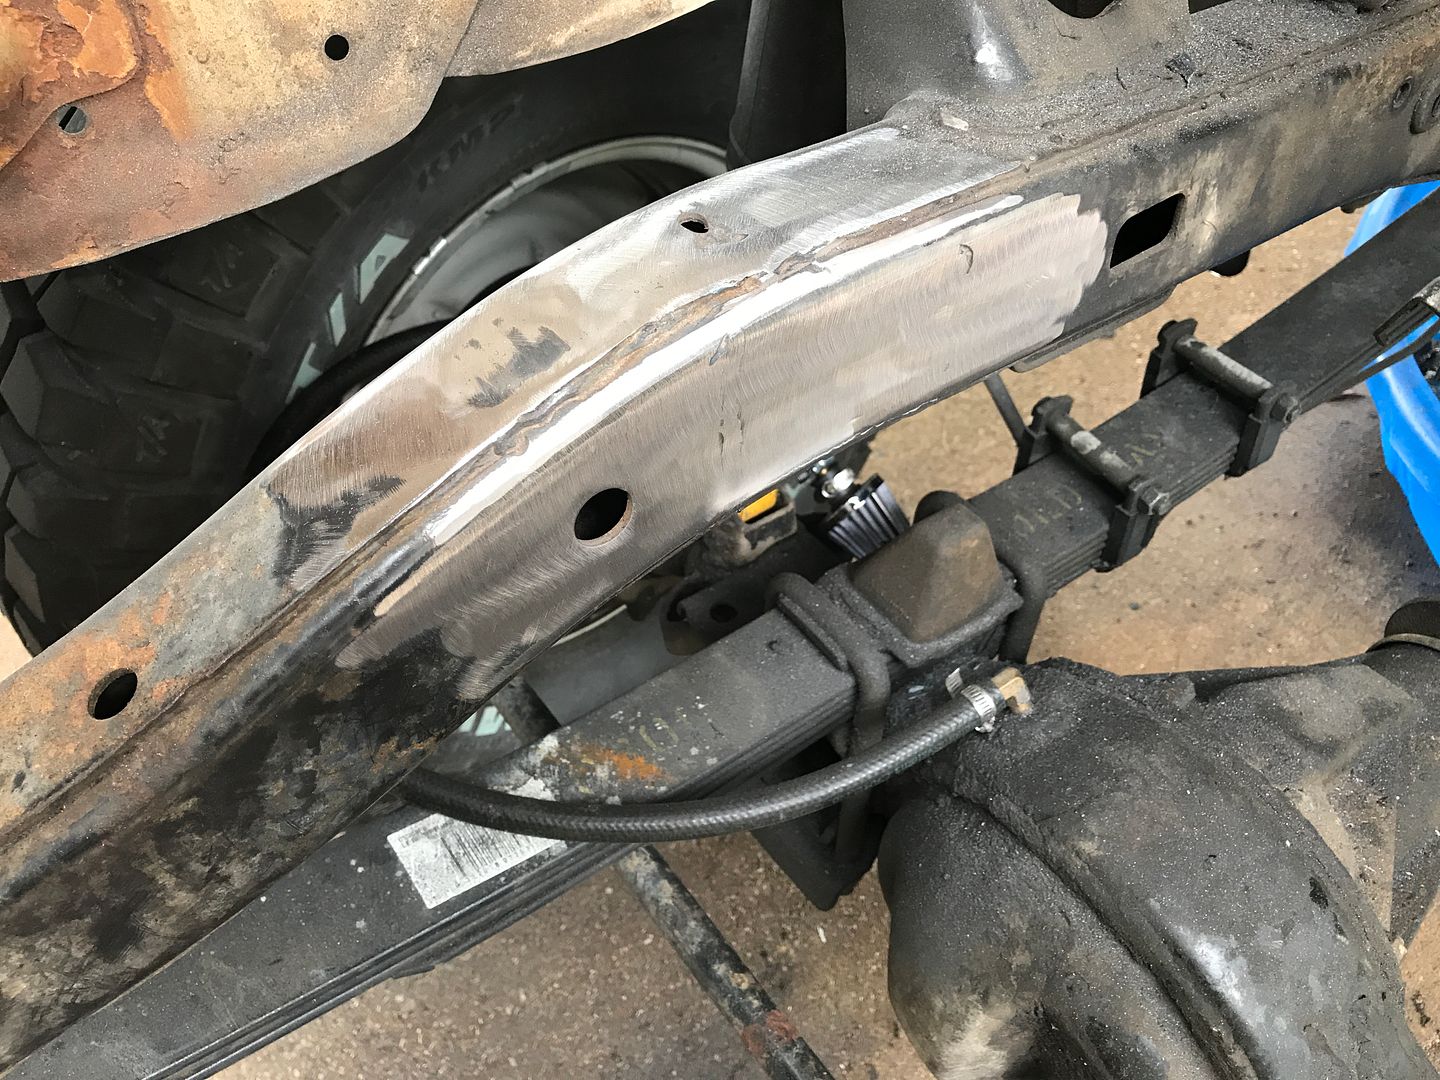
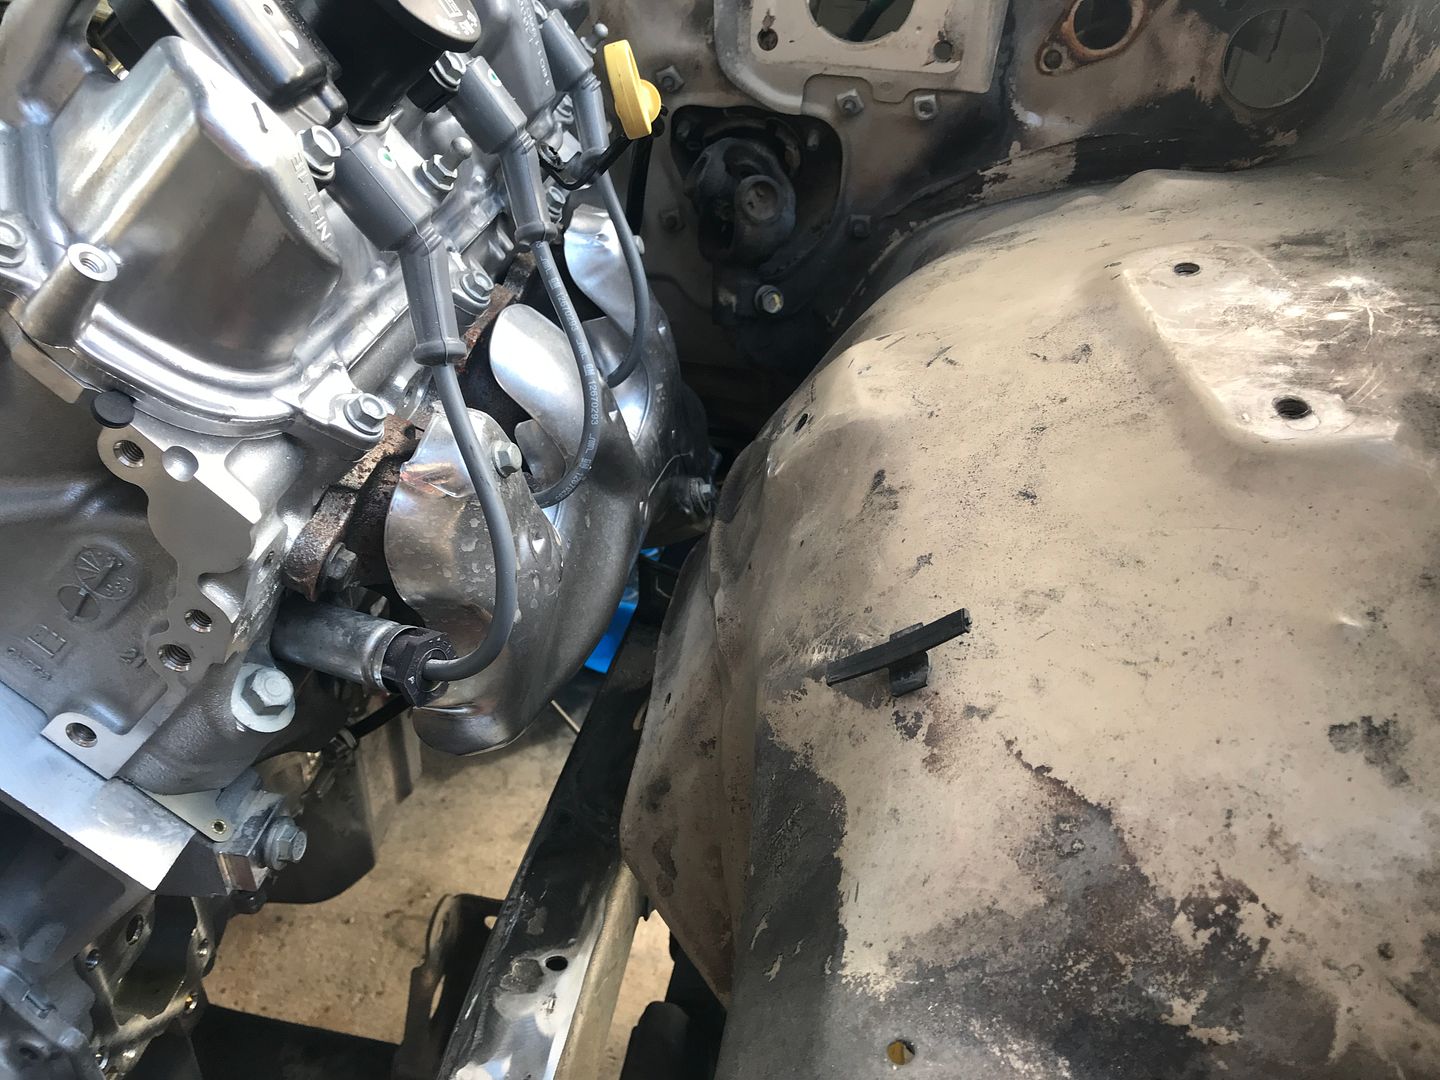
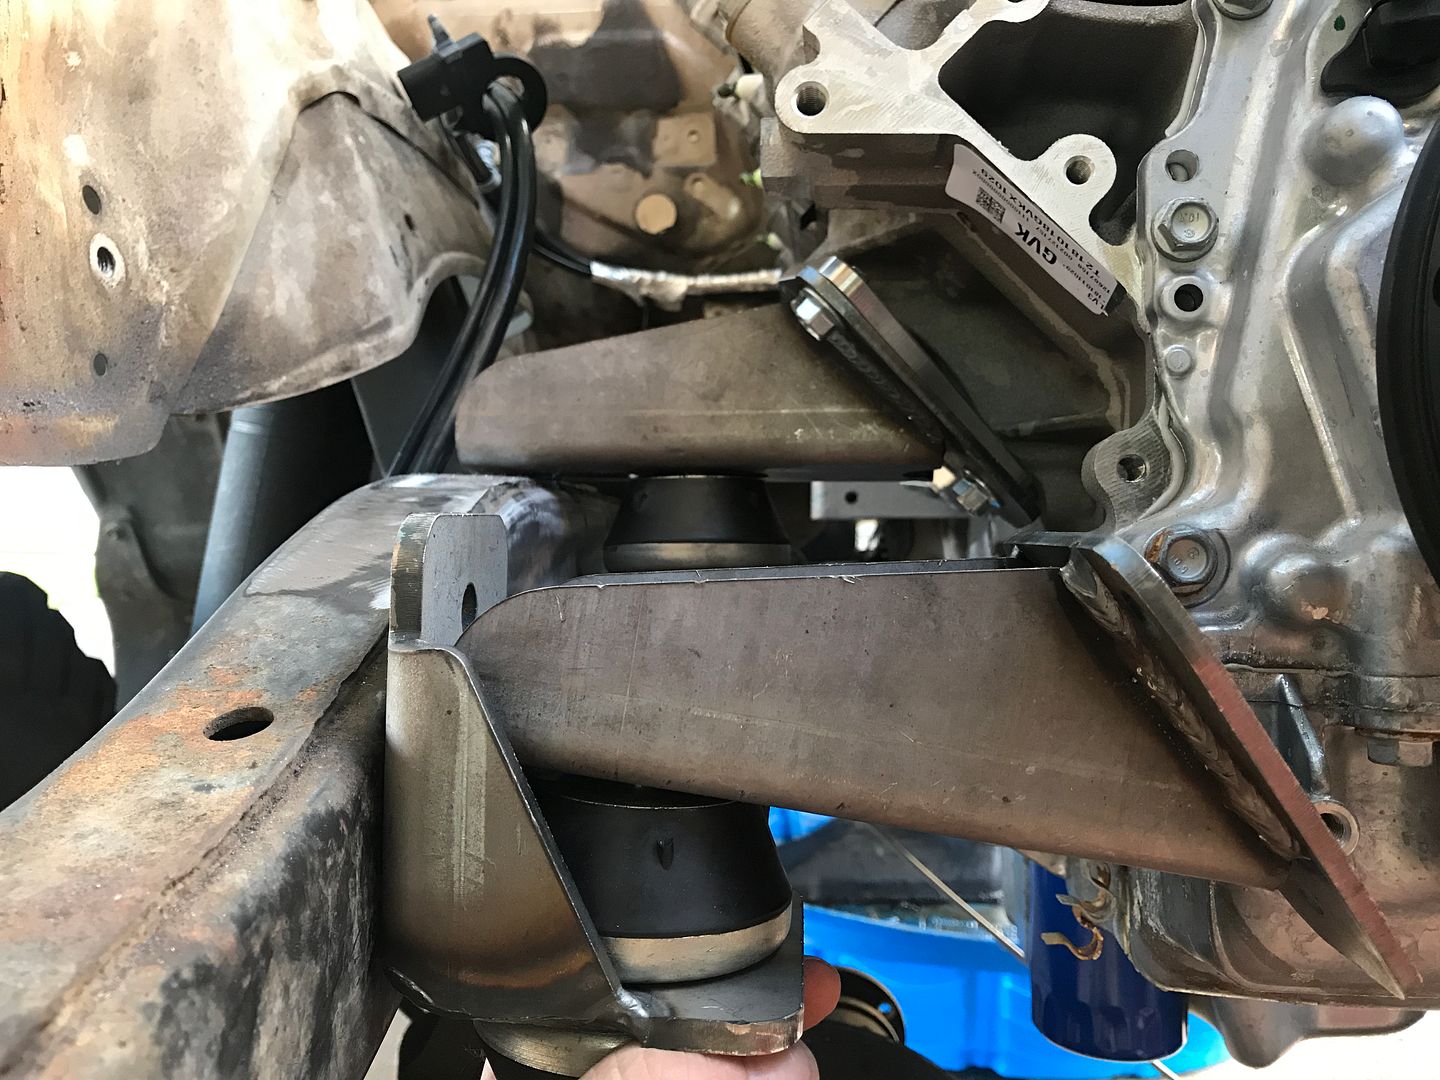
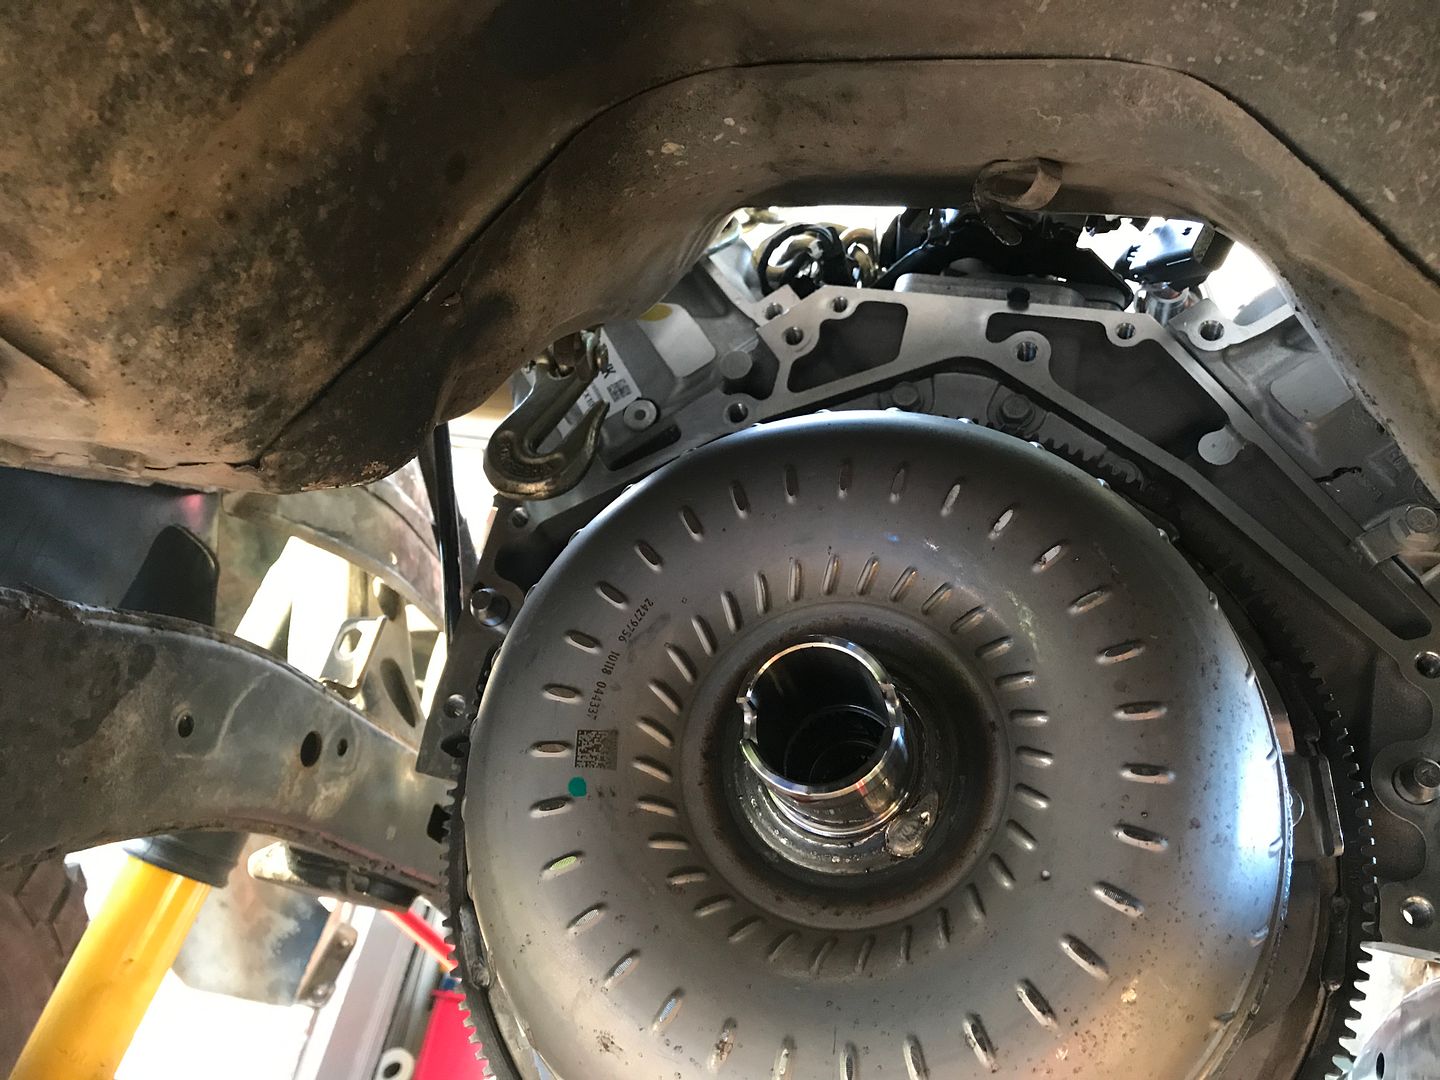
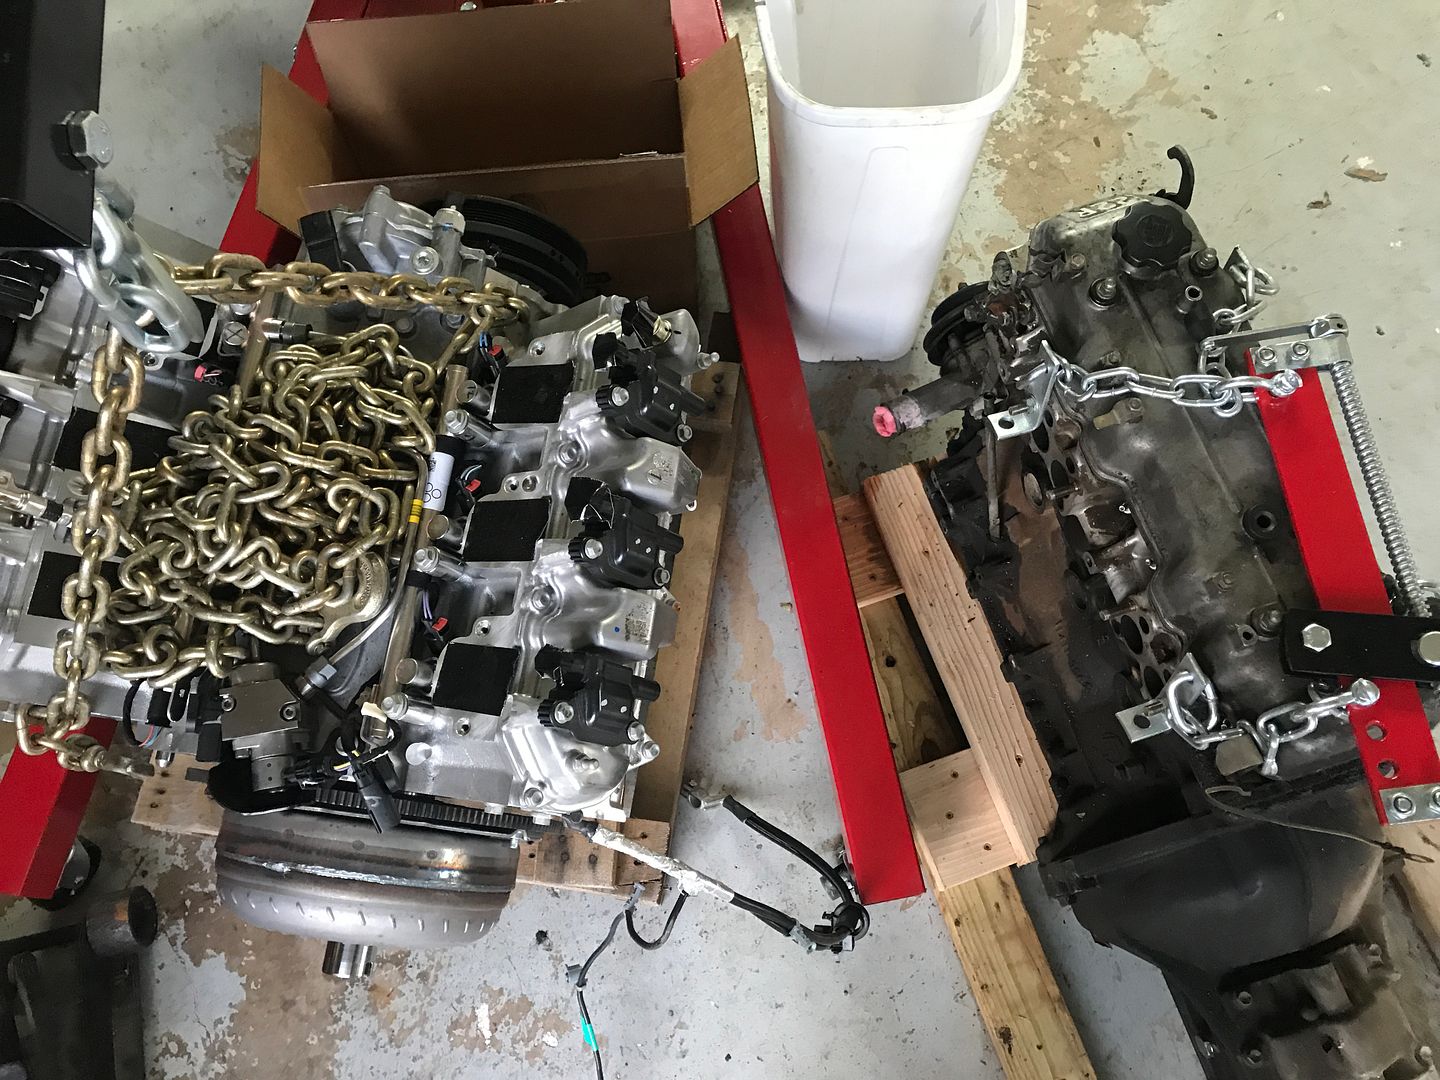
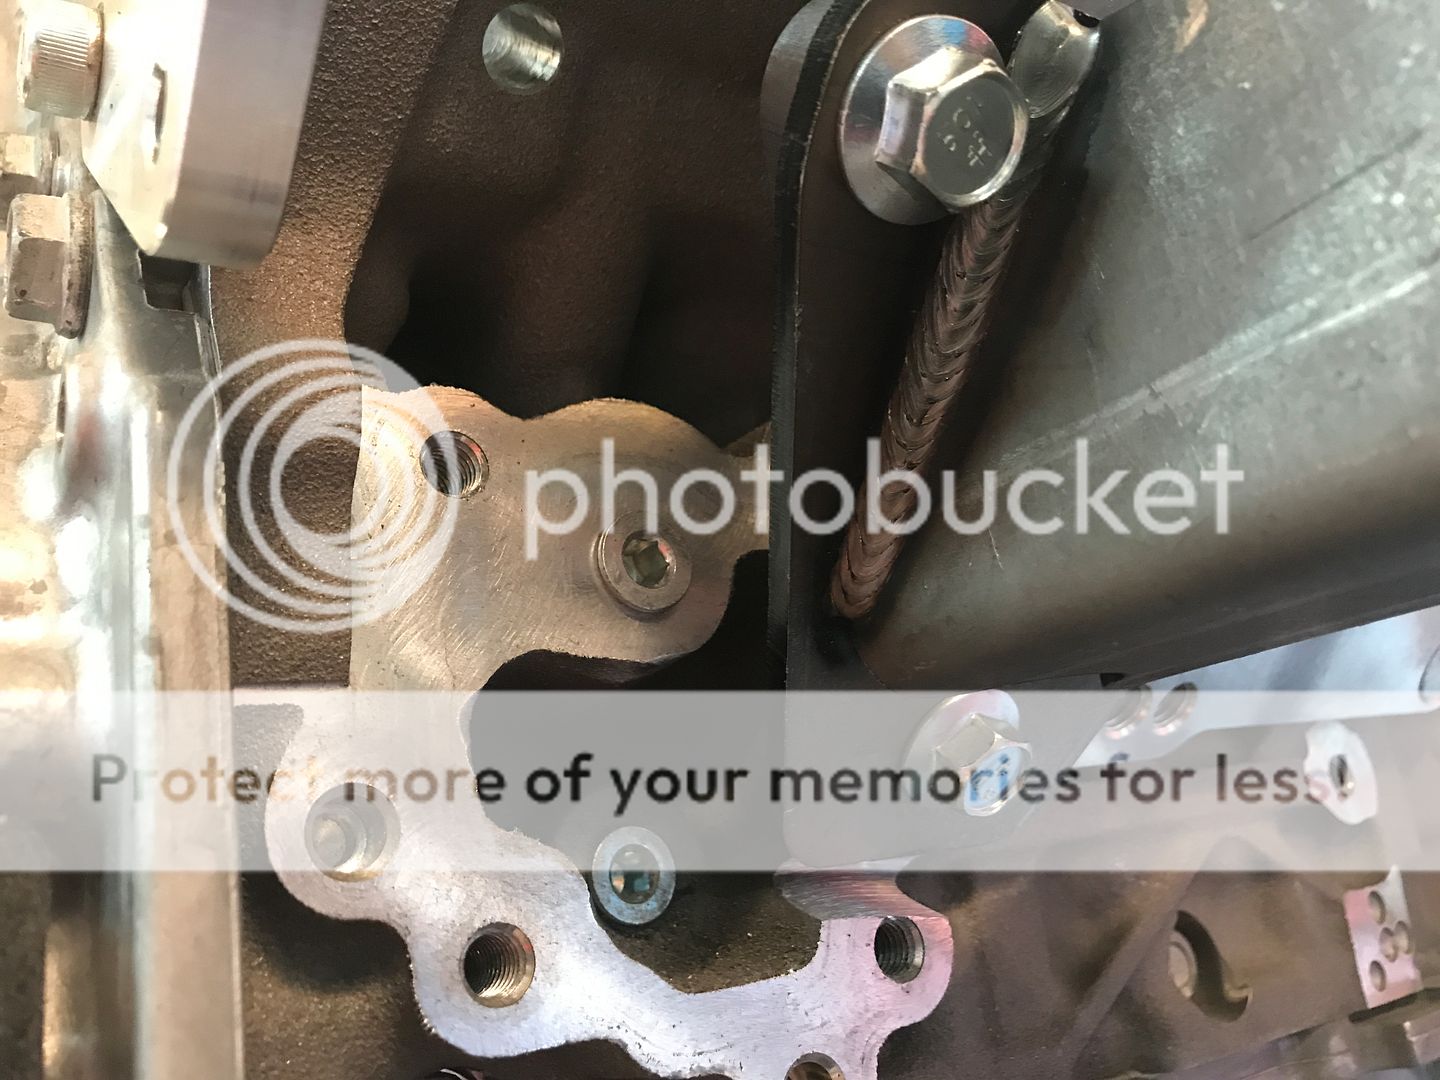
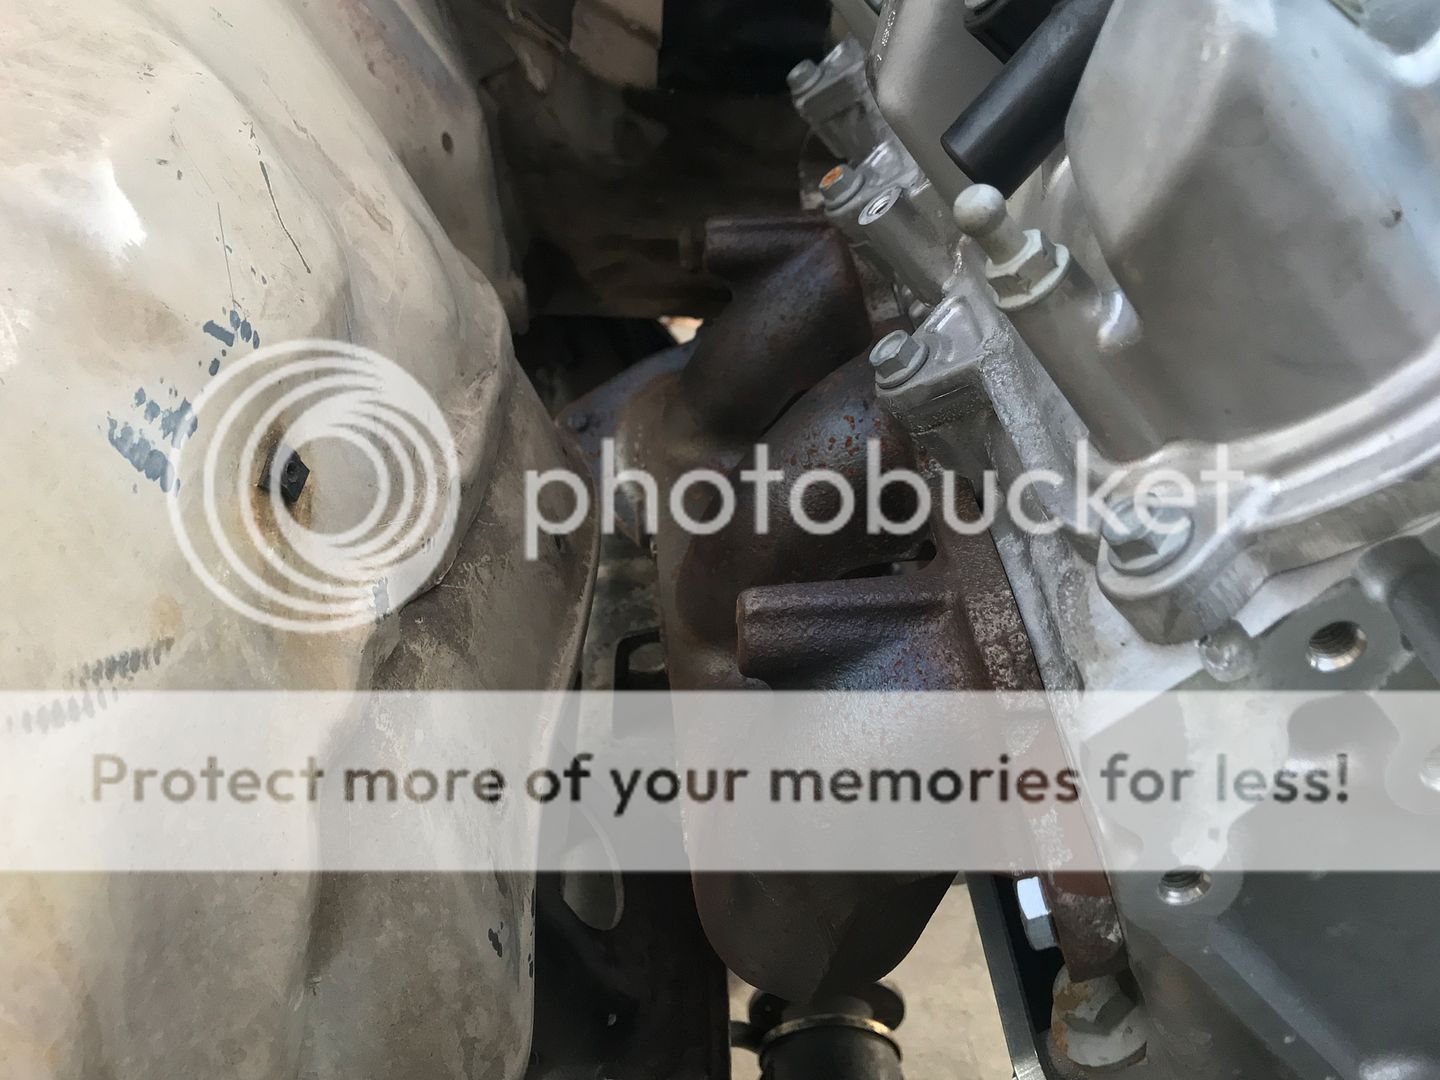
I test fit the engine after removing the transmission today. I have to take the transmission computer out and send it to Howell for programming anyway. There are more problems to solve now. Custom headers will have to be fabbed. The frame side of the motor mounts will have to be flipped (pictures below) in order for enough material to be welded. I’ll call Advance Adaptors to find out if this is ok. It appears I’ll need that body lift to clear the hood. I definitely don’t want to cut into that. There seems to be enough room for the radiator and Derale fan.

I finished prepping the frame and removing the motor mounts.

I test fit the engine after removing the transmission today. I have to take the transmission computer out and send it to Howell for programming anyway. There are more problems to solve now. Custom headers will have to be fabbed. The frame side of the motor mounts will have to be flipped (pictures below) in order for enough material to be welded. I’ll call Advance Adaptors to find out if this is ok. It appears I’ll need that body lift to clear the hood. I definitely don’t want to cut into that. There seems to be enough room for the radiator and Derale fan.


 12-07-2018, 03:30 PM
#24
Registered User
Thread Starter
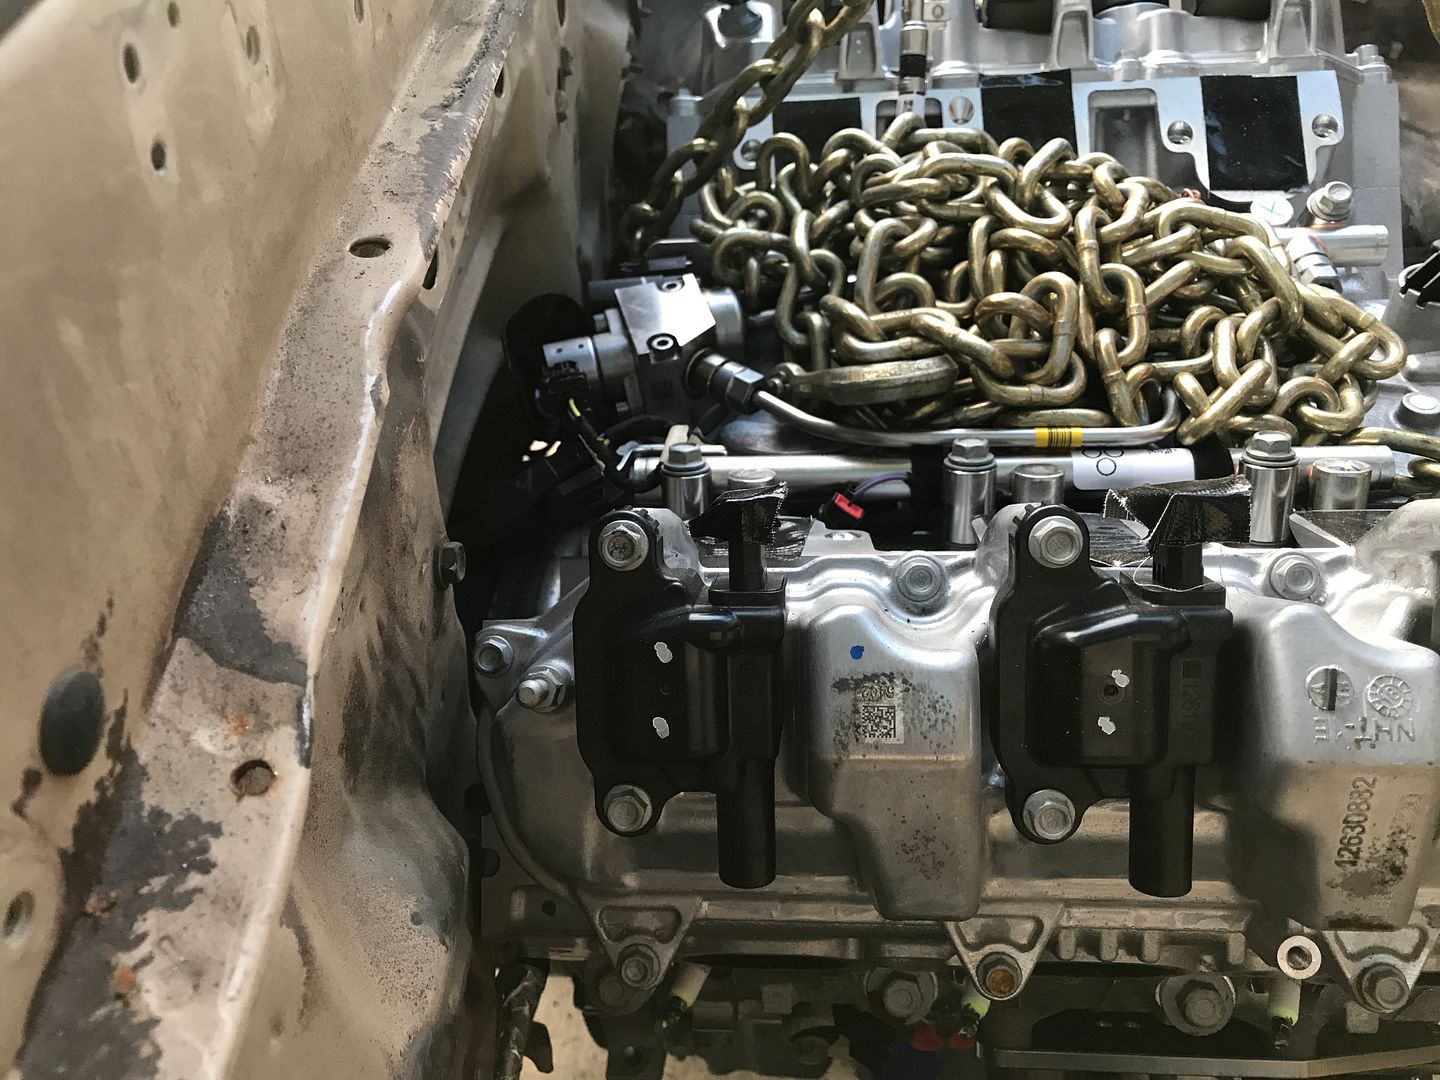
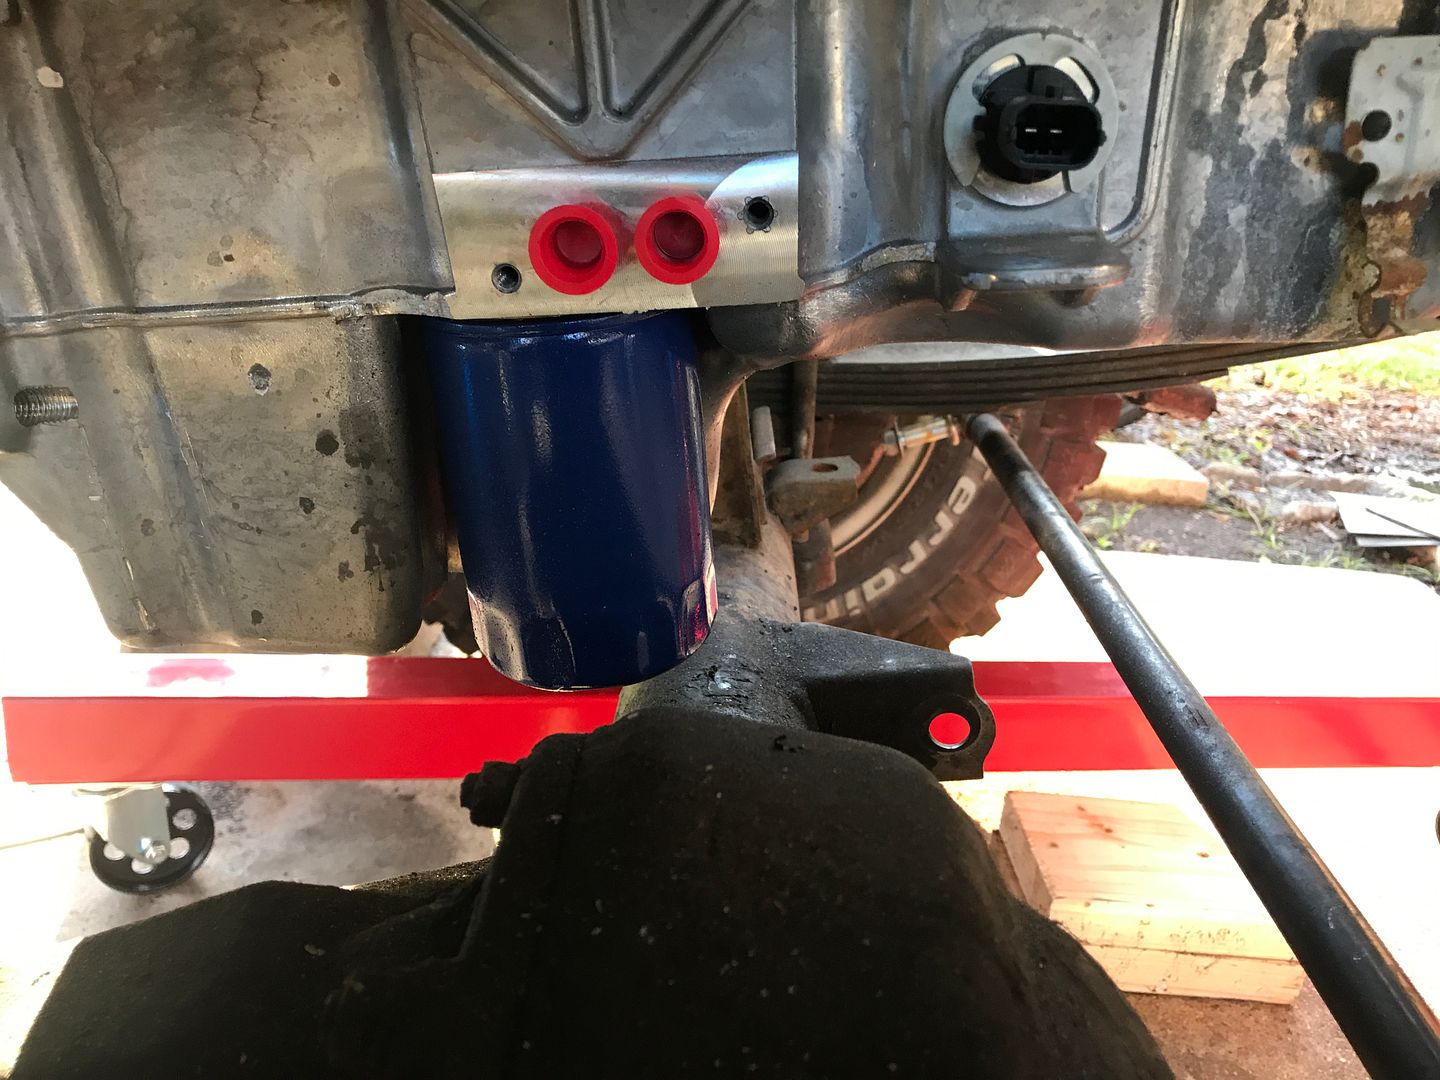
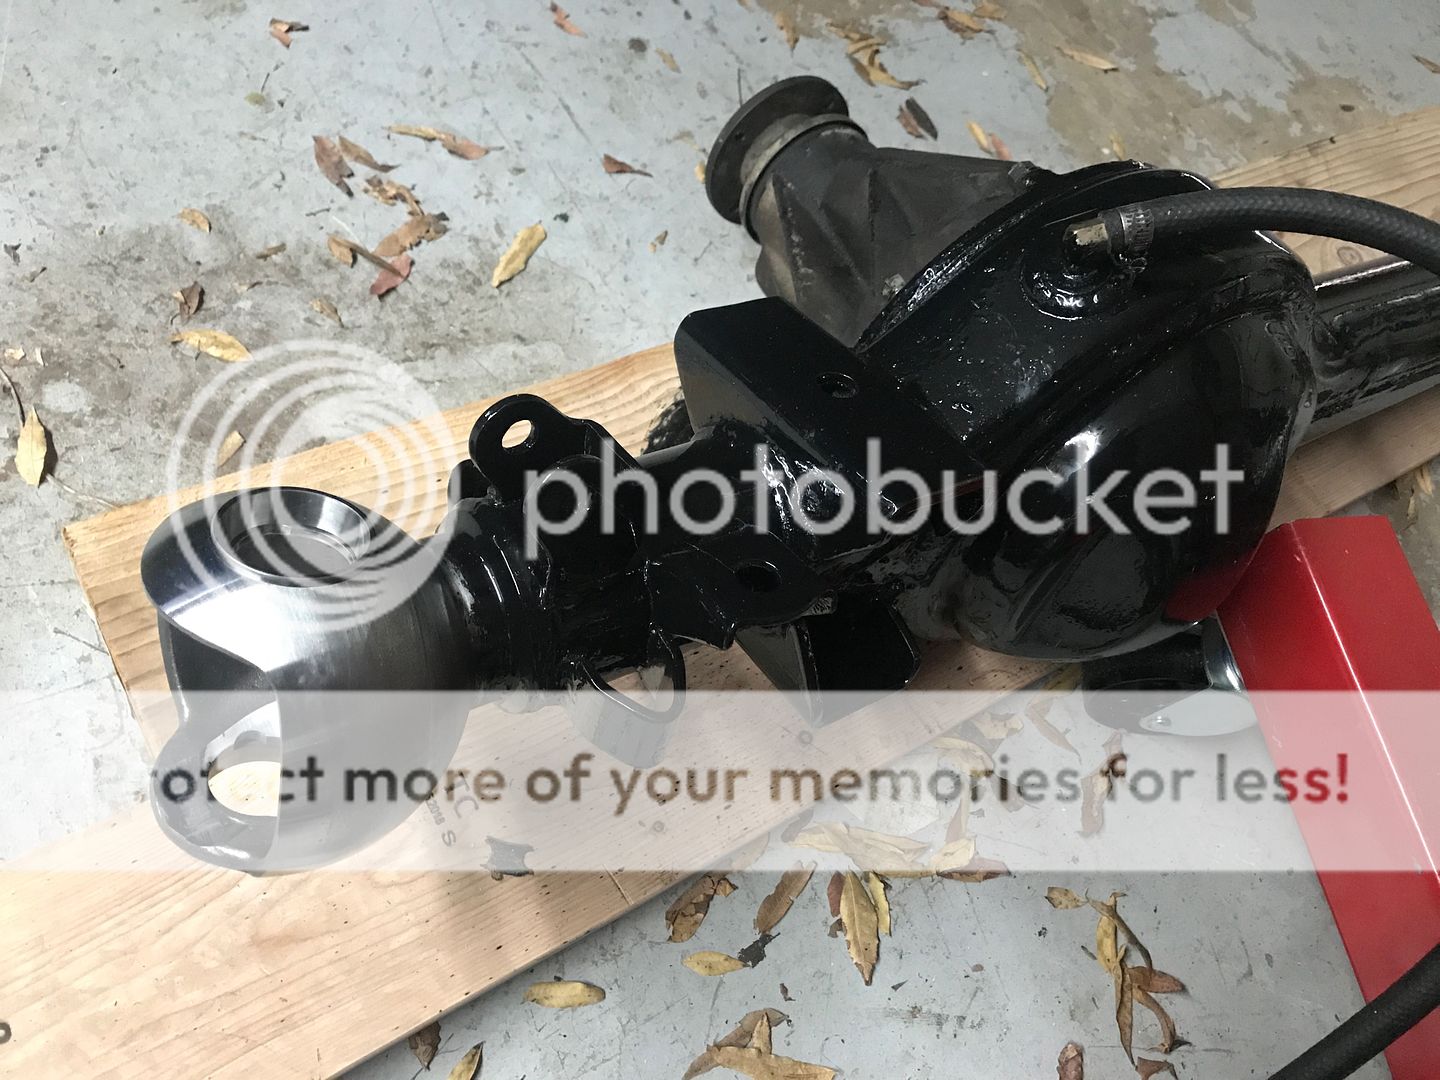
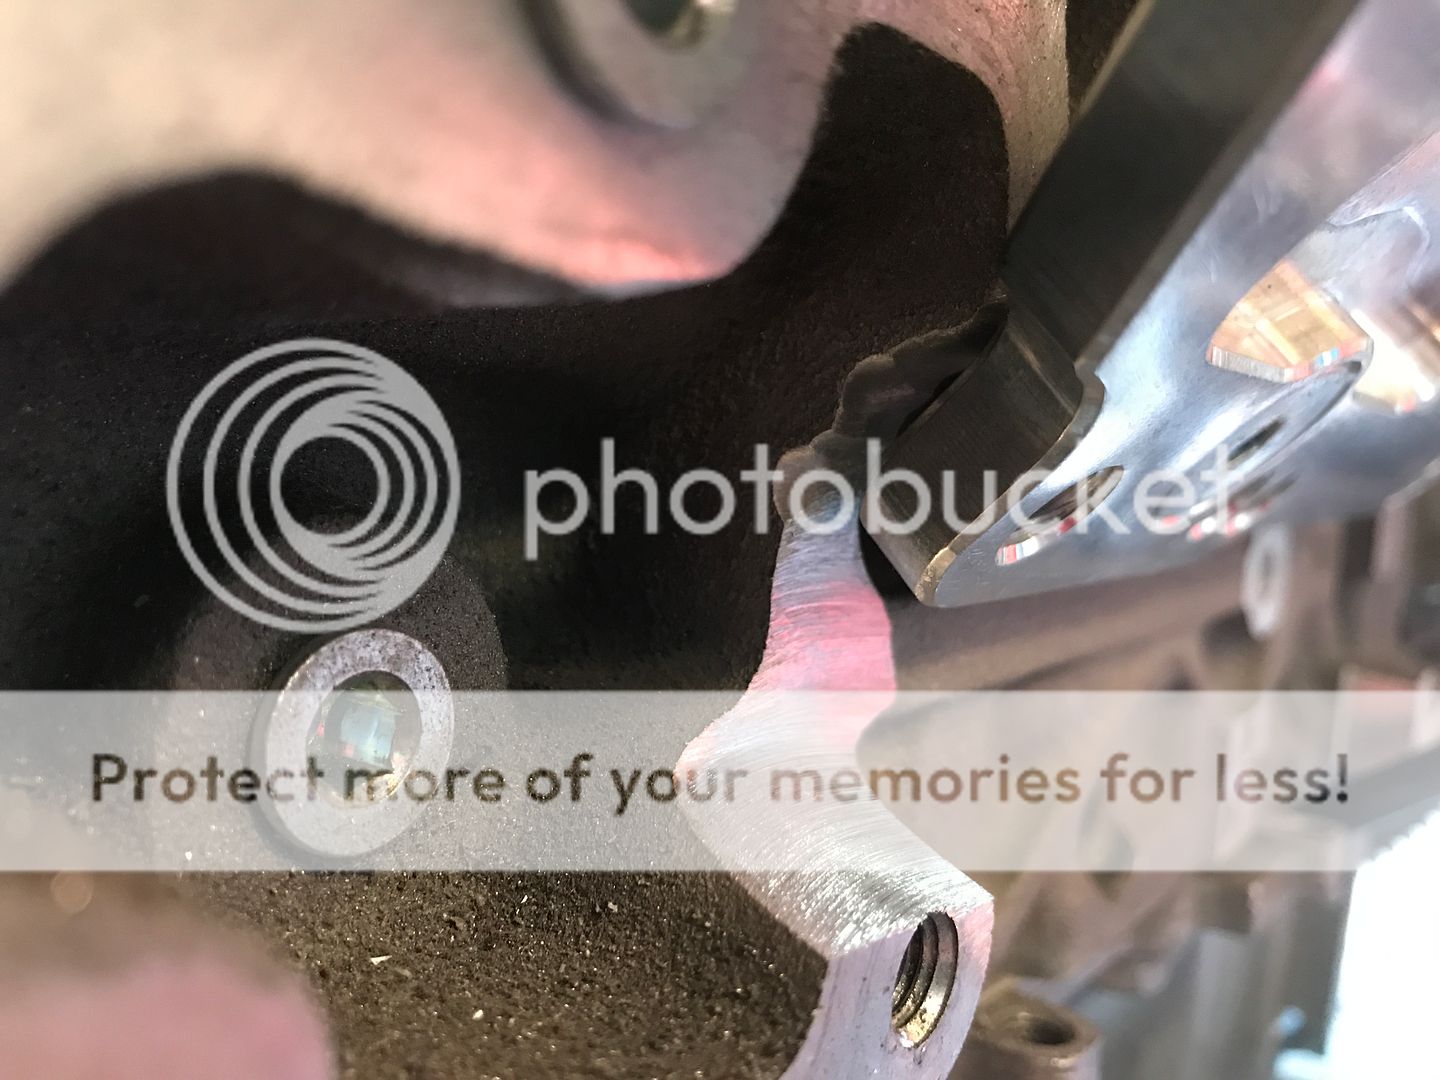
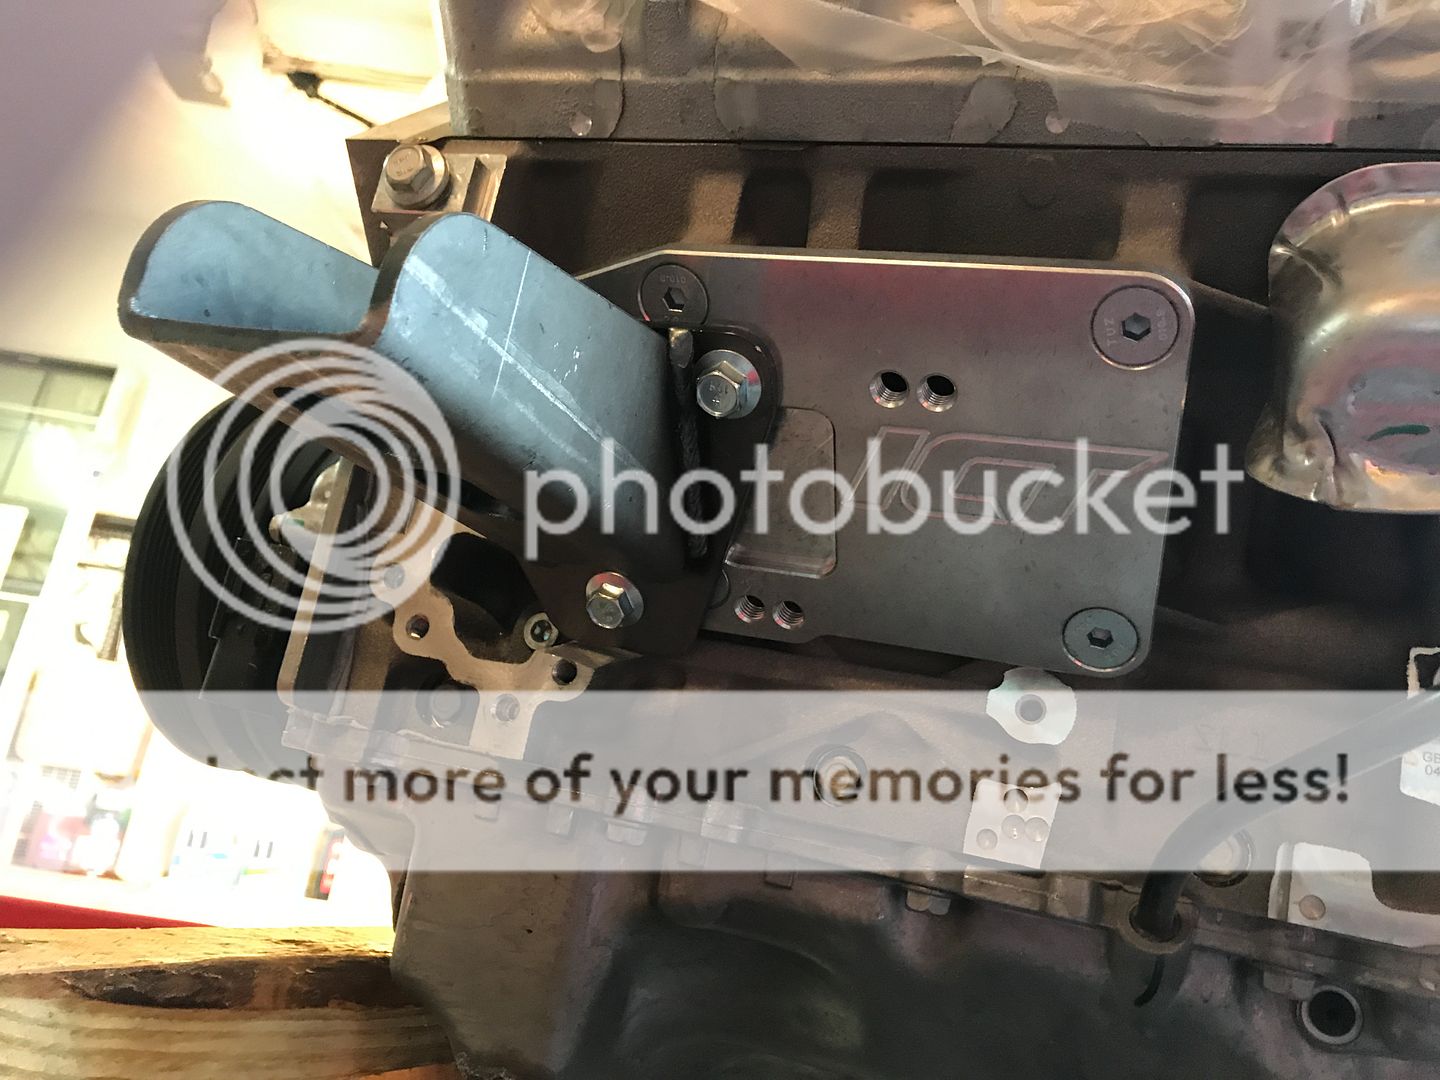
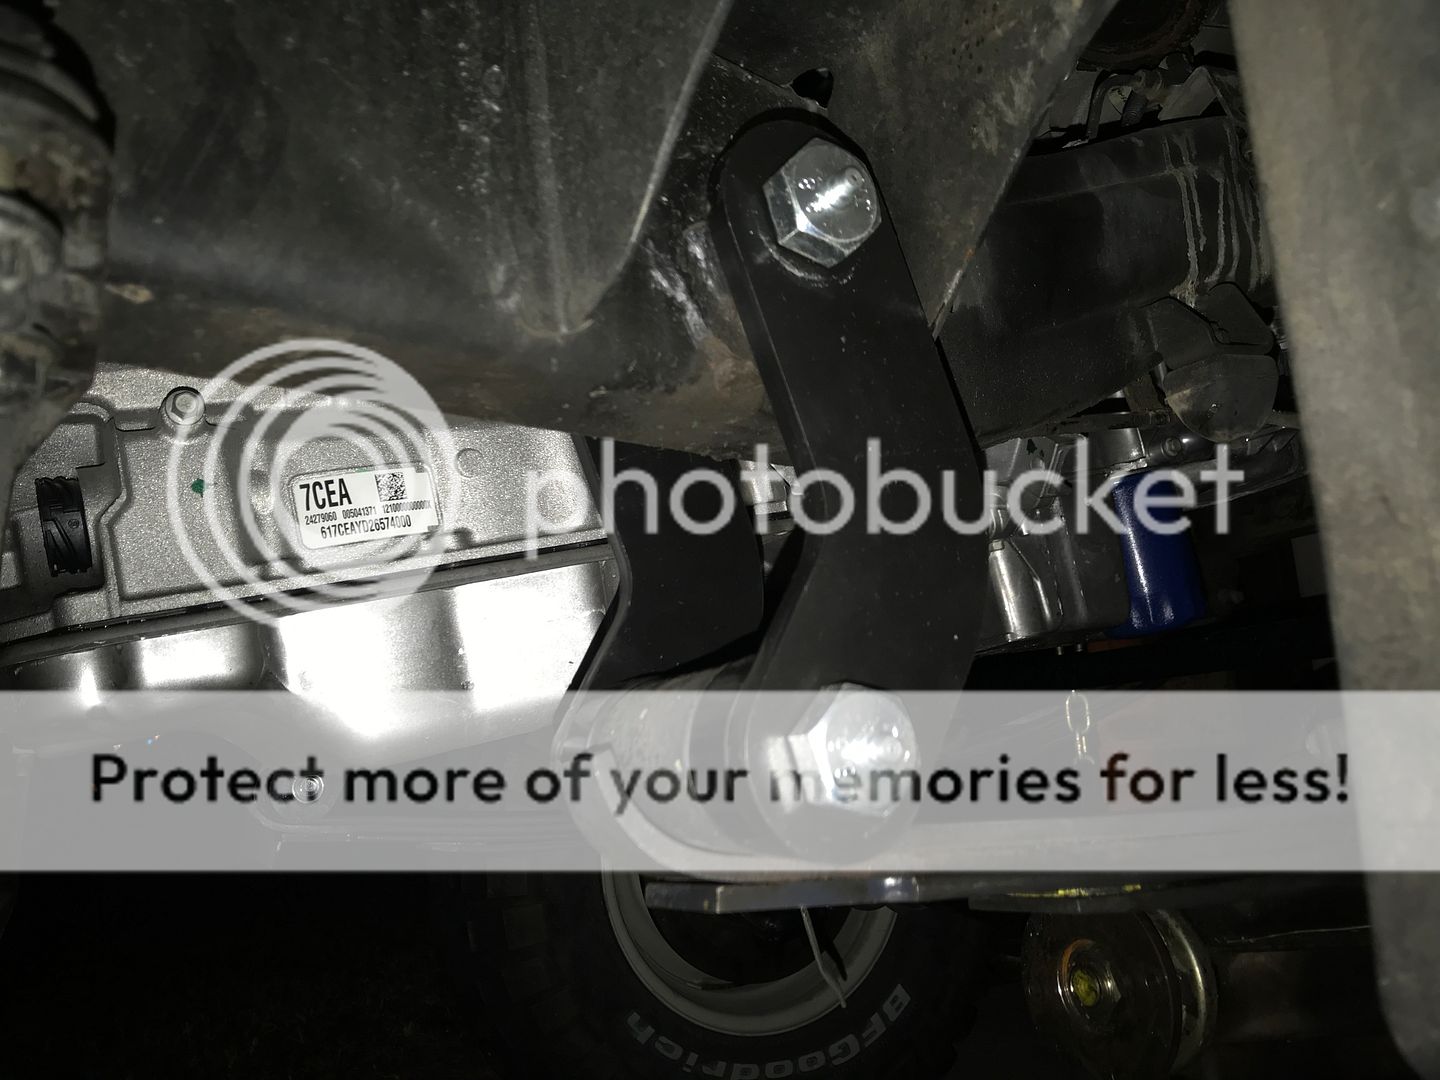
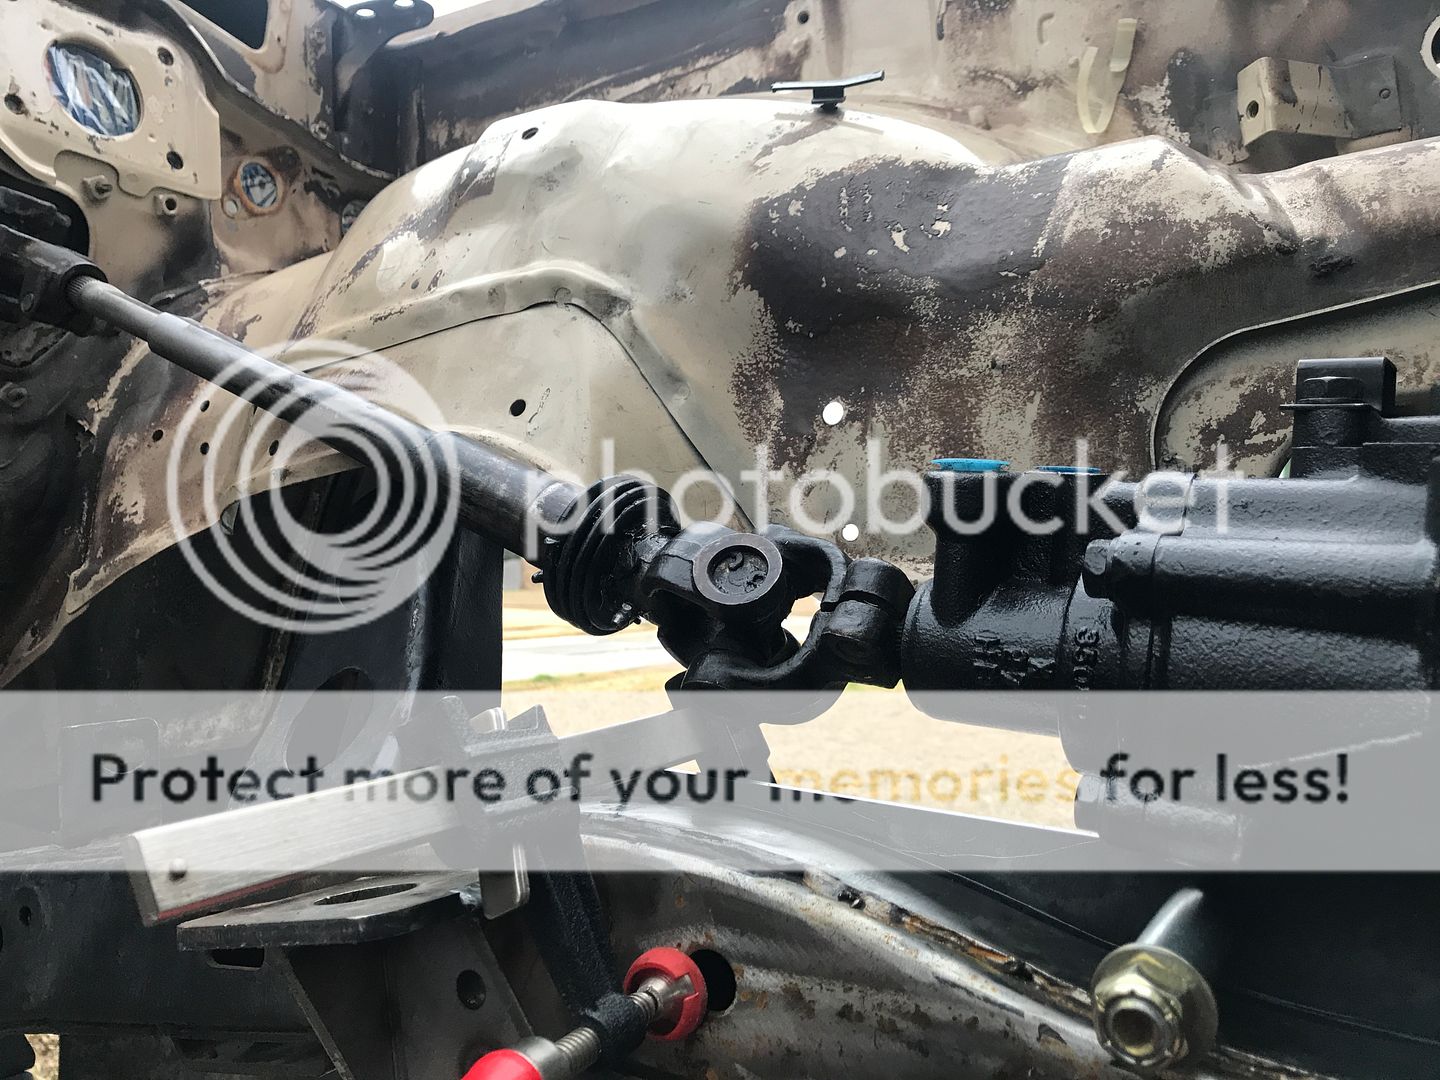
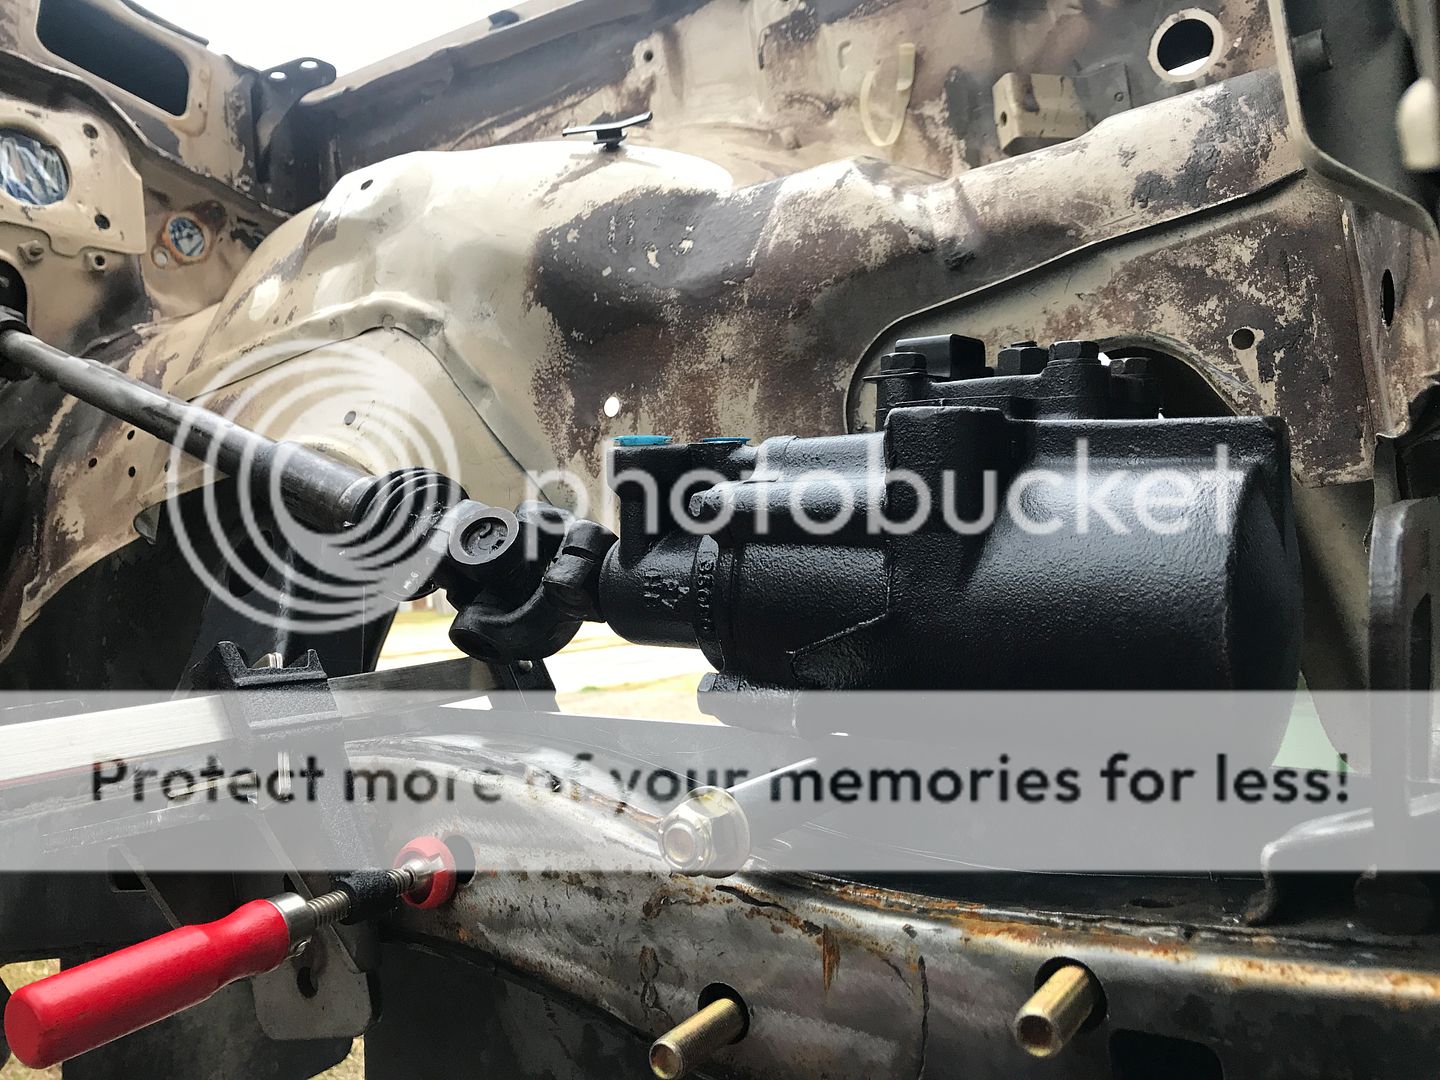
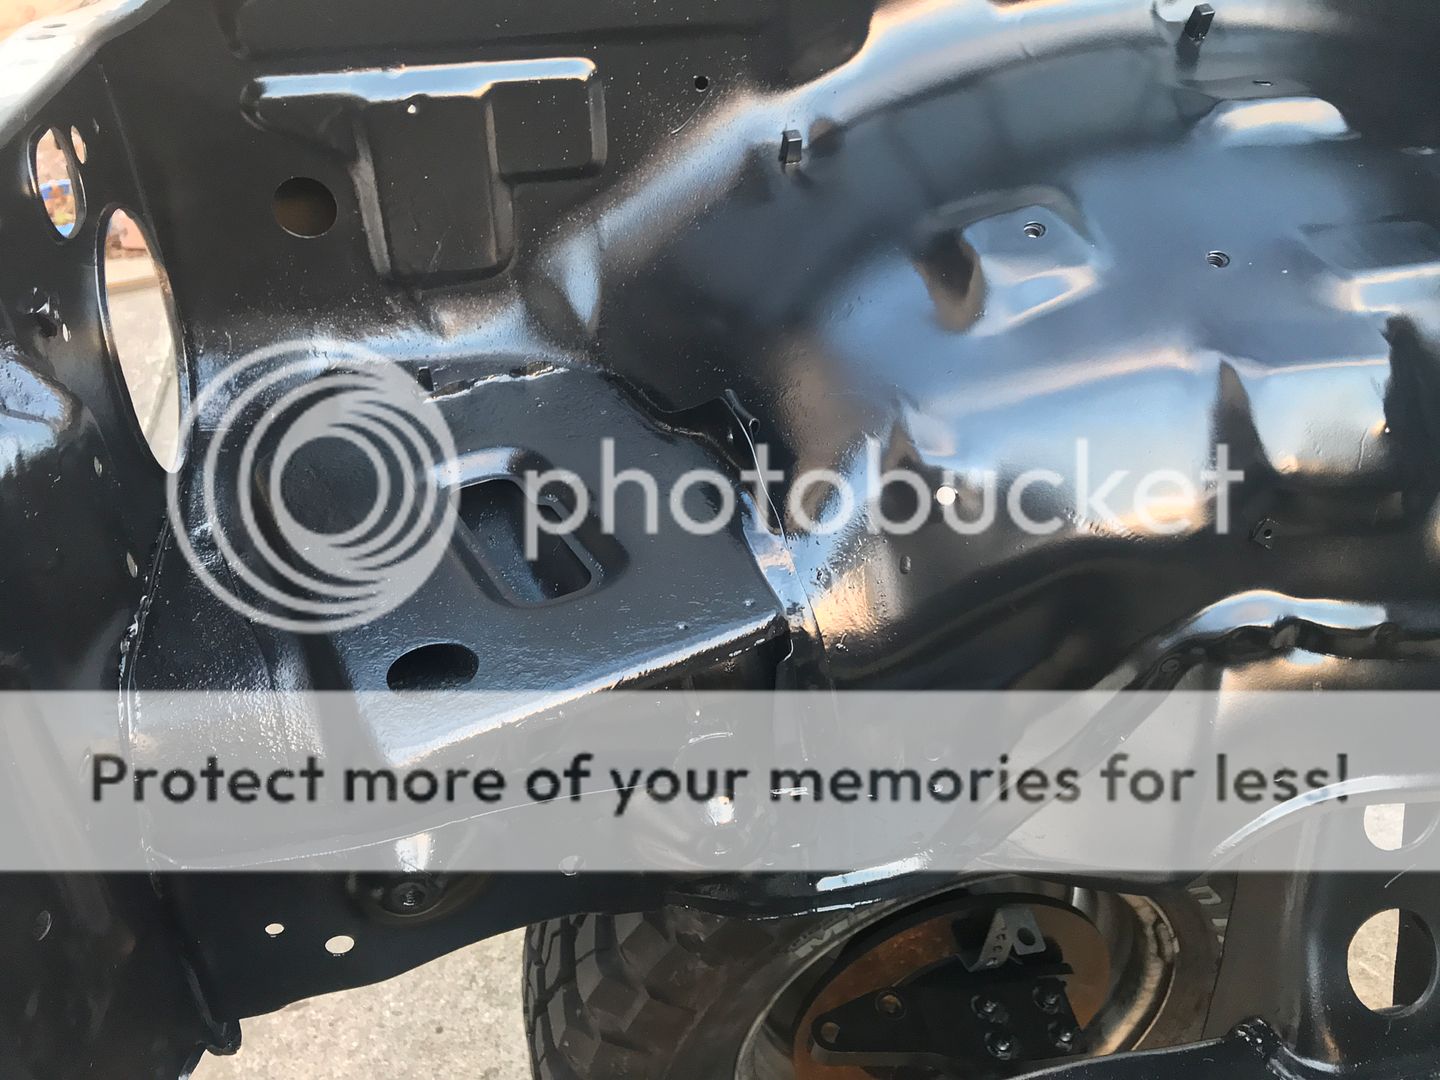
Ok, as I started stripping more things off of the truck to get at the frame and engine bay, the more work I created. It was apparent the front axle needed a rebuild. So that is what I did. And since I was doing that, I might as well and do a hi steer conversion. And since I'm doing those things, I might as well upgrade the braking system. I'll spare you most of the details. Those things have been covered in numerous threads and articles. I will say that the front axle rebuild kit I received did not have any shims. I sent an email about it, but never heard back. Oh well. I have yet to purchase the brake set up but it will be the IFS rotors and calipers with the FJ80 master cylinder and 86-87 Turbo brake booster. Clearance will be an issue with the heads coming so far up. E-brake will have to be figured out too. The driver side head completely covers the outlet where the cable comes through the firewall. I'll just leave you with pictures.
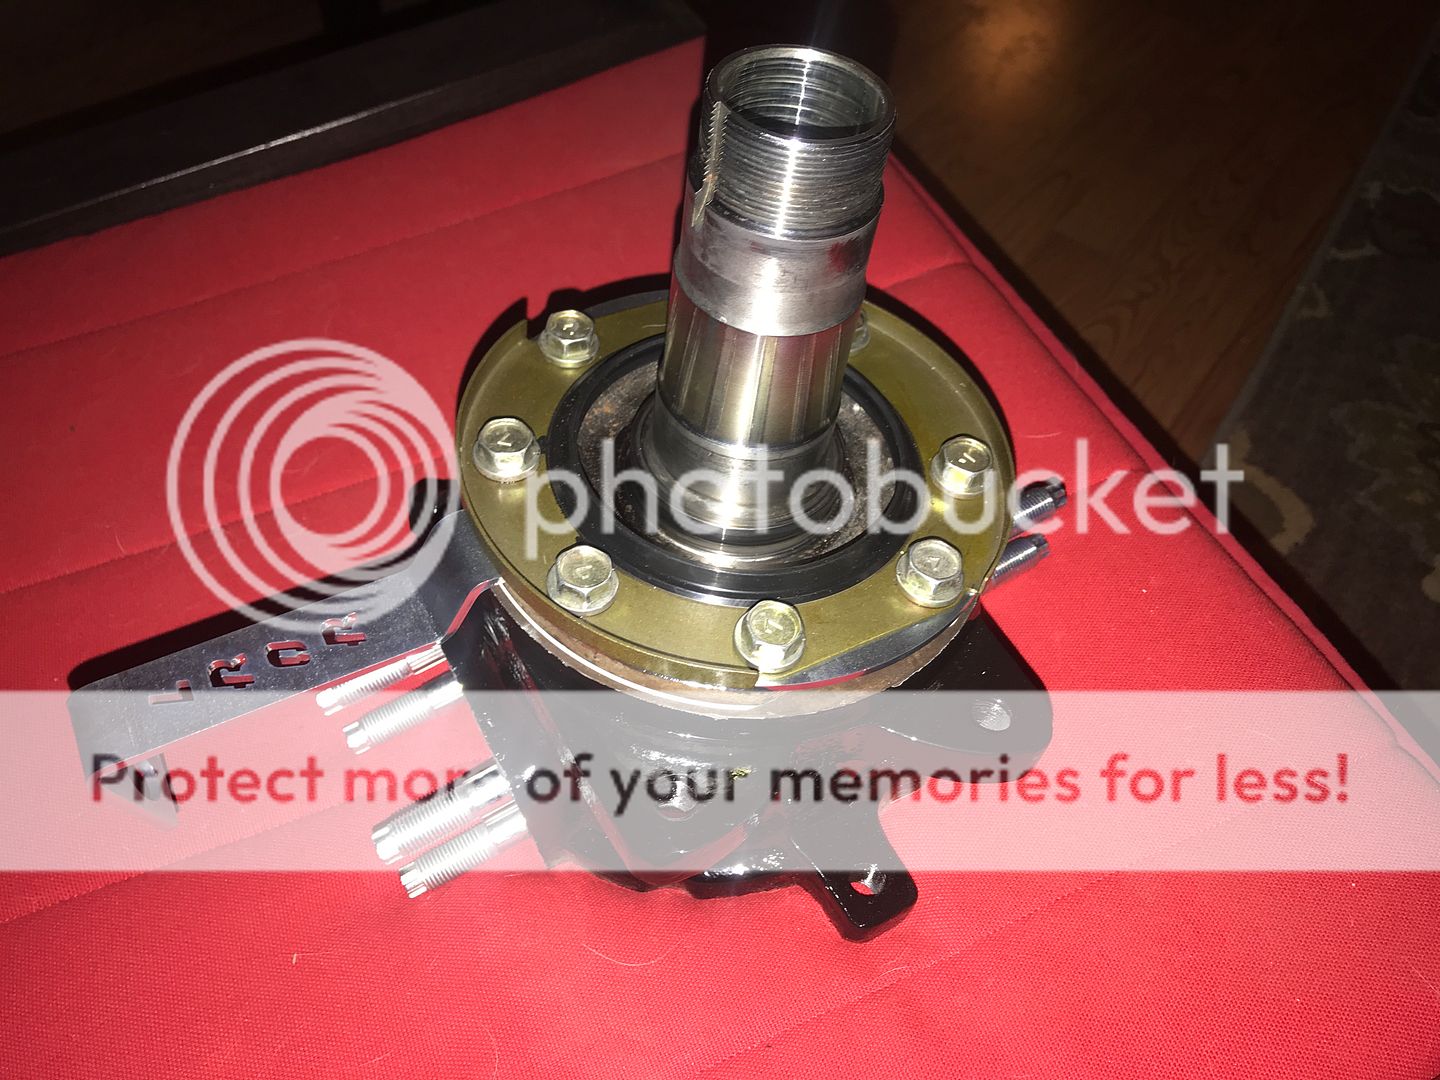
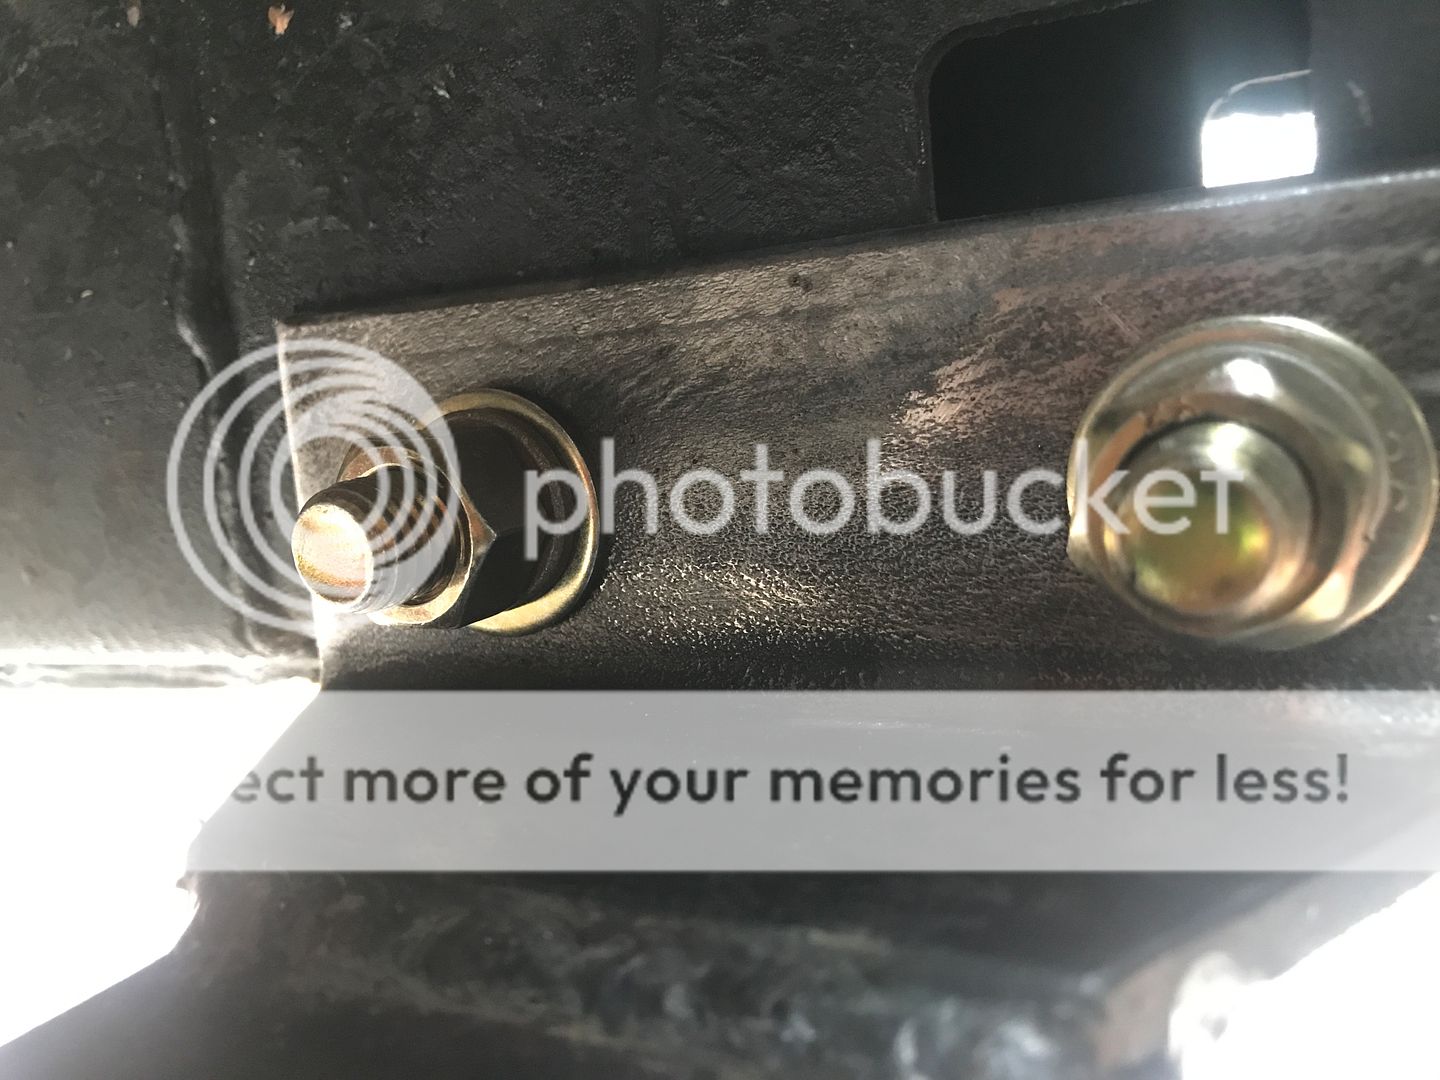
A note about these backing plate eliminators: they don't fit despite the website saying they were redesigned. No worries. Follow instructions on picture.
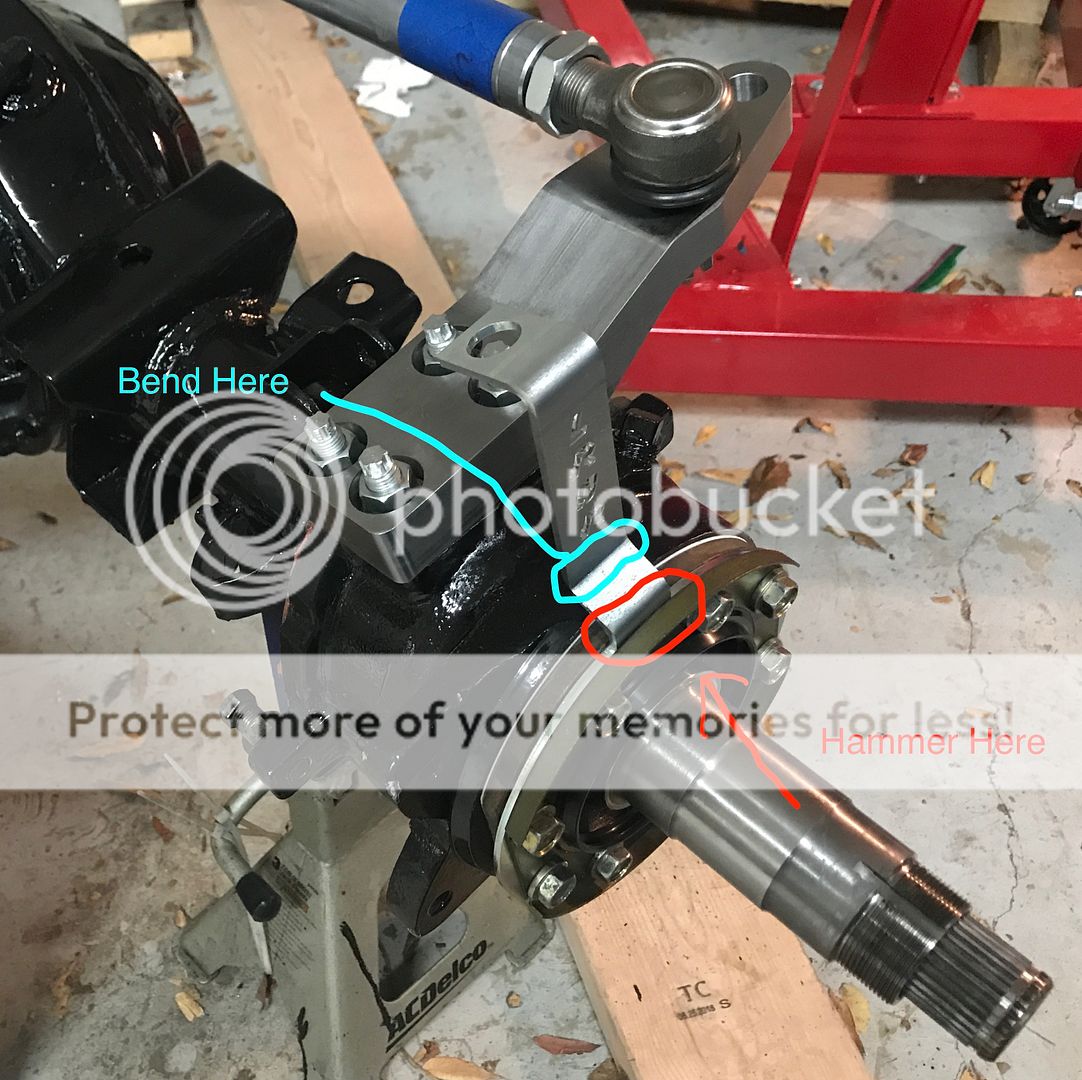


A note about these backing plate eliminators: they don't fit despite the website saying they were redesigned. No worries. Follow instructions on picture.


Last edited by Trueblue93; 12-07-2018 at 03:31 PM.
12-07-2018, 04:03 PM
#25
Registered User
Thread Starter
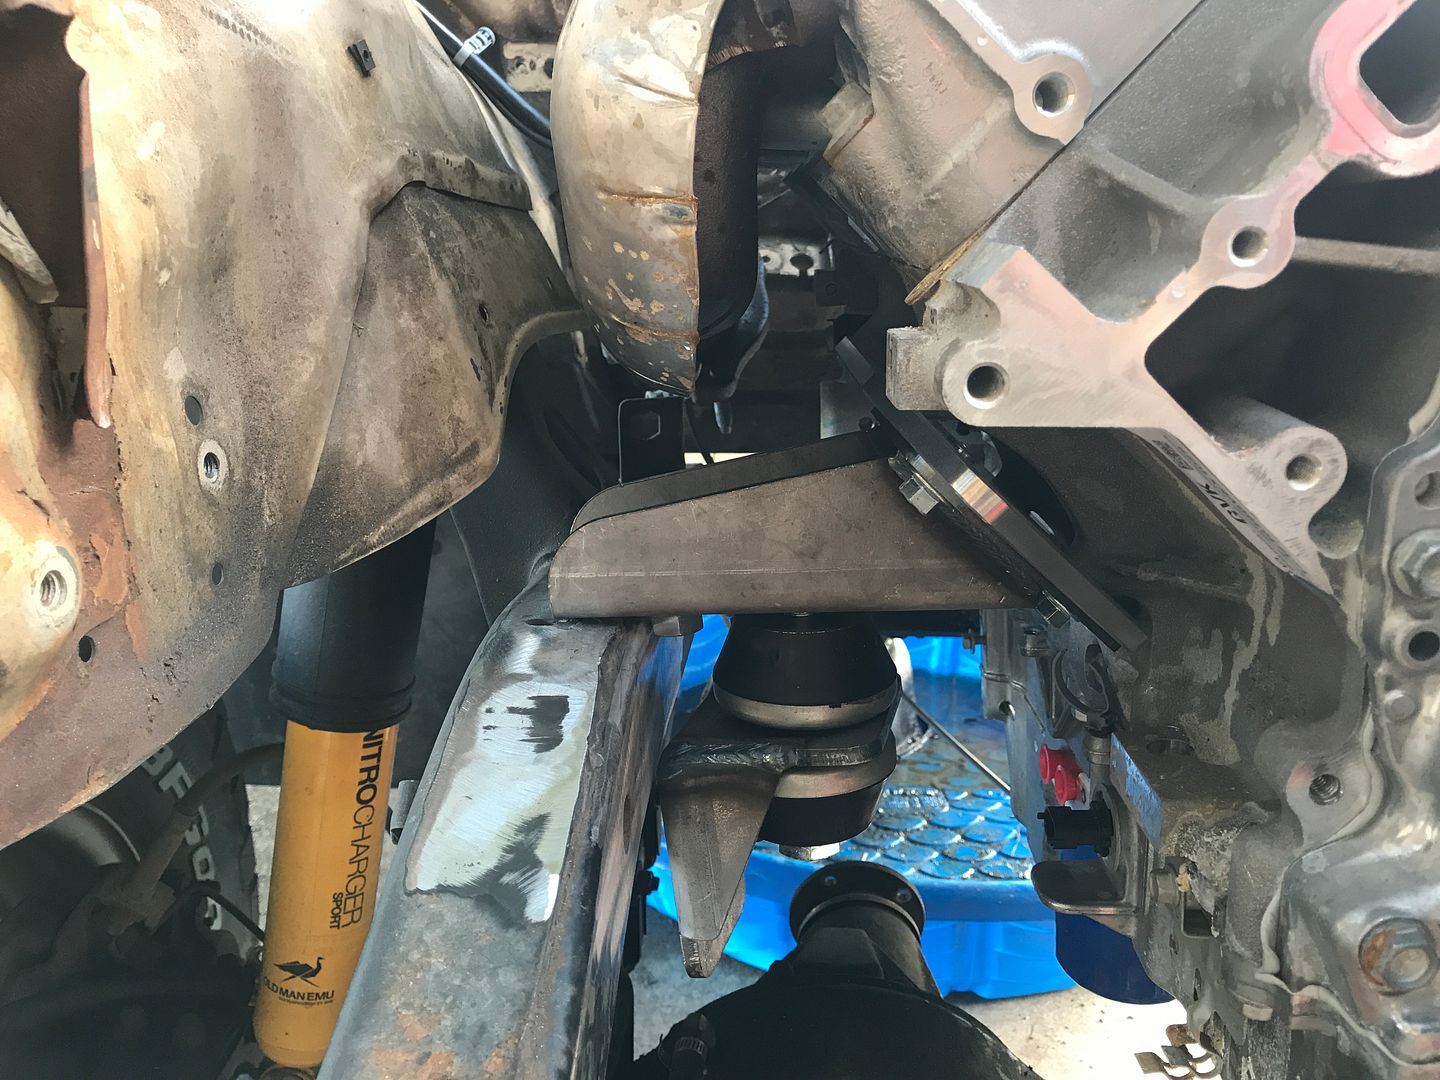
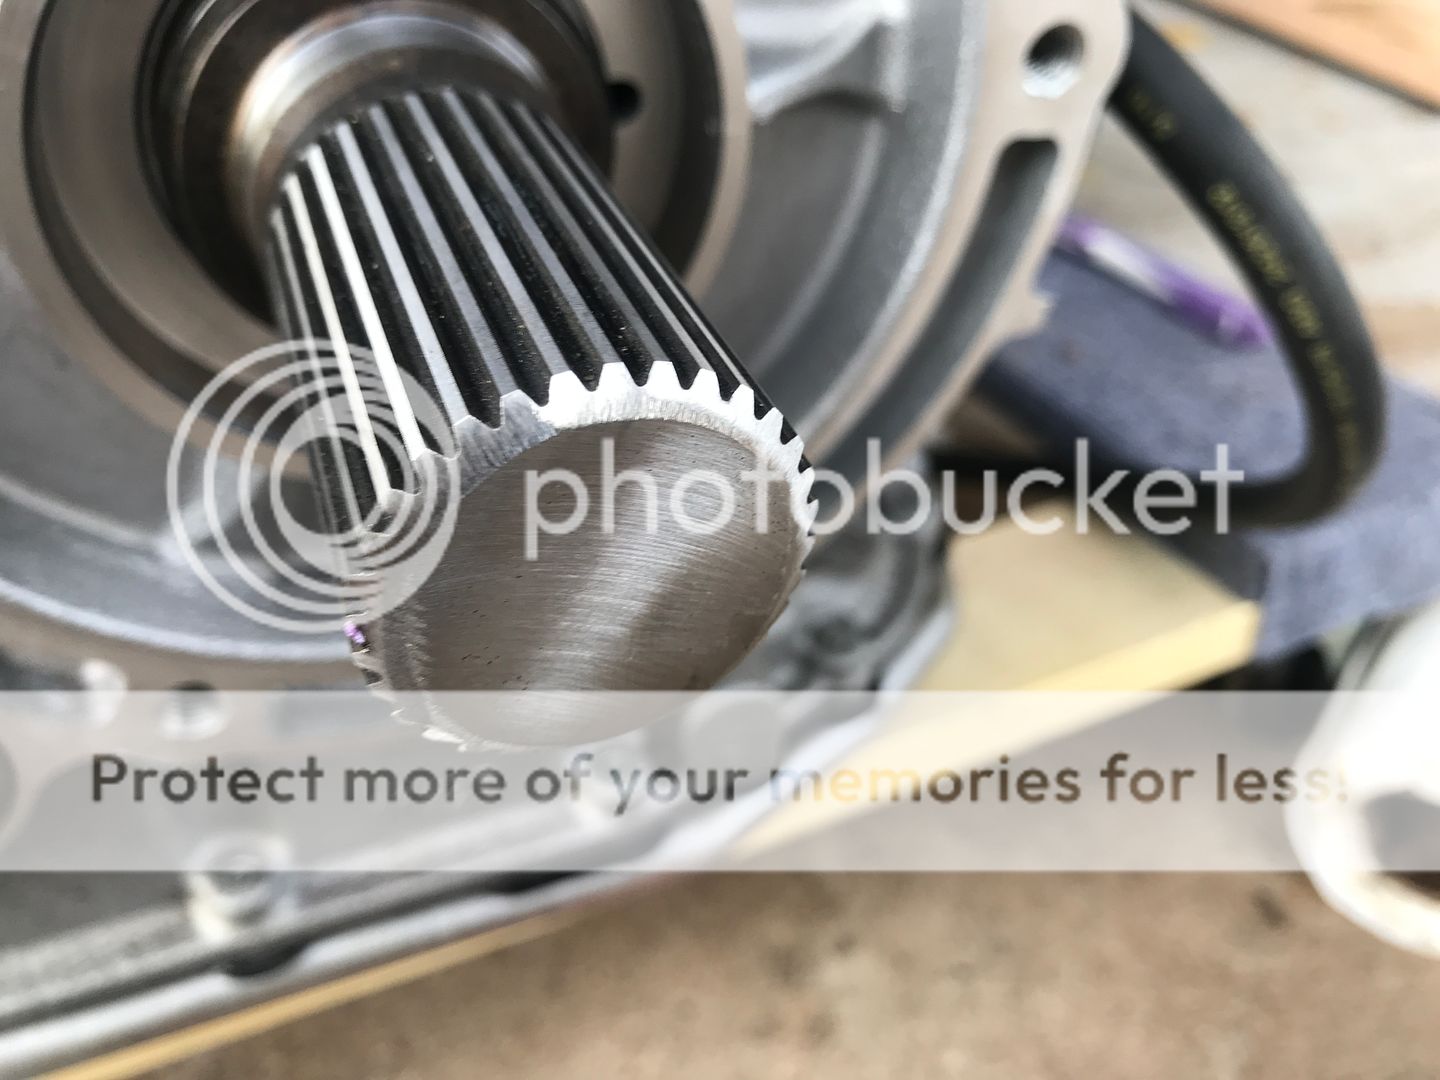
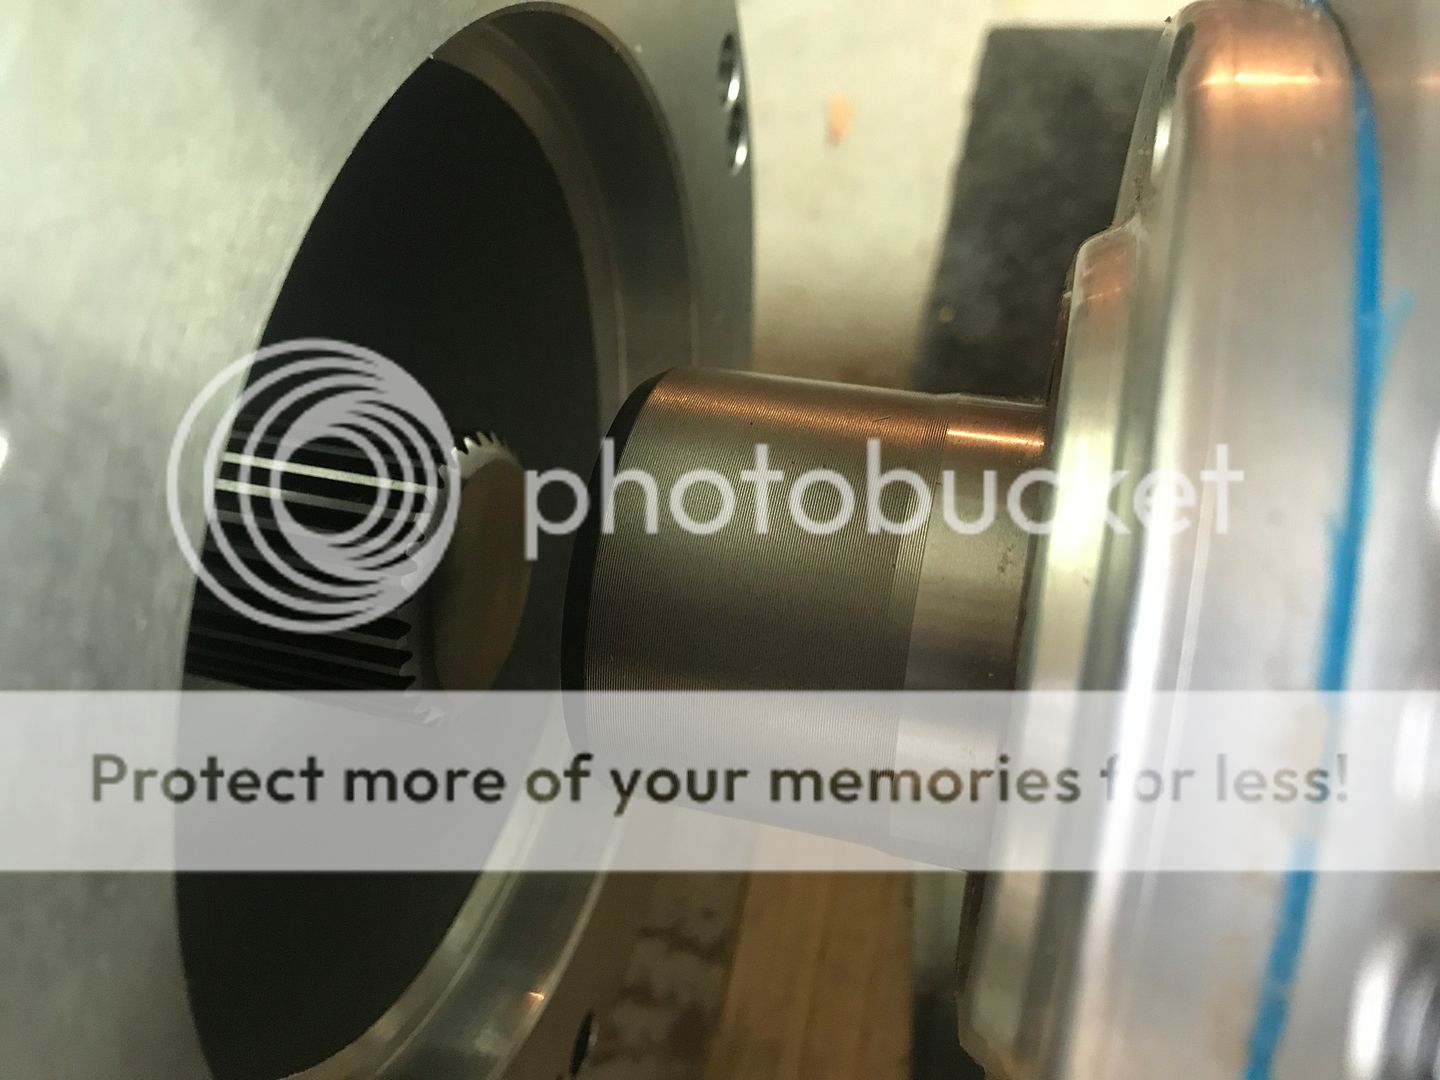
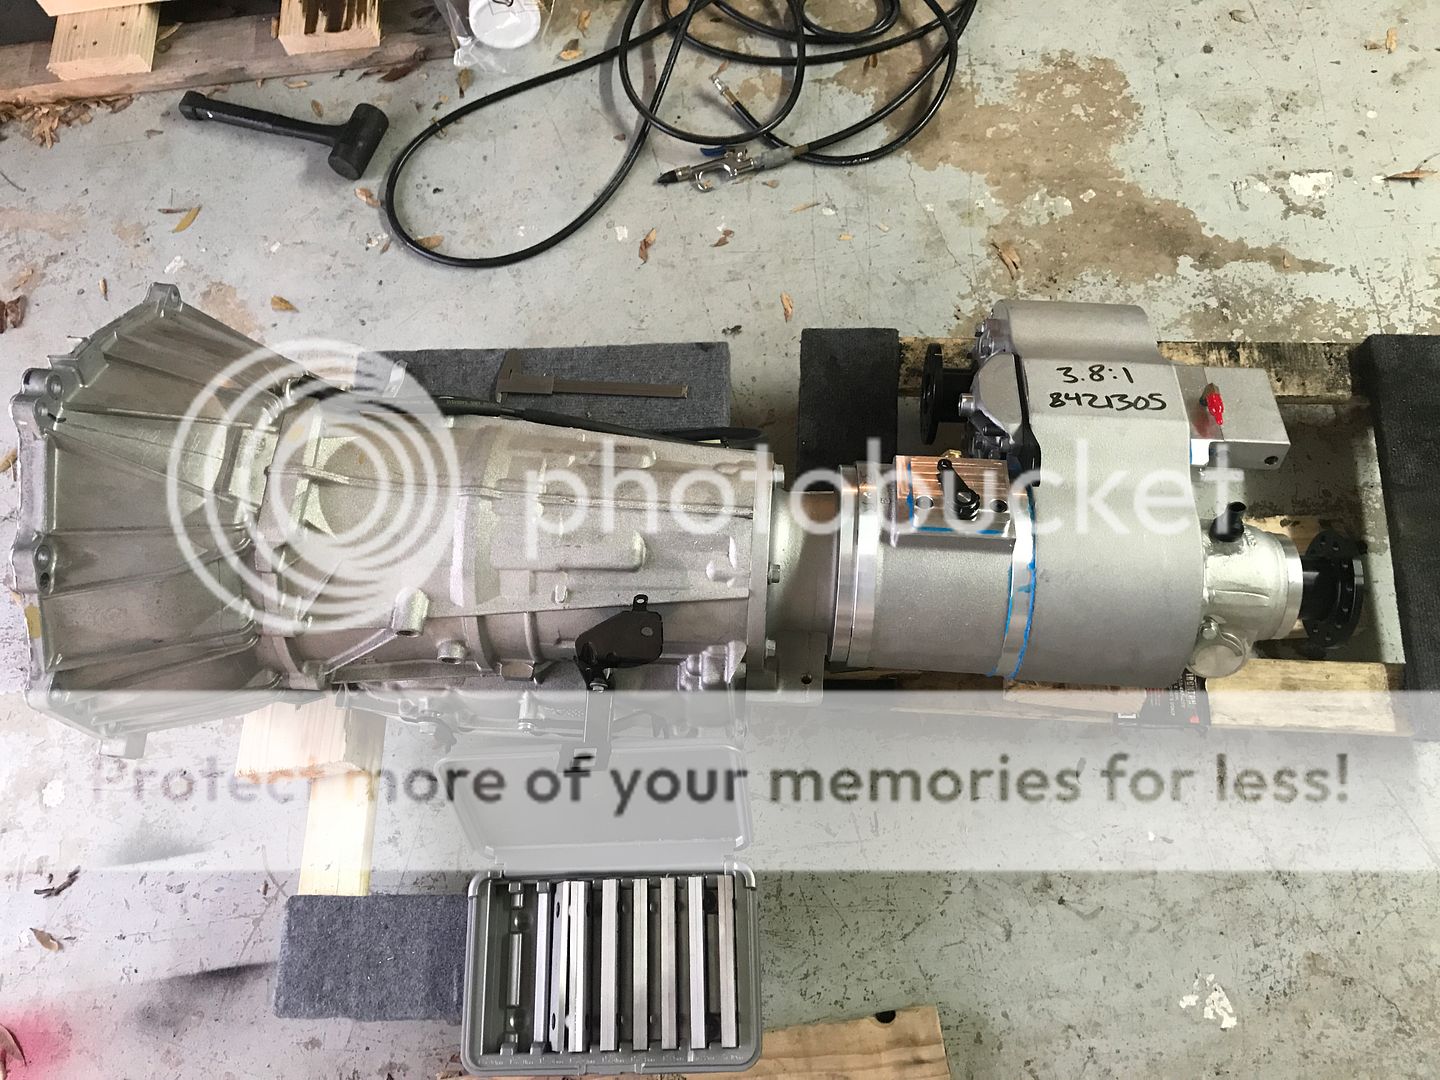
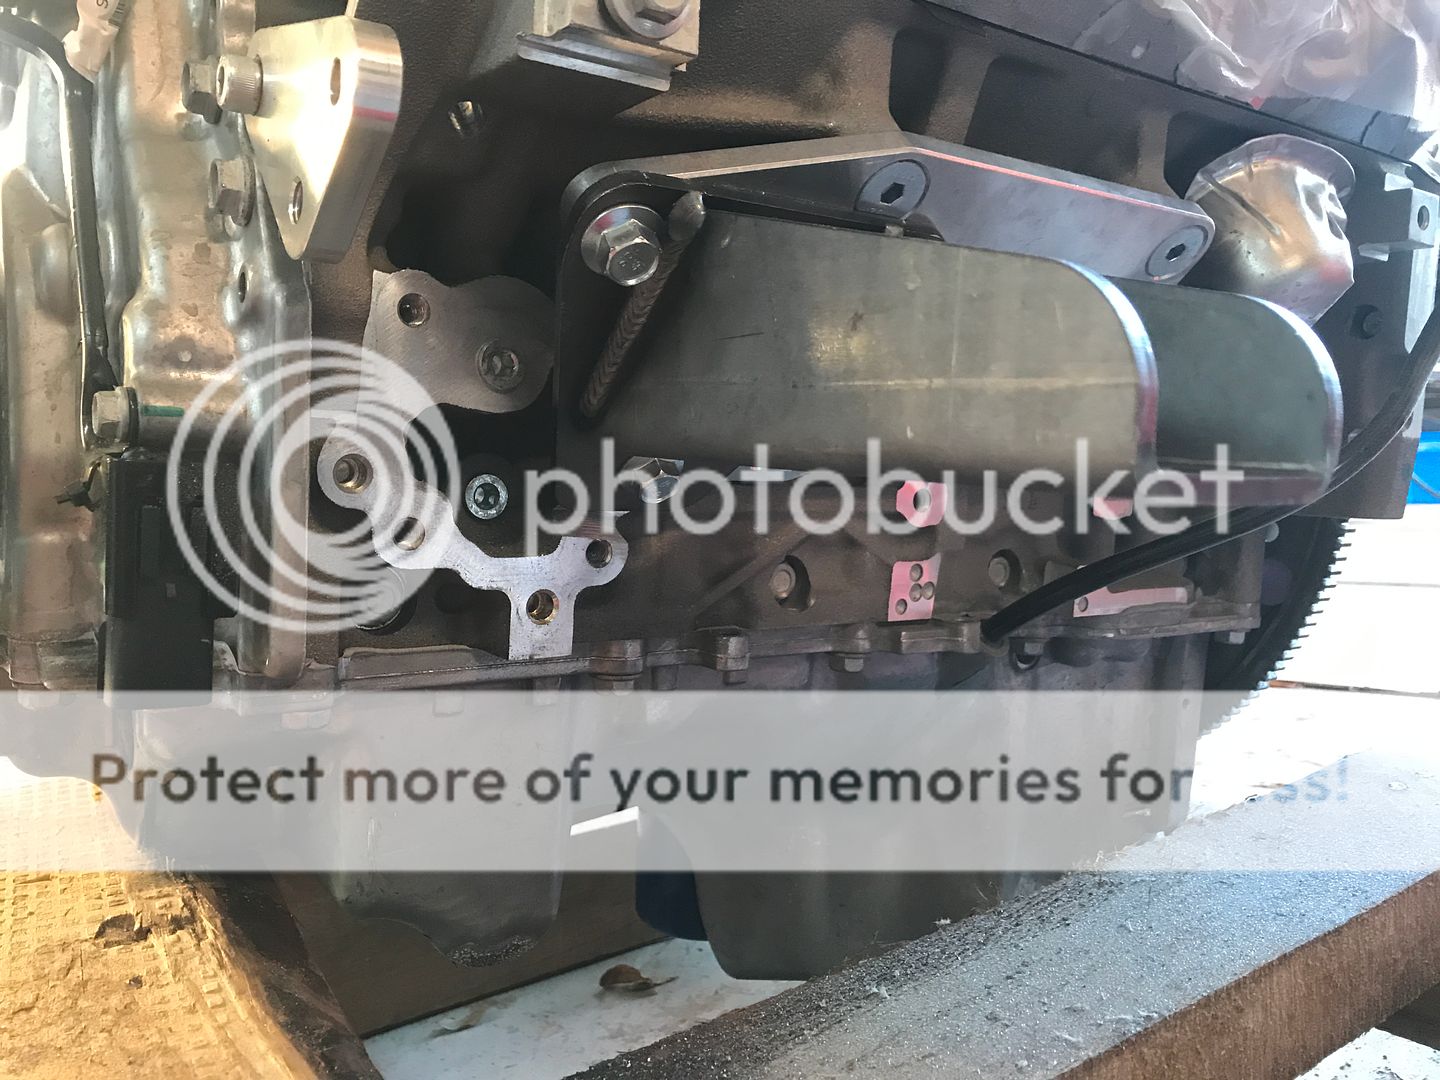
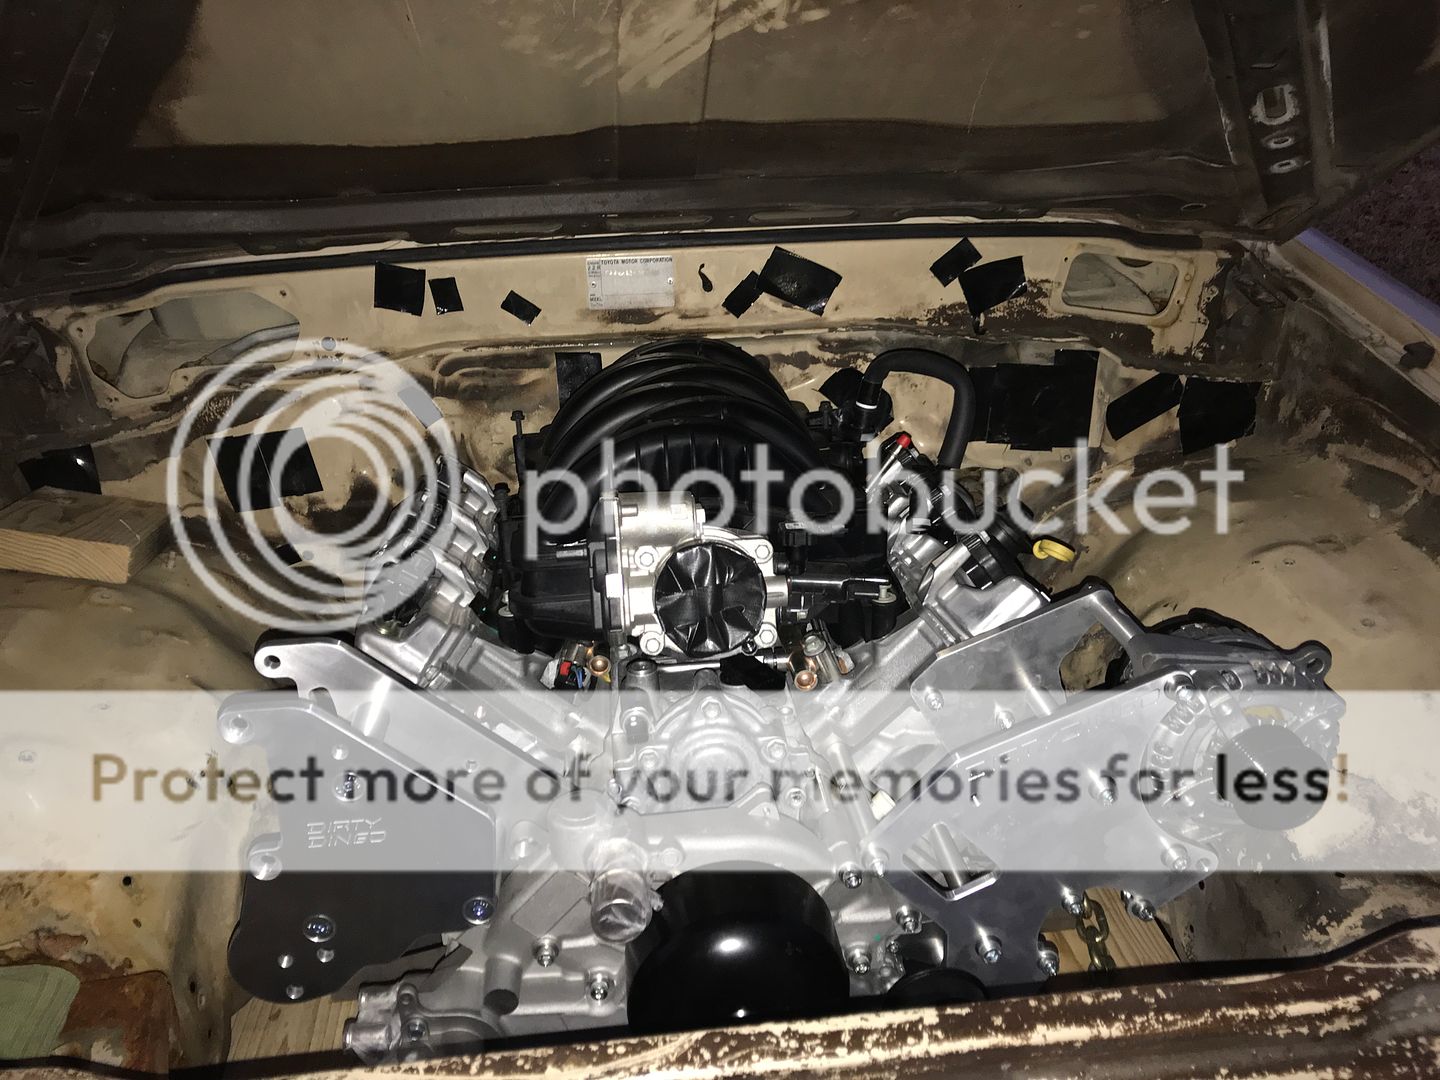
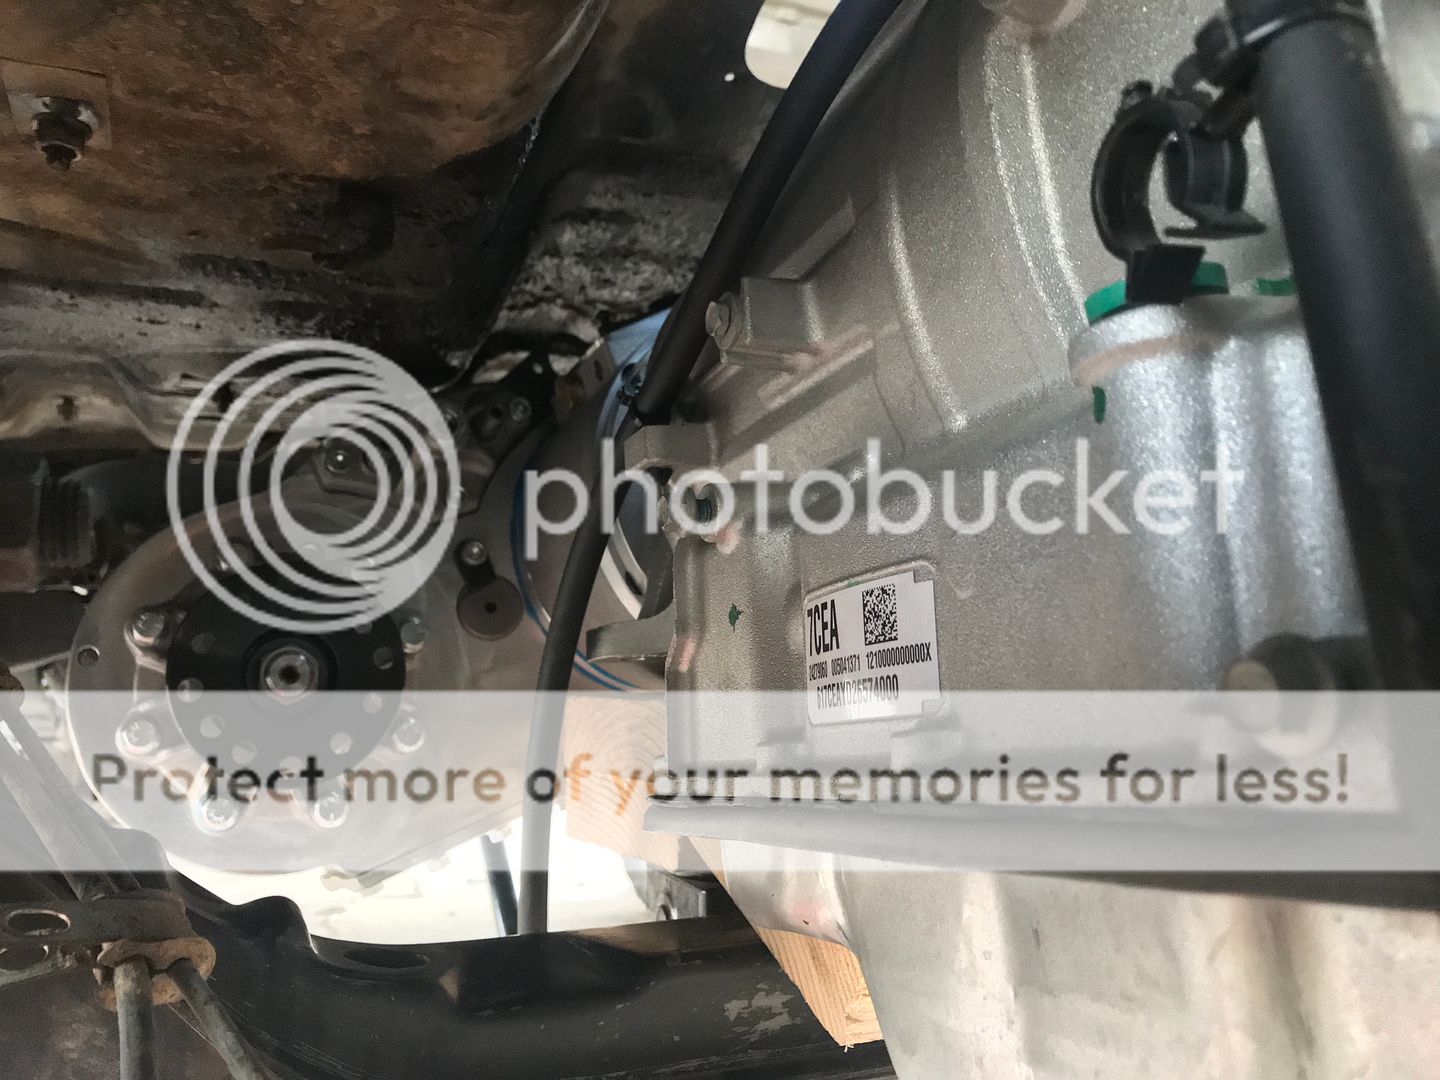
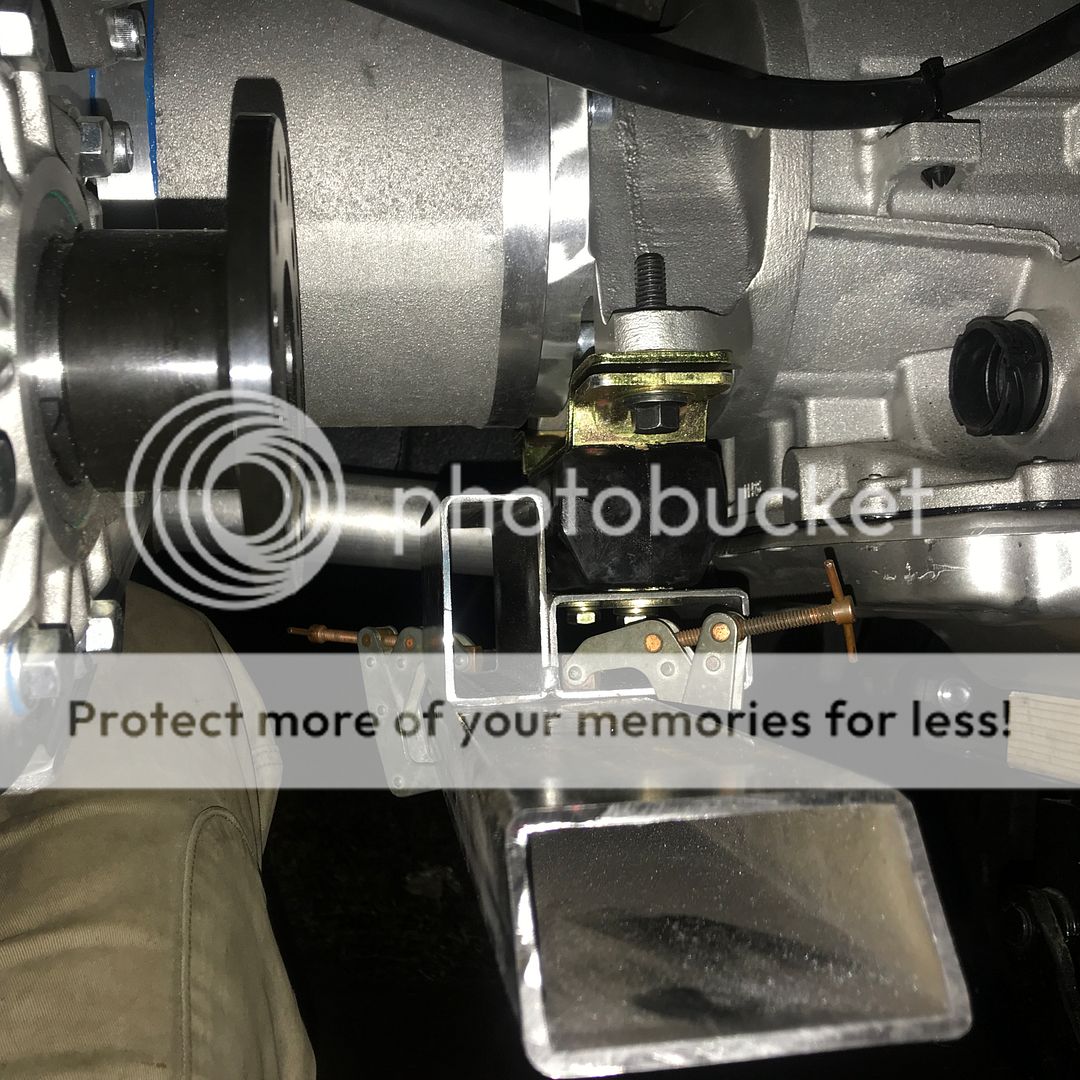
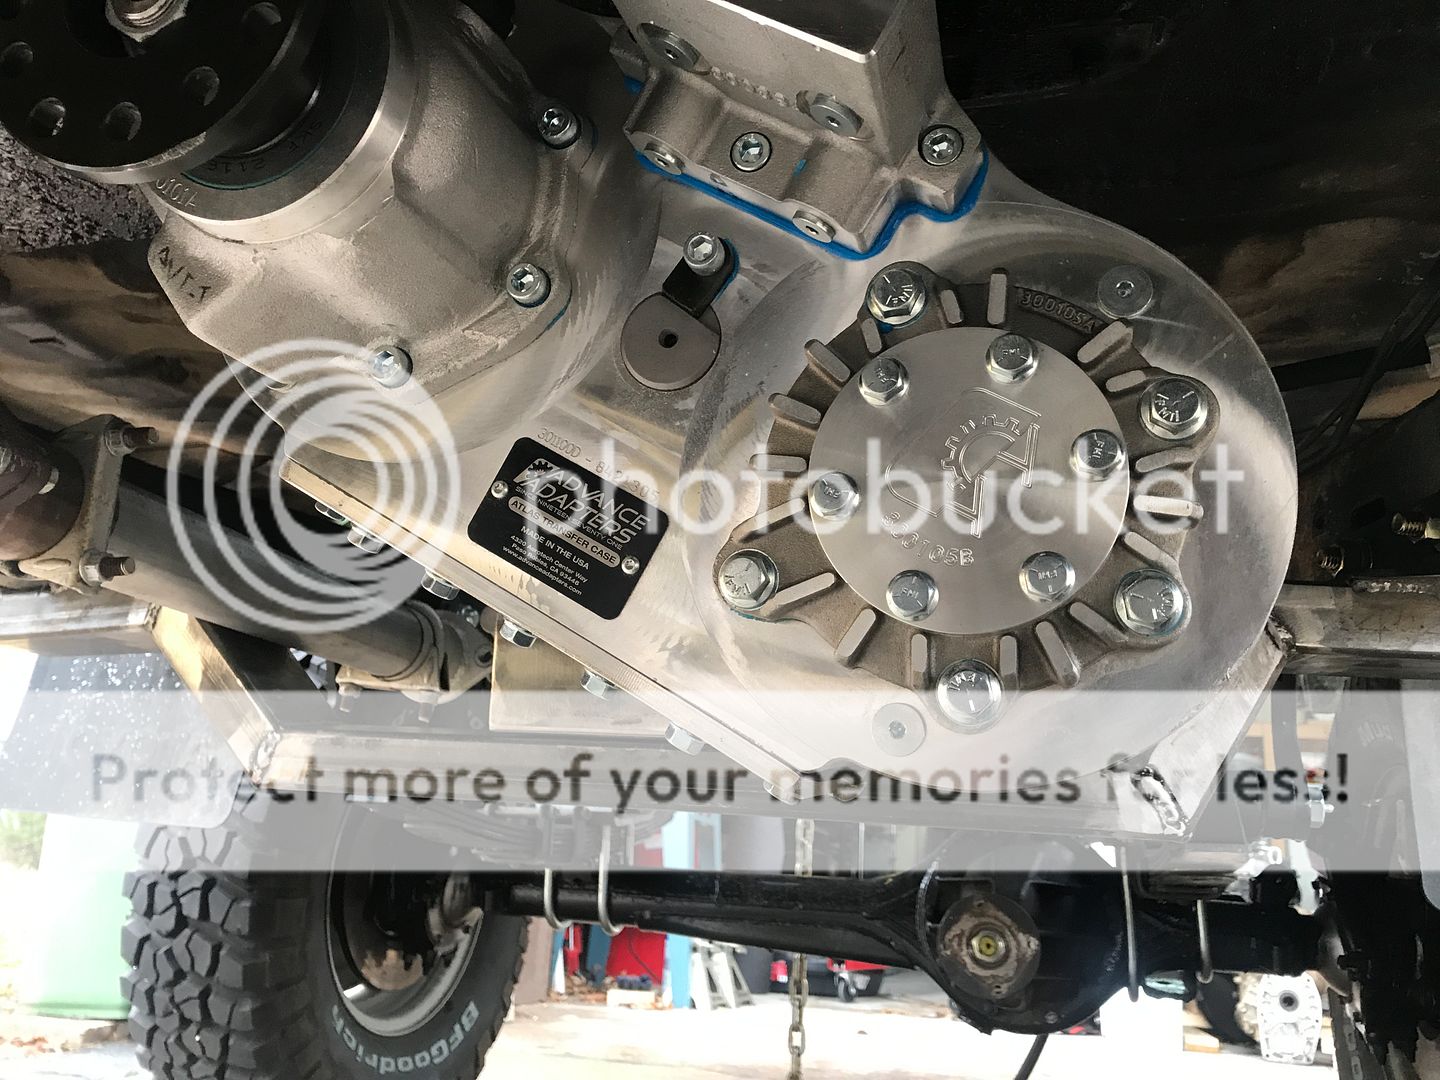
After the axle rebuild it was on to testing fitting the engine, trans, and tc all together. The trans had to be converted from a 2wd to 4wd setup. It was easy. I just put the tc adaptor on to measure the shaft stick out, marked it, and cut it. Before that I had to tap the two holes and plug them (shown with brass plugs) The final step is putting a 4wd shaft seal in. The 2wd setup cycles fluid through those two plugged holes so the seal is not needed, I guess. It took a lot of time and effort by myself trying to find the right geometry of everything. And what I mean by that is moving the assembly forward, backward, side to side, and up and down until everything looked as good as I think it can be. As it sits now the rear output flange on the tc is at a nearly identical opposing angle to the differential flange. The front drive shaft is a different matter. I need to call and talk to someone from Tom Wood's driveshafts or some place like them to see what they think. I had to clearance the block to mount the motor adaptor and mount on the drivers's side. A vacuum pump used to be in that spot but would have been in the way of the frame and/or power steering system. I have the motor mounts tacked in place. I started working on the crossmember/transmission mount. After doing some reading and research, the Atlas 4sp doesn't need a support mount unless it's installed in a rigid frame, usually a custom rock crawler setup or something like that. I'm not sure about clearance. I'll see when I get the drive shaft and adjust from there. And pictures:
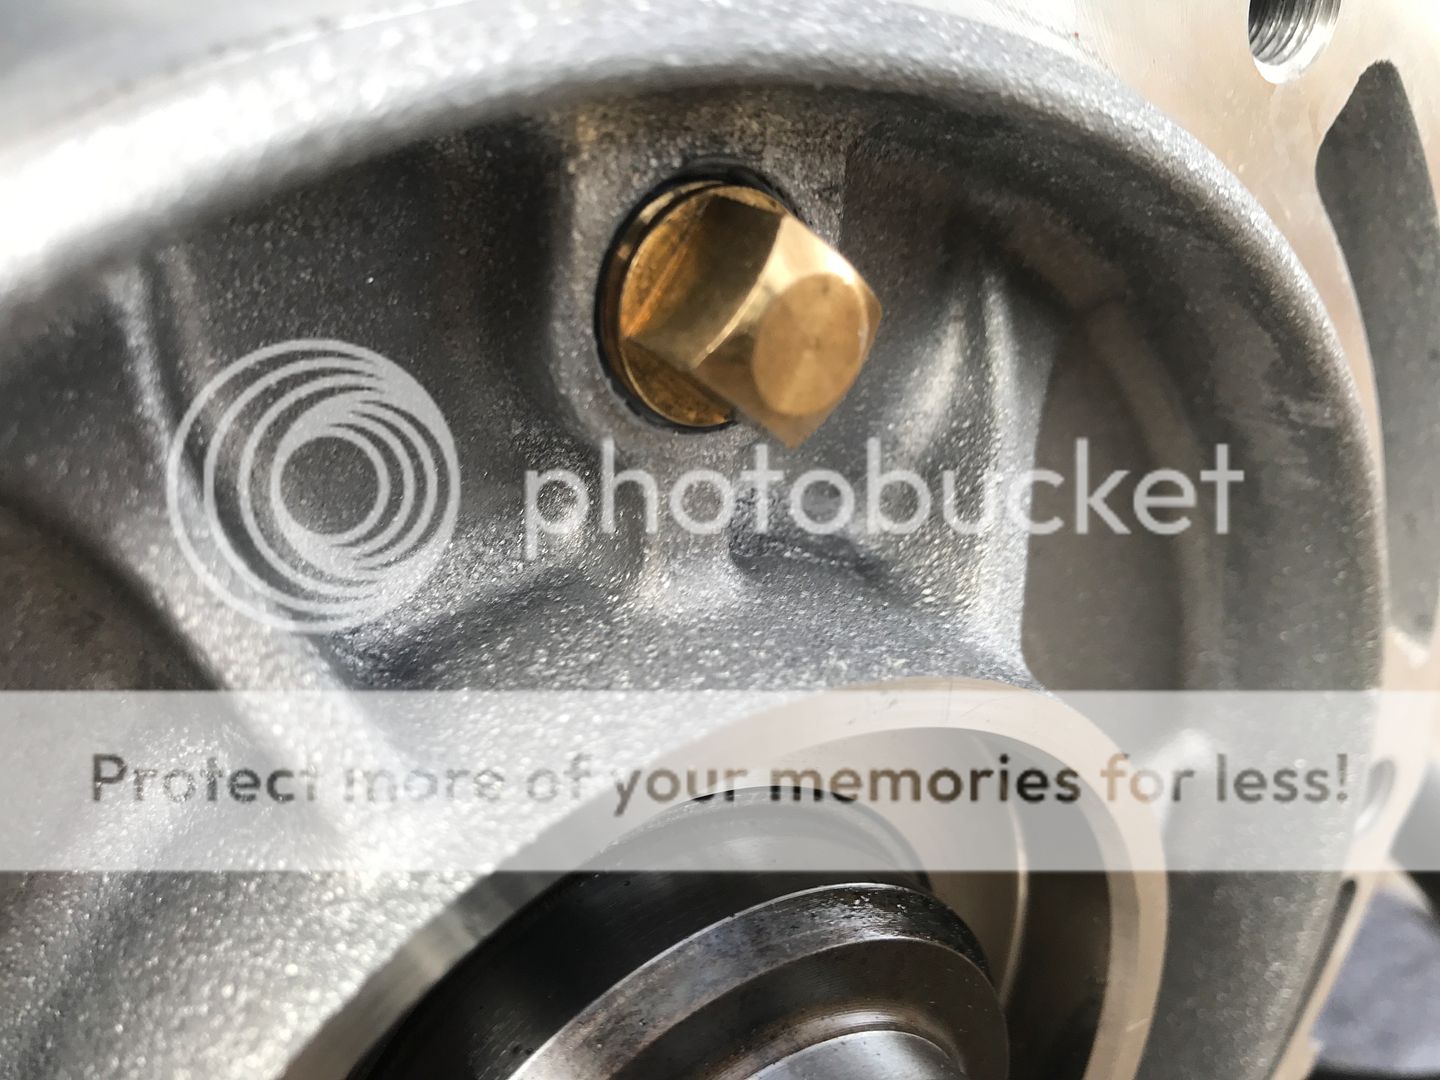
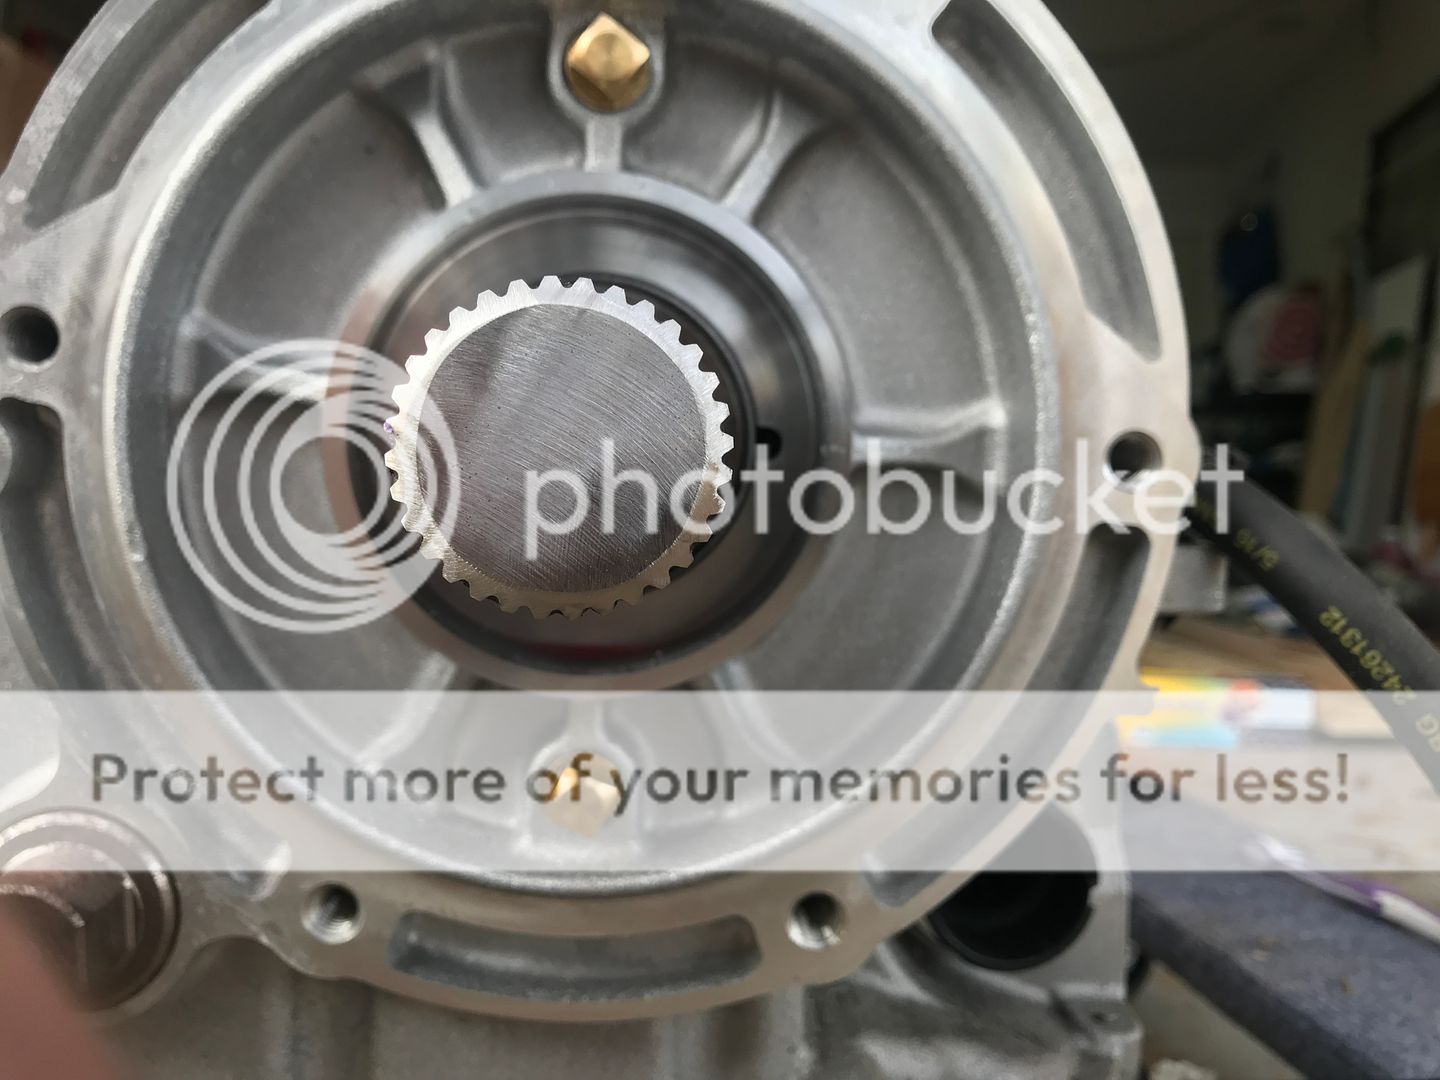
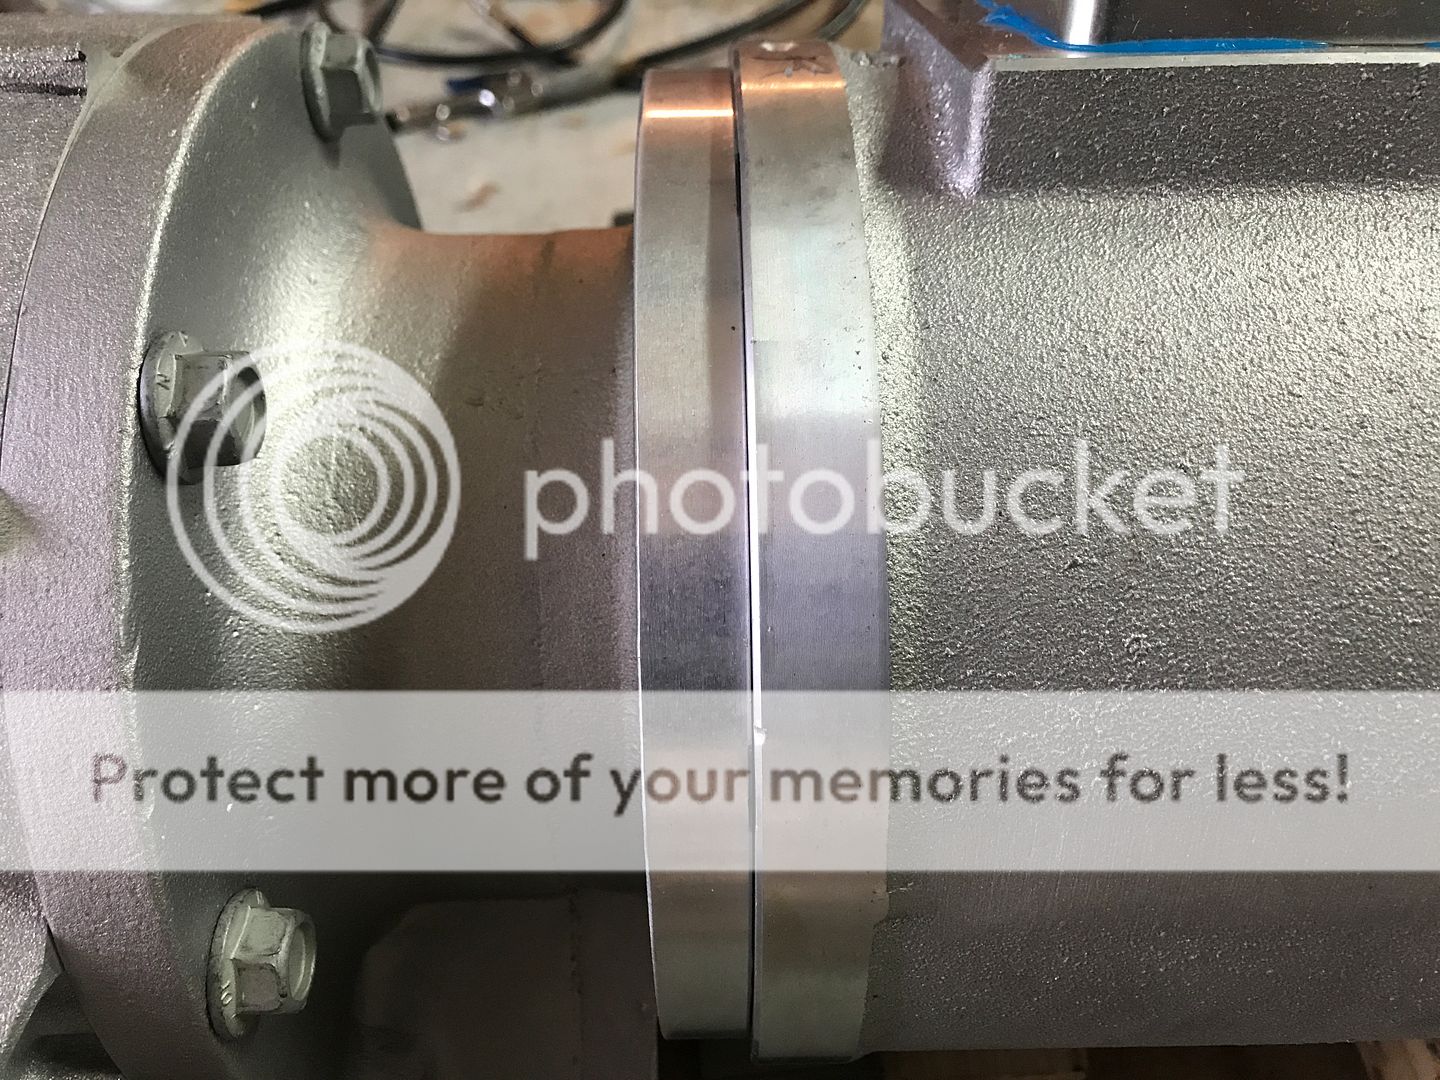
Also, the two silver plugs shown in this photo have to be installed. I think I put the part number for these in a previous post.
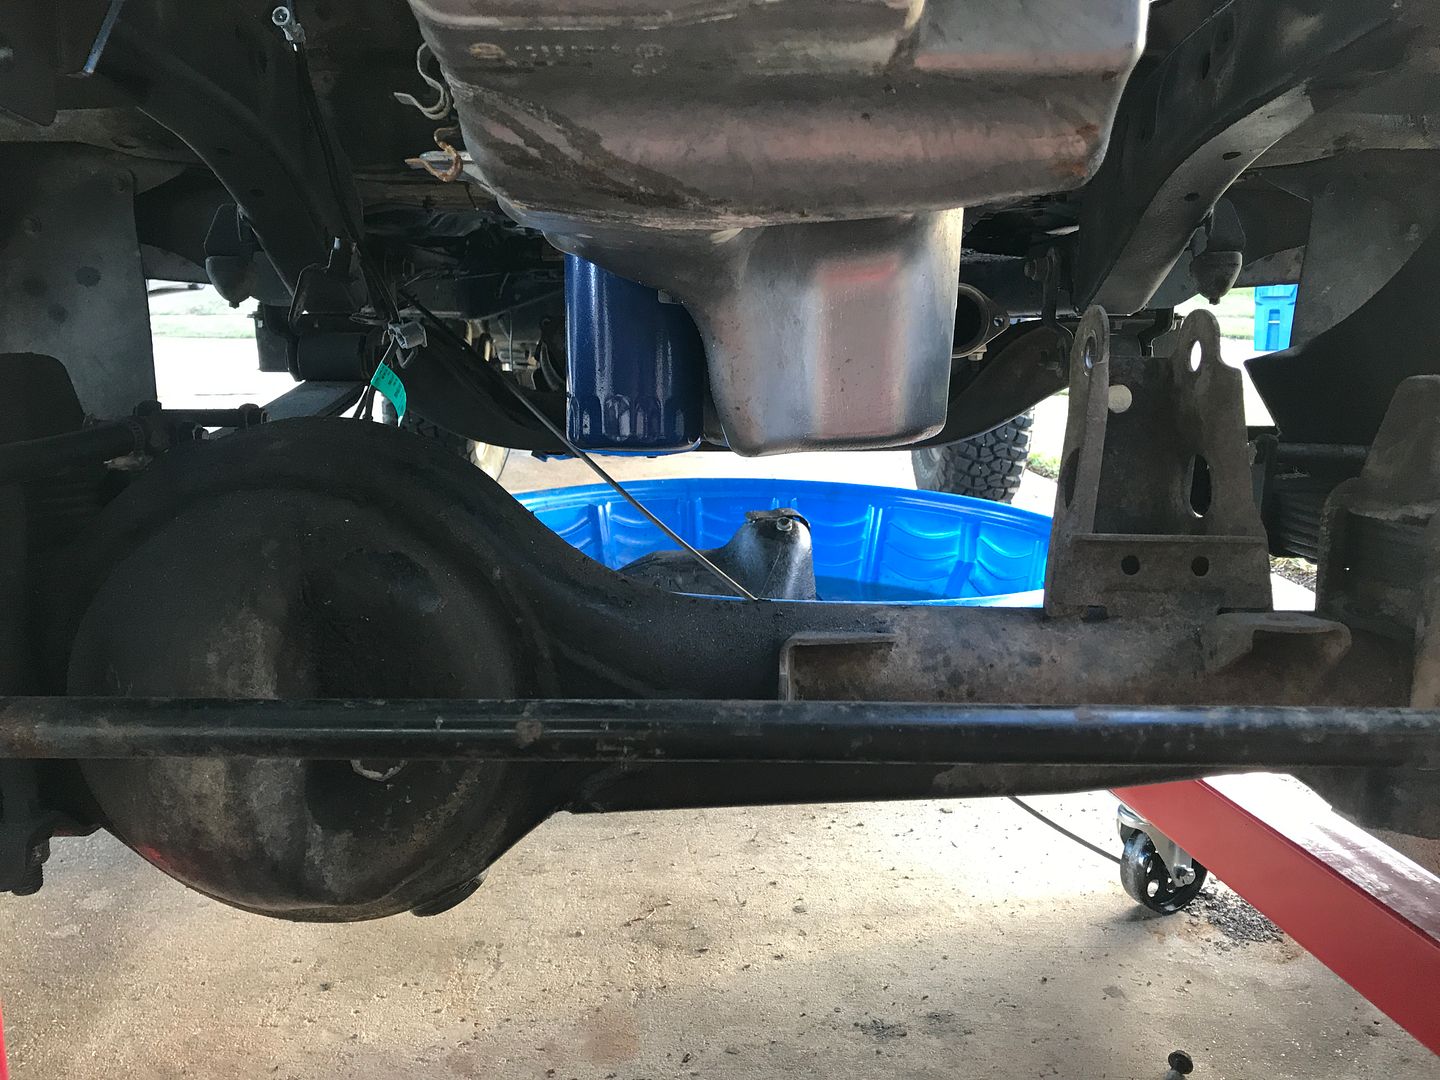
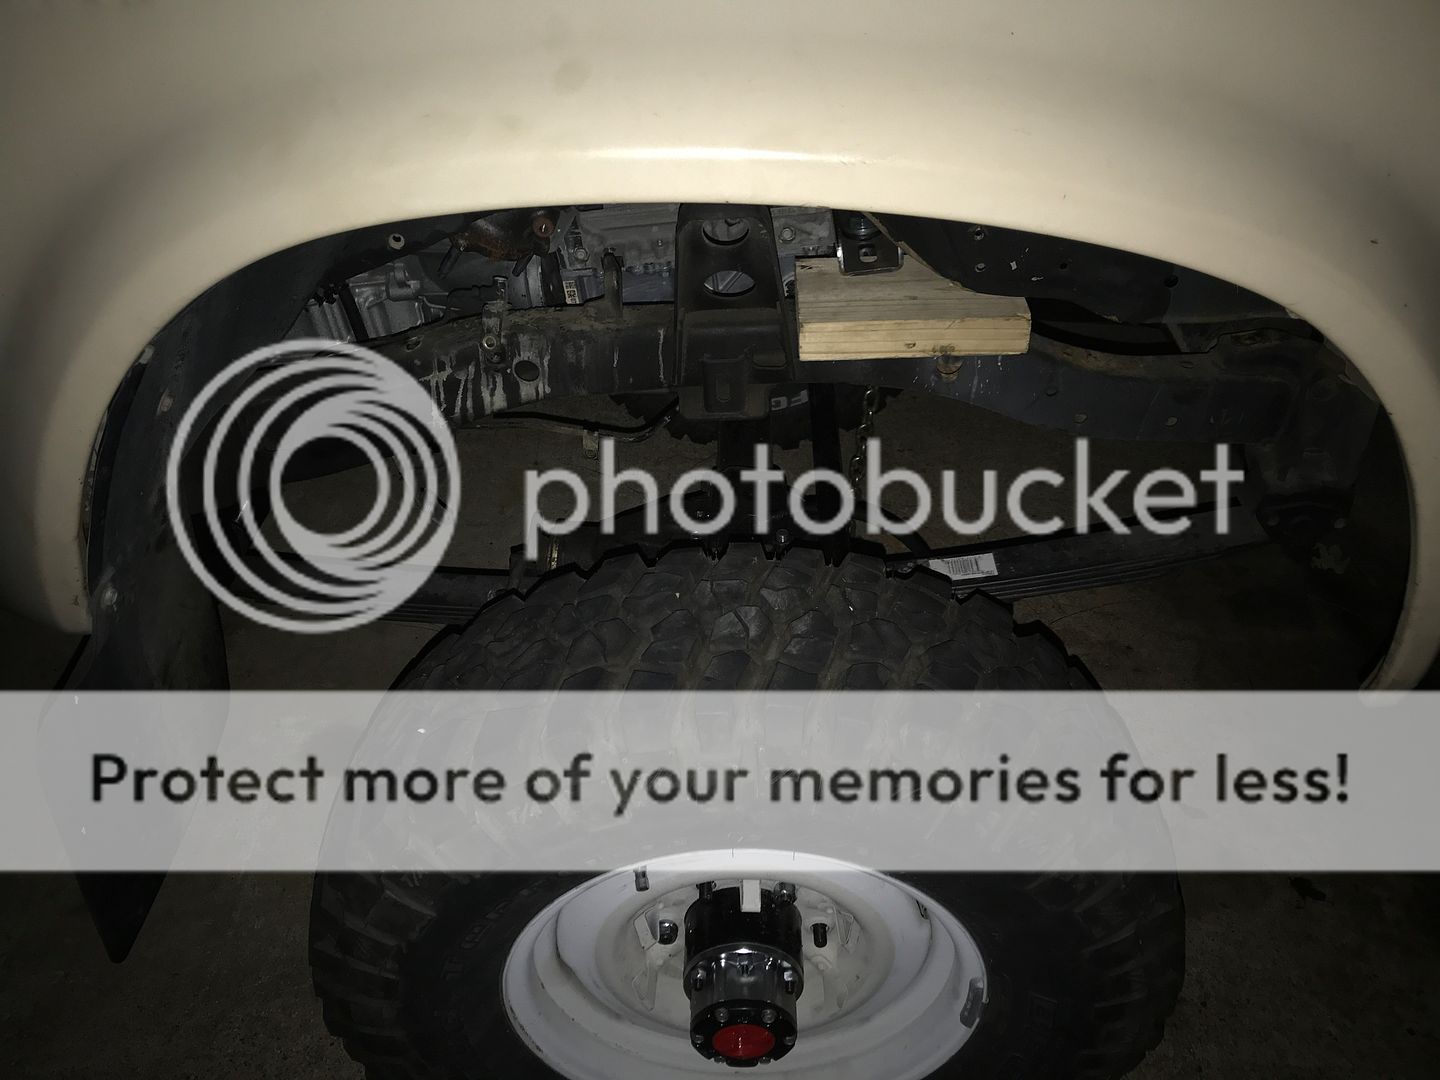
Oh yea, almost forgot. Put some longer shackles on and put another leaf in the pack on the front axle. I'm hoping this gives me enough clearance for the oil pan. Bump stops will help.


 12-14-2018, 07:27 PM
#26
Registered User
Thread Starter
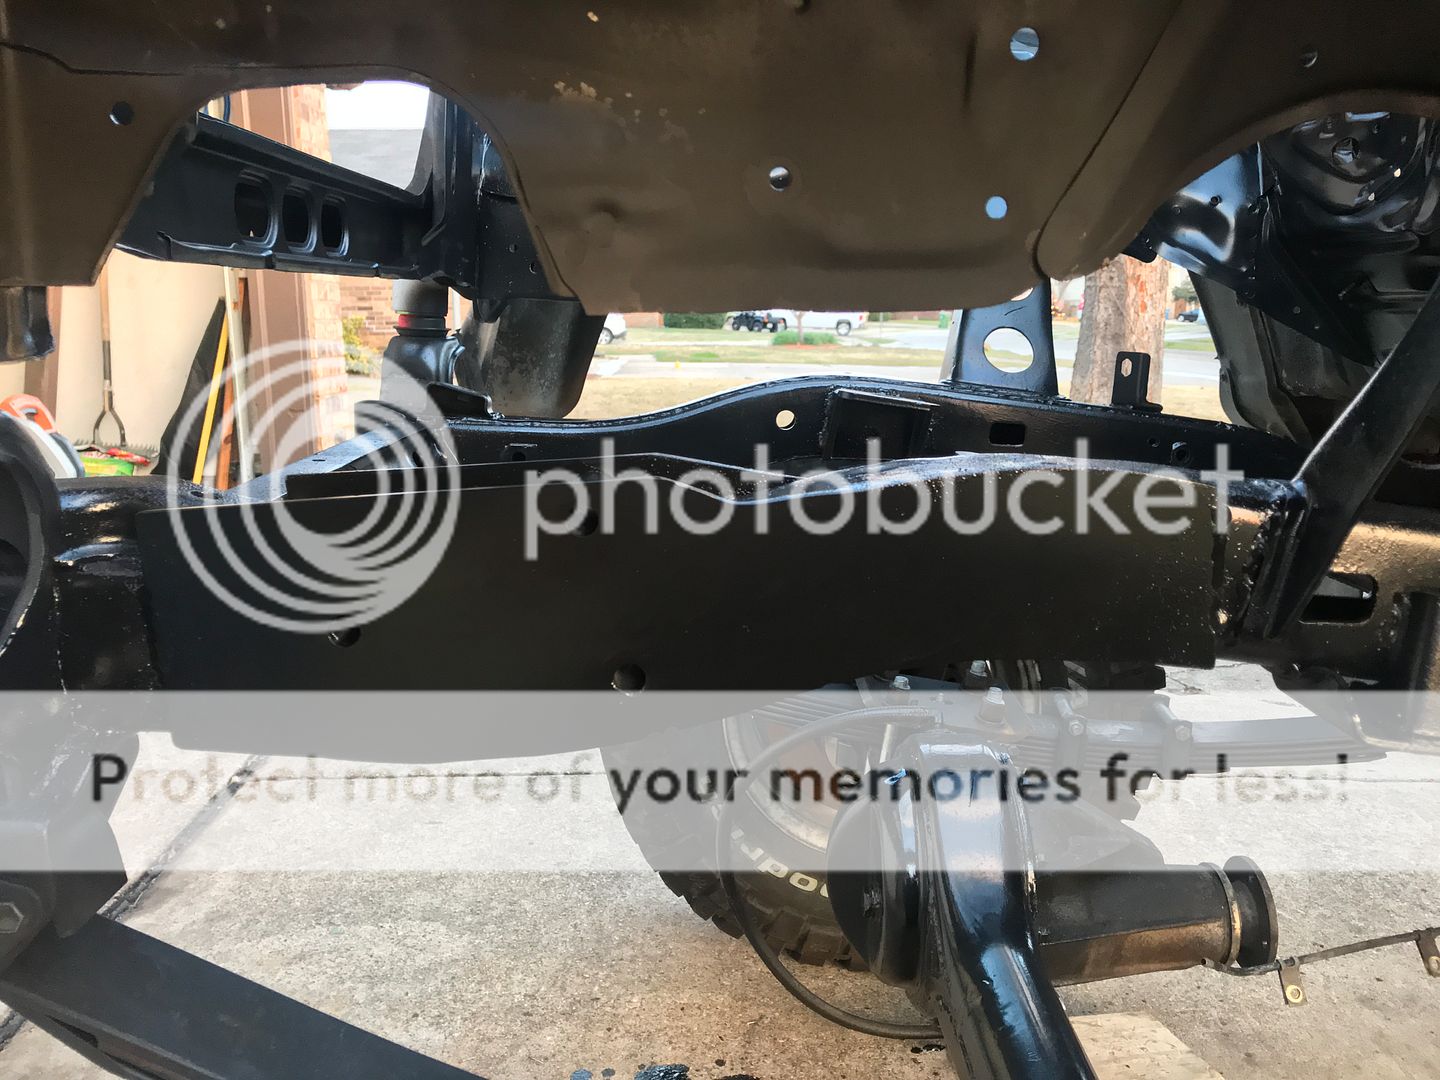
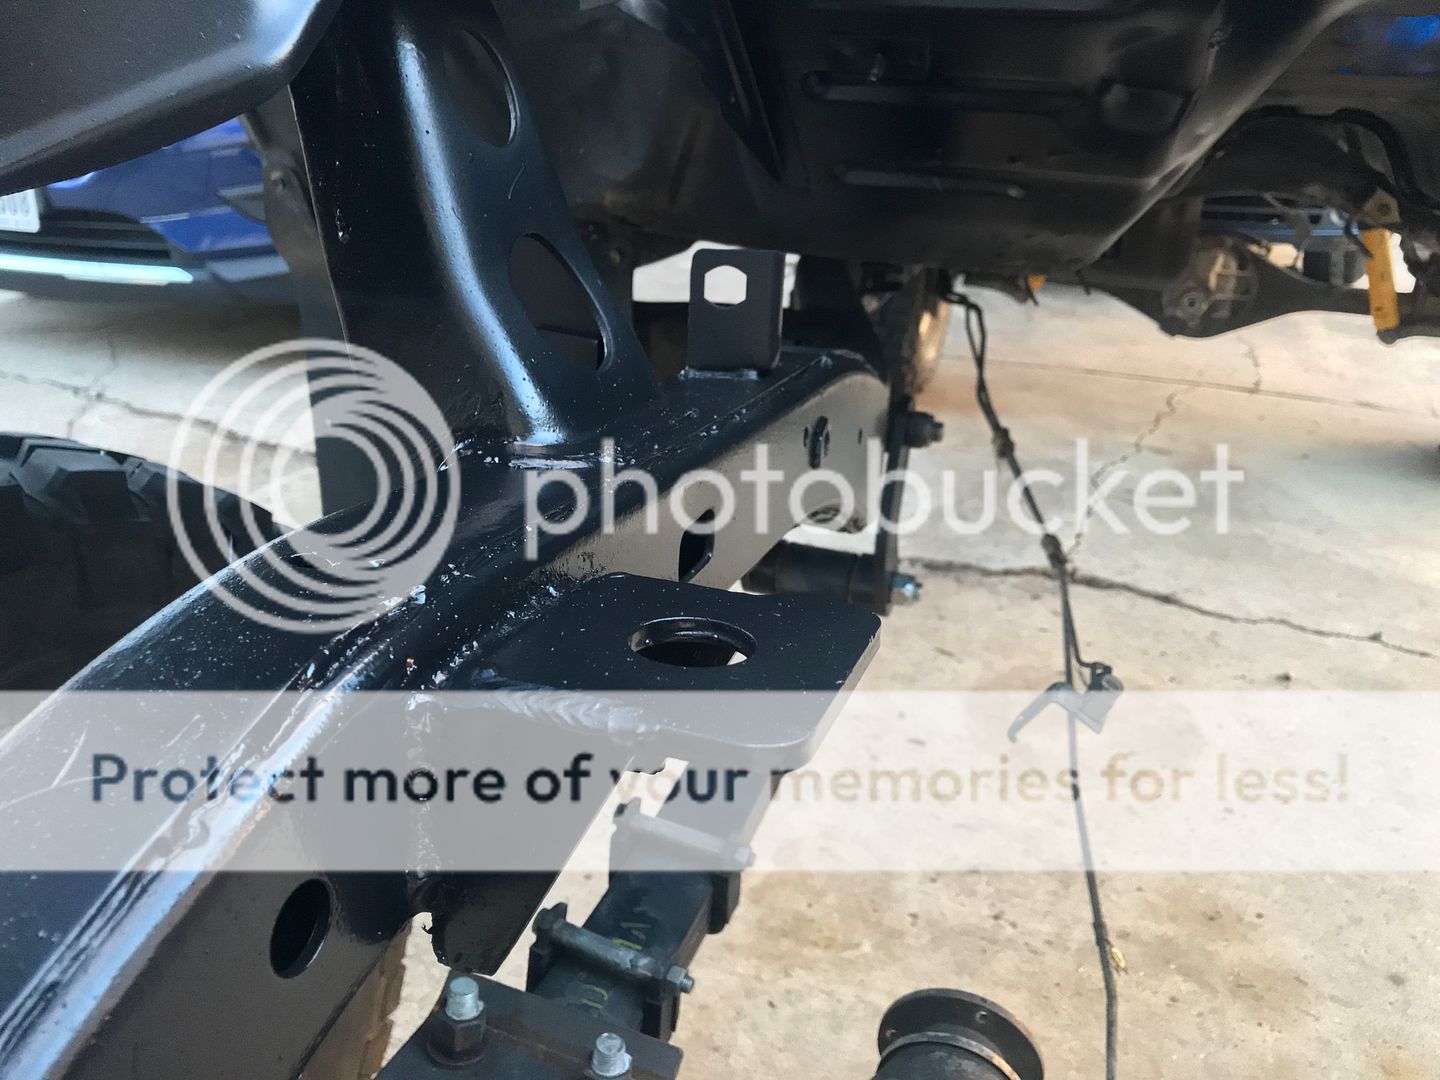
I finished the crossmember.
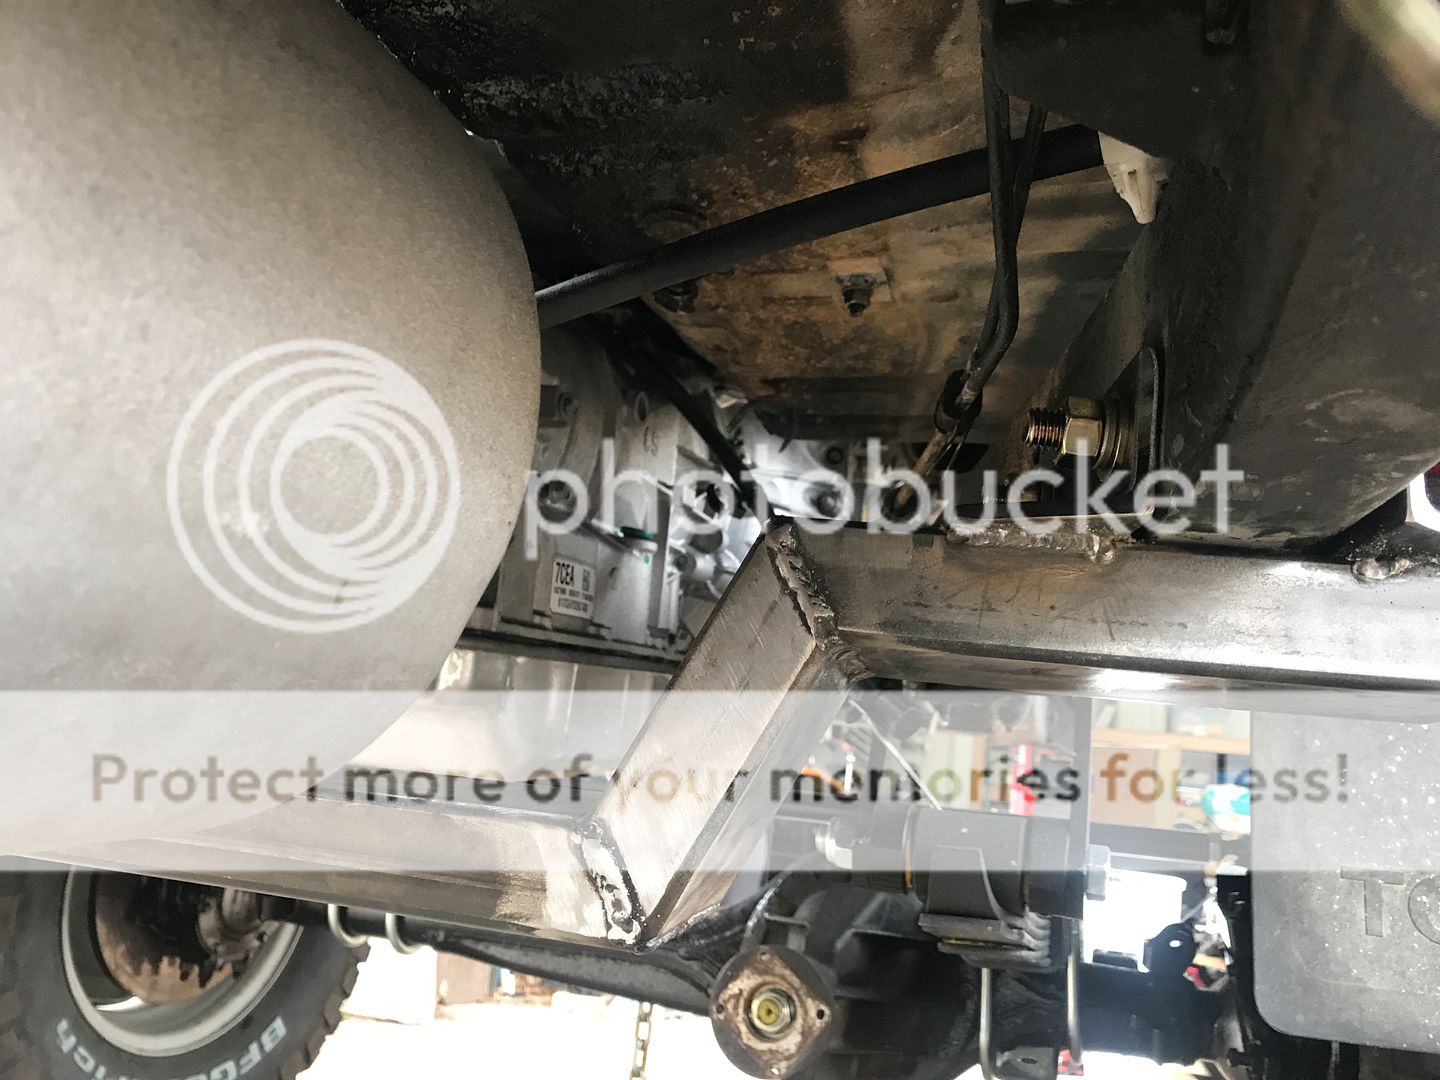
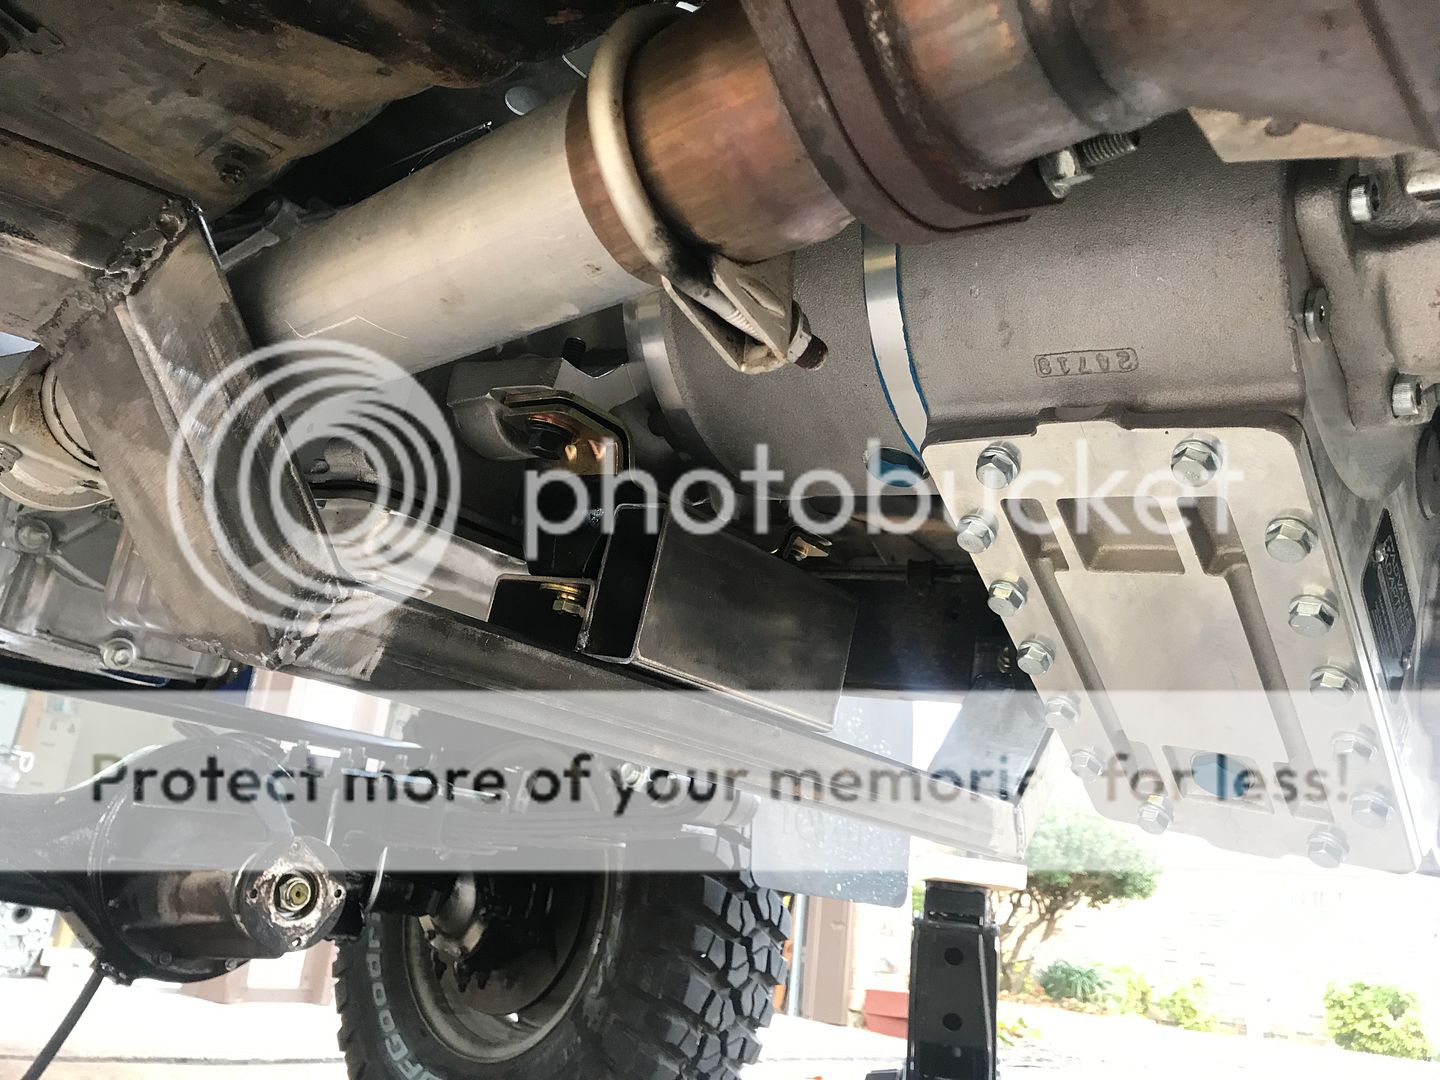
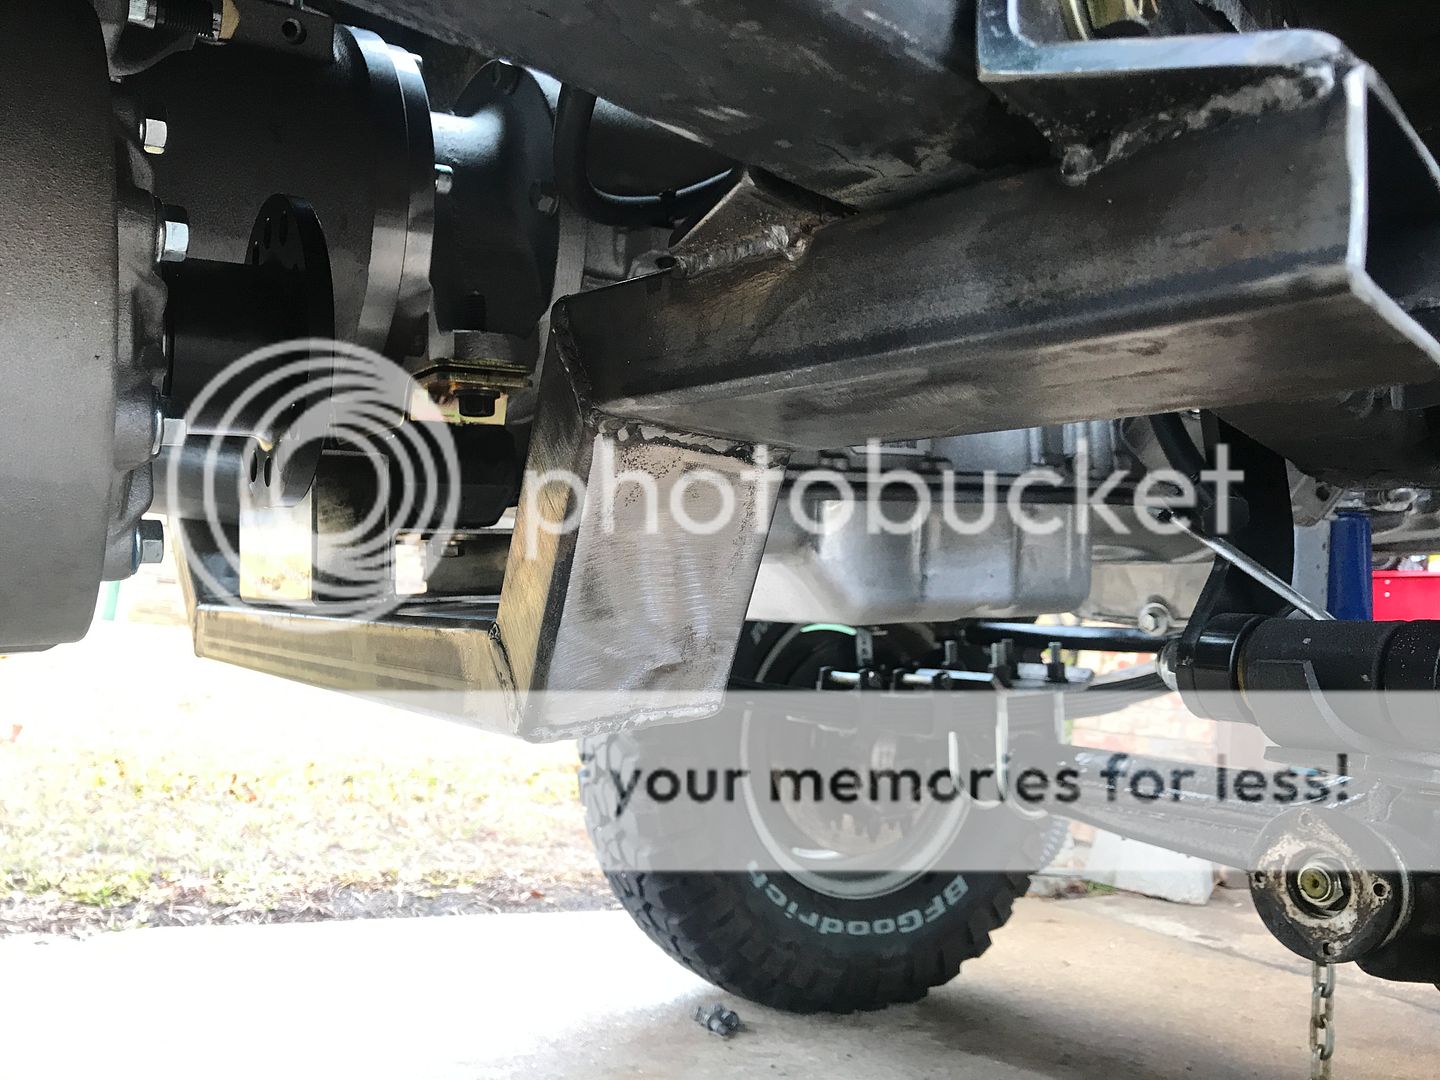
Now I can measure for some plate steel to protect the TC and add a rear support for the plate.
I might have to modify the area where the front propeller shaft is located. It really depends on how long the cv joint is before angling down toward the differential.
An unintentional result was that I ended up with two jack points for a Hi Lift jack. I just need to make an adaptor to slide into the end of the crossmember tubing. Easy like Sunday morning.
Last edited by Trueblue93; 12-14-2018 at 07:32 PM. Reason: Adding content
01-19-2019, 07:52 PM
#27
Registered User
Thread Starter
Pics
It's been a while. I've made some progress.
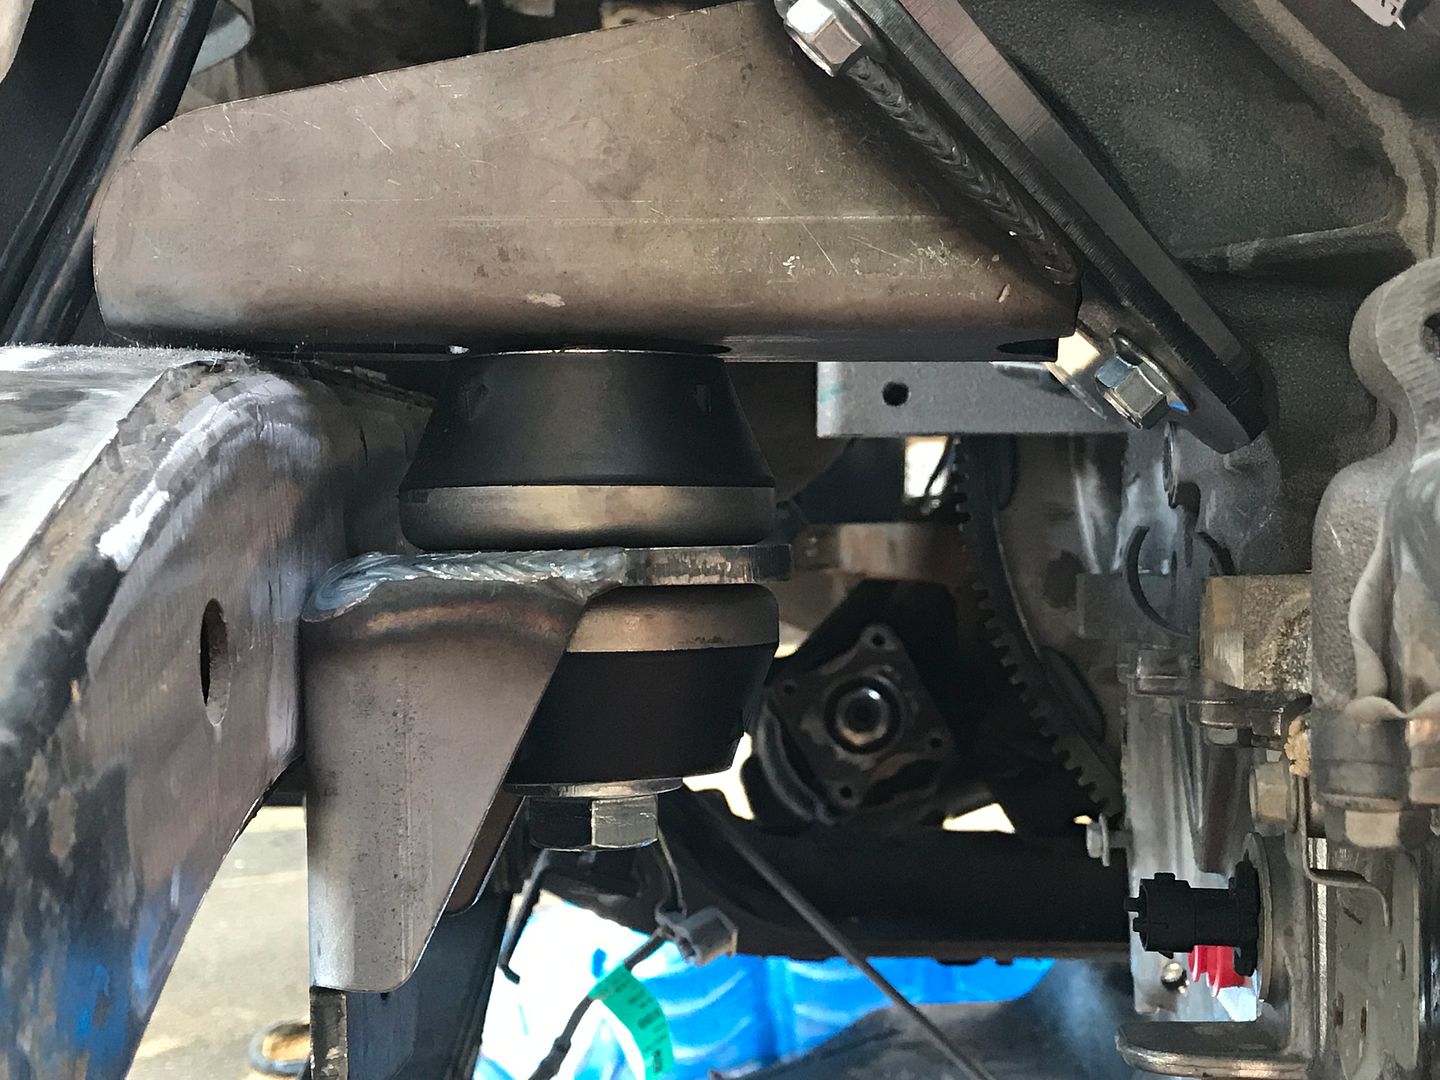
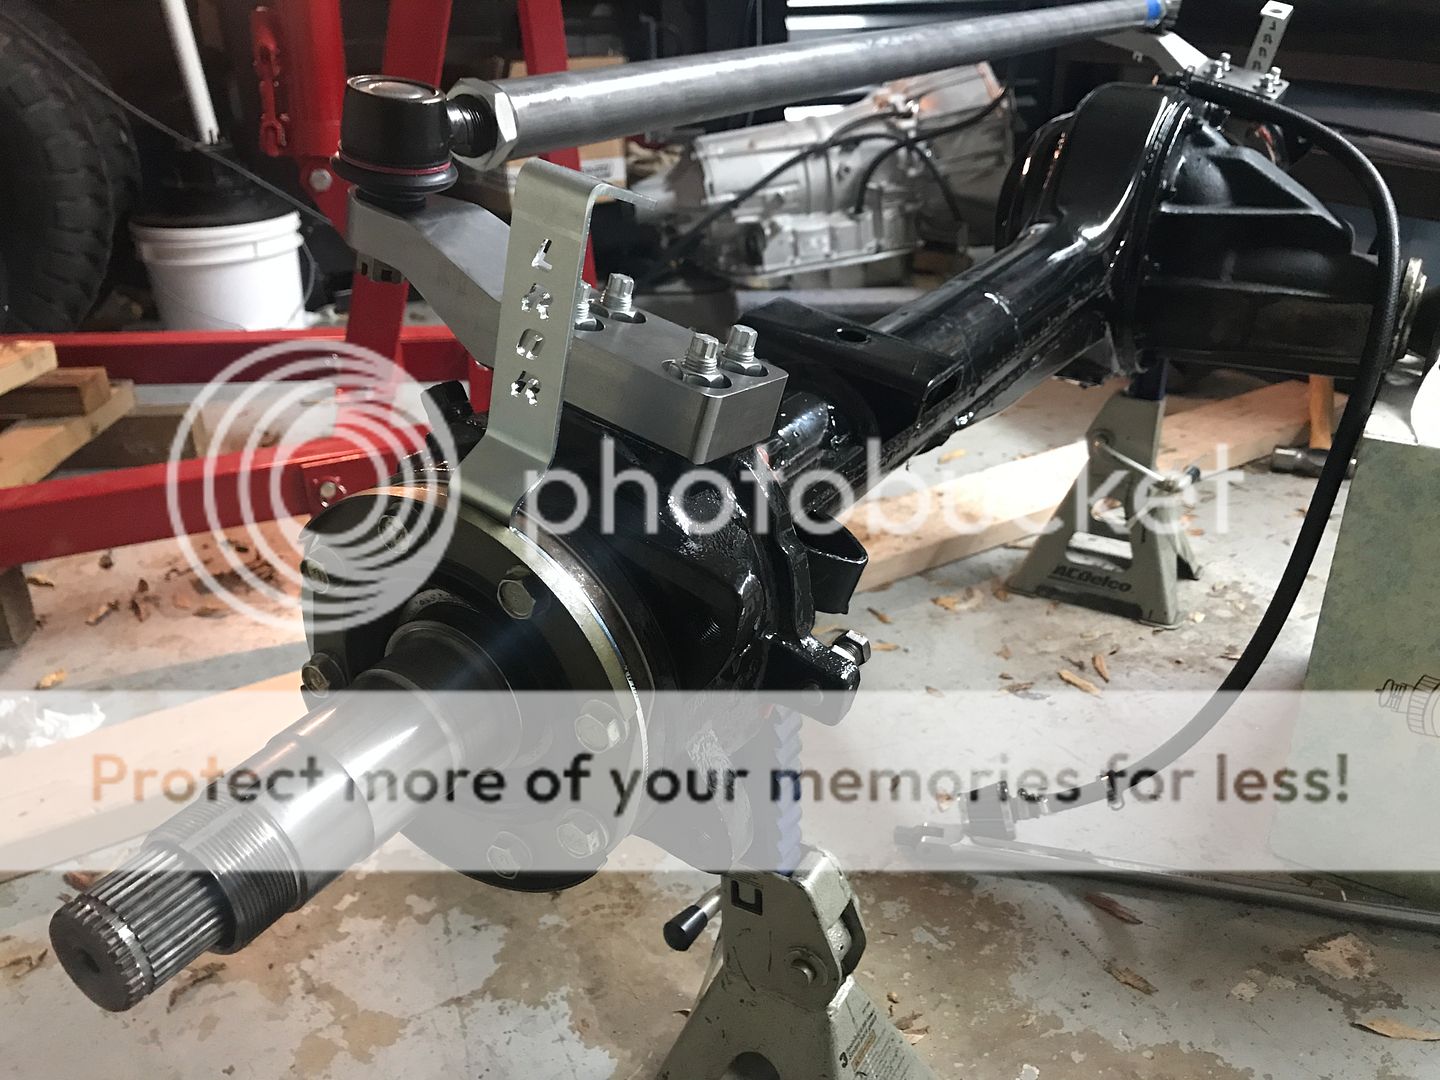
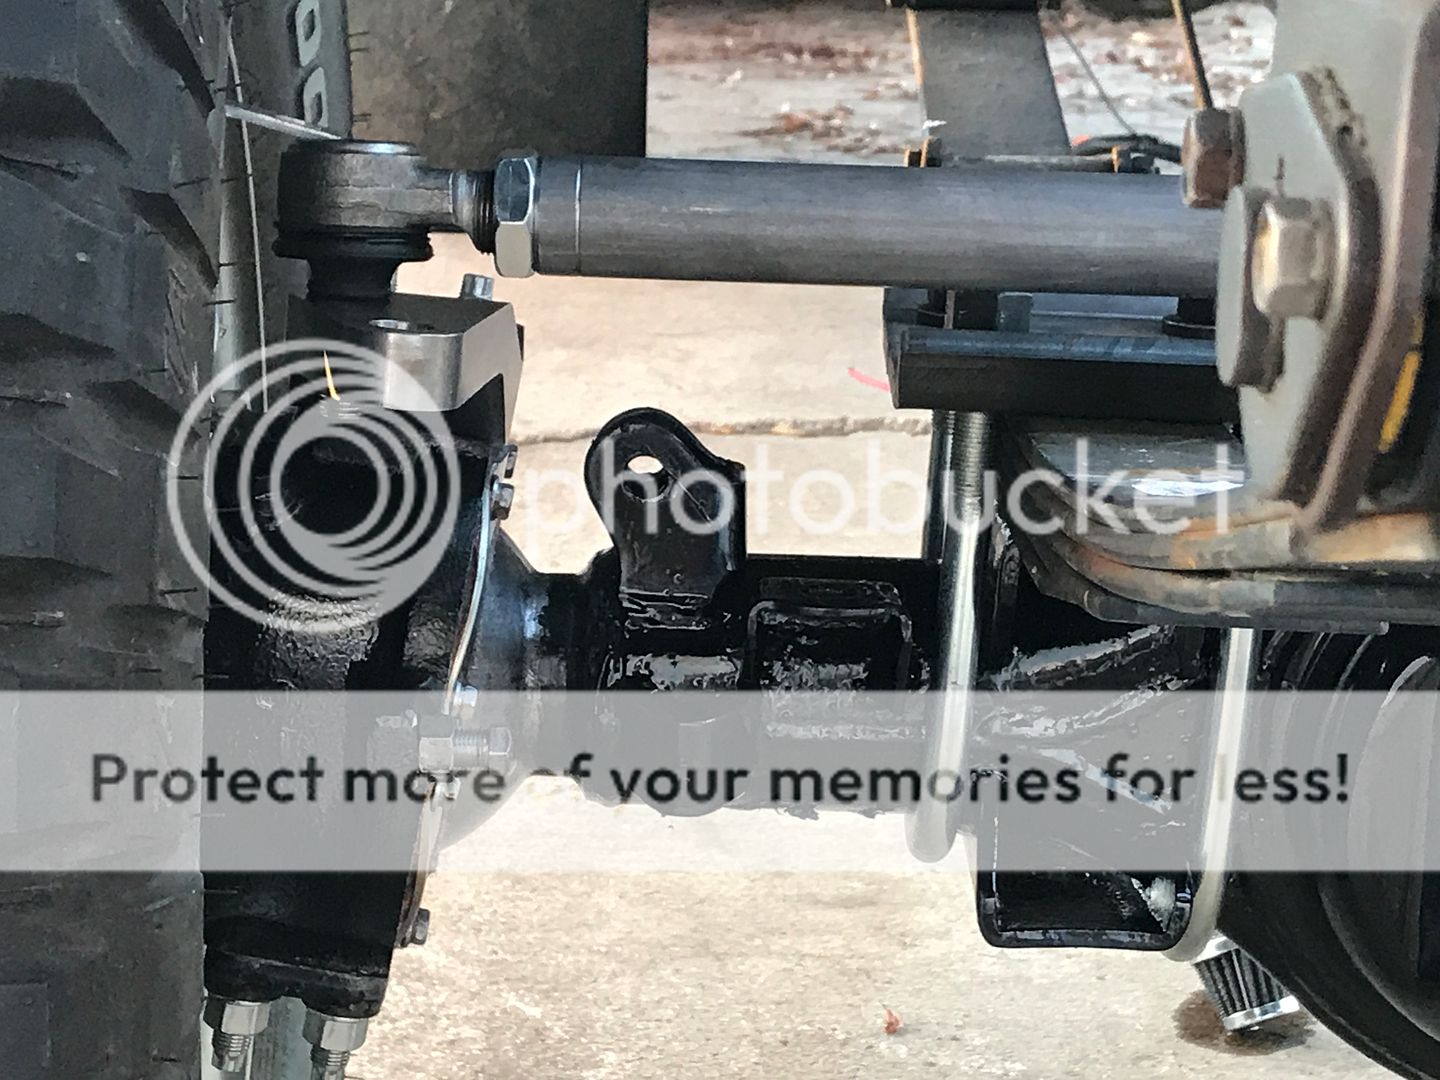
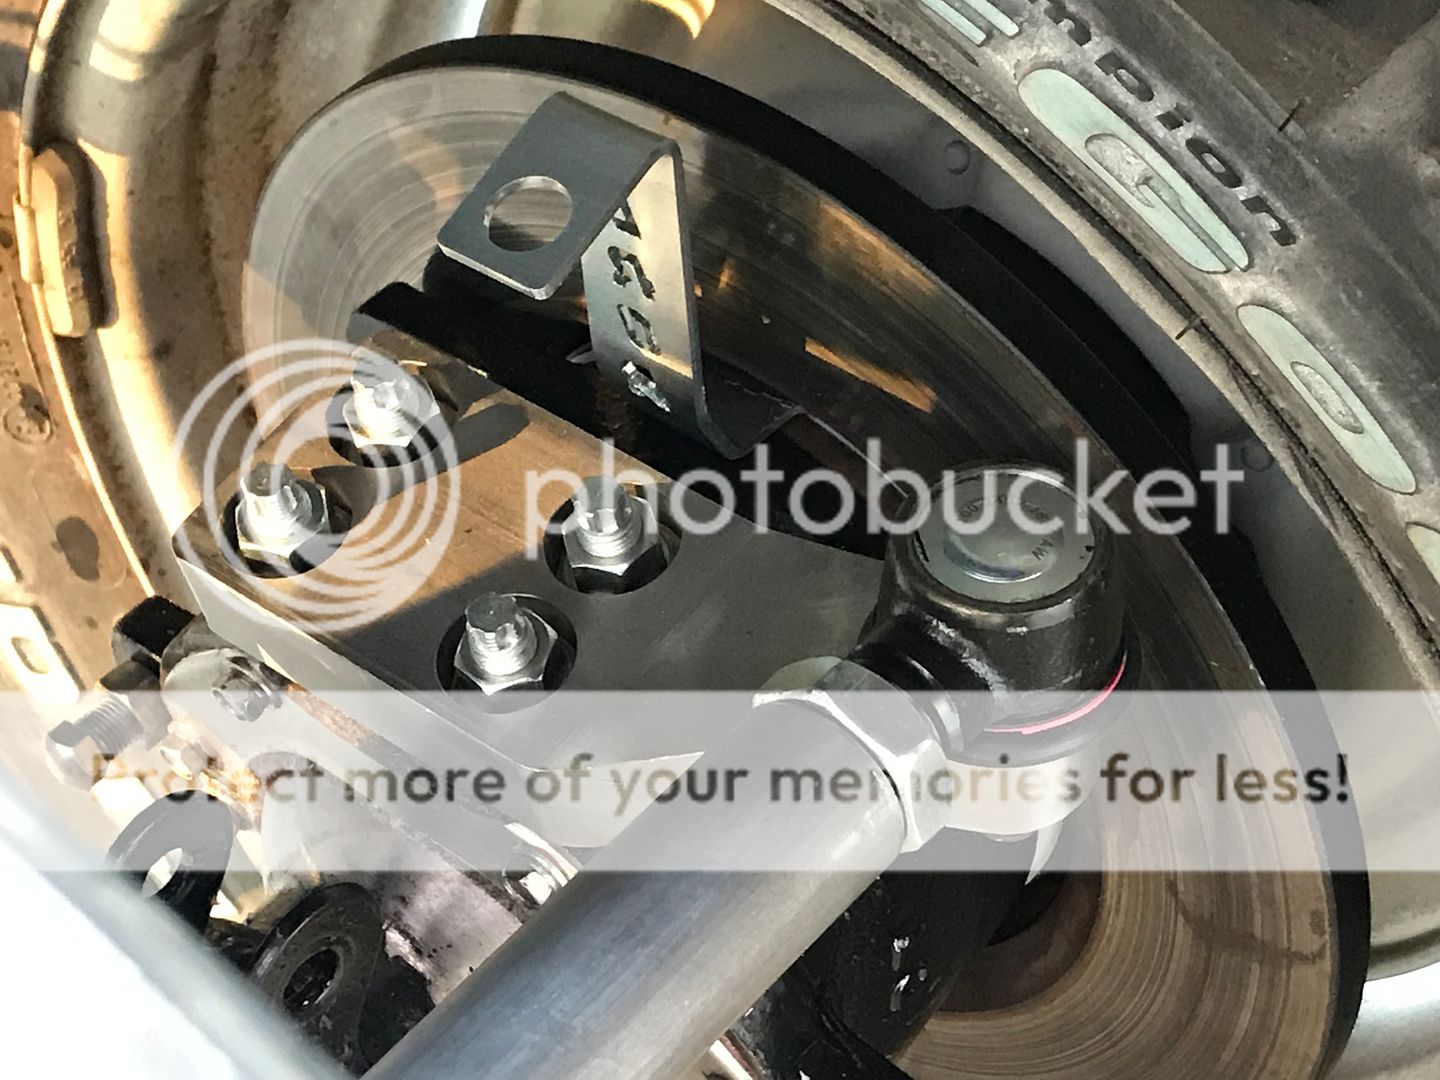
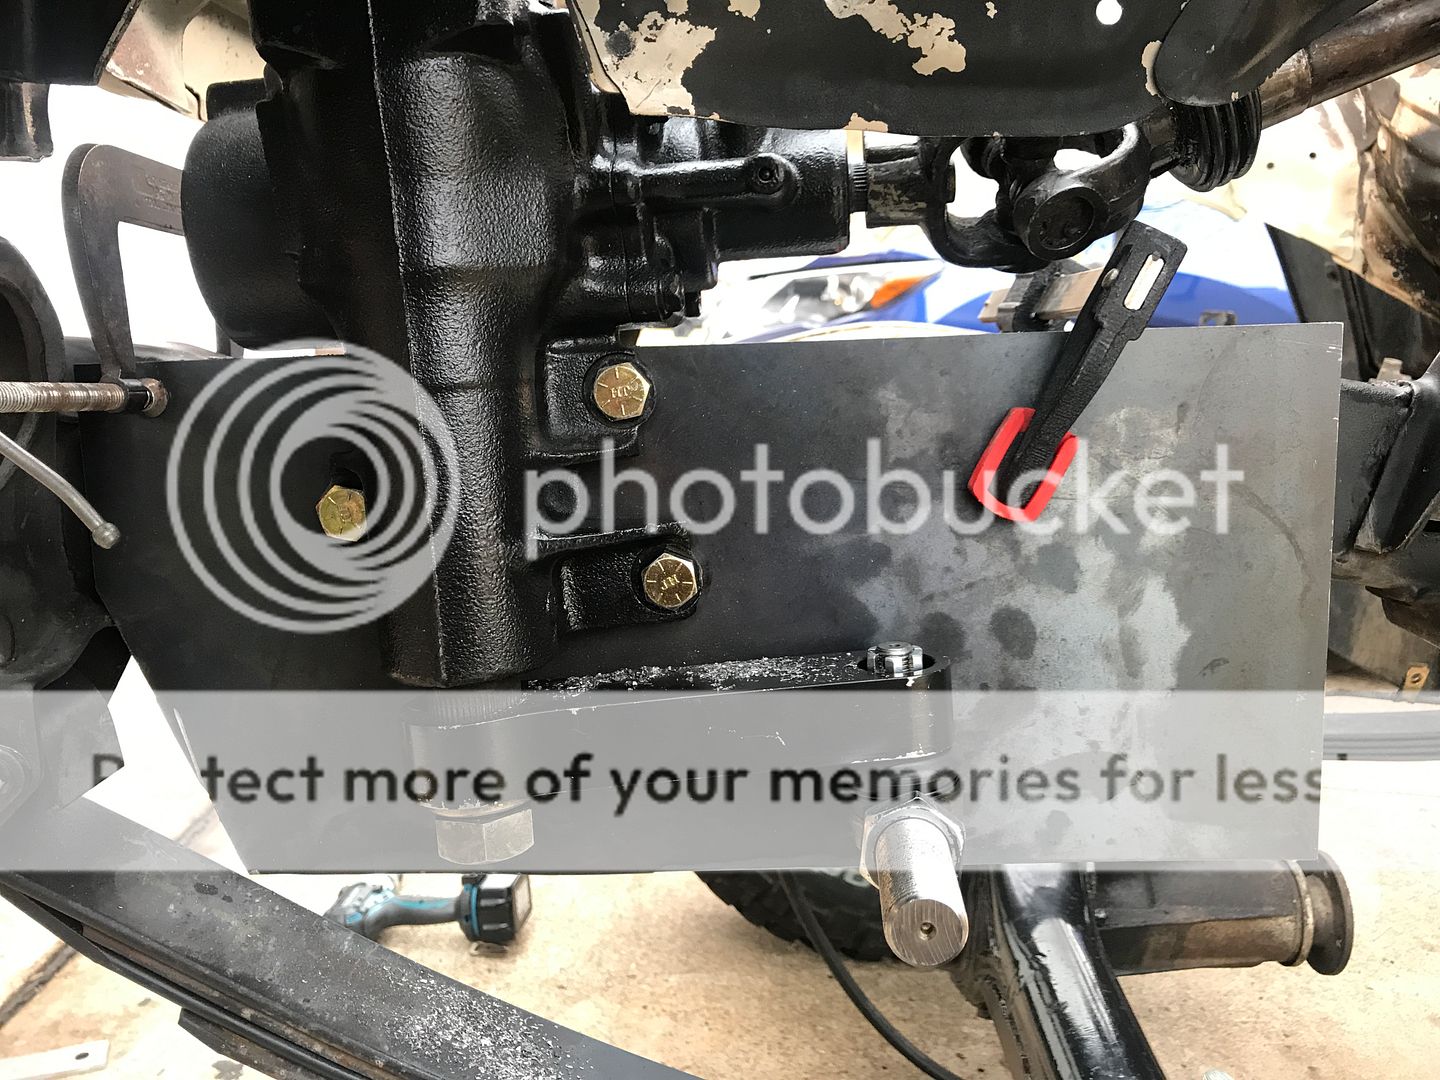
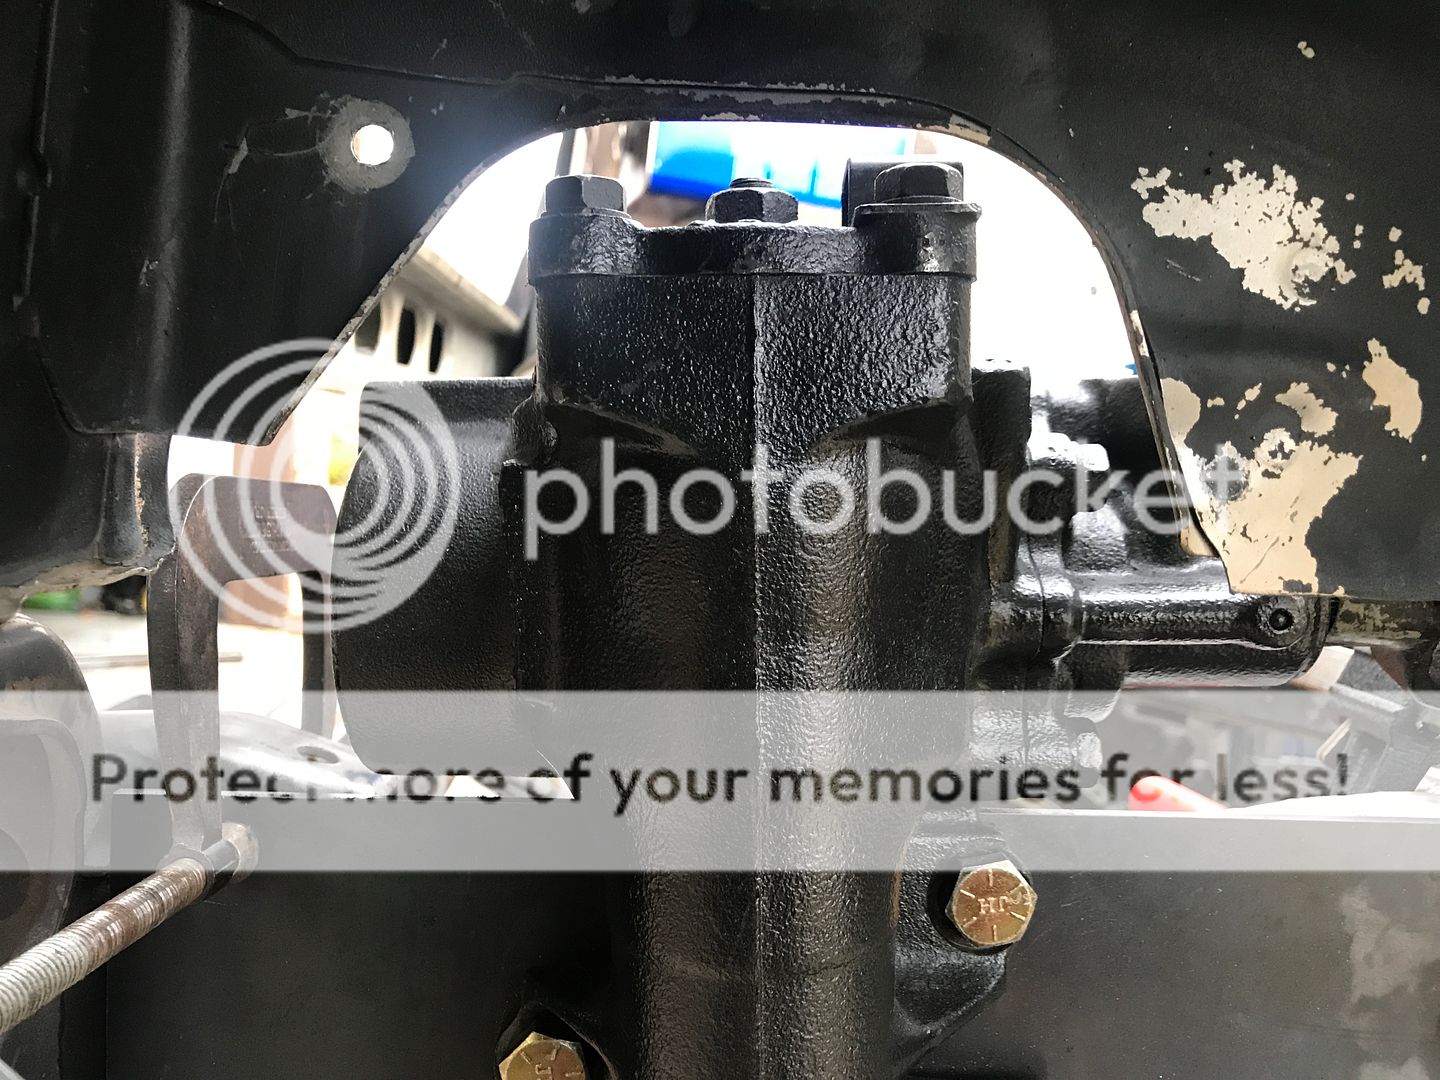
Mocked up the hi steer kit from Sky. With the 2" body lift the mounting plates that come with the kit wouldn't work. I fabbed up my own brackets with much more support. If I'm missing something, please feel free to critique anything.

Hmmm.....I thought I had taken some more photos of it finished. I'll try to snap some tomorrow.
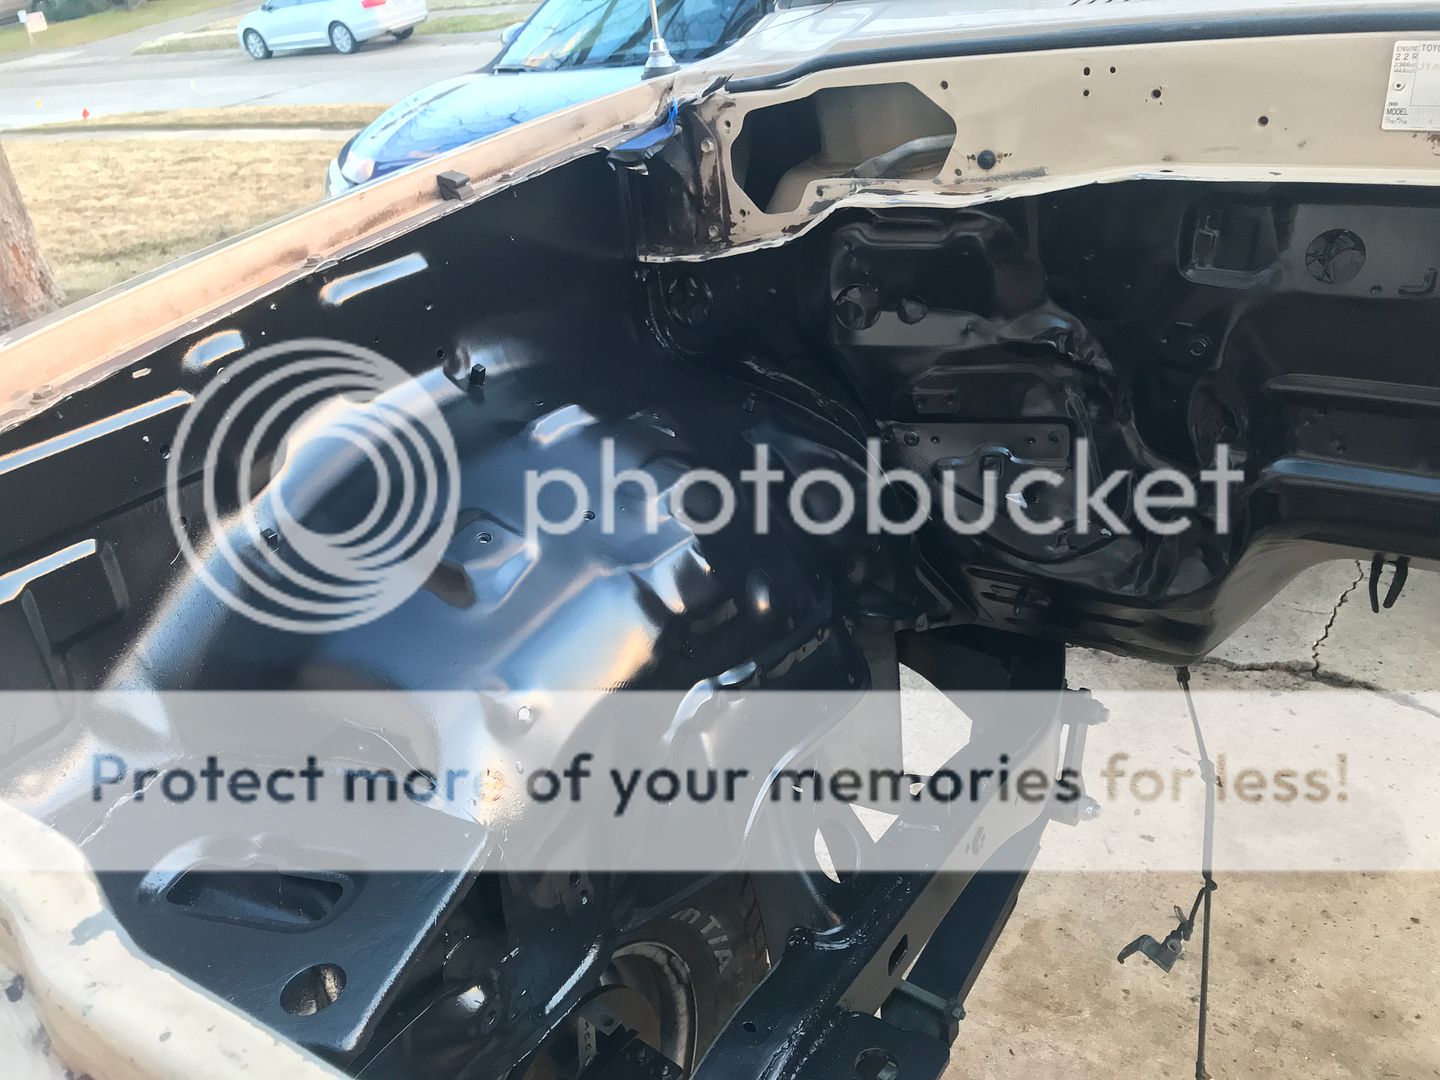
I scrubbed down the engine bay and wiped it clean with acetone three separate times. One coat of POR and two coats each of the Eastwood's 2k black primer and chassis black.

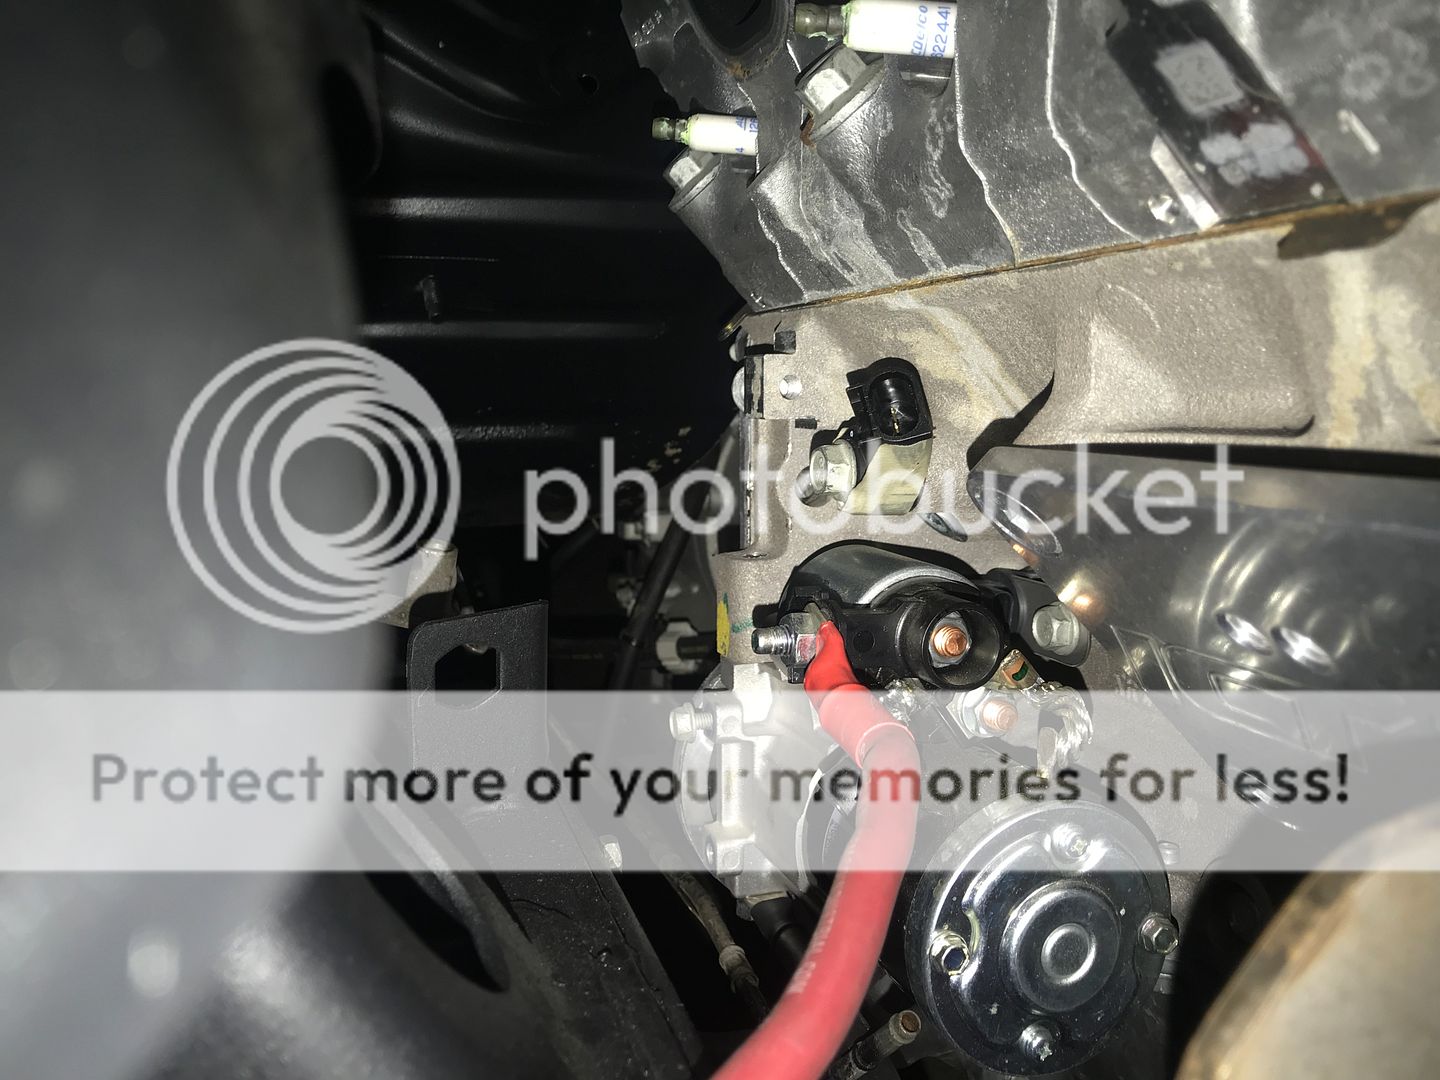
Welded up the motor mounts and put everything back in, sans TC. Just haven't had the time yet.

Fabbed up a battery mount after much contemplation about orientation. The A/C compressor comes so far over with the Dirty Dingo mounts that I had to go with a smaller battery.
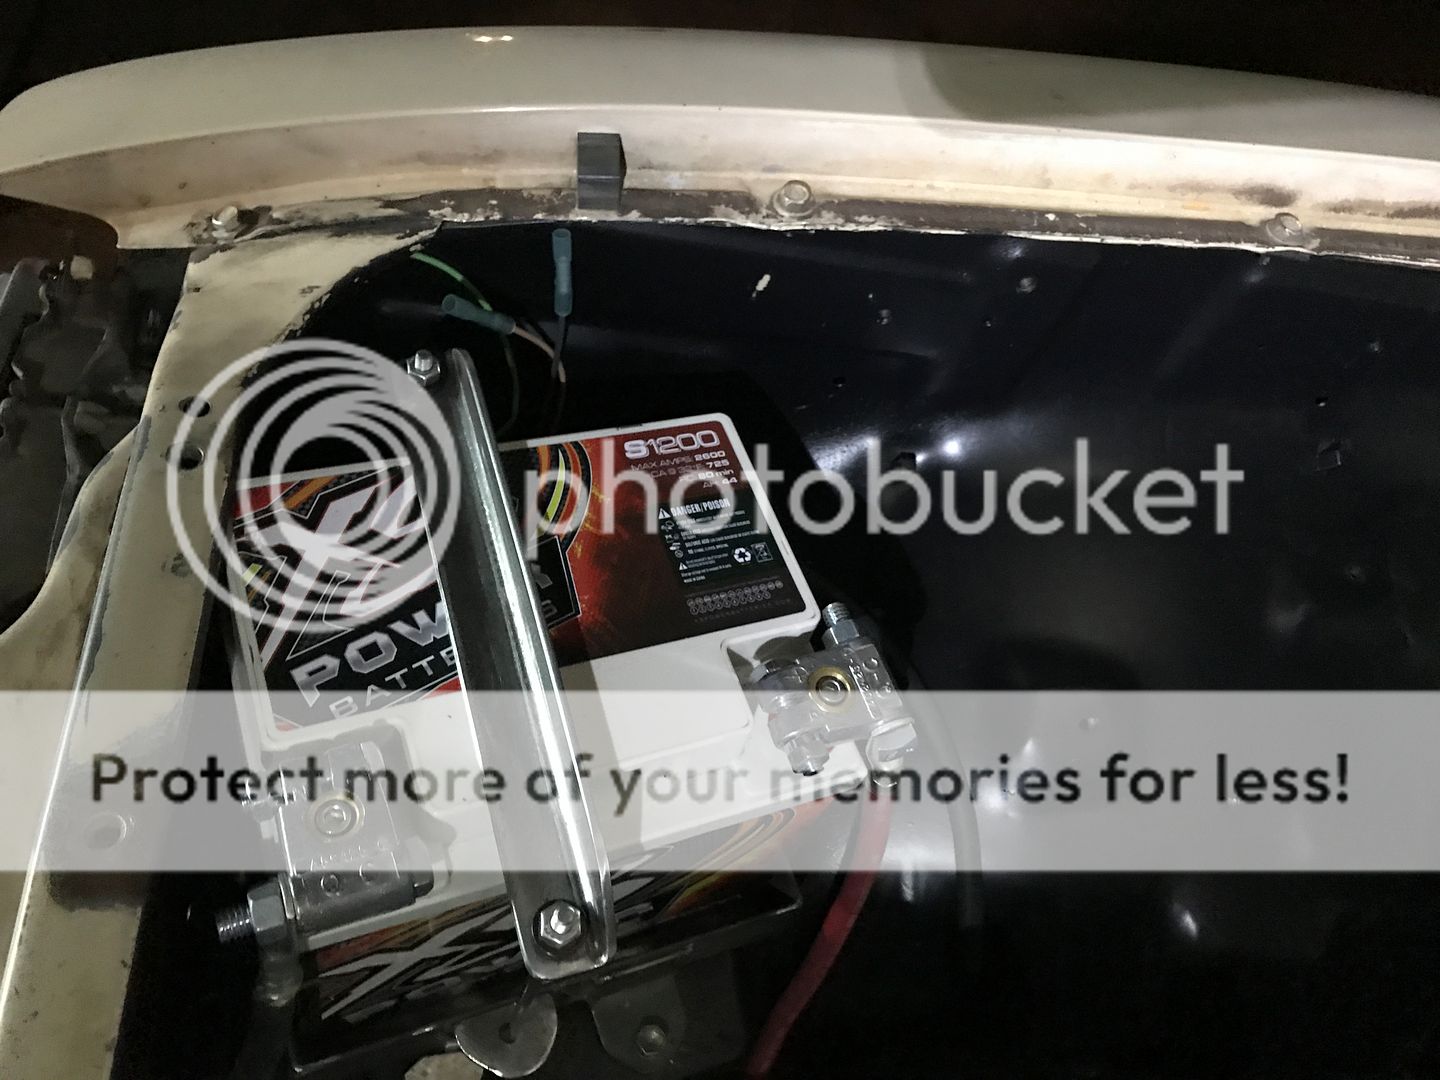
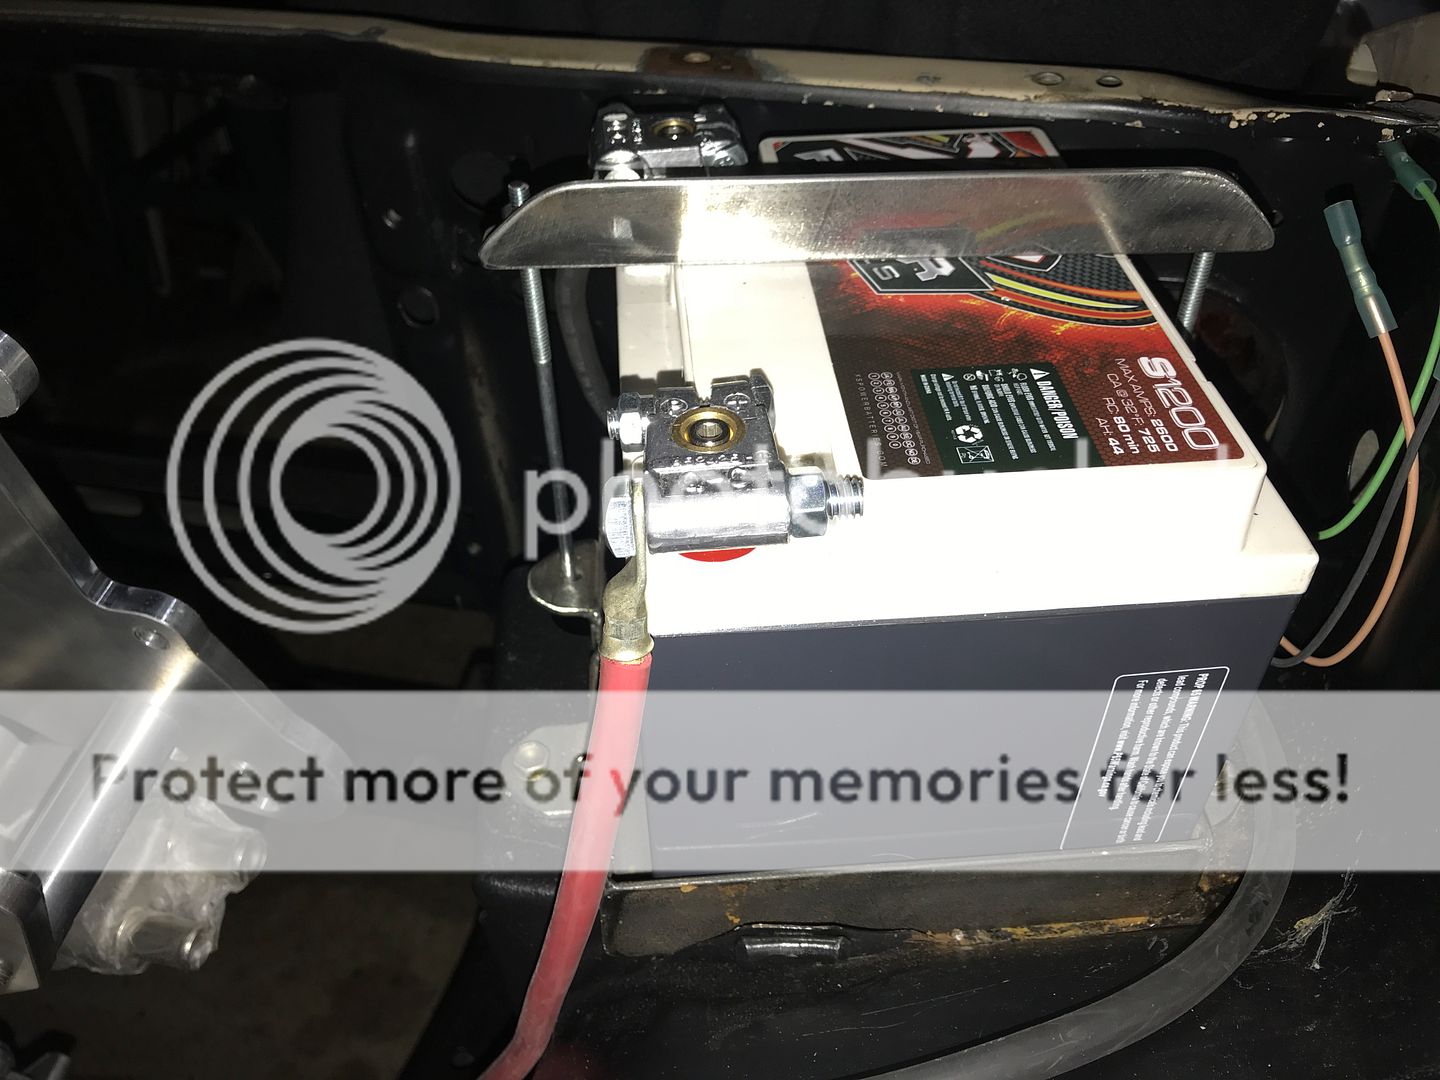
I started the wiring process. Again, after much contemplation about where to put everything, I think I finally have the main power distribution the way I want it.
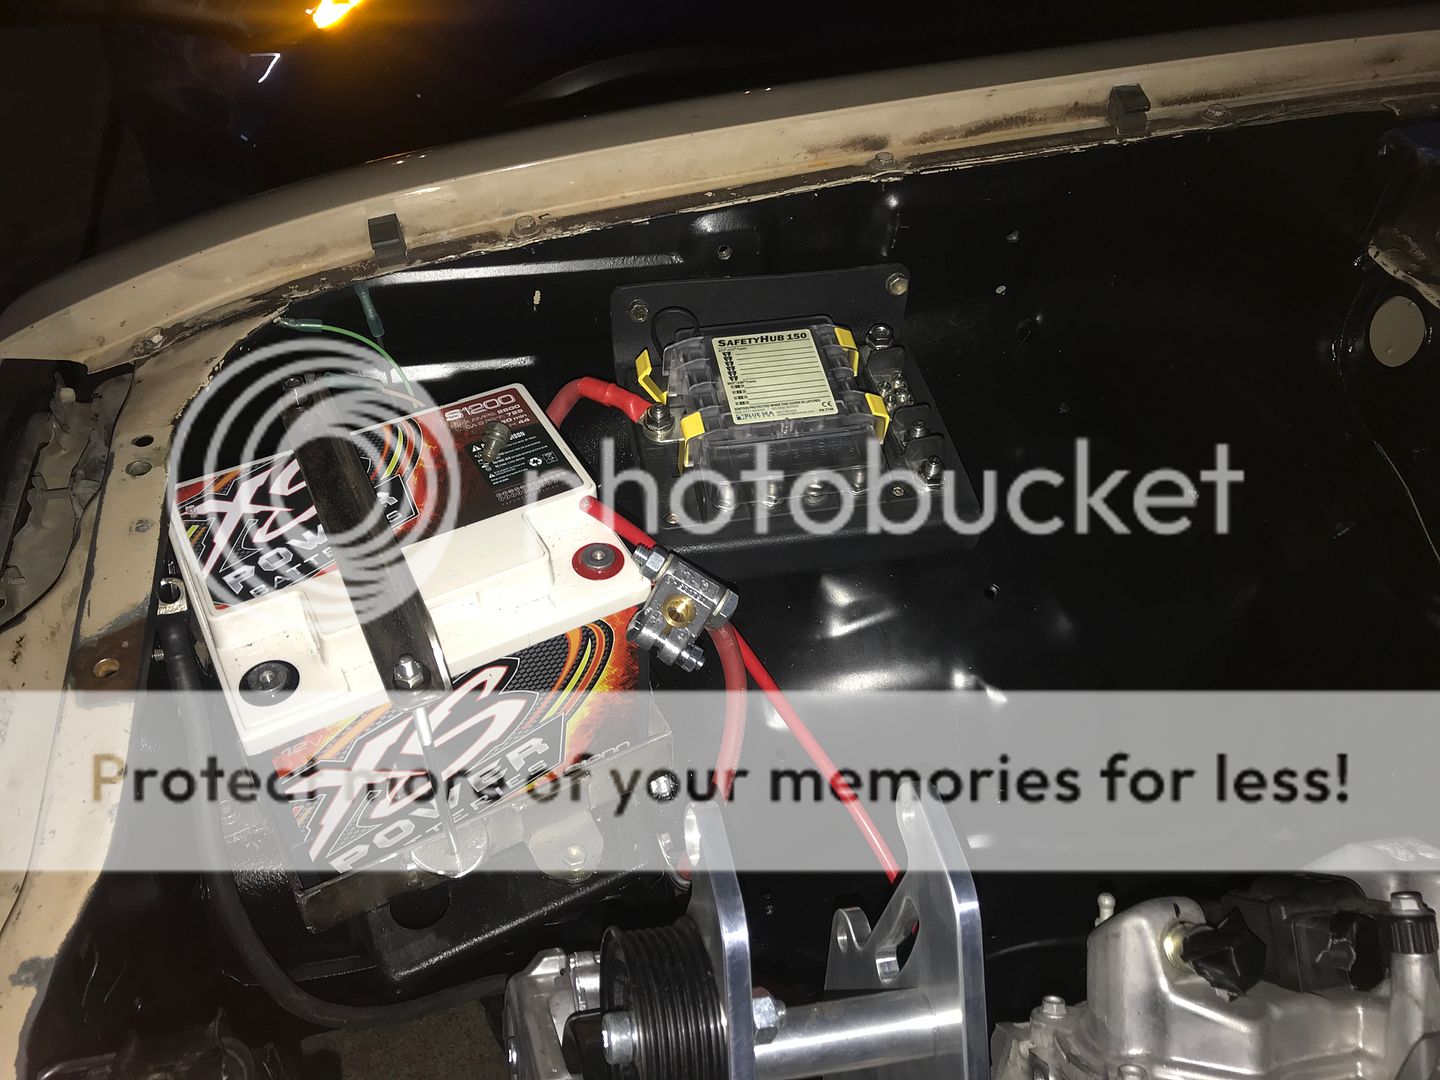
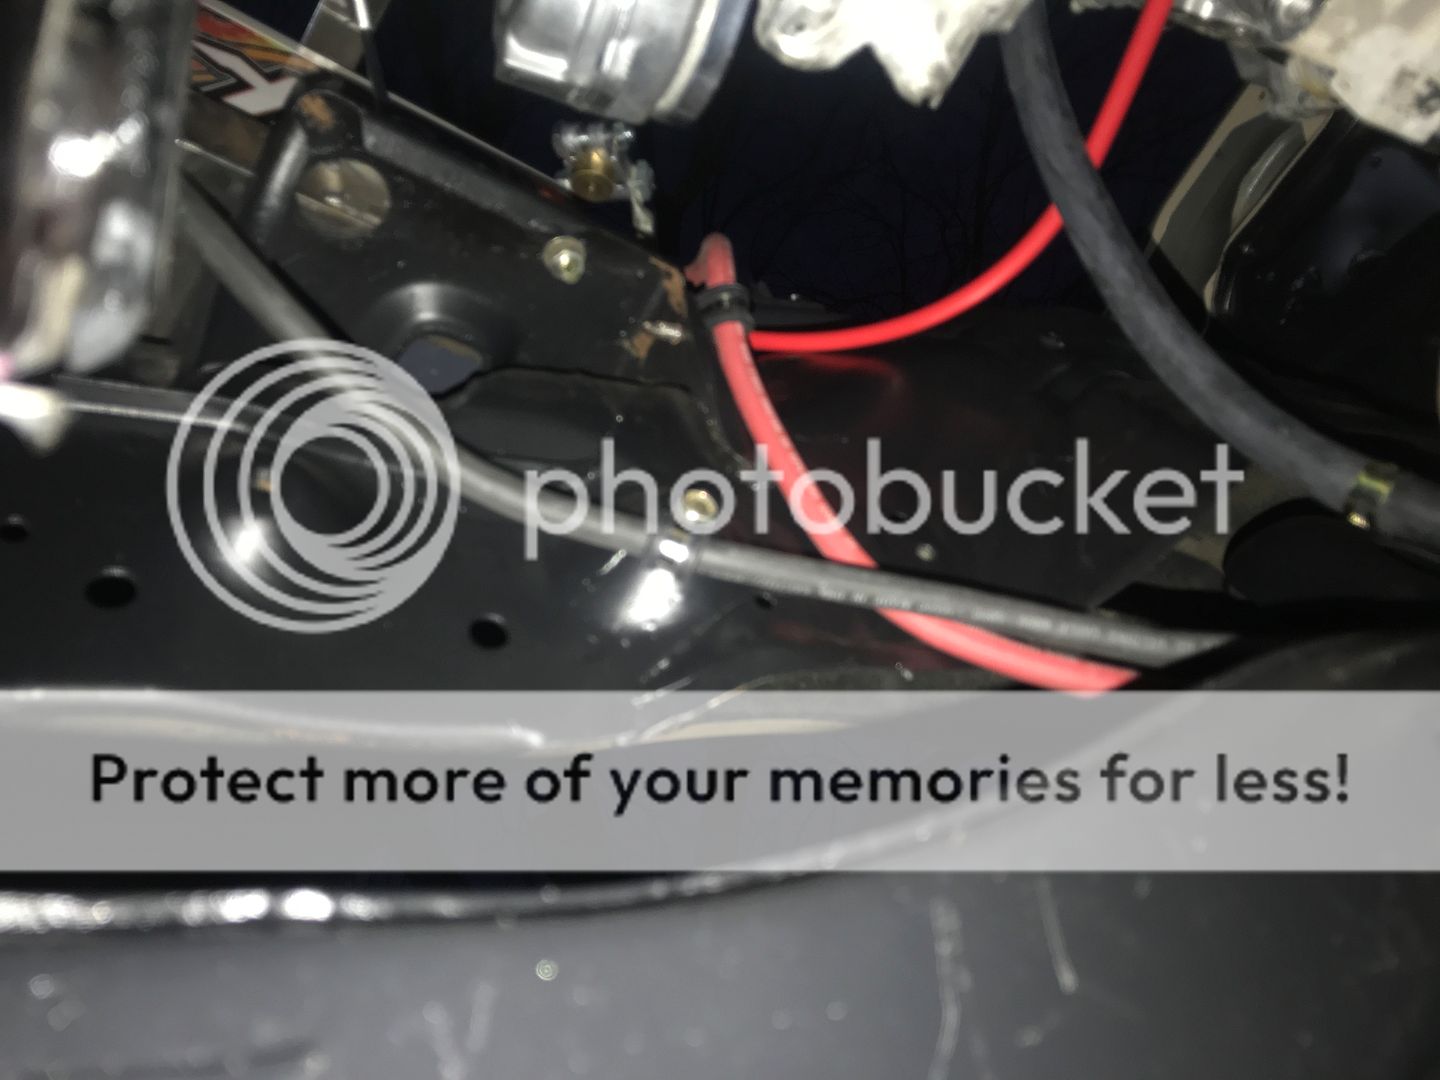
I have two MSD solid state relay blocks to put in tomorrow. I'm putting the electric vacuum pump on the inside of the frame on the passenger's side just behind the radiator. After that, I can start putting in the chassis harness from Painless.
,Bryan
Mocked up the hi steer kit from Sky. With the 2" body lift the mounting plates that come with the kit wouldn't work. I fabbed up my own brackets with much more support. If I'm missing something, please feel free to critique anything.


Hmmm.....I thought I had taken some more photos of it finished. I'll try to snap some tomorrow.
I scrubbed down the engine bay and wiped it clean with acetone three separate times. One coat of POR and two coats each of the Eastwood's 2k black primer and chassis black.


Welded up the motor mounts and put everything back in, sans TC. Just haven't had the time yet.


Fabbed up a battery mount after much contemplation about orientation. The A/C compressor comes so far over with the Dirty Dingo mounts that I had to go with a smaller battery.


I started the wiring process. Again, after much contemplation about where to put everything, I think I finally have the main power distribution the way I want it.


I have two MSD solid state relay blocks to put in tomorrow. I'm putting the electric vacuum pump on the inside of the frame on the passenger's side just behind the radiator. After that, I can start putting in the chassis harness from Painless.
,Bryan
Last edited by Trueblue93; 01-19-2019 at 08:07 PM. Reason: pic corrections
The following users liked this post:
SomedayJ (07-16-2019)
01-21-2019, 07:23 PM
#29
Registered User
Thread Starter
Thanks man! I did consider that. I thought it would be more of a headache in the long run. Had I not run across this battery I probably would have. This little battery packs plenty of punch for it's size. I haven't given much thought about the intake yet other than keeping enough room to run one. It's probably going to run the drivers side of the engine bay.


The following users liked this post:
jazz1 (01-27-2019)

 01-23-2019, 09:51 PM
#34
Registered User
Thread Starter
Lons81, very good advice. Thank you! I looked for it about 30 minutes on Monday but couldn't find it. It'll turn up this weekend and I'll get it in there. I still have to wait on other things before I tidy up the harness for good....ie, A/C system from Vintage Air.
Toyospearo, thanks man! I'm eager to get it on the road. I didn't plan on it taking this long or costing as much. There's not really a guide on swapping this motor in. I'm kind of winging it as I go. I'm still trying to get the engine harness worked out. I've contacted several rework outfits to find out which circuits I need and don't need to no avail. I guess they want to make money on selling me a harness I don't need, lol. The original one that I have is brand new! Fortunately, I have an awesome friend who has provided me with all of the pinouts on this harness and more, so maybe I can figure it out from that.
Discombobulated, at this point I'd be happy to hear it run. The vision is starting to come together! About 6 more months worth of spare money and I think I'll be finished
Bryan
01-24-2019, 05:10 AM
#35
Bryan. FYI. If you have problems with pin outs on certain items, you can go to the Painless office and talk to their engineers. They are located off I30 and Beech Street in Ft Worth. I had a few questions on my harness replacement and they helped me out.
01-26-2019, 06:29 PM
#37
Registered User
Thread Starter
Lons81, I just read through your build. Great job sir! Did you finish it up? The thread just kind of ended after your shoulder surgery.
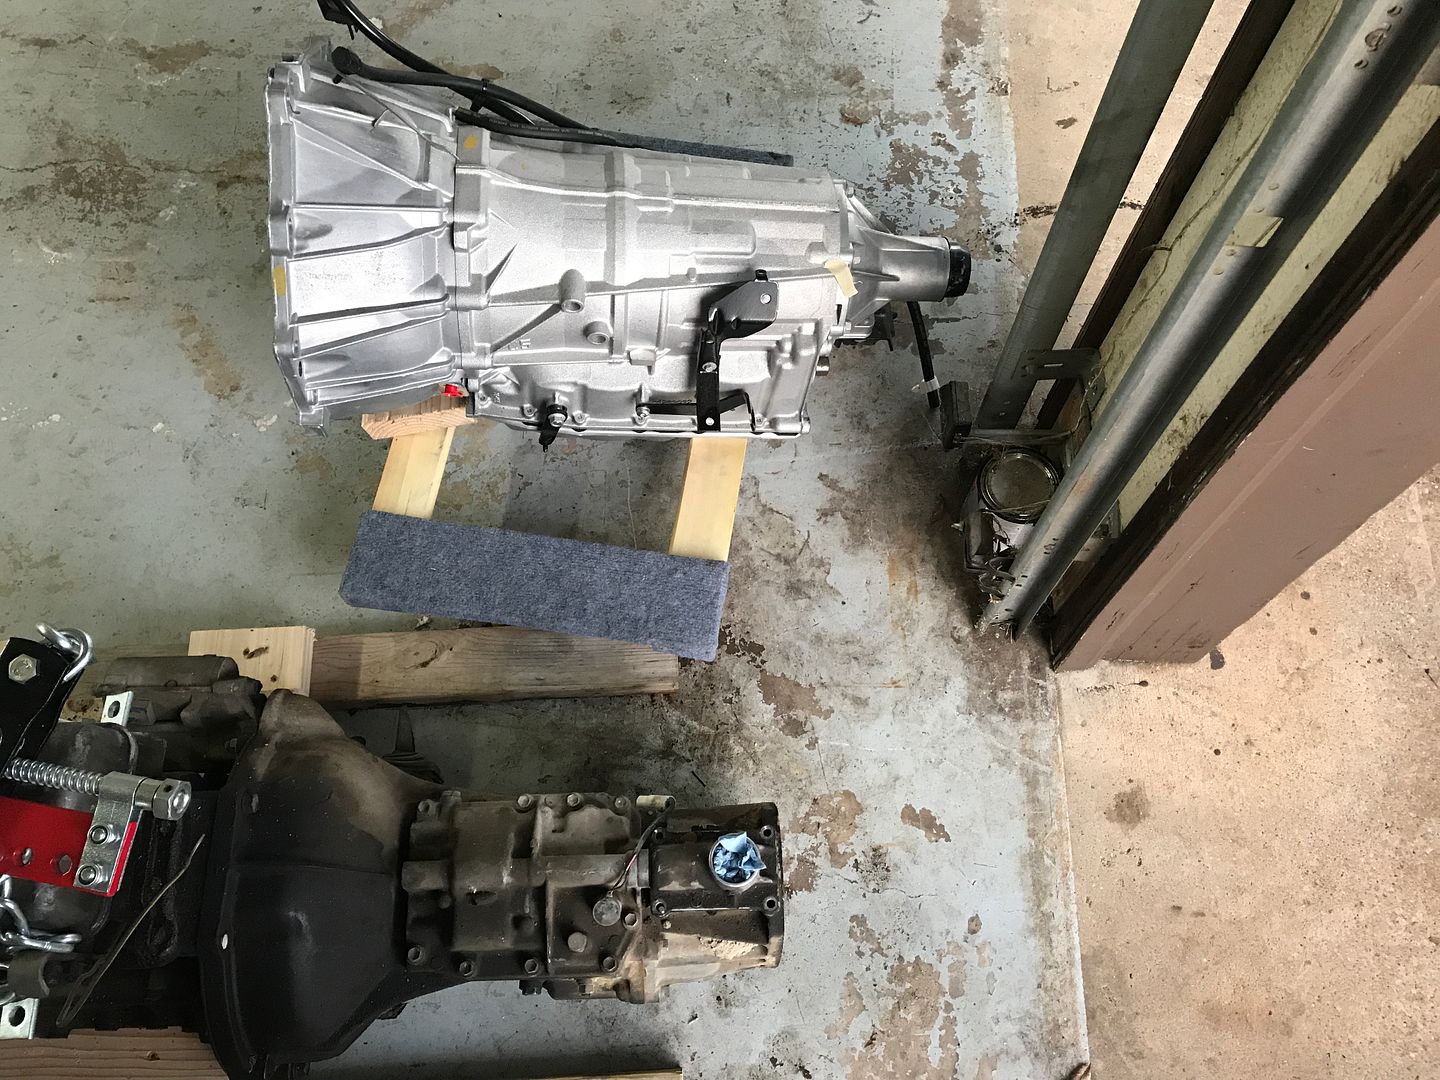
I got rid of alot of the original parts today. Joe came and picked up the block, tc, a/c, carb, intake, header, and some misc stuff. I hope he can put it to good use. He practically stole them from me . Kyle came and picked up the L52 and dropped off a pair of 3rd members. Thanks gentleman.
I got rid of alot of the original parts today. Joe came and picked up the block, tc, a/c, carb, intake, header, and some misc stuff. I hope he can put it to good use. He practically stole them from me
. Kyle came and picked up the L52 and dropped off a pair of 3rd members. Thanks gentleman.
01-27-2019, 05:28 AM
#38
Bryan, thanks for asking. It’s getting closer every day now. After the original surgery and a long rehab with couple setbacks, i’ve been able to get small things done. Still can’t lift more than 20 lbs or push/pull like wrenching. I hope to have it completed by the end of summer
01-27-2019, 09:28 AM
#39
Great project. I used older V6 in OT project and I thought too many wires so tossed the ECM and added carburetor. You definitely showing a lot more patience with all you are dealing with. Lots more horsepower than the '91 V6!!
01-27-2019, 03:54 PM
#40
Registered User
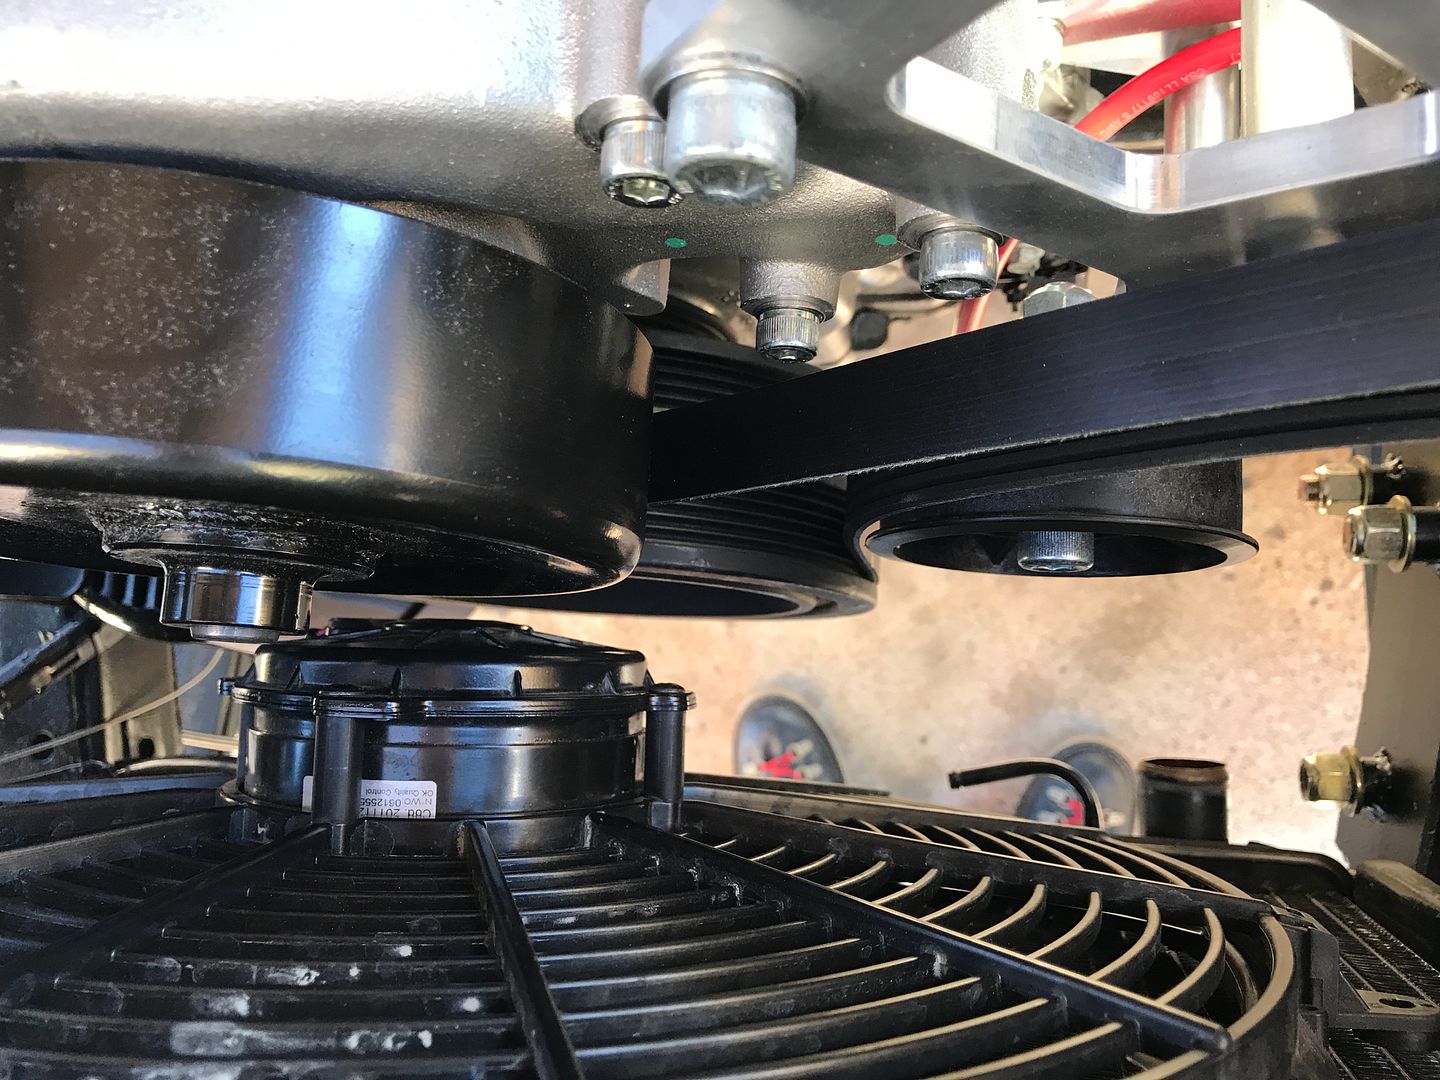
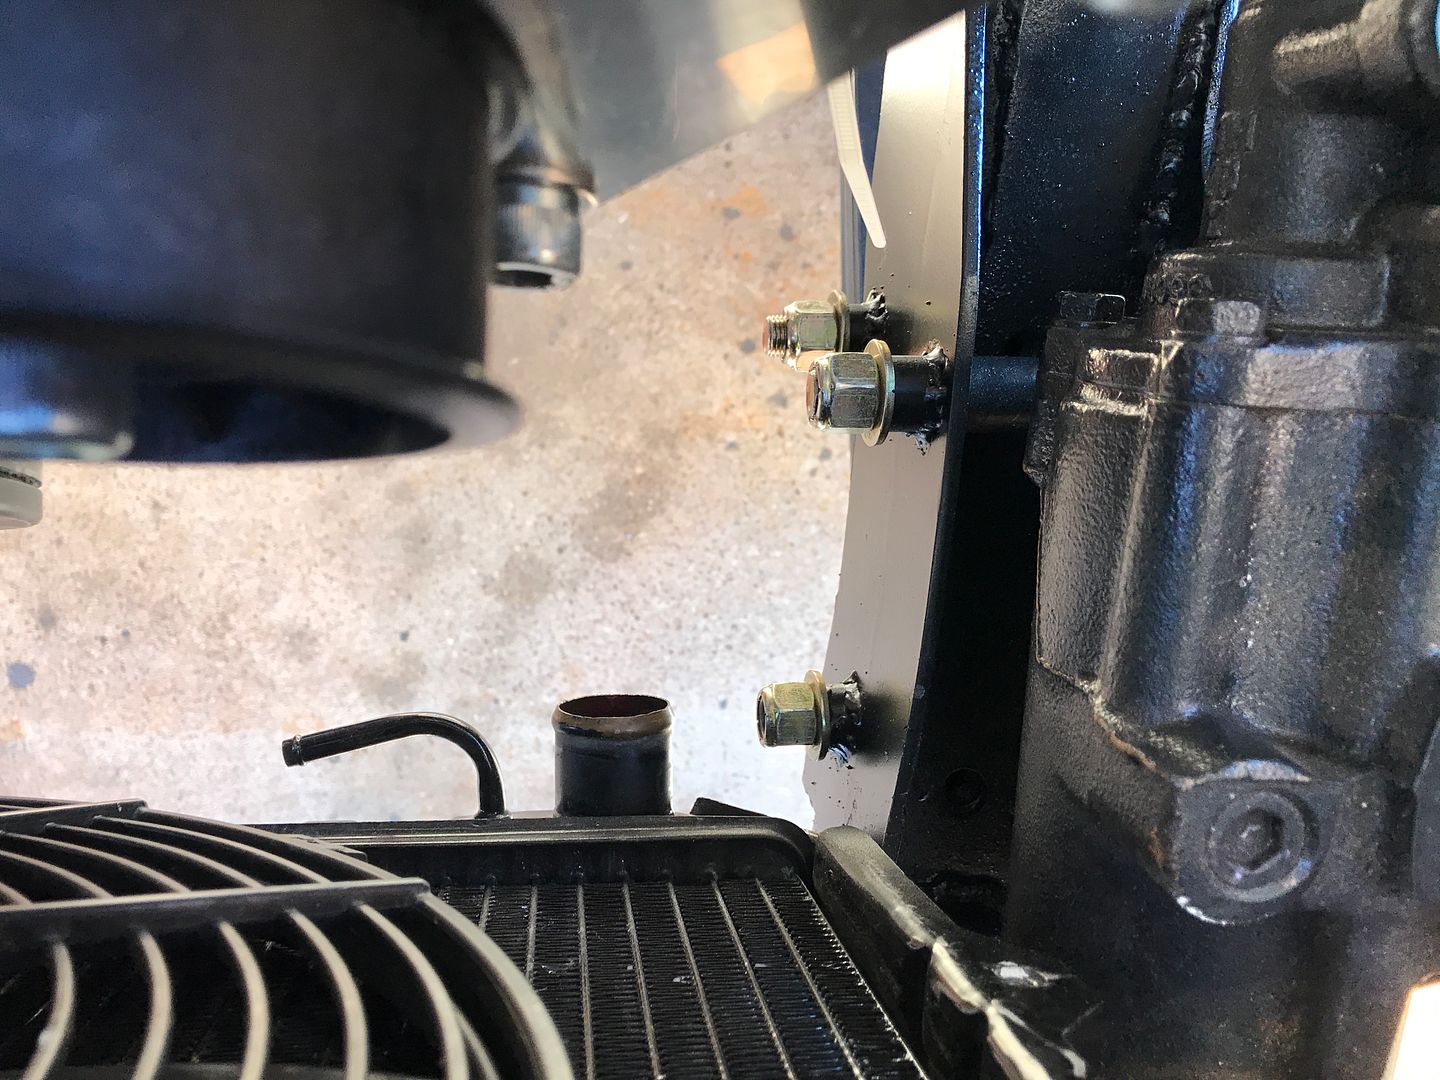
Thread Starter
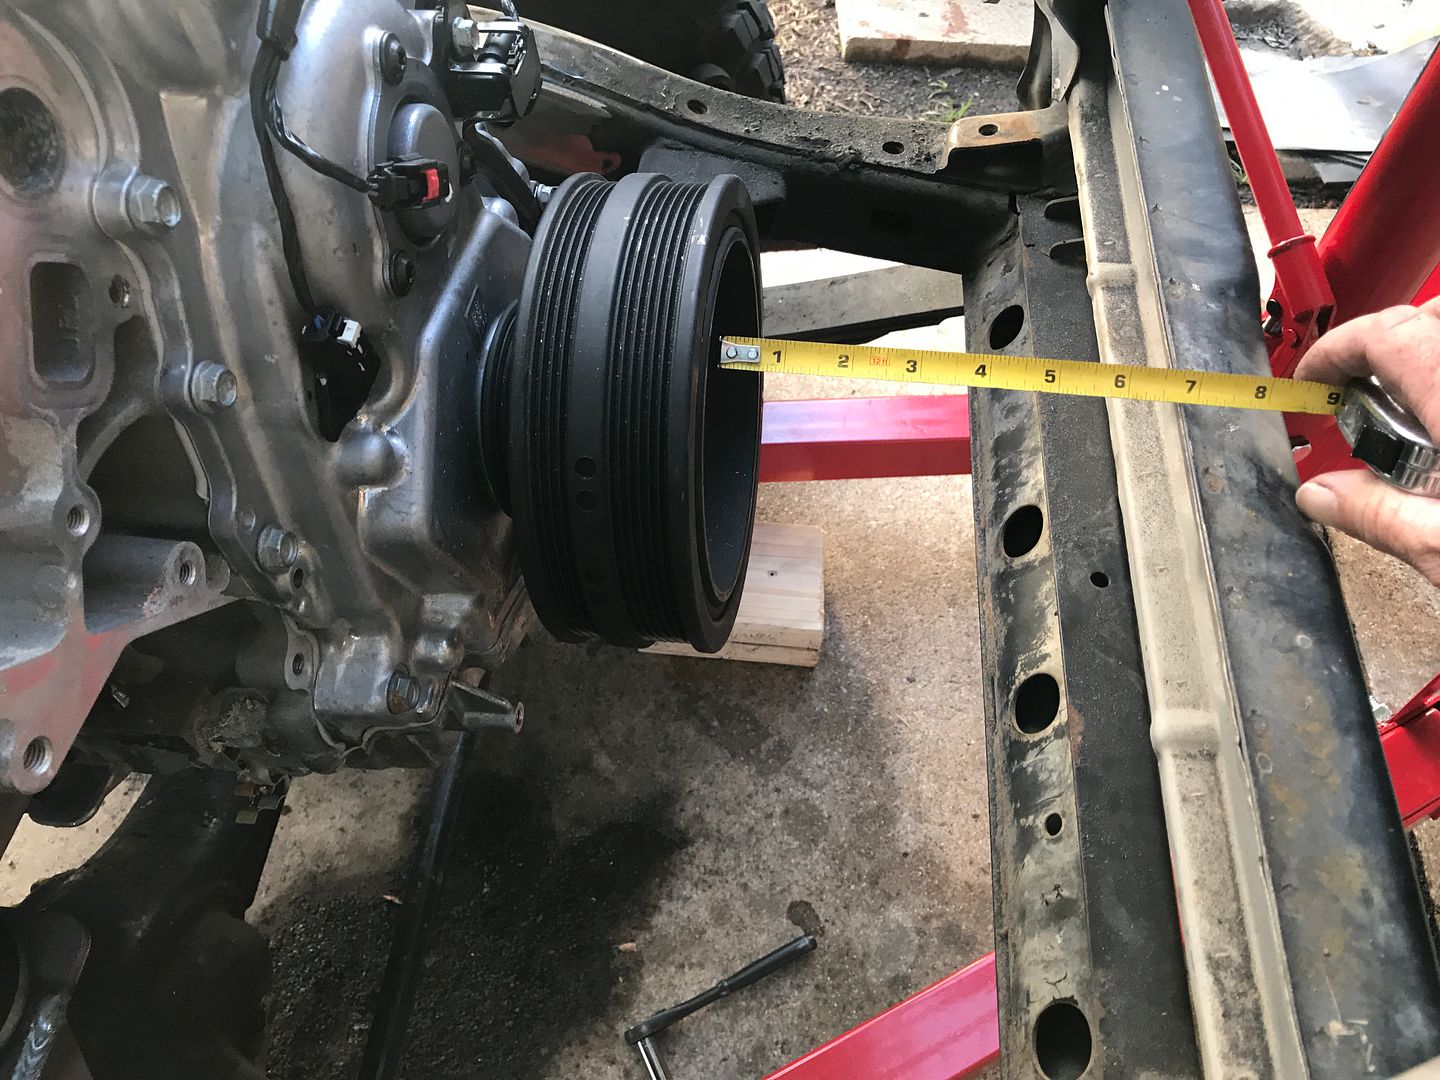
I finally received the correct water pump. I’m pushing the limits for clearance. I had just bought this 3 core radiator from LCE (I think) before deciding to do the swap. Its a bit bigger than the stock radiator. It just barely fit under my hood. I made some brackets to lower it down a couple of inches. I’m hoping this thing will cool this motor. The fan is a SPAL 18” and fits inside the tanks from top to bottom perfectly. I guess I’ll find out quickly if there’s not enough clearance or if it’s not up to task. If so, I’ll get an aluminum one or two core made for it. Now I’ll have to figure out the hoses.