Last edit by: IB Advertising
See related guides and technical advice from our community experts:
Browse all: Fuel System Guides
- Toyota 4Runner 1984-1995 How to Replace Fuel Filter
Step by step instructions for do-it-yourself repairs
Browse all: Fuel System Guides
I changed the fuel filter on my 4Runner today.
#1
I changed the fuel filter on my 4Runner today.
Hope for the best, expect the worse.
What should be a 5 minute job took about 25 minutes because getting everything lined up is a pain. Why Toyota did you choose to put the bolt for adjusting the bracket on the TOPSIDE of the filter. If it was on the bottom, where it should be then you could just finger tighten the compression fittings, bracket nuts, and bracket position bolt. But no, you have to decide on bracket position for before mounting it and/or snugging the compression fittings. Regardless, it's and easy job, just that one bit would have made it literally 5 minutes.
What should be a 5 minute job took about 25 minutes because getting everything lined up is a pain. Why Toyota did you choose to put the bolt for adjusting the bracket on the TOPSIDE of the filter. If it was on the bottom, where it should be then you could just finger tighten the compression fittings, bracket nuts, and bracket position bolt. But no, you have to decide on bracket position for before mounting it and/or snugging the compression fittings. Regardless, it's and easy job, just that one bit would have made it literally 5 minutes.
#7

Trending Topics
#10
You don't have to use a flare nut or crow's foot wrench, but when working around flared fittings like on the fuel lines, it is wise to use the proper tool or you could cause yourself some serious headache when a crescent wrench rounds off a corner or two. Also it is a PITA but you should wait until the flared fittings are attached before you tighten up the clamp around the filter itself (I agree this was a dumb design, but now we just deal with it.....and lucky you don't need to change this part very often). If you don't, you'll put unnecessary stress on the line which could result in a leak later or at least difficulty getting the flares to seat.
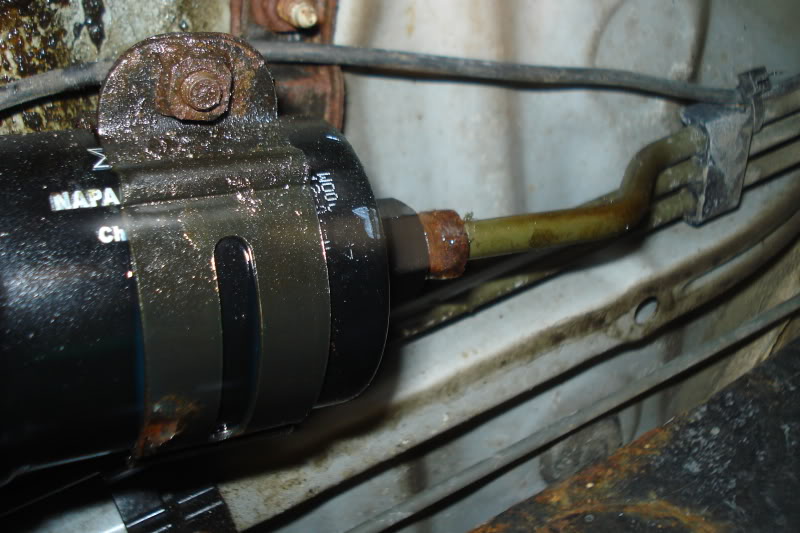
You can see that the bolt comes down from the top:

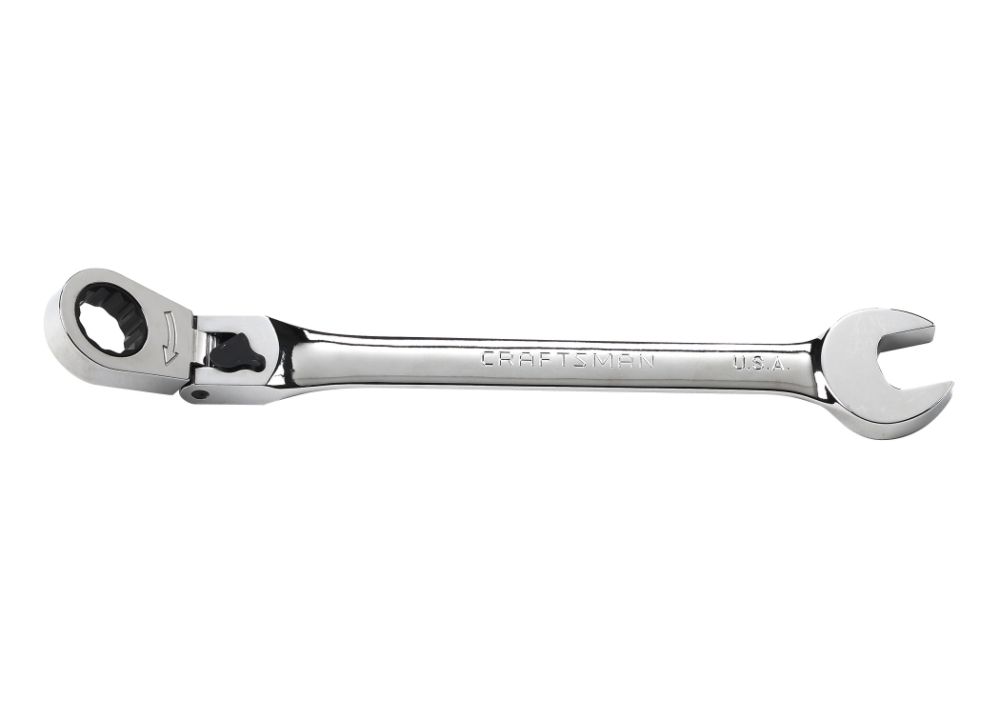
A wrench like this makes that blind bolt alot easier:

You can see that the bolt comes down from the top:

A wrench like this makes that blind bolt alot easier:

#11
You don't have to use a flare nut or crow's foot wrench, but when working around flared fittings like on the fuel lines, it is wise to use the proper tool or you could cause yourself some serious headache when a crescent wrench rounds off a corner or two. Also it is a PITA but you should wait until the flared fittings are attached before you tighten up the clamp around the filter itself (I agree this was a dumb design, but now we just deal with it.....and lucky you don't need to change this part very often). If you don't, you'll put unnecessary stress on the line which could result in a leak later or at least difficulty getting the flares to seat.
You can see that the bolt comes down from the top:

A wrench like this makes that blind bolt alot easier:

You can see that the bolt comes down from the top:

A wrench like this makes that blind bolt alot easier:


#14
Yeah, thread dig, but I need some info pertaining to this.
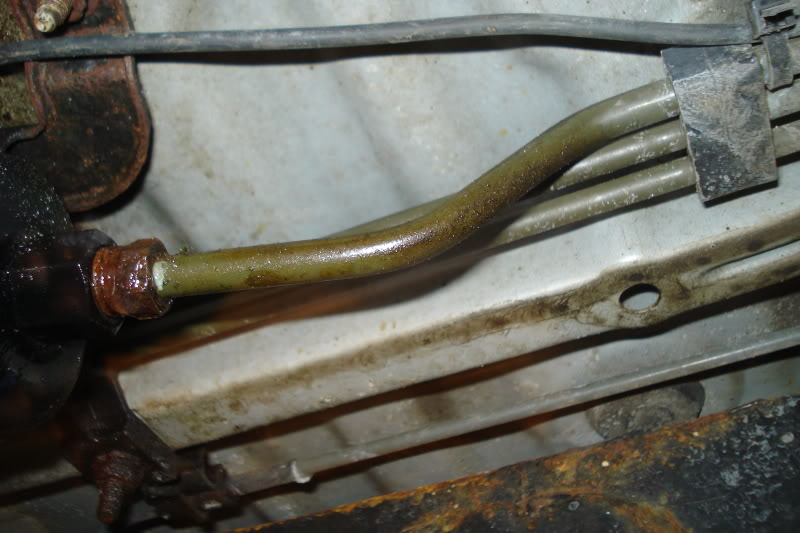
In my intro thread I mentioned a fuel smell. I found it today. On the engine side of the fuel filter, there's a leak. I'm wondering if this is something that I can attempt to first fix by snugging it up, or if I'd be risking screwing up the fittings.
Here's the leak:


I'd also like to know more about the flare nut wrench. Size for this job? I don't own one, but need some e-tape for another project I'm working on at the moment, so I figured I'd just got buy both at the same time. Help if you can, much appreciated.
In my intro thread I mentioned a fuel smell. I found it today. On the engine side of the fuel filter, there's a leak. I'm wondering if this is something that I can attempt to first fix by snugging it up, or if I'd be risking screwing up the fittings.
Here's the leak:


I'd also like to know more about the flare nut wrench. Size for this job? I don't own one, but need some e-tape for another project I'm working on at the moment, so I figured I'd just got buy both at the same time. Help if you can, much appreciated.
Last edited by The Ruckus; 04-24-2009 at 03:07 PM.
#17
If it is the threads you could try to snug it up but make sure you clean the threads of that rust. If it is the threads I would just replace the fuel filter to make life "easier". Correct me if I am wrong but didnt you just get this 4Runner, its a limited right? So a good excuse to do a quick new used vehicle maintenance. Just ,make sure you really clean up those threads.
#18
X2 on the flare wrench! The flare wrenches only have one point out of 6 cut out. You slide it with the one side cut out, push it over the nut and it comes right off! I have one and I am glad I do. It makes those fuel filters a breeze. I had mine changed the first time I did it in under 10 minutes. Including taking off the plastic cover.
#20
Oh one more thing: SIZE! Duh.....
Most have 2 different sizes. I think mine is a 12 and a 10. If my memory serves correctly, 12 is the one you want. I would check, but I don't have it on my person right now.
Most have 2 different sizes. I think mine is a 12 and a 10. If my memory serves correctly, 12 is the one you want. I would check, but I don't have it on my person right now.


 I need to do mine this summer too, sounds like fun, any noticeable differences yet?


