Toyota Tundra: How to Repair and Replace Parking Brake
If your Tundra parking brake is worn or needs adjusted, read on to see how to fix it yourself, using basic tools.
This article applies to the Toyota Tundra (2000-present).
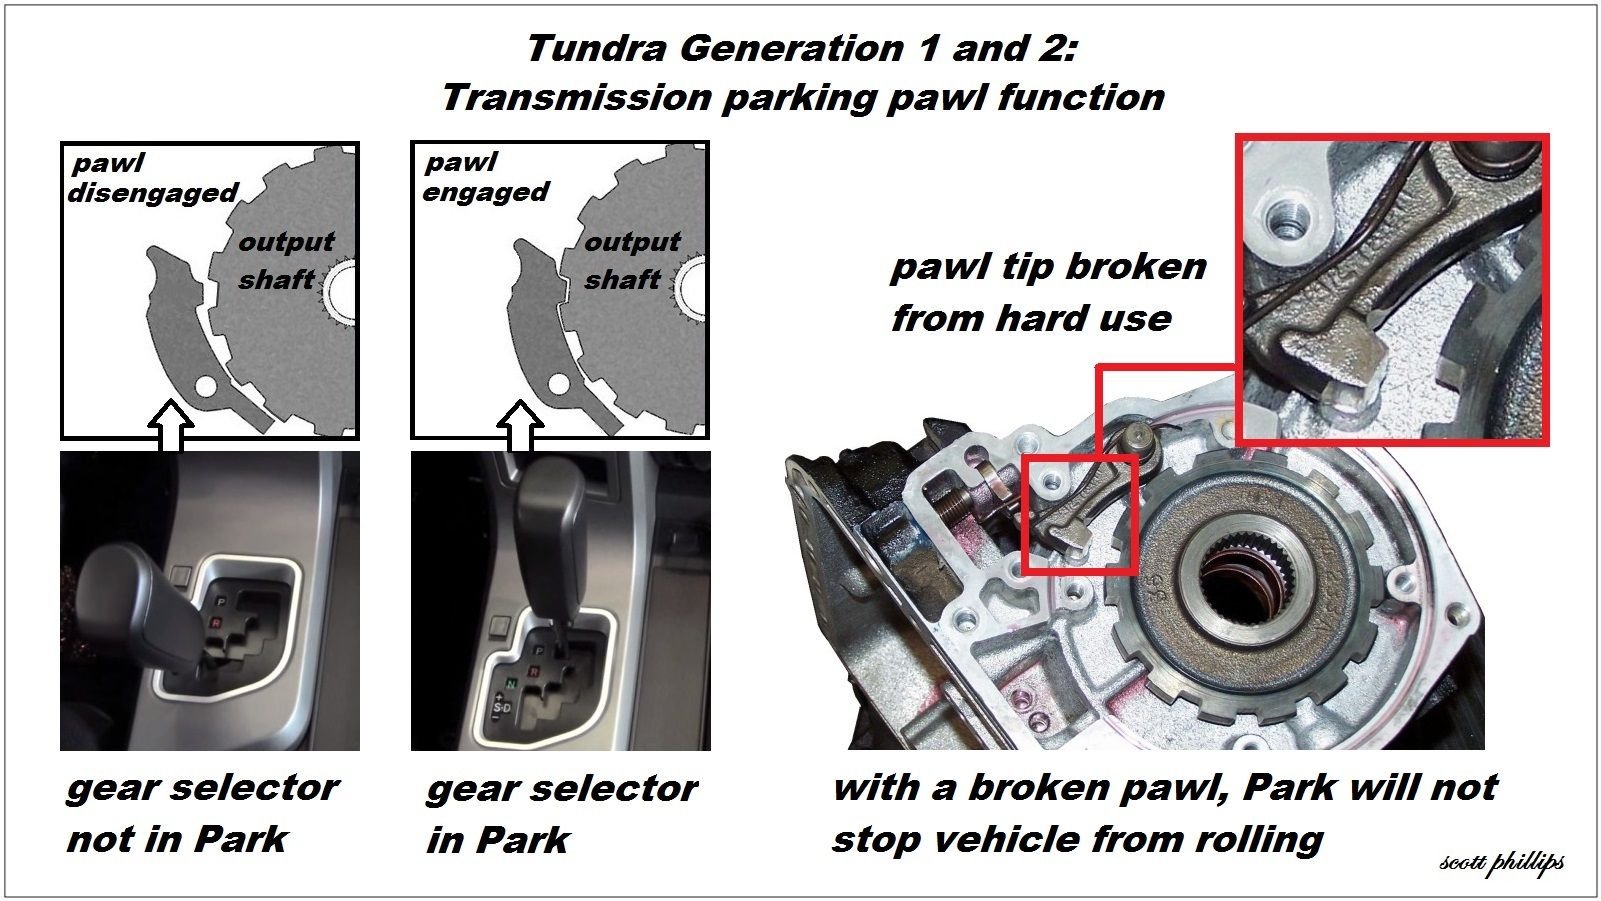
The Tundra's parking brake performs a critical function. When parking on an incline, the parking brake should be set before shifting into park. This prevents the 5000+ lb weight of the Tundra from jamming against the transmission parking pawl, which can break and cause the truck to roll unexpectedly.
To prevent problems, many Tundra owners find that the parking brake must be adjusted, or the shoes must be replaced.
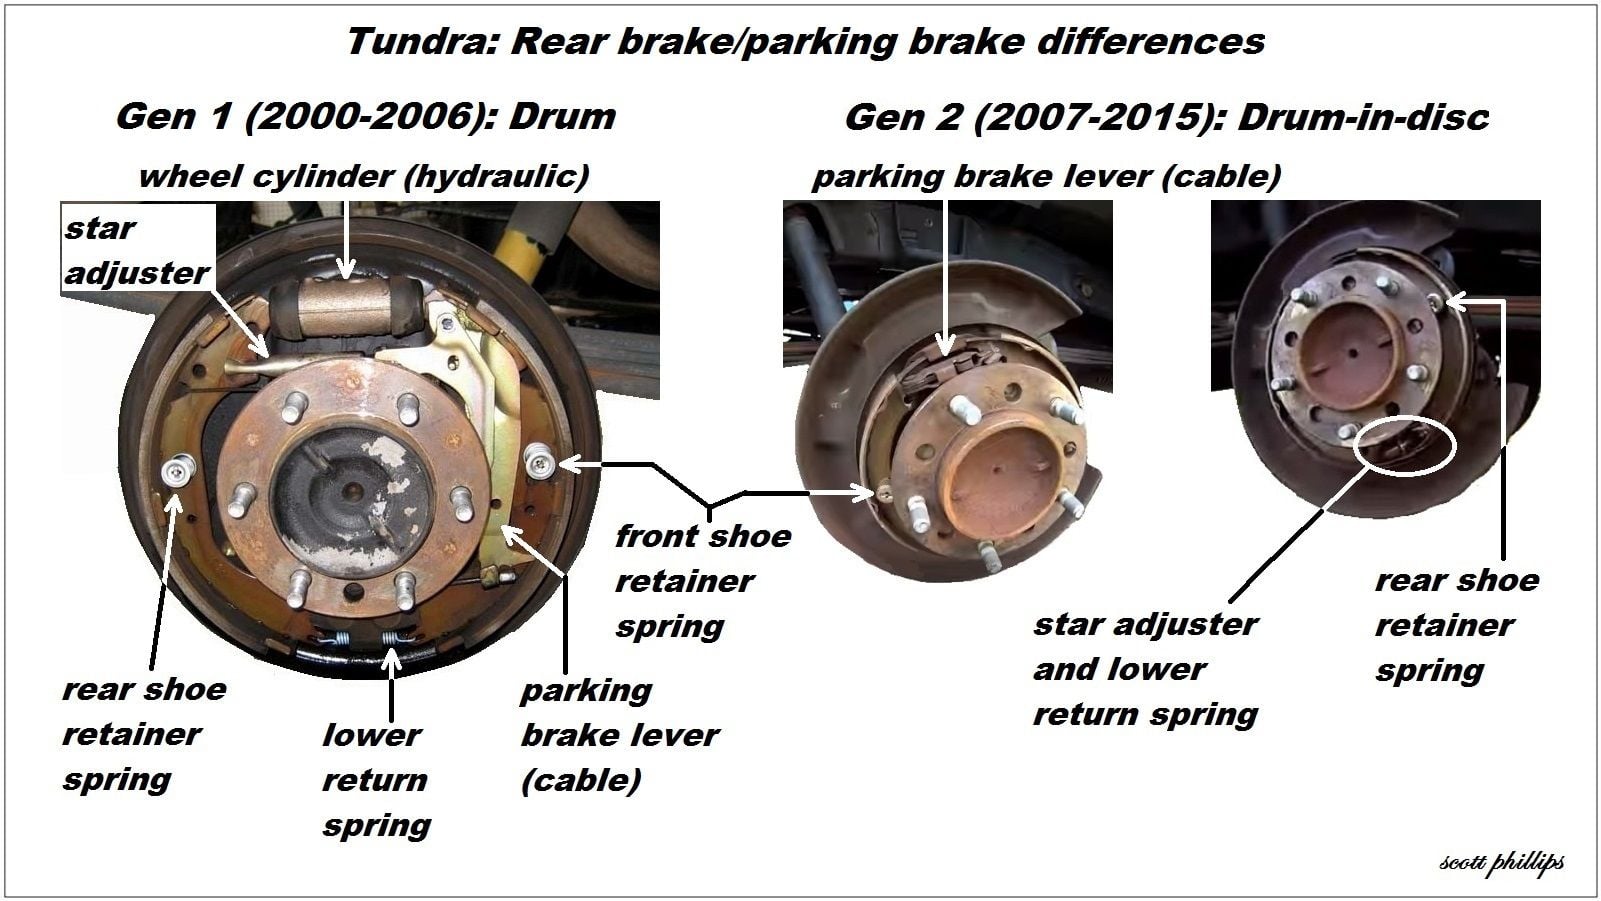
- Generation 1 Tundras (2000-2006) have rear drum brakes, which do both normal braking and act as the parking brake. The brake shoes are actuated hydraulically by the brake pedal and mechanically by the parking brake cable.
- Generation 2 Tundras (2007-2016) have rear disc brakes. The calipers do normal braking and are actuated hydraulically by the brake pedal. The parking brake is a drum brake inside the disc hub, which is actuated mechanically by the parking brake cable.
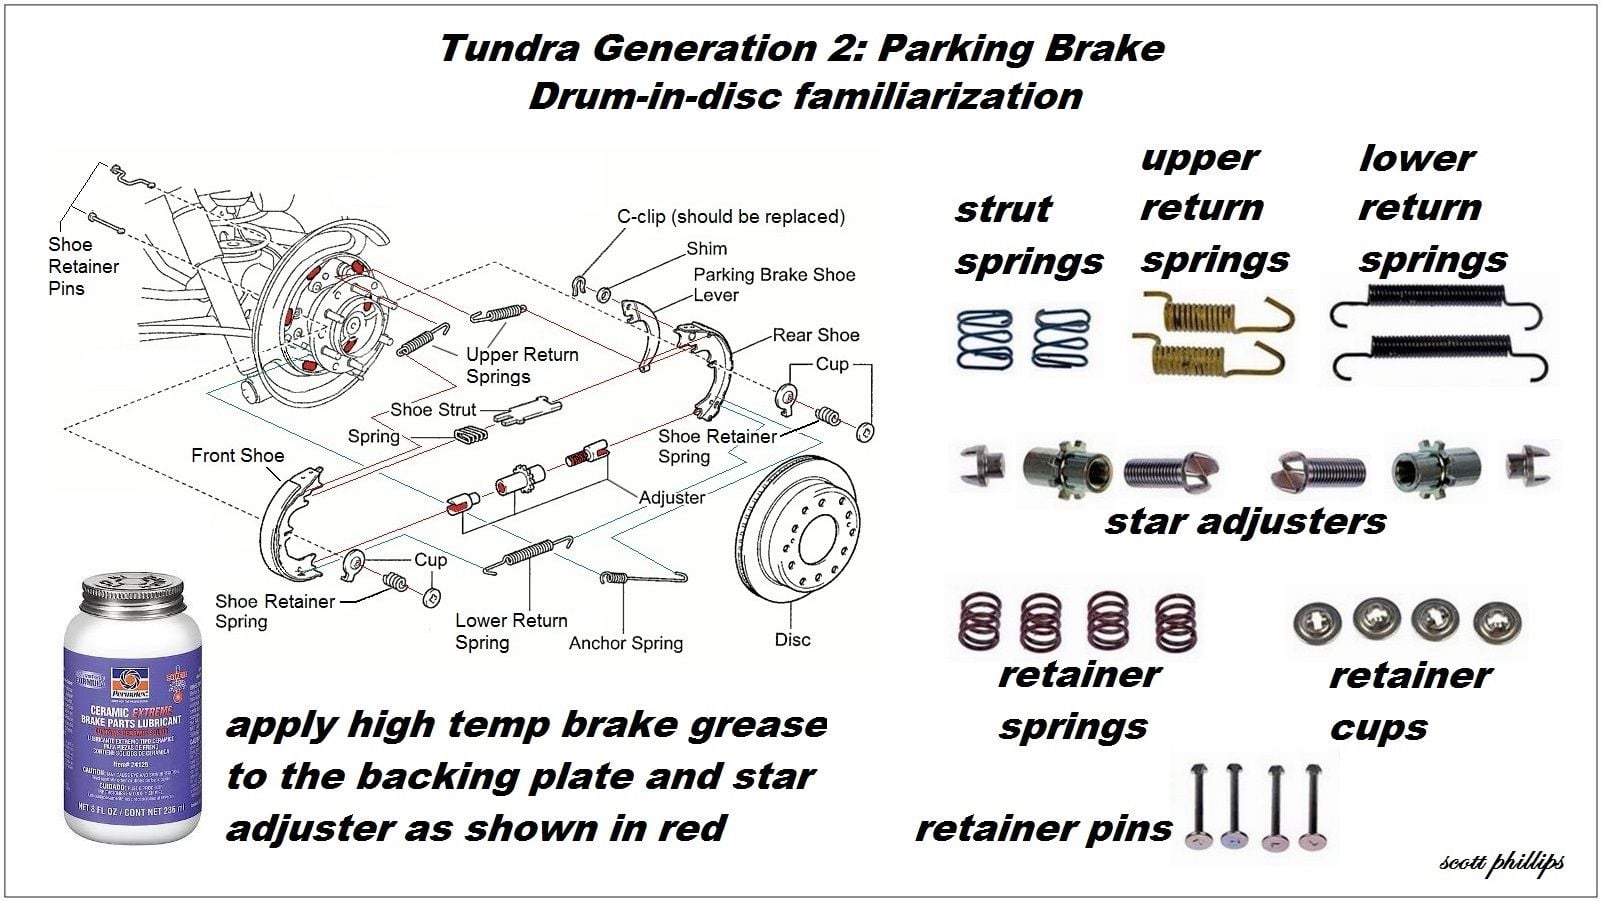
This DIY will show brake shoe replacement on the Gen 2 drum-in-disc parking brake. The procedure for the Gen 1 drum brake is nearly identical and actually easier, because the drum brake is larger with better access.

Materials Needed
- Parking brake shoes
- Parking brake parts kit
- Brake spring tools kit
- High temperature brake grease
- Brake cleaner spray
- Socket wrench set
- Breaker bar
- Needle nose pliers
- M8-1.25x50 tap bolts (2)
- Floor jack
- Jack stands
- Wheel chocks
Step 1 – Tundra drum-in-disc familiarization
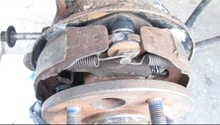
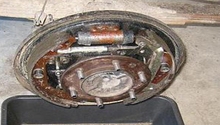
Working with drum brakes can be a bit tricky. Below is a diagram that gives a primer with the assembly of brake drums, and what you can expect during disassembly.
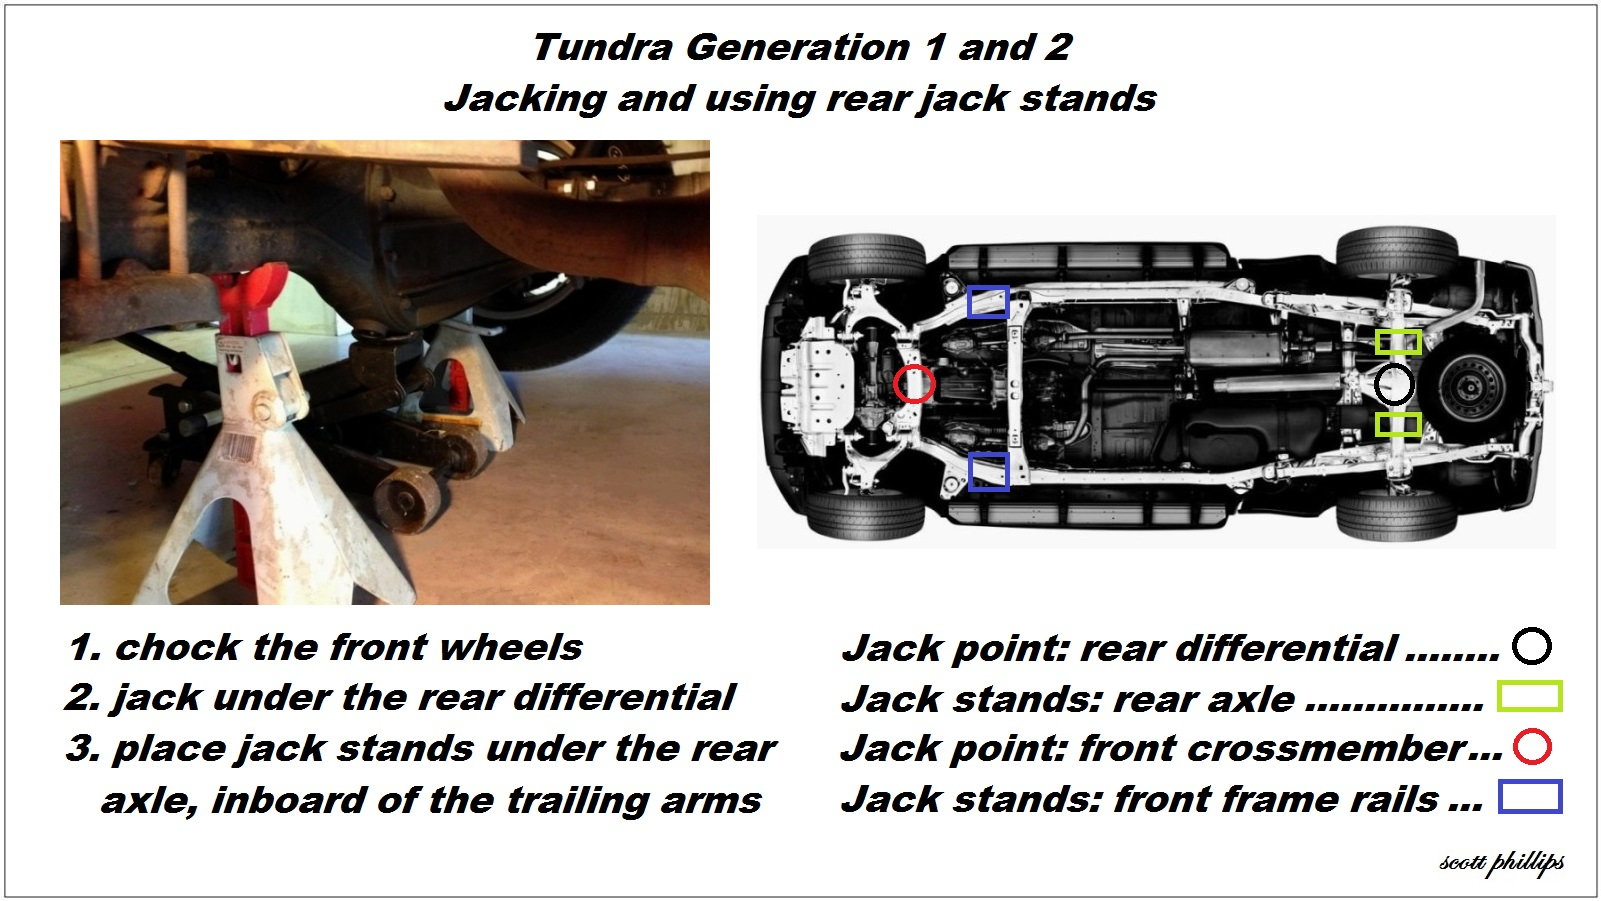
Step 2 – Jack the rear of the truck
- Park the Tundra on a flat concrete surface.
- Chock the front wheels.
- Break the torque on the rear lug nuts.
- Use floor jack at the rear differential.
- Place jack stands under the rear axle, inboard of the trailing arms.
Step 3 – Remove the rear calipers and rotors
- Remove the rear wheels.
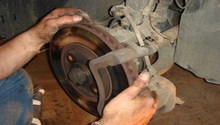
- Remove the brake caliper and hang it with wire.
- Remove the caliper bracket.
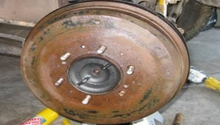
- If needed, use M8-1.25x50 tap bolts to remove the rotor.
- See How to Replace Brake Pads, Calipers and Rotors.
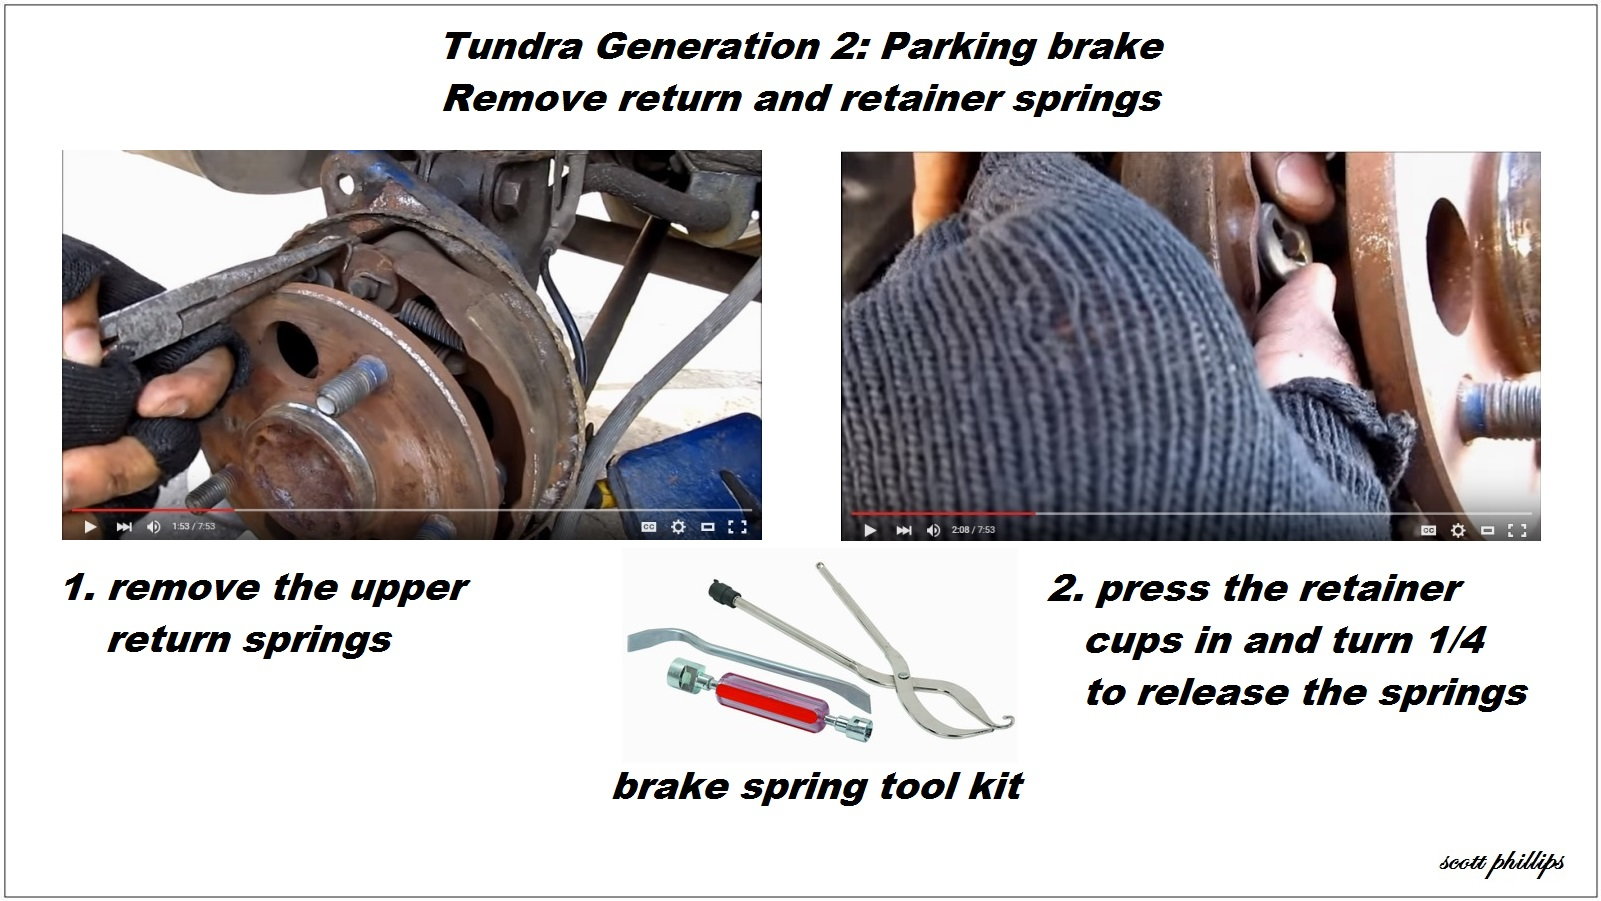
Step 4 – Remove the return and retainer springs
- Take apart only one side at a time, so you have a reference if needed.
- Remove the upper return springs.
- Press in the shoe retainer cups, then turn 1/4 to remove the cups and shoe retainer springs.
Pro Tip
Using a brake spring tool kit makes this job much easier.
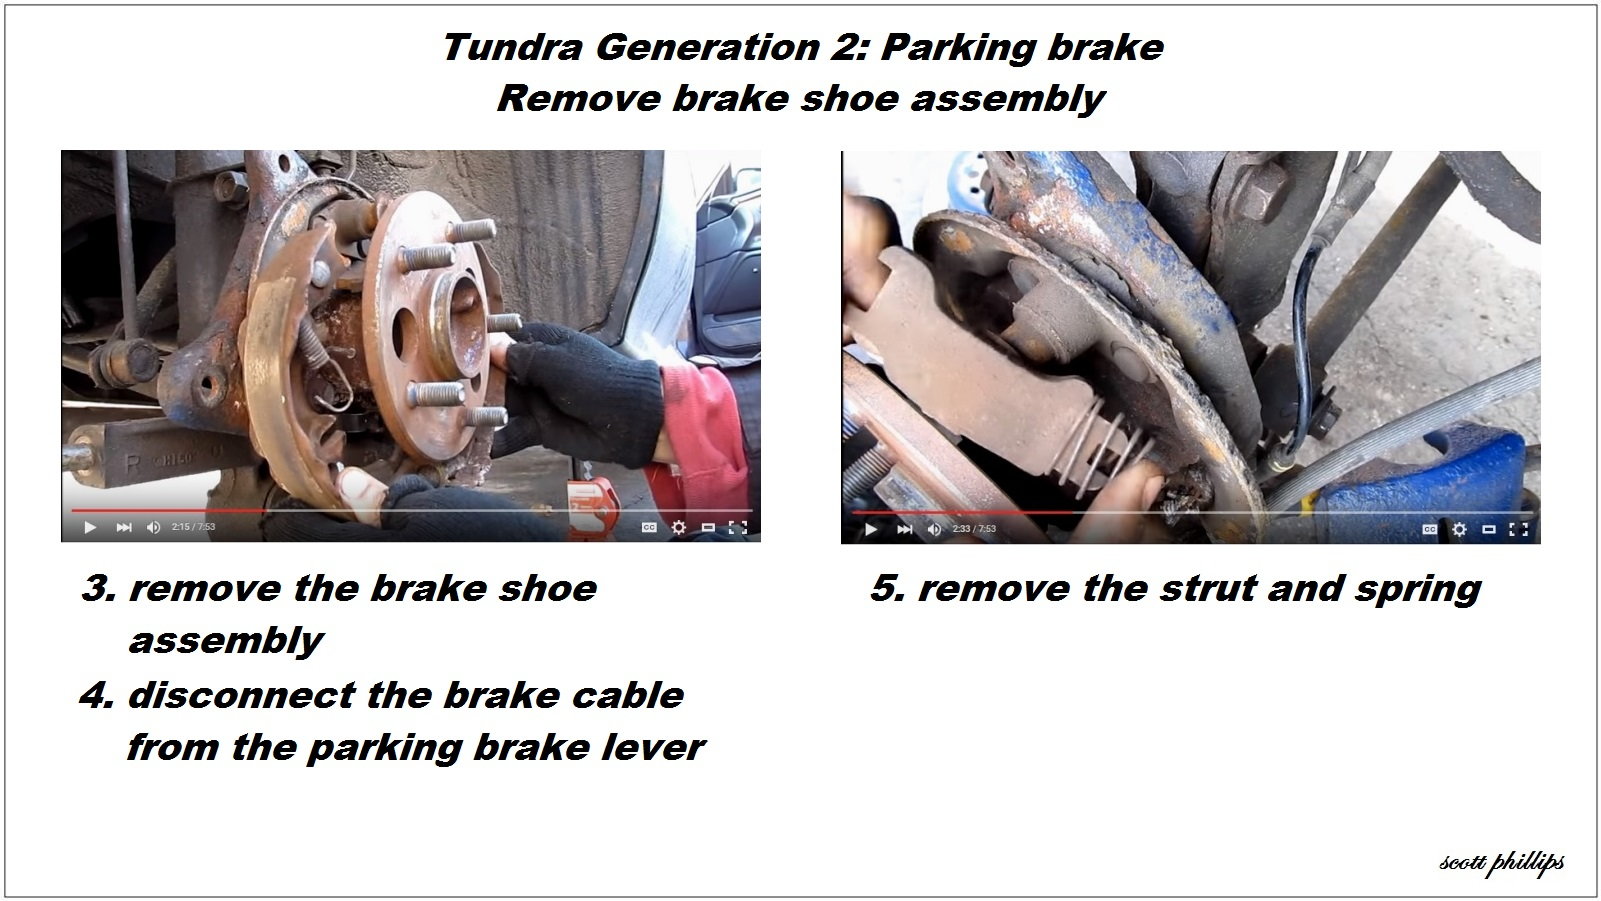
Step 5 – Remove the parking brake shoe assembly
- Spread the shoe assembly and work it down off the backing plate.
- Using pliers, disconnect the cable from the brake lever.
- Lift out the strut and spring.
Step 6 – Clean and grease
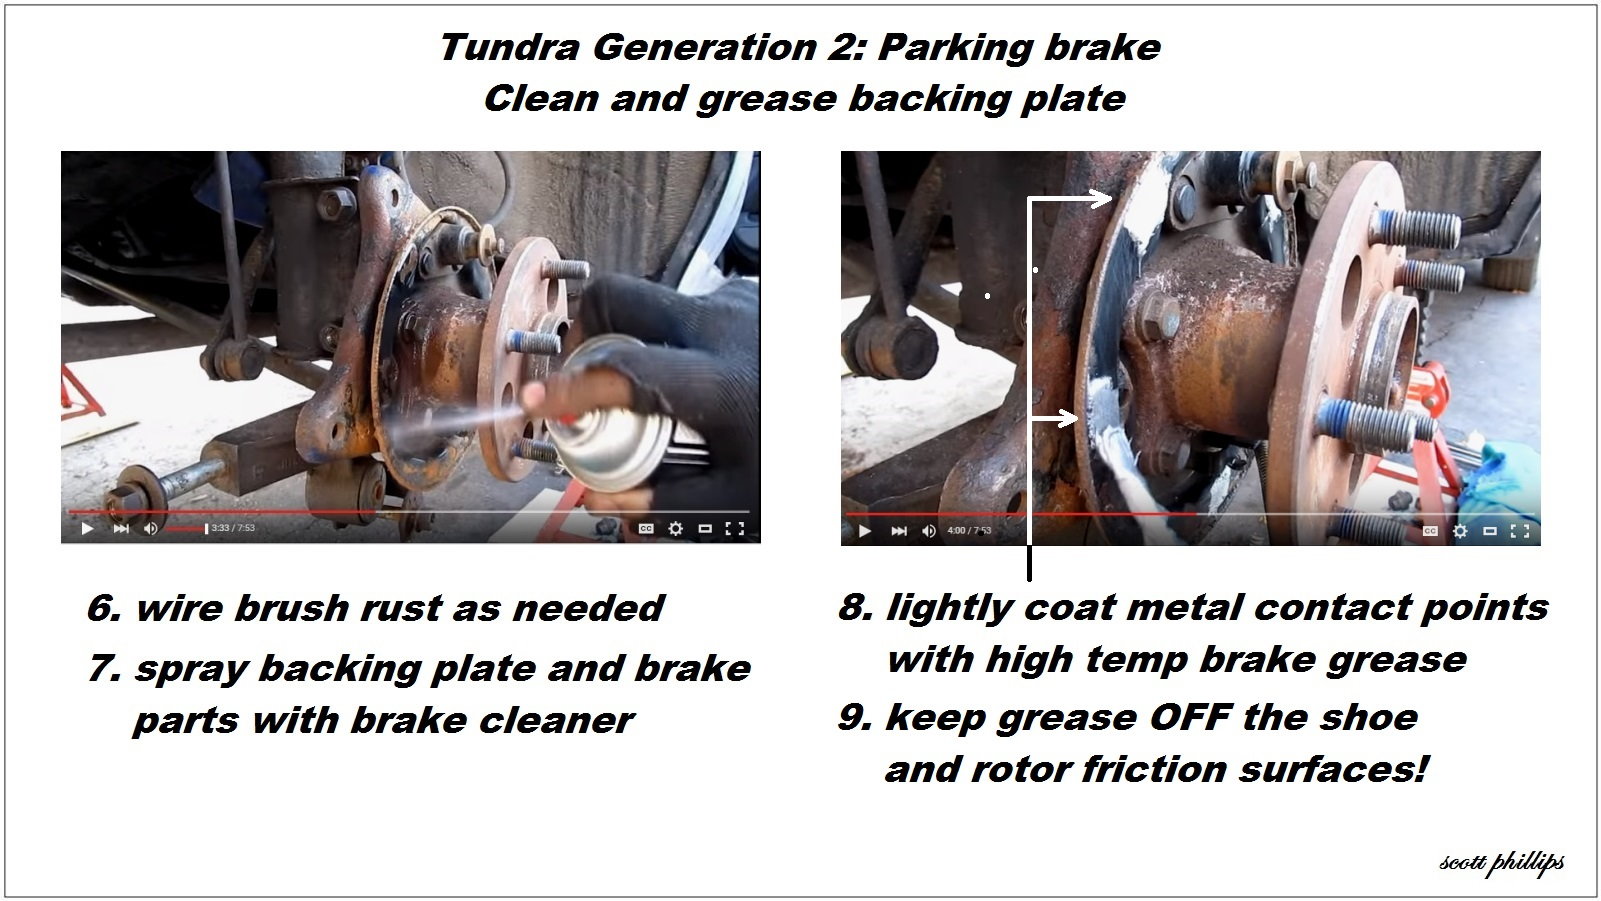
- Wire brush off any rust as needed.
- Spray down the backing plate and brake parts with brake cleaner.
- Use high temp brake grease to coat the backing plate and part contact points.
Step 7 – Reinstall parking brake
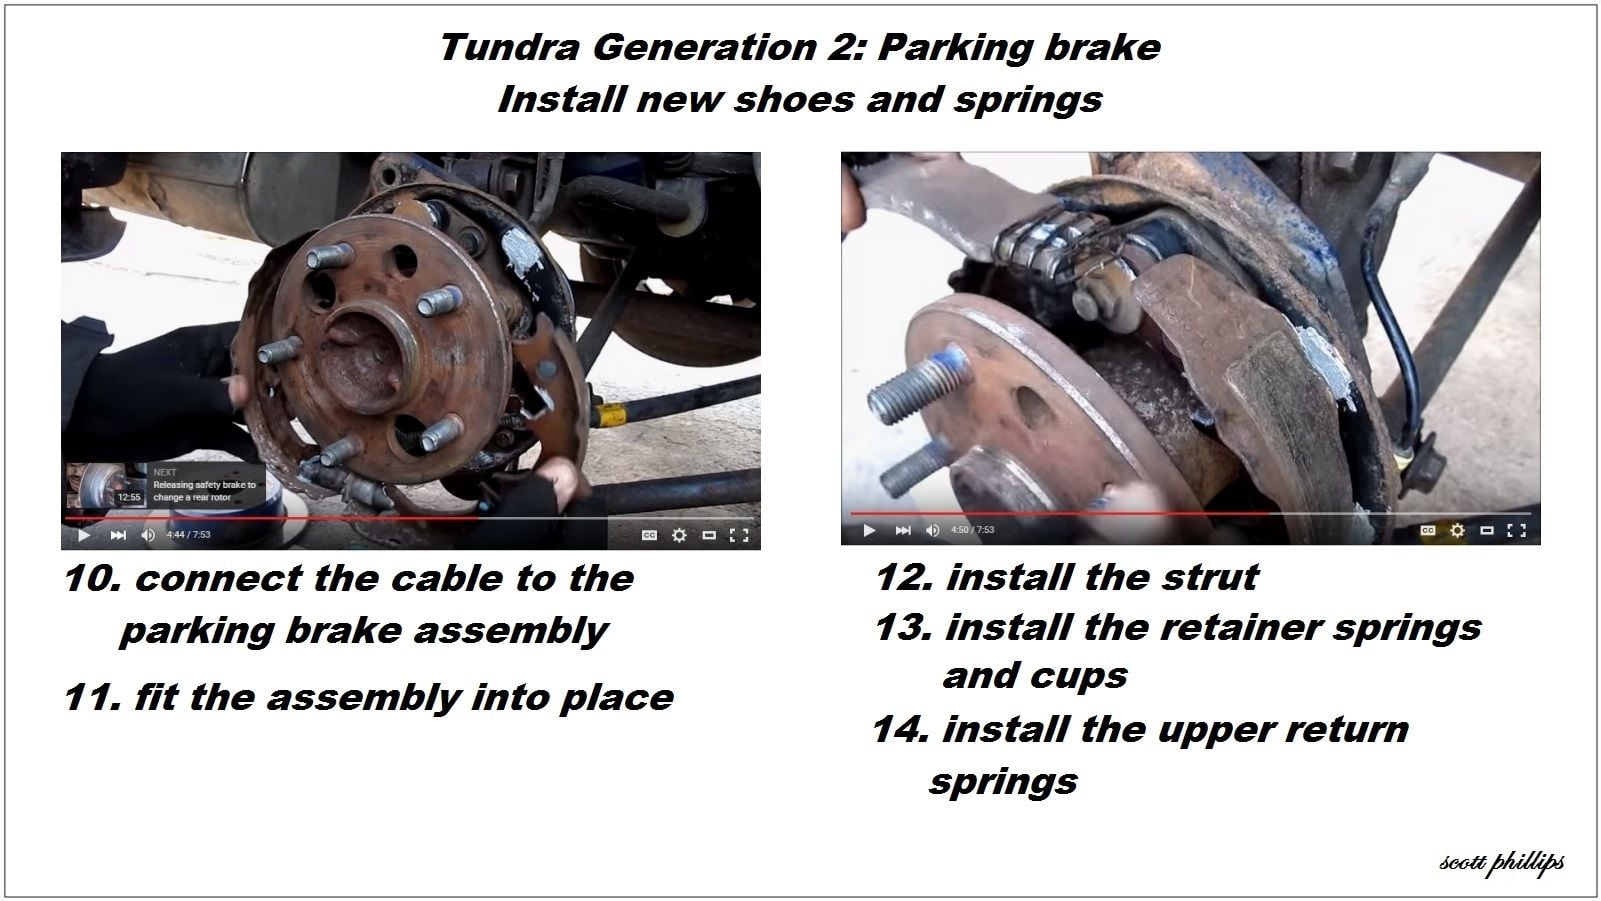
- Assemble the brake parts with new springs and shoes.
- Connect the cable and fit the assembly into place.
- Install the strut.
- Install the retainer springs and cups.
- Install the upper return springs.
- Reinstall the rotor and caliper.
Step 8 – Adjust the parking brake
- Parking brake pedal released.
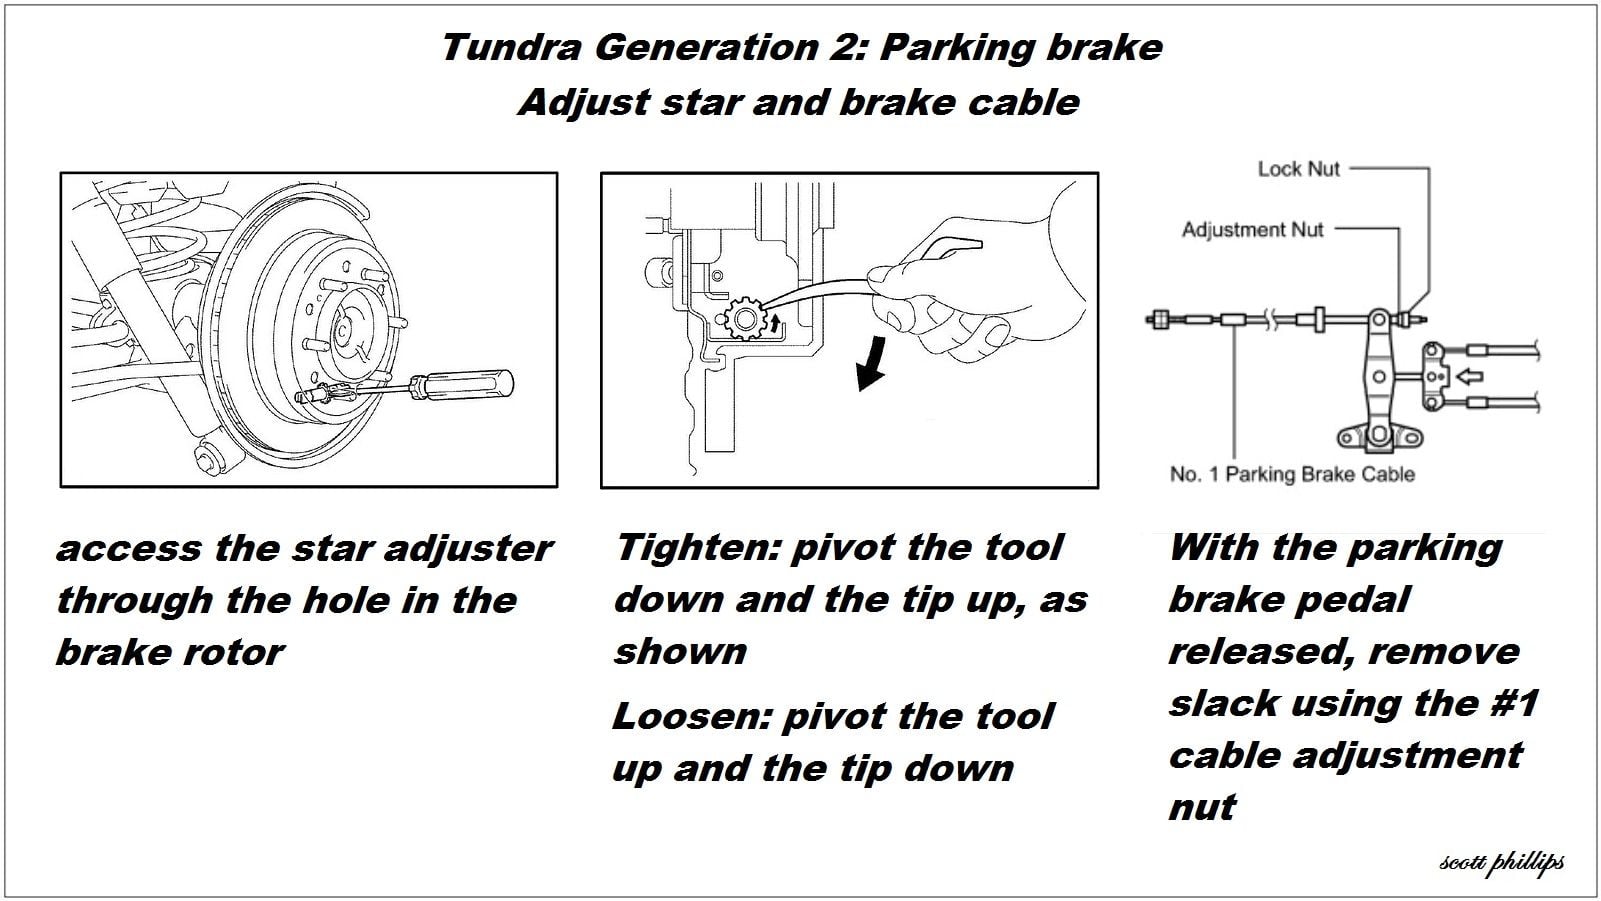
- Tighten the star adjuster until the rotor drags when turned.
- Back off the star adjuster eight clicks.
- Repeat on the other side.
- On the brake cable under the driver side, adjust the parking brake #1 cable nut until the slack is removed.
- The properly adjusted parking brake pedal should go down six to nine clicks.
Pro Tip
Always do the star adjuster first, then the #1 cable adjuster.
Related Article and Site
- How to Replace Brake Pads, Calipers and Rotors - YotaTech.com
- Rear Parking Brake Shoe Replacement - TundraSolutions.com

