Toyota 4Runner 1996-2002: How to Replace Shock Absorbers
Shock absorbers are in place to control the movement of the suspension as it works through its travel. Shocks are filled with oil that must pass through small orifices as they compress and rebound, thus providing damping control. When a shock develops a leak or blows a seal, the shock is unable to maintain control of the springs, resulting in an abnormal ride quality and diminished handling characteristics.
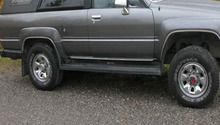
This article applies to the Toyota 4runner (1996-2002).
Many manufacturers suggest replacing the shock absorbers at 50,000 mile intervals; however, most mechanics agree that there is no need to replace them unless they are failing or you are looking to upgrade the suspension. The condition of the shocks can be determined by a quick visual inspection, as well as performing a simple bounce test. Look around the body of the shock for signs of leaking fluid, as a blown shock will often be caked in oil and dust. Test the shocks by firmly pushing on each corner of the vehicle body to compress the suspension. A functioning shock absorber will compress and allow the suspension to return to its original position. If the suspension compresses and then continues to bounce, the shock absorber is faulty and is in need of replacement. This article will outline the procedure for replacing the front and rear shock absorbers on the third generation Toyota 4Runner.

Materials Needed
- Floor jack and jack stands
- Metric wrench set and socket set
- Pry bar
- 1/2" breaker bar
- Torque wrench
- Adjustable (crescent) wrench
- Chain wrench
- High-strength Threadlocker
- Spring compressor (optional)
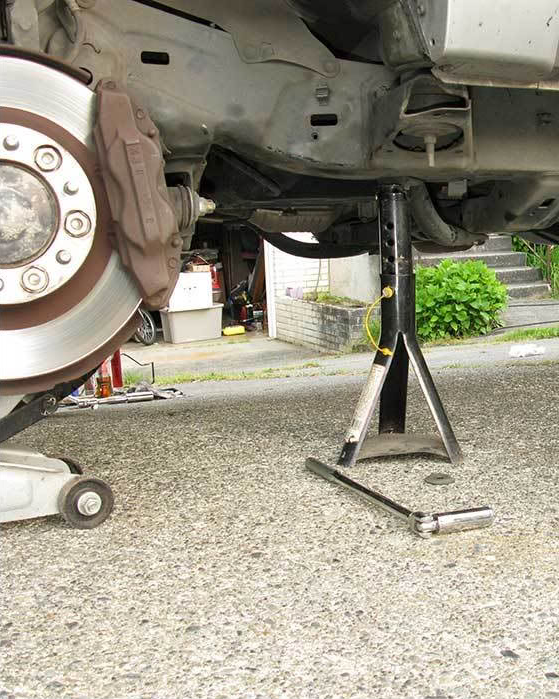
Step 1 – Lift and support vehicle
To replace the shock absorbers, the vehicle needs to be lifted and the frame supported with jack stands. Positioning jack stands at the factory specified frame locations will relieve tension on the shocks and allow the suspension to hang free. For additional information on lifting you vehicle, see How to Jack Up Your Truck.
Step 2 – Front shock absorber replacement
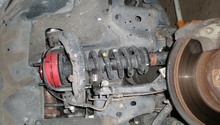
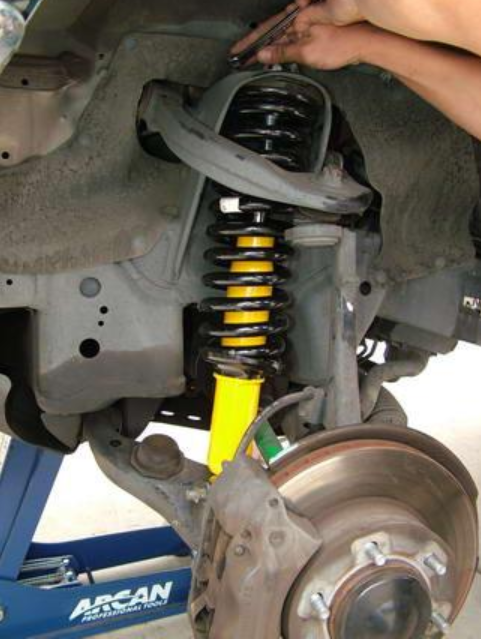
Each front shock absorber is part of a Macpherson strut assembly (a.k.a. coilover). In order to replace the shocks, the strut typically has to be removed from the vehicle and disassembled with a spring compressor; however, many shade tree mechanics find the spring compressor route a bit difficult and unsafe. Fortunately, the shocks can be separated from the spring while the spring is retained in its perch by disconnecting a few suspension and steering components. The following will outline the procedure for replacing the shocks without the use of a spring compressor, but if you are comfortable using a spring compressor, the strut can simply be removed from the truck and disassembled on the work bench before re-installing the new components.
- Remove the front wheel and disconnect the anti-roll bar from the roll bar end-link.
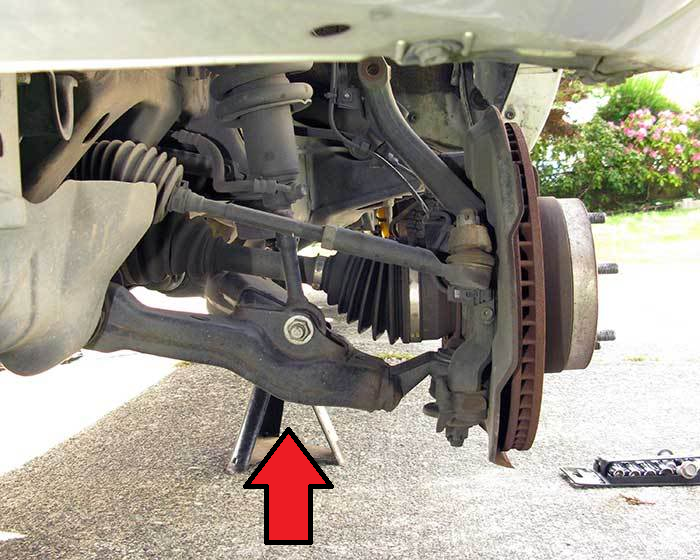
- Position a floor jack under the lower control arm and raise it until light pressure is applied.
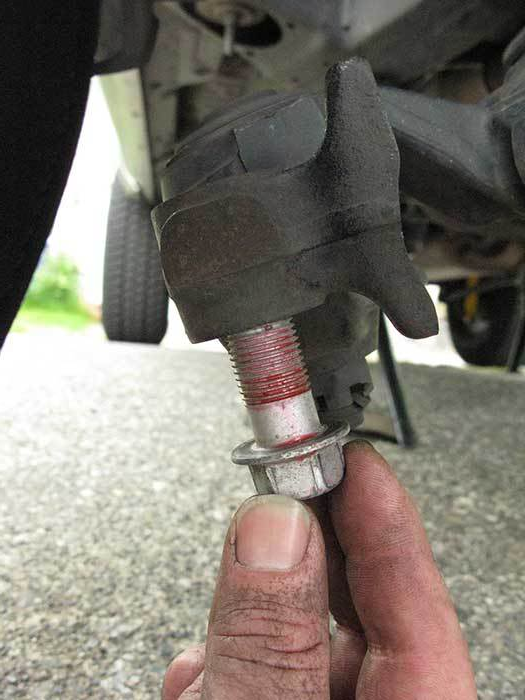
- Remove the upper shock nut, bushing, and washer. In some cases, two nuts may be locked together instead of a single lock nut.
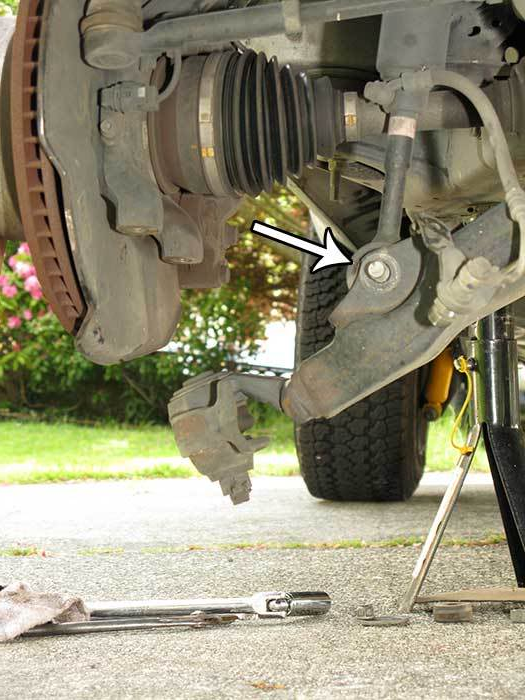
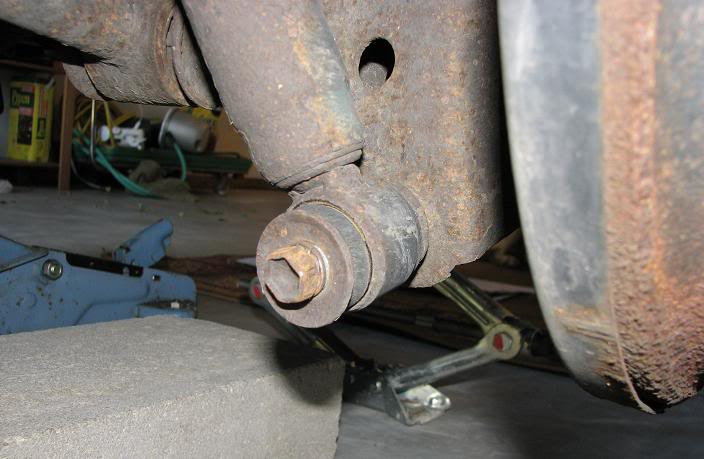
- Remove the (2) lower ball joint bolts using a 22mm wrench. Once disconnected, the hub/knuckle will need to be supported by placing a jack stand, block of wood, crate, etc. under the hat of the brake rotor.
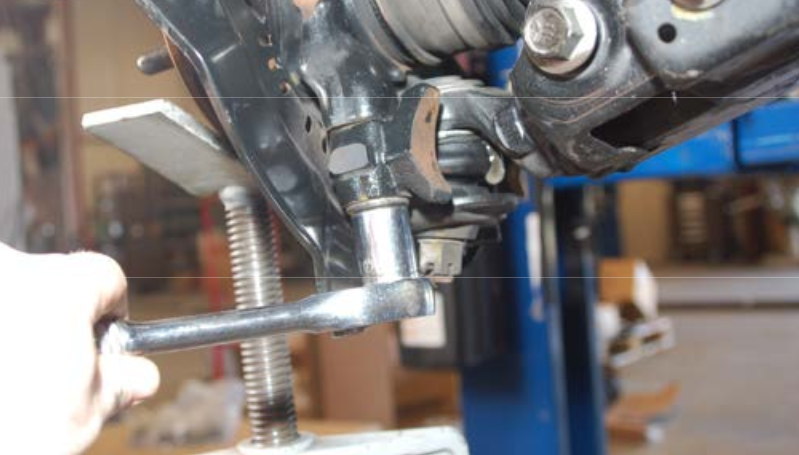
- With the ball joint bolts removed, slowly lower the floor jack to allow the strut to fully extend and the control arm to drop before removing the lower shock bolt using (2) 22mm wrenches. In some cases, the lower control arm may need to be pried down in order to relieve tension on the shock bolt.
- With the shock bolt disconnected, the shock absorber and spring can be removed from the vehicle.
- Slide the new shock absorber and spring into position, then install the lower shock bolt. Torque to approximately 75 ft/lbs.
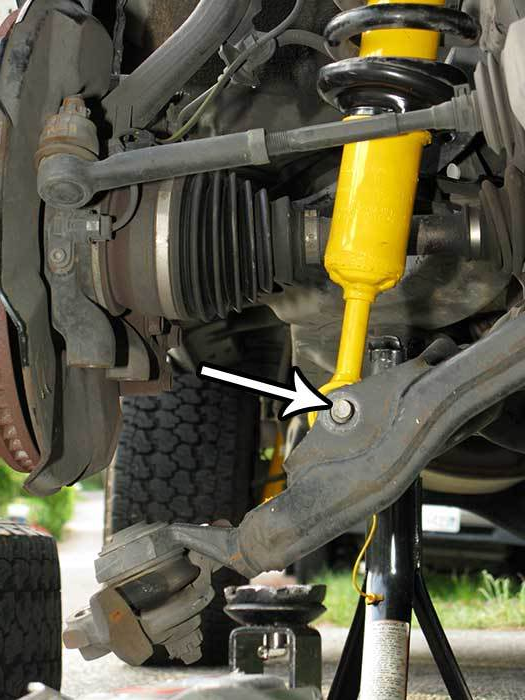
- Slowly jack up the lower control arm to compress the suspension. Be sure the upper shock mount and spring are properly positioned while lifting. Re-attach the knuckle/hub to the lower ball joint using high-strength Threadlocker (red) on the bolts before tightening to approximately 165 ft/lbs.
- Install the bushing, washer and upper shock nut(s). Torque to 18-24 ft/lbs.
- Reattach the sway bar to the end-link (14 ft/lbs) before re-installing the wheel. Repeat procedure for other side.
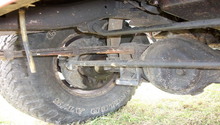
Step 3 – Rear shock absorber replacement
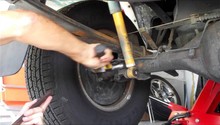
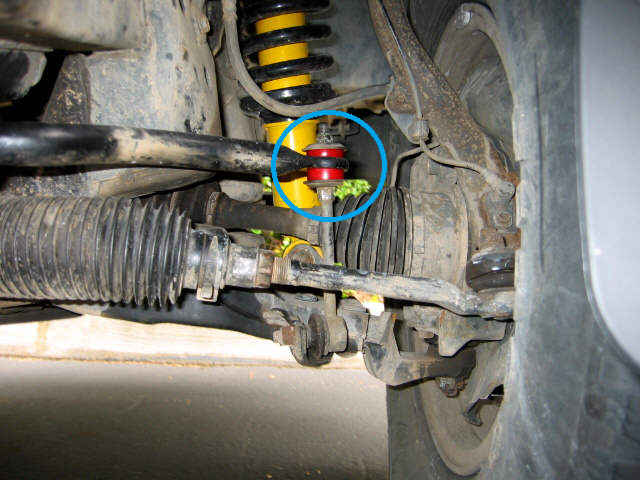
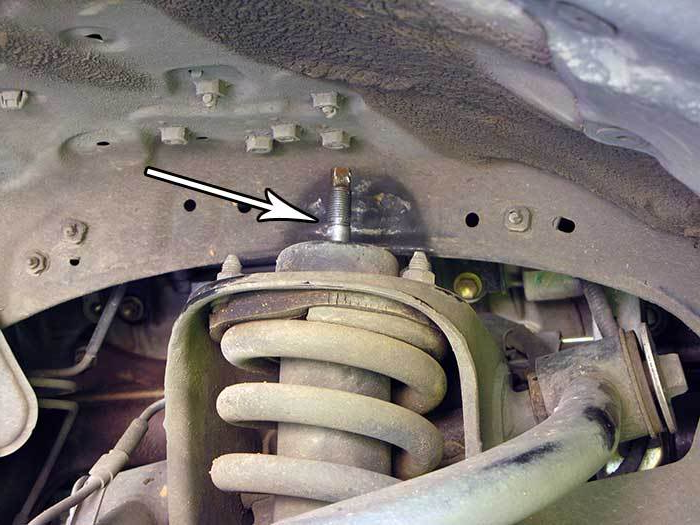
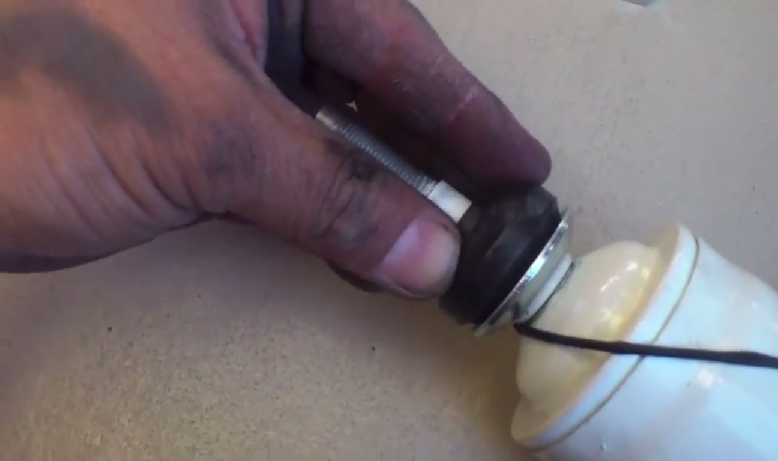
- The top of the rear shocks are tucked up inside of the frame rails and can sometimes be a bit difficult to access. Using a 14mm wrench, loosen the top shock nut. The shock body will likely spin when attempting to remove the nut, so either hold the top shock stud with a small crescent wrench or the shock body with a chain wrench to allow the nut to be loosened. With the nut removed, retrieve the washer and rubber bushing.
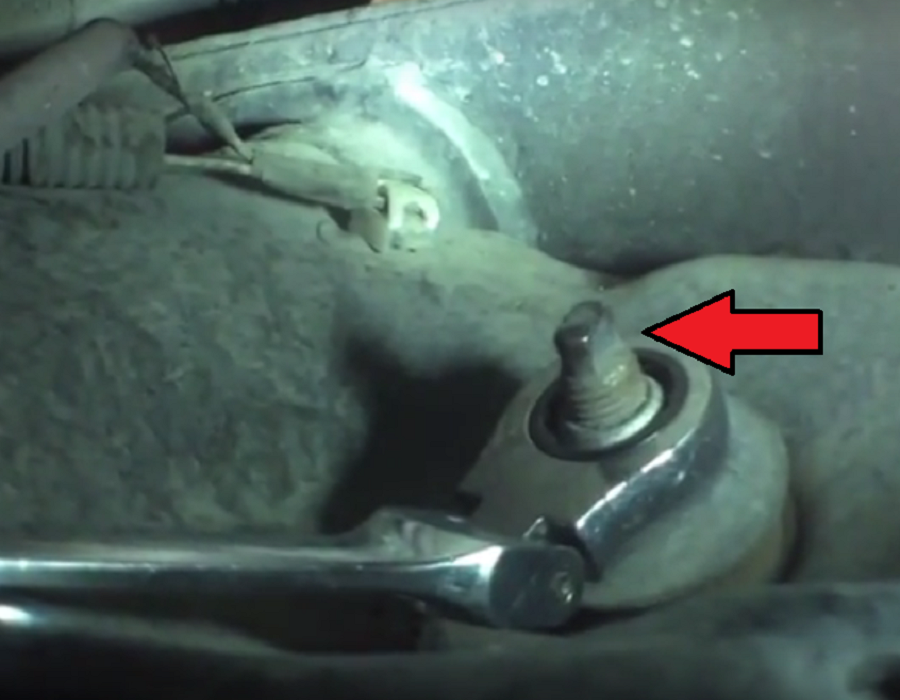
Figure 10. Upper shock mount. 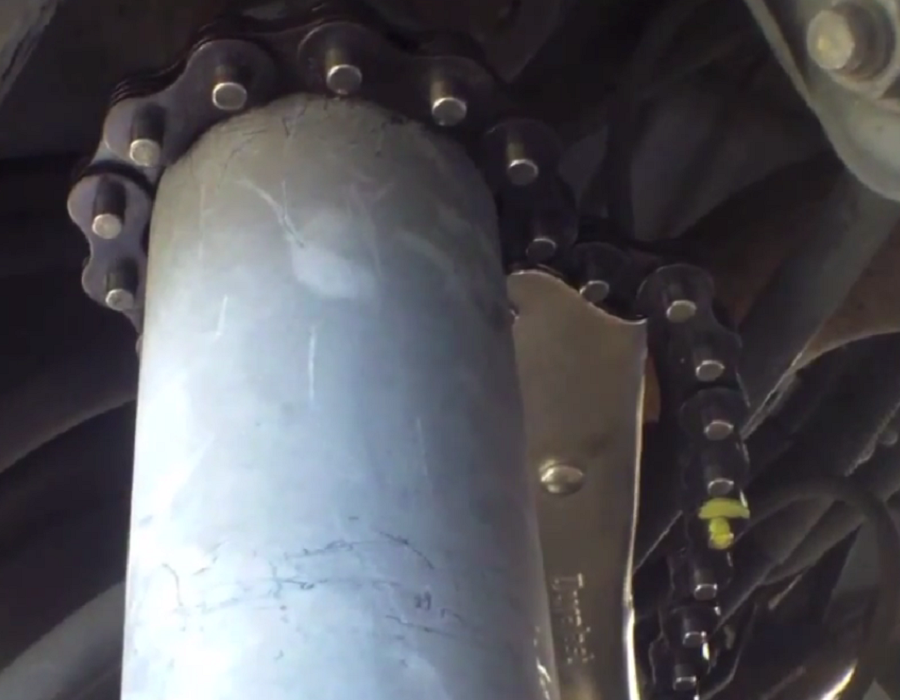
Figure 11. Chain wrench holding shock body from spinning.
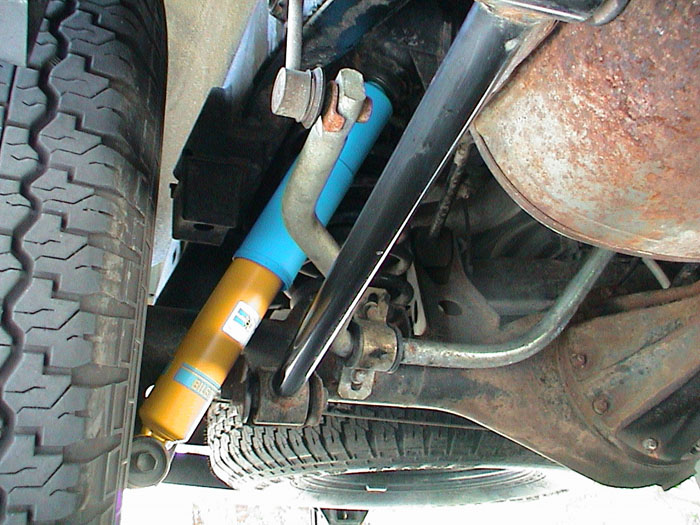
- Remove the lower shock mount bolt using a 17mm socket and breaker bar. With the bolt removed, the shock can be removed. Retrieve the old bushing if it is stuck on the shock mount.
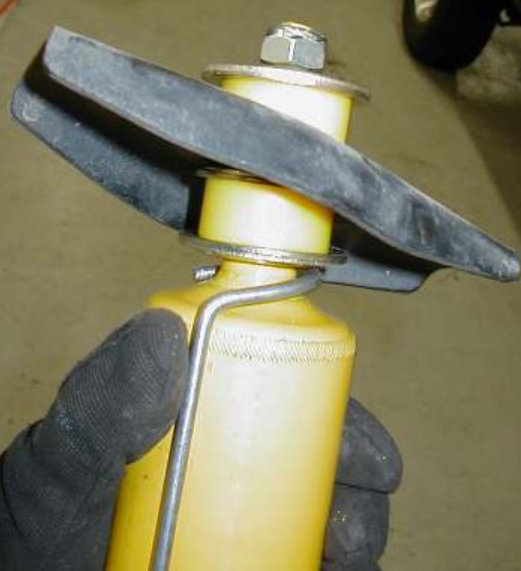
- Install a new lower shock bushing to the lower shock mount and install one of the new upper shock bushings as well as washers onto the top of the shock.
- Install the new shock by placing the top of the shock into the upper mount. At this point, the rubber bushing, washer and nut can be installed onto the shock stud. While holding the nut, the whole shock body can be spun to tighten the nut up. Torque to approximately 30 ft/lbs.
- If necessary, slightly compress the shock to fit it to its lower mount. Torque the mounting bolt to 72 ft/lbs.
Step 4 – Putting it all back
With everything tightened and double checked, go ahead and prepare to lower the vehicle back down. Jack the car up until it is off the jack stands. Carefully remove the jack stands from underneath the truck. Slowly lower the truck back down onto the ground. Take the truck out for a slow and controlled drive to make sure everything is working correctly and feels good. Try to find a road with bumps and inconsistencies to check out how the new shock absorbers handle things.

Related Discussions
- Replacing Shocks on Stock Height 4Runner? - YotaTech.com
- 2002 4Runner Shock Replacement How to (Front & Rear) - YotaTech.com
- Strut Replacement - 96 4Runner - YotaTech.com