BayAreaMetalFab B.A.M.F BPV Relocate bracket
 10-23-2011, 08:42 PM
#1
Registered User
Thread Starter

Join Date: Jul 2010
Location: El Sobrante
Posts: 32
Likes: 0
Received 0 Likes
on
0 Posts
BayAreaMetalFab B.A.M.F BPV Relocate bracket
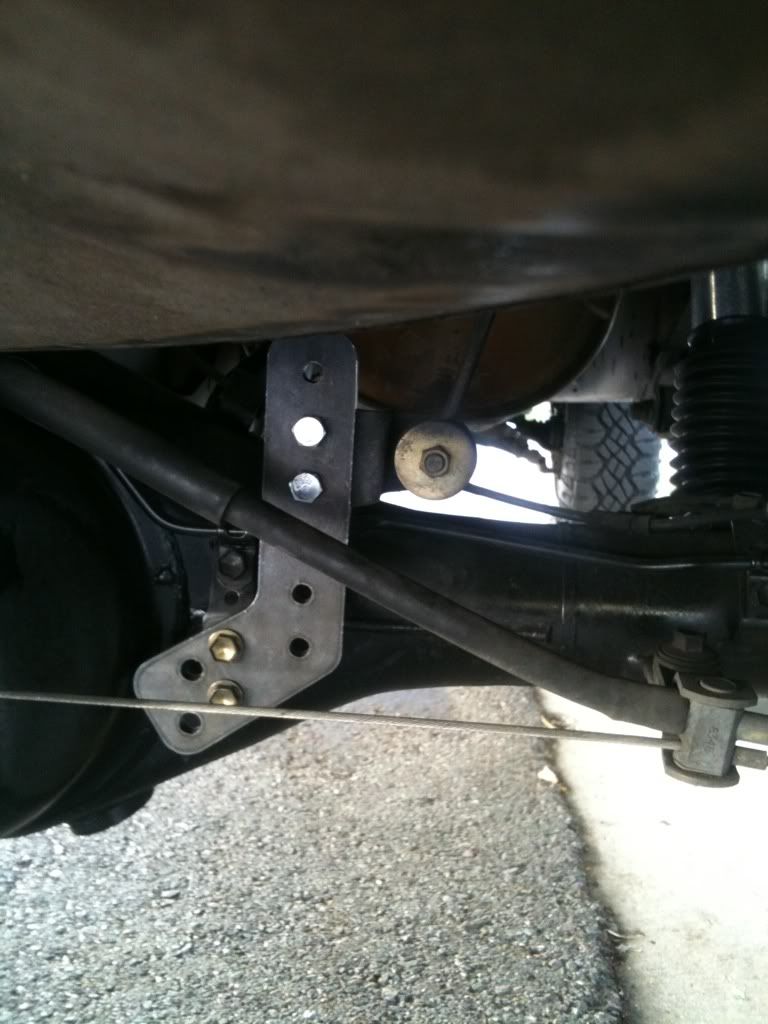
Every one that lifts there 1st Gen truck needs to relocate the BPV (Brake-Proportioning-Valve) to the height you lifted your truck. All the company's selling these brackets are flimsy and cheap sheet metal.
I wanted to take it to the next level so I designed a BPV relocate bracket for the 1st Gen Tacomas that is BAMF!
Specs
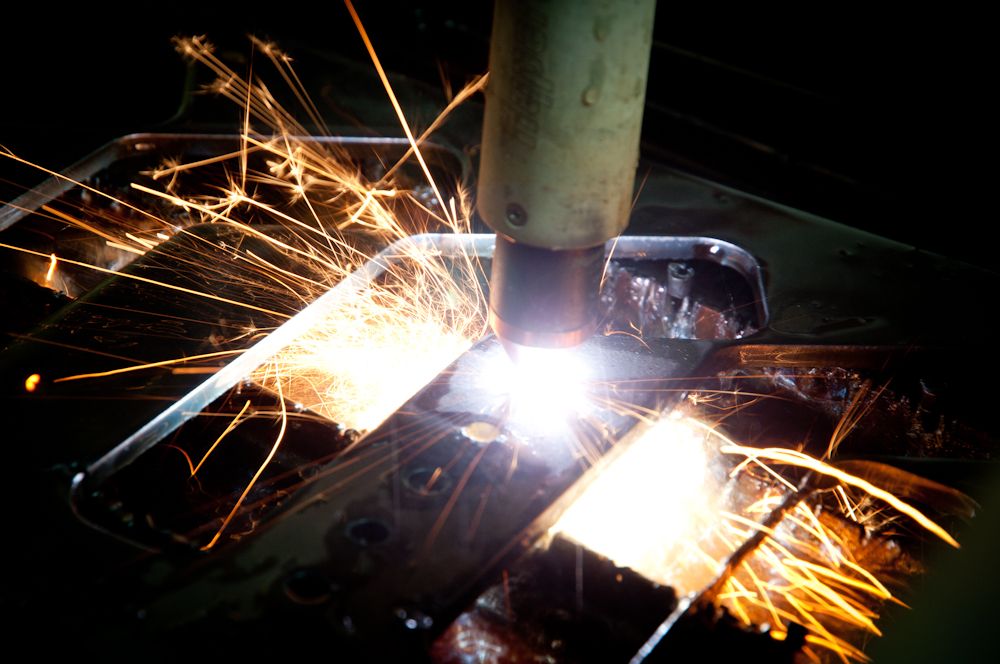
1/4" CNC Plasma cut Steel I have two sizes to choose from set up for all lifts from 1" too 5.5" or 3.5" in .5" increments at the same great price. 2, 5/16th"x 7/8th" grade 8 nuts and bolts are supplied with the bracket and the stock 2 attach it to your axle shipped in raw steel lightly oiled to prevent rusting. The great thing about this bracket is if your rear springs sag over time you wont have to make a new one just move it down a notch and your good to go.
Sure you can make your own for less but to make it adjustable takes a lot of measuring and time also if you have ever tried to cut 1/4" plate by hand you would buy one of these just to not do it. I'm taking out the guess work and effort to build your own at not much more then it would cost to buy the bolts and plate from Home Depot.
Price is $25.00 Shipped
Paid / Shipped/Installed
Orders
1. pyroskier
2. Blue
3. Rucas
4. 45acp
5. Alpha Q Up
6. RelentlessTaco
7. Slodgetto Blem
8. meatman
9. StAndrew
10. brs127s
11. Blackdawg
12. Creepwood
13. Banjohauler
14. Box Rocket
15. okboatie1
16. malander
17. wtmtntaco 3.5"
18. Norton 3.5"
19. riotrob 3.5"
20. Blurple 3.5"
21. Harris19 3.5"
22. SCSPerformance
23. Your name here!
24.
25.
26.
27.
28.
29.
30.
31.
32.
33.
34.
35.
36.
37.
38.
39.
40.
The two sizes on the left is a 5.5" total lift and the right is a 3.5" total lift.

As are all of the products I make these brackets are CNC plasma cut all holes are honed out with Cobalt bits giving you perfect fit and accurate lift numbers. So take the guess work out of making a bracket and order one of the best BPV relocate brackets on the market today.
I wanted to take it to the next level so I designed a BPV relocate bracket for the 1st Gen Tacomas that is BAMF!
Specs
1/4" CNC Plasma cut Steel I have two sizes to choose from set up for all lifts from 1" too 5.5" or 3.5" in .5" increments at the same great price. 2, 5/16th"x 7/8th" grade 8 nuts and bolts are supplied with the bracket and the stock 2 attach it to your axle shipped in raw steel lightly oiled to prevent rusting. The great thing about this bracket is if your rear springs sag over time you wont have to make a new one just move it down a notch and your good to go.
Sure you can make your own for less but to make it adjustable takes a lot of measuring and time also if you have ever tried to cut 1/4" plate by hand you would buy one of these just to not do it. I'm taking out the guess work and effort to build your own at not much more then it would cost to buy the bolts and plate from Home Depot.
from 4crawler:
Most Toyota mini-trucks/95.5 to 2004 Tacoma's have front disk brakes and rear drum brakes. Drum brakes are "self-energizing" meaning that they are designed such that the brake shoes are forced into tighter contact with the drum under load. If you remember your bicycle with caliper brakes, notice how the front brake was stronger than the back one? This is because the front caliper is mounted in front of the fork and the arms are pulled forward under braking, forcing the brake pads to ride up the bevel on the rim, gripping that much tighter.
Disk brakes, on the other hand, move directly towards the brake disk, and are very linear in their braking force. So, on a vehicle with front disk and rear drum brakes, some sort of front/rear brake biasing is needed (less pressure to the rear, more to the front).
On a pickup, the weight on the rear axle can very greatly depending on what's in the bed. So, Toyota added a load sensing brake proportioning valve that tries to sense the load on the rear axle and vary the brake bias accordingly. At light loads, the bias is towards the front, to keep the rear wheels from locking. At heavy loads, the bias is moved towards the rear, to spread the braking force more evenly. This sensing is done via a rod attached between the axle and the valve (that is installed on the inside of the frame). As the axle is loaded, the frame and axle get closer together as the springs compress, making the lever move.
One problem encountered when adding suspension lift to the rear axle, is that the valve senses this as a lightly loaded condition, and effectively cuts out the rear brakes. So, to compensate for this, an extension bracket needs to be installed to lift the point of attachment for the arm to compensate for the amount of lift. If you add 2" of lift, you should have a 2" extension bracket. This will move the arm back into the useable range of the proportioning valve.
Paid / Shipped/Installed
Orders
1. pyroskier
2. Blue
3. Rucas
4. 45acp
5. Alpha Q Up
6. RelentlessTaco
7. Slodgetto Blem
8. meatman
9. StAndrew
10. brs127s
11. Blackdawg
12. Creepwood
13. Banjohauler
14. Box Rocket
15. okboatie1
16. malander
17. wtmtntaco 3.5"
18. Norton 3.5"
19. riotrob 3.5"
20. Blurple 3.5"
21. Harris19 3.5"
22. SCSPerformance
23. Your name here!
24.
25.
26.
27.
28.
29.
30.
31.
32.
33.
34.
35.
36.
37.
38.
39.
40.
The two sizes on the left is a 5.5" total lift and the right is a 3.5" total lift.
As are all of the products I make these brackets are CNC plasma cut all holes are honed out with Cobalt bits giving you perfect fit and accurate lift numbers. So take the guess work out of making a bracket and order one of the best BPV relocate brackets on the market today.
Last edited by JLee; 11-21-2011 at 10:41 AM.
 10-23-2011, 08:43 PM
#2
Registered User
Thread Starter
Join Date: Jul 2010
Location: El Sobrante
Posts: 32
Likes: 0
Received 0 Likes
on
0 Posts
Also I have 9 Blems that I cut today that I'm selling for 10.00 bucks shipped you would just need to drill the holes a little bigger a good 5/16th and 3/8th bit is all you would need but they have to be good or you will dull out the bit on the first hole.
These are the blems

the top 5 holes need to be bored out to 5/16th and the 4 lowers need to be 3/8th. And it hits the bolt for the hard line so it will have to be hit with a grinder to fit right. I widened the bracket by 1.5" to clear the hard line bolt.

This is a shot of the new ones and the blem new on the right blem on the left.

(Note) Plasma cutting hardens the edge of the cut so these holes are hardened steel and a normal high speed drill bit will dull out on the first hole.
These are the blems
the top 5 holes need to be bored out to 5/16th and the 4 lowers need to be 3/8th. And it hits the bolt for the hard line so it will have to be hit with a grinder to fit right. I widened the bracket by 1.5" to clear the hard line bolt.
This is a shot of the new ones and the blem new on the right blem on the left.
(Note) Plasma cutting hardens the edge of the cut so these holes are hardened steel and a normal high speed drill bit will dull out on the first hole.

Thread
Thread Starter
Forum
Replies
Last Post
scott90
86-95 Trucks & 4Runners
7
10-04-2015 09:21 AM


