
My camp kitchen build - test
 04-12-2009 | 05:24 PM
#1

Thread Starter
Guest
Joined: Jul 2008
Posts: 315
Likes: 0
My camp kitchen build
After viewing Corey's thread on the Drifta Kithens, I decided to build one myself to justify some of the power tools in my garage. The materials list was basically 1 full sheet of 15/32 plywood, a few scrap pieces of 3/4 plywood, 2 drawer slides, 3 window sash latches, 1 4 foot piano hinged cut in two. Here is the main box 32 inches X 24 in.
Last edited by dport; 04-12-2009 at 05:39 PM.
04-12-2009 | 05:28 PM
#2
Registered User
Joined: Mar 2004
Posts: 2,171
Likes: 1
From: Vancouver
If you do not add to this thread and it is only for testing purposes it should go in the appropriate section:
https://www.yotatech.com/forums/f4/
https://www.yotatech.com/forums/f4/
04-12-2009 | 05:55 PM
#5
Thread Starter
Guest
Joined: Jul 2008
Posts: 315
Likes: 0
Here is the top cover, which houses one of my coleman stoves. I have one newer LP and one liquid fuel stove. I would have liked to build the whole box a little narrower, but the LP stoves are a good bit wider than the older stoves. The top cover will flip over and the front of if will hang below. It will be supported by a flip brace. This will provided a second surface for the second stove. My wife and I camp with several other cpl's and often end up the "mother and father" of the group, therefore requiring two stoves.

Trending Topics
04-12-2009 | 06:56 PM
#10
Thread Starter
Guest
Joined: Jul 2008
Posts: 315
Likes: 0
I'm having internet trouble b/c of storms, so I'll have to post more pics tomorrow.
Godzilla, I am just planning on sealing it with water sealer and letting it sit on the ground. I think it'll be OK since it'll only be on the ground a few days at a time. I think it'll sit pretty level and sturdy do to it's overall width. It has a pretty large footprint.
Godzilla, I am just planning on sealing it with water sealer and letting it sit on the ground. I think it'll be OK since it'll only be on the ground a few days at a time. I think it'll sit pretty level and sturdy do to it's overall width. It has a pretty large footprint.
04-13-2009 | 01:08 AM
#11
Thread Starter
Guest
Joined: Jul 2008
Posts: 315
Likes: 0
This is the top, flipped over and suported by the under brace. Notice the latch on the corner. When the latch is released, the front board will just swing down and be out of the way
Last edited by dport; 04-13-2009 at 01:10 AM.
04-13-2009 | 06:12 PM
#13
Thread Starter
Guest
Joined: Jul 2008
Posts: 315
Likes: 0
This is the rear of the box in the closed position. The hinge in the center swings up and catches on the small block in the center of the top when it's flipped over to provide the second cooking surface.
Last edited by dport; 04-13-2009 at 06:14 PM.
 05-01-2009 | 01:49 AM
#19
Thread Starter
Guest
Joined: Jul 2008
Posts: 315
Likes: 0
Now that's innovative!!! I need to get some updated pics up. I had to cut the kitchen in half, just below the drawers b/c I found a good deal on a camper shell. I mounted 3 buckle style latches around the joint so the kitchen is still stable when in use. I used it for an over night trip last weekend and I am hooked on having a camp kitchen. I also picked up a cheap wire dish drying rack like you set on your counter and made a bracket that lets it hang off the side. I will have some field pics next weekend
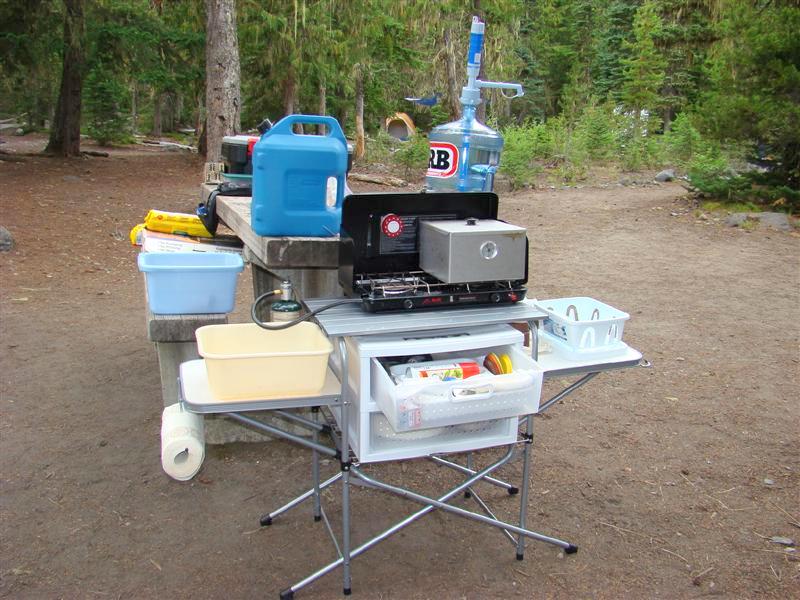
05-01-2009 | 03:24 AM
#20
Joined: May 2002
Posts: 32,242
Likes: 21
From: Auburn, Washington
Looking forward to the pics.
I bought a little dish drying rack yesteryear to use with my kitchen setup.
I had a "home size" version in my old camping gear, but it was to big for this new setup.
I had used the prior rack when I had my tent trailer long ago.
You can see the new baby rack on the far right shelf of the setup.
I bought a little dish drying rack yesteryear to use with my kitchen setup.
I had a "home size" version in my old camping gear, but it was to big for this new setup.
I had used the prior rack when I had my tent trailer long ago.
You can see the new baby rack on the far right shelf of the setup.


