83 Blowby and Timing Jumps Around
 09-21-2014, 07:13 PM
#21
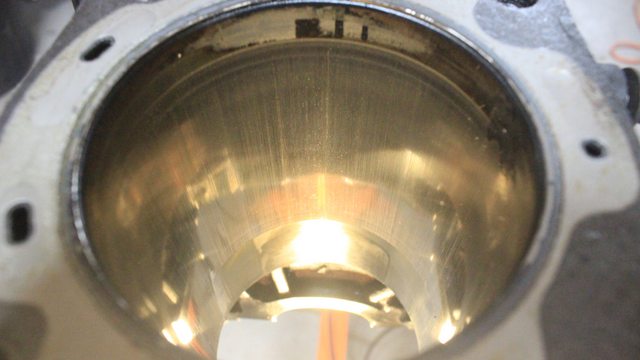
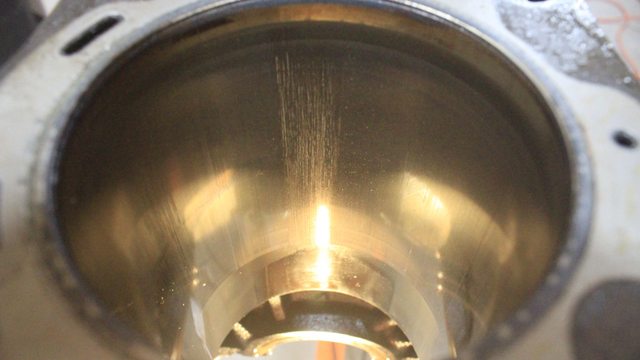
The groove on the Crank is from where the seal rides on the crank - this is "normal" per se, but can cause problems. You can get a seal save sleeve or a seal spacer to aleviate the problem. The bearings are toast and the crank looks like it could be ok, but you should probably get it mic'ed to see if it needs to be re-ground and polished. As far as your cylinder walls go, I'd have to see them. Sounds to me like that could be glazed and would need to be honed at a minimum, possibly bored.
Don't try to hone it yourself - it's not something you can get away with doing with a honing tool from your local auto parts store. It takes experience and talent that even an experienced mechanic typically doesn't have. To get everything done right for a rebuild get ready for AT LEAST a $400 bill from the machine shop for the block work - even more if you have to have that crank touched up
Don't try to hone it yourself - it's not something you can get away with doing with a honing tool from your local auto parts store. It takes experience and talent that even an experienced mechanic typically doesn't have. To get everything done right for a rebuild get ready for AT LEAST a $400 bill from the machine shop for the block work - even more if you have to have that crank touched up


 09-23-2014, 04:39 PM
#25
Registered User
Thread Starter
Join Date: Aug 2014
Location: Castle Rock, Colorado
Posts: 27
Likes: 0
Received 0 Likes
on
0 Posts
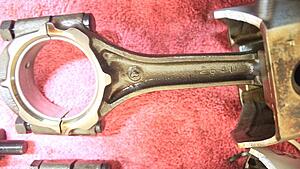
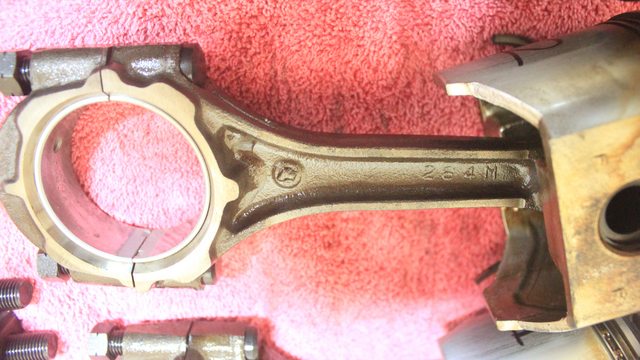
Going to get my block bored, honed, and decked. Just ordered the Engnbldr master kit, LCE street crank, and other parts. Also gonna have them check my stock connecting rods to see if their in spec? I actually don't know if they are the originals "230,000 miles" BTW #1 #4 are marked 264M #2 #3 264U Any reason?


Last edited by Mr.Farva; 09-23-2014 at 10:19 PM.
 10-01-2014, 09:00 PM
#30
Registered User
Thread Starter
Join Date: Aug 2014
Location: Castle Rock, Colorado
Posts: 27
Likes: 0
Received 0 Likes
on
0 Posts
Dropped my block off today. Hope everything goes well. Also got the rest of my parts, crank, block off stuff, head bolts, intake studs, etc.
Yep..? Please explain more.
Got another question,
When I go to assemble the bottom end. Do you guys use assembly lube or just motor oil? (on crank, caps, rods, wrist pins, etc.)
Yep..? Please explain more.
Got another question,
When I go to assemble the bottom end. Do you guys use assembly lube or just motor oil? (on crank, caps, rods, wrist pins, etc.)
10-01-2014, 09:46 PM
#31
Main bolts aren't a wear item so there's no need to replace them use they are damaged for some reason.
Use moly-graphite assembly lube. You can use motor oil, but motor oil doesn't adhere to metal as well as assembly lube so when you crank the engine for the first time you'll run dry until the oil circulates through. BI use CRC Sta-Lube on everything I build and it has never let me down. It's pretty much an all purpose assembly lube with moly, graphite and lithium so it is safe to use on all engine wear surfaces. Rule of thumb: if it moves, lube it, if it normally has oil running through it, lube it, if you don't know what a part does, lube it (then call a professional to finish the build because you likely don't know what you are doing).
I assume you have a Copy of the Factory Service Manual? If not, you really need to download it. A Haynes or Chiltons manual is a bad guide for the first time rebuilder. These engines are pretty simple, but you really want to make sure you have the proper torque specs and tolerances from the FSM.
 10-08-2014, 03:36 PM
#34
Registered User
Thread Starter
Join Date: Aug 2014
Location: Castle Rock, Colorado
Posts: 27
Likes: 0
Received 0 Likes
on
0 Posts
Ok, a short story.
Got a call from the engine guy, 2 pistons have small nicks on the skirts. So I called Engnbldr, At first I had to send the pistons back to him then he would sent a new set back. That would be about 2 weeks... So I ordered another set of pistons on my dime... 5 mins later I got a email from "his son?" Tod Stanwood. He told me the scuffs where not that big of a deal, just to dress them with a little emery cloth and run them. But he was going to send me a new set of pistons NO CHARGE anyway. So a few days later the engine shop received the new set and finished the work. I went and picked it all up.
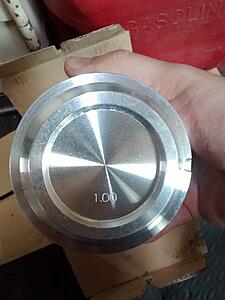
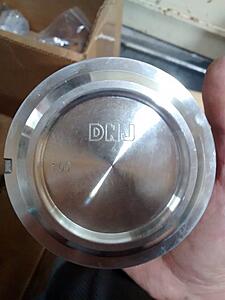
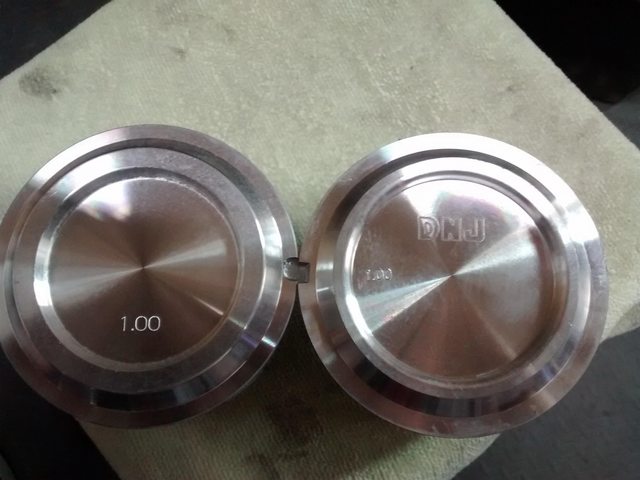
I pulled the new set out to inspect them. And noticed they were DNJ's and top of the piston was different from the other Rock Product pistons I originally received. Which set do I need to run?
Rock Products DNJ is stamped on the inside
DNJ
Got a call from the engine guy, 2 pistons have small nicks on the skirts. So I called Engnbldr, At first I had to send the pistons back to him then he would sent a new set back. That would be about 2 weeks... So I ordered another set of pistons on my dime... 5 mins later I got a email from "his son?" Tod Stanwood. He told me the scuffs where not that big of a deal, just to dress them with a little emery cloth and run them. But he was going to send me a new set of pistons NO CHARGE anyway. So a few days later the engine shop received the new set and finished the work. I went and picked it all up.
I pulled the new set out to inspect them. And noticed they were DNJ's and top of the piston was different from the other Rock Product pistons I originally received. Which set do I need to run?
Rock Products DNJ is stamped on the inside

DNJ

Last edited by Mr.Farva; 10-08-2014 at 09:57 PM.
10-16-2014, 07:30 PM
#36
Registered User
Thread Starter
Join Date: Aug 2014
Location: Castle Rock, Colorado
Posts: 27
Likes: 0
Received 0 Likes
on
0 Posts
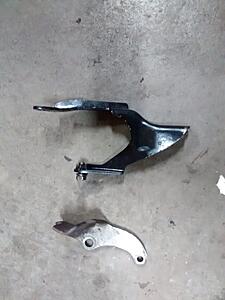
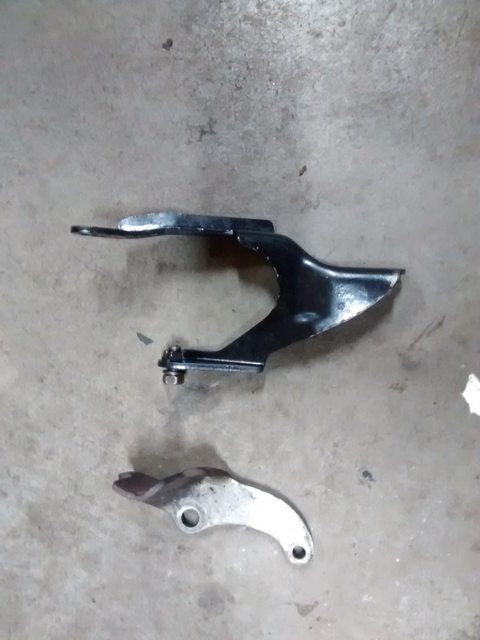
Still putting the motor back together. Cant remember where these two brackets went? HELP! I think the bottom one went by the starter???
 10-16-2014, 09:39 PM
#37
Top one is the power steering pump support. The "Y" end is the upper part and straddles the water pump inlet and mounts to the power steering pump braket and the other end mounts to the front side of the block to the only threaded hole that isn't covered by the timing cover just below the water pump.
The bottom one is the exhaust collector tube bracket. The two tranny bolts on the driver side bolt through it, through the bell housing and into the block. If you have an after market header then you don't need it, but your bolts will be too long. I trimmed the bracket part of mine off and used it as a "spacer" so I didn't have to find shorter bolts.
The bottom one is the exhaust collector tube bracket. The two tranny bolts on the driver side bolt through it, through the bell housing and into the block. If you have an after market header then you don't need it, but your bolts will be too long. I trimmed the bracket part of mine off and used it as a "spacer" so I didn't have to find shorter bolts.
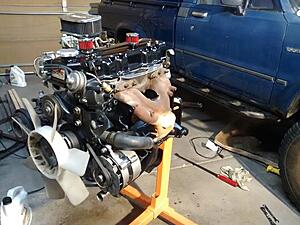
10-16-2014, 09:47 PM
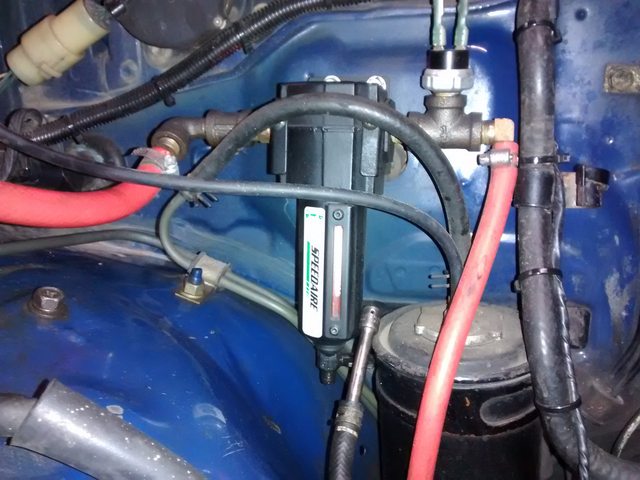
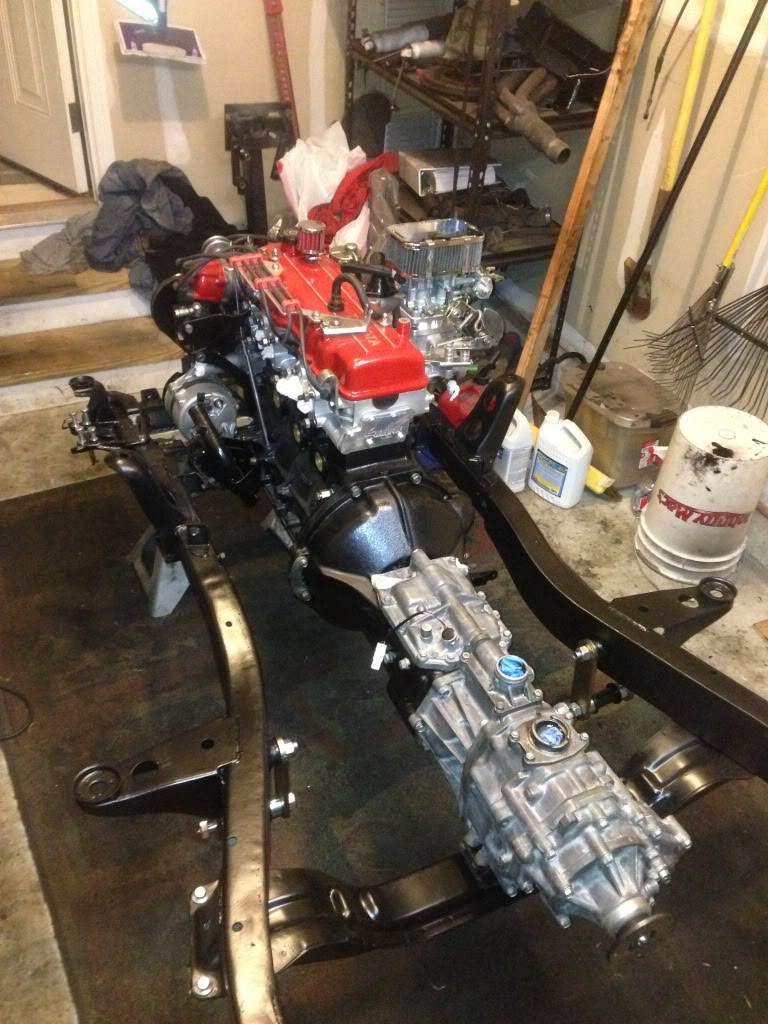
#38
This pic might help. The exhaust bracket is to the 9 o'clock position on the tranny (again, I trimmed mine so it looks a little different than yours plus it needed to be trimmed to fit my rock ripper headers). And if you can zoom in, you can see the Y shaped bracket directly above the alternator.


 10-16-2014, 10:57 PM
#40
Registered User
Thread Starter
Join Date: Aug 2014
Location: Castle Rock, Colorado
Posts: 27
Likes: 0
Received 0 Likes
on
0 Posts
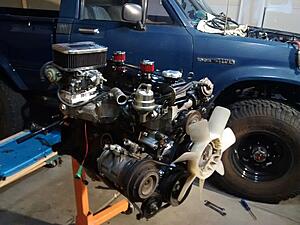
THANK YOU kawazx636 for the pictures.
Motor is just about done, I think... What should I set my valve lash at first before I can start it and warm it up?
Motor is just about done, I think... What should I set my valve lash at first before I can start it and warm it up?


